Get Matte Zipper Bags: Unit Packaging Insert Checklist
Use this checklist to compare matte zipper bag specs, costs, timelines, quality checks, and insert details before ordering custom unit packaging.
Why a Get Matte Zipper Bags Unit Packaging Insert Checklist Matters
A matte snack pouch can look expensive on the shelf. Low glare. Solid zipper. Clean print. Then the customer opens it and finds nothing useful: no care note, no batch card, no QR code, no refill reminder, no reorder prompt. The pouch handled the first impression and dropped the second.
A Get Matte Zipper Bags Unit packaging insert checklist keeps the outer pouch, insert, compliance copy, fill method, and packing instructions tied together before production starts. That sounds painfully basic. It is also where a surprising number of packaging projects fall apart.
Buyers often treat matte zipper bags as one purchased item. They are not. The finished unit is a small system: laminated film, matte coating, zipper profile, print layer, seal area, lot-code space, insert card, product fill, carton count, and handling rules. Miss one of those, and the final package can feel cheaper than the render promised.
Inserts are usually inexpensive compared with the cost of getting a customer to open the bag. A 3 x 4 inch card on 250gsm to 350gsm stock may add only a few cents at volume. Used well, it can carry instructions, warranty terms, QR education, coupon codes, ingredient context, tamper notes, subscription messaging, or a plain “how to use this without making a mess” note. Glamorous? No. Useful? Very.
This matters for startup CPG teams, ecommerce brands, beauty labels, cannabis-adjacent accessory sellers, food producers, pet brands, and procurement managers comparing pouch suppliers. It also matters for teams already buying Custom Packaging Products and trying to make pouches, inserts, cartons, and fulfillment rules behave like one packaging program.
Buyer reality: a matte pouch is not finished because the artwork is approved. It is finished when the insert, zipper, seal, fill weight, carton count, and approval files are all defined.
How Matte Zipper Bag Unit Packaging Actually Works
Matte zipper bags are flexible pouches with a reclosable zipper and a non-gloss surface. The finish softens reflections, makes photography easier, and gives retail packaging a calmer, more premium look. You see them in snacks, coffee, supplements, cosmetics, apparel accessories, pet treats, craft items, and small hardware kits.
The unit includes more than the pouch. Think of six working parts: the bag, the product fill, the insert card or leaflet, any desiccant or compliance item, the heat-seal area, and the way finished units are counted into cartons. If empty bags ship to a co-packer, the workflow is different from a supplier-managed kitting project where inserts are added before delivery.
Common formats include stand-up zipper pouches, flat zipper bags, three-side seal bags, bottom-gusset pouches, and child-resistant zipper pouches where regulations or buyer expectations require them. A 5 x 8 inch stand-up pouch with a 3 inch bottom gusset behaves very differently from a flat 4 x 6 inch zipper bag. The insert may sit neatly in one and curl, bow, or block the zipper in the other.
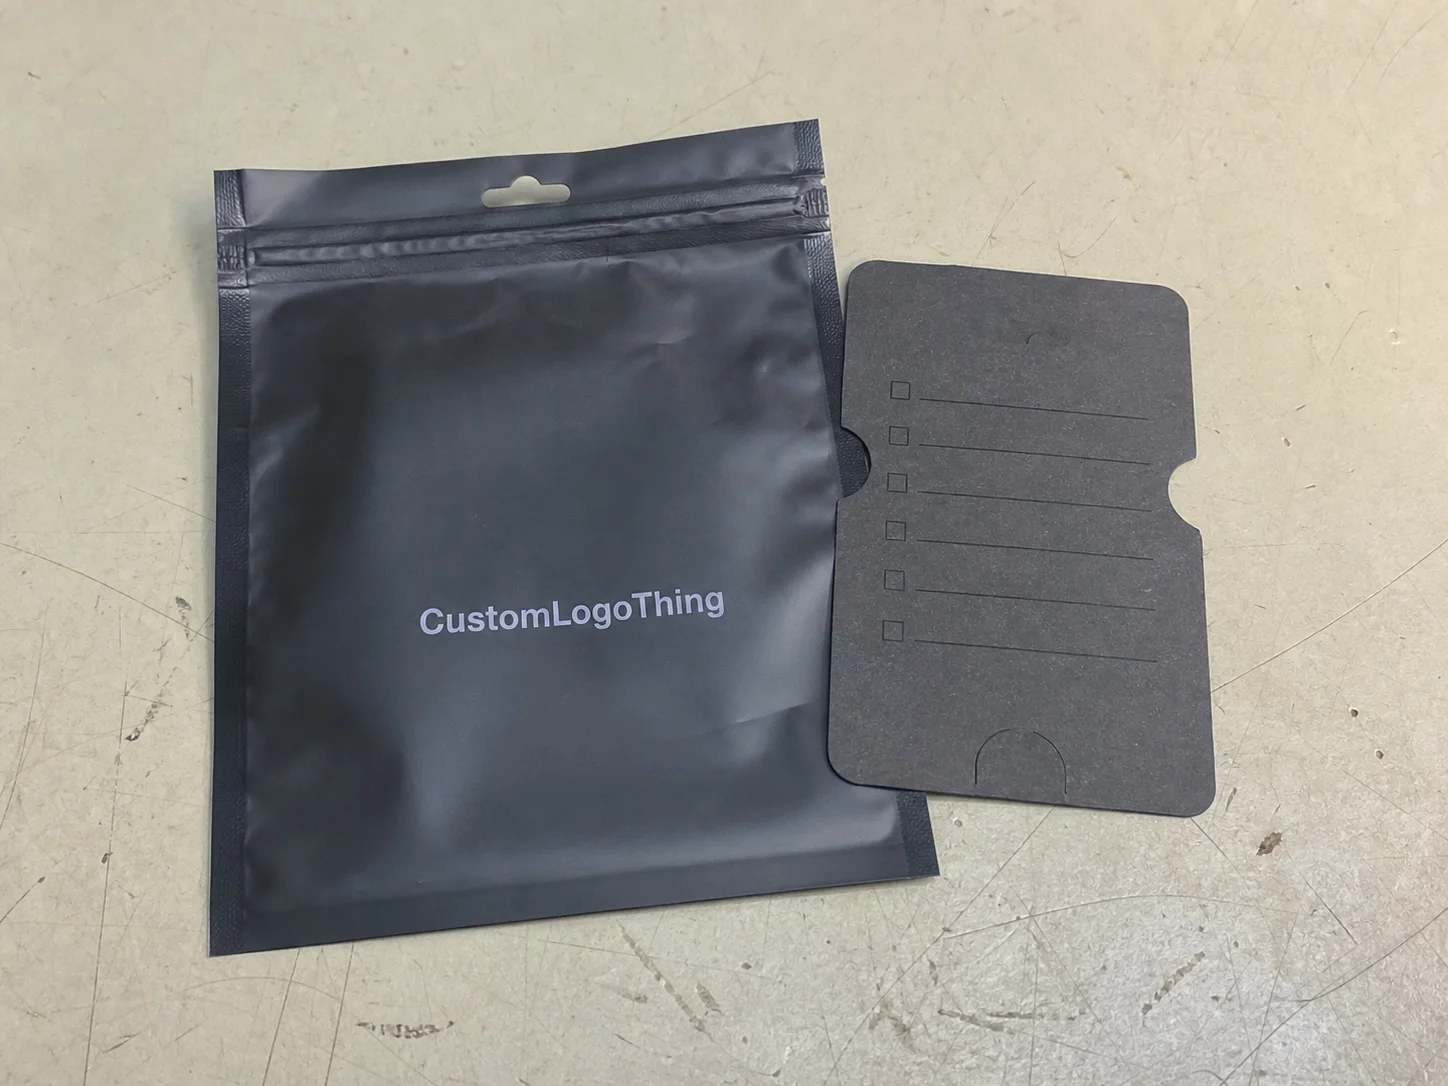
Insert placement is not decoration. It is a packing decision. The card can sit loose inside the bag, behind the product, front-facing against a clear window, attached with a small sticker, or outside an inner product wrap while still inside the pouch. For powders and oily goods, the card usually needs protection from residue. For apparel accessories, a front-facing insert can add structure and improve shelf presentation.
Matte finish changes handling. Fingerprints may show on soft-touch films. Scuffs are more visible on dark solid colors. Barcodes still need contrast testing because low glare does not automatically mean easy scanning. Clear windows can look sharp, but they need to stay away from gusset distortion and zipper pressure points.
The seal zone also has to stay clean. A trapped insert edge can weaken the heat seal. So can powder, crumbs, oil, or careless loading. One weak seal can erase every design choice you paid for.
Share the checklist with the bag manufacturer, insert printer, co-packer, and fulfillment team. Otherwise, each party defines “finished unit” differently. That is how good packaging design turns into slow packing lines and awkward emails.
Key Specs to Confirm Before Ordering Custom Zipper Bags
Start with dimensions. Confirm width, height, bottom gusset, usable fill area, zipper placement, tear notch location, hang hole needs, and whether the supplier measures internally or externally. A 6 x 9 inch pouch can have less usable space than expected once the zipper, seal margin, and gusset are included.
Material structure is the next hard decision. Common laminations include PET/PE for general use, PET/CPP for clarity and stiffness, metallized PET/PE for stronger light and aroma protection, and kraft-look laminated structures for a natural retail effect. Recyclable mono-material PE or PP options are improving, but they can still involve tradeoffs in stiffness, heat resistance, print appearance, seal settings, or barrier performance.
For sustainability claims and recycling guidance, review current resources from the U.S. Environmental Protection Agency. Do not assume a package is recyclable because it looks simple. Flexible packaging rules are picky, local, and not always kind to nice-looking claims.
Barrier needs depend on the product. Coffee, jerky, supplements, powdered drink mixes, and aromatic goods often need stronger oxygen and moisture protection. Dry apparel accessories usually do not. Greasy foods need oil resistance. Light-sensitive products may need metallized or opaque films. Do not pay for barrier you do not need. Also, do not guess your way through shelf life and call it strategy.
Matte finish choices vary too. Standard matte lamination gives a clean low-gloss look and is often the safest default. Soft-touch matte feels more velvety, costs more, and may show scuffs faster. Spot gloss over matte can highlight a logo or product name, though it adds setup complexity. Paper-touch effects feel tactile but may lose durability in rough ecommerce handling.
Print decisions include color count, digital versus flexographic or rotogravure printing, white ink requirements, metallic effects, transparent windows, and barcode testing. Digital printing works well for smaller SKU runs, seasonal artwork, and frequent changes. Plate-based printing can lower unit cost at scale, but setup fees and lead time are higher.
Zippers deserve their own line on the quote. Options include standard press-to-close, double zipper, powder-resistant zipper, child-resistant zipper, slider zipper, and hook-and-loop style closures for special applications. A powder-resistant zipper may be worth the extra cost for protein powder or fine granules. It is usually overkill for a hair clip set.
The insert spec should be just as clear: trim size, paper stock, fold count, coating, ink coverage, QR code placement, regulatory text, language versions, and food-contact suitability if the card touches product. If the insert carries supplement directions, warranty terms, safety warnings, or care instructions, version control becomes a compliance issue. Not a “we’ll fix it in the next run” issue.
- Dimension check: confirm finished size, gusset, fill line, zipper clearance, and tear notch location.
- Material check: define PET, PE, CPP, metallized, kraft-look, or mono-material structure.
- Finish check: compare standard matte, soft-touch matte, spot gloss, and paper-touch durability.
- Insert check: approve trim size, stock, fold, QR destination, placement, and language version.
- Compliance check: reserve space for lot codes, warnings, recycling marks, and required panels.
Request a physical dieline and a filled mockup before approving bulk production. Flat artwork rarely reveals zipper clearance, insert fit, shelf shape, barcode curve, or the way matte film catches scuffs under warehouse handling.
Cost, MOQ, and Unit Cost Drivers Buyers Miss
Zipper bag pricing is not just a per-bag number. It is shaped by film layers, pouch size, print method, finish, zipper type, insert handling, tooling, freight, and order volume. A low quote gets expensive fast if it excludes insertion labor, plate charges, proofing, carton configuration, or inspection.
MOQ depends heavily on print method. Digital printing can support smaller runs and more SKU variation, sometimes starting around 500 to 2,000 pieces depending on supplier, bag size, and film. Flexographic and rotogravure printing often make more sense from 5,000 to 20,000+ pieces because setup costs are spread across more units. Exact thresholds vary. Ask for stepped pricing instead of one quantity.
Typical custom matte zipper pouches might land around $0.18 to $0.55 per unit for mid-volume runs, depending on size, film, print coverage, finish, and zipper. Small specialty runs can be higher. Large repeat orders can be lower. Inserts may add $0.02 to $0.12 each for printing, while manual insertion can add another $0.03 to $0.15 per unit depending on fold complexity, version matching, inspection requirements, and labor market.
Those are practical planning ranges, not universal prices. Anyone promising universal packaging pricing without the size, material, artwork, quantity, and packing method is guessing with confidence. Packaging has plenty of that already.
| Cost driver | Typical impact | Buyer question to ask |
|---|---|---|
| Standard matte lamination | Usually lower than soft-touch matte | Is this durable enough for ecommerce handling? |
| Soft-touch matte finish | Often adds cost and scuff sensitivity | Can I see a rubbed or handled sample? |
| High-barrier film | Higher unit cost but better shelf-life protection | What barrier data supports this structure? |
| Specialty zipper | Can materially change tooling and unit price | Does my product truly need this closure? |
| Manual insert placement | Adds labor, QC time, and version-control risk | Who matches inserts to SKUs before packing? |
Ask for line-item quotes: bags, inserts, insertion labor, setup fees, samples, freight, overrun allowance, rush charges, and carton packing. A blended number hides the part of the project most likely to break the budget. The checklist should include cost ownership, because “included” means different things depending on the supplier.
The cheapest unit price is often the most expensive path for first runs. Thin film wrinkles. Weak matte lamination scuffs. Low-grade zippers fail after a few openings. Unclear insert handling creates warehouse delays that no spreadsheet predicted. Better procurement compares the landed, packed, inspected unit.
Quote at three volumes: pilot run, reorder run, and scale run. The break-even point often appears only after setup, freight, and labor are compared across quantities. Also ask suppliers to price the same pouch with and without the insert included. Bundling may save coordination time, or it may hide handling fees that your co-packer can handle more efficiently.
Process and Timeline From Artwork to Packed Units
A clean production path has a sequence: brief submission, specification review, dieline creation, artwork placement, insert artwork proofing, sample approval, production printing, lamination, curing, bag conversion, insert printing, packing, inspection, and shipping. Skip one gate and the risk moves downstream. Usually into rework.
Lead times vary. A digitally printed short run may move faster than a high-volume plate-based project, but custom materials, specialty matte finishes, zipper availability, regulatory reviews, sample rounds, and freight mode can add days or weeks. First custom orders need more buffer than reorders because the dieline, color target, insert fit, and packing instructions are still being proven.
A reasonable first-run schedule often needs several weeks after final proof approval, not after the first inquiry. That distinction matters. Artwork review is not production. A sample request is not production. A quote is definitely not production, no matter how hopeful the launch calendar looks.
Approval gates should be written down. Approve the dieline. Check the color proof. Scan the barcode. Read the insert at actual size. Test the zipper. Test the seal. Review a filled unit, not just a flat pouch. For transport validation, buyers shipping fragile or premium units may also look at procedures from ISTA, especially where ecommerce distribution is rough.
Inserts often run on a separate schedule from bags. That matters. If the pouches are ready but the QR destination, nutrition panel, warranty copy, or language version is still undecided, final packing stalls. The fastest schedule on paper can collapse because one small card is waiting for approval.
Create a shared timeline with named responsibilities for the brand, designer, supplier, insert printer, co-packer, and freight contact. A simple spreadsheet works. Include due dates for artwork, proof approval, sample review, production start, inspection, shipment, and warehouse arrival. For a first production run, add buffer for holiday shipping congestion, customs review, new supplier onboarding, and co-packer line trials.
Confirm one operational detail early: does the supplier ship empty bags and inserts separately, or deliver completed unit packaging ready for filling, kitting, or fulfillment? That answer changes receiving inspection, packing-line setup, carton labels, and who owns insert mistakes.
Common Mistakes That Create Rework, Waste, and Delays
The most common mistake is approving pouch artwork before confirming the real product fill volume. A beautiful matte bag can bulge, slump, or fail to stand once the actual product is loaded. Granola, gummies, folded socks, supplement scoops, and pet treats all settle differently. Use a rough filled mockup before committing to final dimensions.
Insert thickness is the second quiet problem. A folded card on 350gsm stock may feel premium, but it can change how the product settles, how the zipper closes, and how the pouch presents on shelf. In a small flat zipper bag, even a 1mm thickness difference can matter. The insert spec should record stock and fold style, not just artwork size.
Barcode and QR code problems show up late if nobody tests them. Matte surfaces can improve scanning because glare is reduced, but low contrast, curved placement, tiny codes, and heavy ink coverage can still fail. Test scans with a phone and a warehouse scanner if possible. Place QR codes on inserts only if the insert is easy to find and the code has enough quiet space around it.
Seal-zone contamination deserves more attention. Powders, oils, crumbs, and insert edges can interfere with heat sealing if packers are not given clear loading instructions. A failed top seal does more damage to trust than a slightly imperfect color match. For food and supplement packaging, document the loading order and inspect early production units.
Version control can turn into real waste. Multiple flavors, scents, sizes, languages, or compliance versions can lead to the wrong insert being paired with the wrong bag. SKU mapping should include pouch artwork code, insert code, carton label, and packing count. If a bilingual insert is approved for one product but not another, the checklist needs to show that distinction.
Overengineering has a cost too. Some brands specify premium matte film, specialty zipper, spot varnish, metallic ink, thick insert stock, and rigid custom printed boxes for a product that needs only a strong pouch and clear instructions. Premium choices are useful when they support the product, margin, or retail channel. They are wasteful when they only satisfy a render.
Freight gets underestimated because flexible bags are lightweight. They are also bulky once converted and carton-packed. Air freight can distort landed cost fast. If units are pre-kitted with inserts, carton dimensions and case counts affect warehousing, palletization, and fulfillment fees. Document tolerances for bag dimensions, color variation, insert placement, and overrun or underrun quantities before signing the purchase order.
Actionable Next Steps Before You Request Samples
Before asking for samples, prepare the basics: product type, fill weight or volume, target bag dimensions, barrier needs, matte finish preference, zipper type, print quantity, number of SKUs, and target launch date. If dimensions are uncertain, send the supplier the product weight, product form, and desired shelf stance instead of guessing.
Then prepare the insert brief. Include insert size, paper stock, fold style, language versions, QR destination, compliance text, placement inside the pouch, and whether insertion is manual, co-packer managed, or supplier managed. If the insert touches food, supplements, or cosmetics, ask about coating, ink, and contact suitability before approving stock.
Bring three reference items to the conversation: a competitor pouch, a rough filled mockup, and a screenshot or PDF of the intended insert content. These references shorten the quoting loop. They also reveal whether your preferred matte finish, zipper, and insert structure match the actual packaging need.
- Ask for MOQ by print method and SKU count.
- Ask what changes the unit cost most: size, film, finish, zipper, insert, or freight.
- Ask who inserts the card and who checks SKU matching.
- Ask for the production timeline from proof approval, not from the first email.
- Ask what quality checks happen before shipment: scan tests, zipper tests, seal tests, and carton counts.
Build an approval folder. Store dielines, artwork, insert files, quote versions, sample photos, test notes, and final packing instructions in one place. Email threads are terrible production control systems. A single folder protects the project when a designer, buyer, or supplier contact changes.
If your brand also uses cartons, sleeves, or mailer components, align the pouch program with broader Custom Packaging Products planning. Matte zipper bags can sit inside custom printed boxes, ship in ecommerce mailers, or form part of a retail kit. The customer experiences the whole package, not the purchase order categories.
Use the Get Matte Zipper Bags Unit packaging insert checklist as a working document before you brief a manufacturer, approve artwork, or lock your launch calendar. The best packaging projects are rarely the ones with the fanciest finish. They are the ones where the bag, insert, product, packing method, and cost model agree before production starts.
FAQs
What should be included in a matte zipper bags unit packaging insert checklist?
Include bag size, material structure, matte finish type, zipper style, print method, insert size, insert stock, placement, compliance copy, SKU matching, packing count, carton details, and approval deadlines. Also document who owns each item: brand, designer, manufacturer, insert printer, co-packer, or fulfillment provider.
How much do custom matte zipper bags with inserts usually cost?
Cost depends on size, film layers, barrier level, print method, finish, zipper type, order volume, insert printing, insertion labor, freight, and setup fees. Mid-volume matte zipper pouches may fall around $0.18 to $0.55 each, while printed inserts and insertion labor can add several cents more. Request separate pricing for bags, inserts, insertion service, samples, and shipping.
Do inserts go inside the zipper bag before or after filling?
It depends on the product and packing workflow. Inserts may be placed before filling, after filling, or outside an inner wrap but inside the pouch. For powders, foods, oily items, or fragile goods, test placement so the insert does not contaminate the seal zone, bend, or block the zipper.
What is the typical lead time for matte zipper bag production?
Lead time varies by printing method, material availability, finish, sampling needs, insert approval, production queue, and freight method. First-time custom projects should allow extra buffer for dieline review, artwork revisions, color proofing, insert testing, and filled-unit sample approval.
Can one insert design work across multiple matte zipper bag SKUs?
Yes, if the content is generic enough and does not conflict with flavor, size, regulatory, ingredient, warranty, or language requirements. Use version control and SKU mapping when inserts vary, because pairing the wrong insert with the wrong pouch can create compliance problems and customer confusion.


