Get Printed Clear Zipper Bags: Logo Print Specifications
What Printed Clear Zipper Bag Specifications Really Control
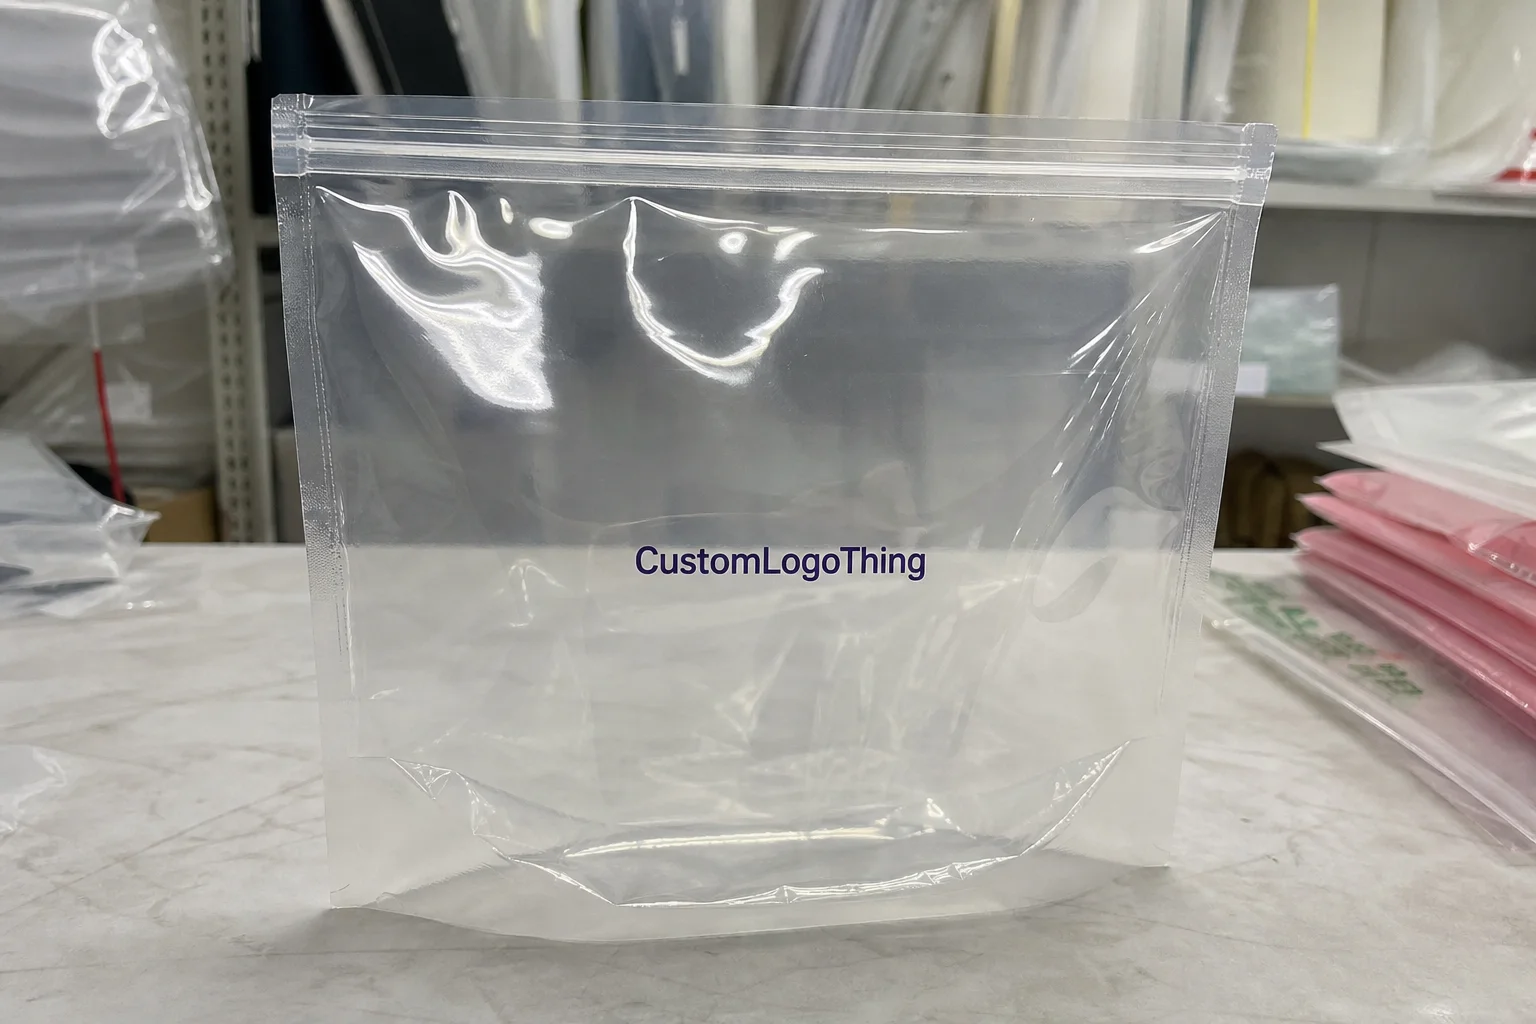
Two clear zipper bags can look almost identical in a product photo, then behave completely differently in hand. One feels clean and retail-ready. The zipper closes with a firm snap. The logo sits sharp on the face of the bag. The other wrinkles around the seal, scuffs during packing, and makes the print look cloudy.
That gap is usually why buyers start searching for Get Printed Clear Zipper Bags logo print specification details right before sending a quote request. They already know they need a clear resealable bag with branding. What they may not know yet is how many small choices decide whether that bag looks intentional or cheap.
A good specification controls more than outside size. It defines bag width and height, usable interior space below the zipper track, material type, film thickness, zipper style, print method, ink colors, artwork placement, pack quantity, carton packing, and any compliance or retail requirements. If the bag is for food contact, child-resistant packaging, apparel, cosmetics, hardware, sample kits, or components with sharp edges, say that before pricing starts.
Clear bags are less forgiving than opaque packaging. The product inside, zipper track, side seals, bottom seal, hang hole, and logo all compete on the same transparent surface. A black logo over a white T-shirt may look great. The same logo over mixed-color beads, dark supplements, patterned fabric, or metal parts can disappear unless the ink system is planned correctly.
Most print problems start before production. A buyer asks for a “standard clear zipper bag with logo,” the designer sends a polished mockup, and the production team still does not know the film gauge, zipper offset, imprint area, or print-safe distance from the seals. Then everyone acts surprised when the proof needs three rounds. There is a better way.
Practical rule: a clear bag specification is not just a drawing. It is the shared language between the buyer, designer, prepress team, and production floor.
How Logo Printing Works on Clear Zipper Bags
The print method affects cost, detail, color strength, and minimum order quantity. Flexographic printing is common for larger runs because it is efficient once plates and press setup are ready. It works well for repeat logos, one- to six-color artwork, warning copy, barcodes, and simple retail branding across thousands of bags.
Screen printing can work for bold, simple logos, especially when the ink deposit needs to be heavier. It is less friendly to tiny type, detailed gradients, or high-volume multi-color layouts. Digital printing helps with smaller batches, test runs, variable designs, and shorter artwork cycles, although film compatibility and ink durability still need to be checked. For very small orders, a printed label on a stock clear zipper bag may be the more honest answer. Not glamorous. Often practical.
Ink behaves differently on transparent film than it does on paperboard. A red spot color printed directly onto clear polyethylene can look weak once a dark or patterned product sits behind it. White ink underbase is often used when the logo must stay readable and the brand color needs visual strength. In many layouts, white prints first, then the color prints over it.
Surface treatment matters. Polyethylene and polypropylene films often need corona treatment, which raises surface energy so ink can bond instead of rubbing off during packing and handling. If treatment level is poor, or if treated film sits too long before printing, ink adhesion can suffer. A tape test, rub test, or simple scratch check can catch problems before cartons leave the plant.
Registration tolerance deserves respect. Fine lines, tiny type under about 5 to 6 points, tight outlines, and multi-color logos can shift slightly during high-speed printing. That does not automatically mean careless production; flexible film moves, stretches, and tracks through equipment under tension. Zipper placement, hang holes, bottom gussets, tear notches, and heat seals also create no-print or low-print zones that artwork should avoid.
For barcodes, ask for a real scan check on the intended print surface. A barcode that scans on a PDF proof may fail after film distortion, low contrast, or a busy product background gets involved. If scanning matters for retail receiving, do not bury that requirement in a casual email thread.
Key Material, Gauge, and Closure Specs to Confirm
Start with the film. LDPE is soft and flexible, which makes it common for apparel, light kits, accessories, and general retail packing. HDPE blends feel crisper and can reduce stretch, though they may not have the same soft hand. PP, or polypropylene, gives higher clarity and stiffness, so it can make a product look sharper on a shelf. Laminated structures are used when the bag needs better barrier, a stronger face, or a more premium retail feel.
Film gauge is not just a number on a quote. A 2 mil bag feels light and flexible. A 3 mil or 4 mil bag gives more structure and puncture resistance. Heavier gauges can improve shelf presence, but they also increase material cost, shipping weight, and sometimes zipper stress if the closure is not matched to the film.
Product shape matters more than buyers expect. Soft apparel does not stress film the way small metal parts do. Cosmetic tubes, sample kits, supplement packs, jewelry components, craft supplies, and hardware can all push against corners, side seals, and zipper tracks differently. If the item has sharp edges, ask for stronger film, rounded inserts, extra clearance, or a different packing direction. It is cheaper to adjust the bag before production than to explain split seams after fulfillment.
Closure style changes the user experience and the cost. A standard press-to-close zipper is economical and familiar. A slider zipper improves opening and closing, but it adds bulk and cost. Double-track zippers can improve reclosure strength. Tamper-evident features, tear notches, vent holes, and resealable adhesive alternatives can be useful, but each one changes tooling, layout, and sometimes lead time.
| Spec Choice | Typical Use | Buyer Consideration |
|---|---|---|
| 2 mil LDPE | Light samples, soft goods, inserts | Lower cost, softer feel, less structure |
| 3 mil LDPE or blend | Retail accessories, cosmetics, kits | Balanced durability and shelf presence |
| 4 mil or laminated film | Heavier items, premium retail, sharper edges | Higher unit cost, stronger hand feel |
| PP clear film | High-clarity display packaging | Crisper presentation, may be less forgiving in flex |
Clarity and haze should be discussed before artwork is approved. Ultra-clear film can make the product look crisp, but ink opacity, film treatment, static, packing method, and scuffing during transit all affect the final presentation. For shelf-facing products, ask for material samples with the actual product inside. Empty bag samples only tell half the truth.
Process and Timeline: From Artwork to Finished Bags
The cleanest production flow is simple: confirm specs, review artwork, create dielines or layout marks, check print colors, issue a proof, approve production, print film, convert film into zipper bags, inspect, pack, and ship. Skipping one of those steps rarely saves time. It just moves the risk later, where it costs more.
The proofing stage is where most time is saved or lost. A clear approval should cover finished bag size, usable interior size, zipper orientation, logo location, imprint size, color callouts, safety margins, and whether the artwork prints on the front, back, or both sides. If the artwork includes CMYK, spot colors, or a white underbase, that should be visible on the proof or listed in the notes.
There are several proof types. A digital PDF proof checks layout, copy, color references, and print position. A physical sample checks size, hand feel, zipper strength, and how the product fits. A press proof or pre-production sample is useful for higher-risk print work, especially if the logo color must match other packaging or the bag will be photographed for retail listings.
Typical timing depends on material availability, print plates or screens, number of colors, custom sizing, zipper style, order quantity, and whether a physical sample is requested. A simple repeat order may move quickly. A new custom size with a multi-color logo, white underbase, and sample approval takes longer. Many custom printed flexible packaging jobs land around 12 to 25 business days after proof approval, but that range can shift with supplier capacity and order complexity.
Approve the simplest complete spec sheet before revised artwork starts circulating. Changing bag size or print area after proofing can reset the clock because the dieline, plate layout, Cost, and Production notes may all need revision. Nobody enjoys redoing a plate layout because the product was measured after the artwork was approved. Measure first.
Cost, Pricing, MOQ, and Unit Cost Drivers
The unit cost of Printed Clear Zipper bags is shaped by material usage and machine setup. The cheapest quote is not always the best value if it misses gauge, print opacity, zipper quality, or packing requirements. A bag that costs two cents less but fails on the shelf is expensive in a quieter, more irritating way.
Major pricing inputs include bag width and height, film thickness, flat or gusseted construction, zipper type, number of print colors, one-side or two-side printing, print coverage, order quantity, carton packing, and any special inspection or labeling needs. A one-color logo in one position is usually more economical than full-panel artwork with tight registration and heavy white ink coverage.
MOQ exists because the supplier has to cover setup. That may include prepress review, plates for flexographic printing, screens for screen printing, ink mixing, press washup, film staging, zipper setup, conversion setup, cartons, and labor. If you need accurate pricing, ask for quantity breaks and alternates rather than comparing one flat number from each supplier.
| Order Scenario | Likely Cost Driver | Typical Buyer Move |
|---|---|---|
| Small test batch | Setup cost spread across fewer units | Consider digital printing or a printed label |
| One-color logo, one side | Lower ink and setup complexity | Good option for launch quantities |
| Two to four colors with white underbase | More plates, more registration control | Request a proof for logo opacity |
| Heavy gauge with slider zipper | Material and closure cost | Confirm the feature improves user experience |
For a basic custom printed clear zipper bag, buyers may see unit ranges such as $0.12 to $0.35 at moderate quantities. The spread can widen quickly with larger sizes, heavier film, slider closures, laminated material, and more complex print. At 5,000 pieces, a simple one-color printed 3 mil bag will price very differently from a larger four-color gusseted bag with white underbase and retail carton packing. Treat any range as a starting point, not a promise.
Ask for alternates. Two gauges, two quantities, and one simplified print version will tell you more than a single quote ever will. Compare 3 mil versus 4 mil, 5,000 versus 10,000 pieces, and full-color artwork versus a one-color logo. Real tradeoffs show up fast when the options are side by side.
Step-by-Step Spec Sheet for a Clear Zipper Bag Order
A clear spec sheet does not need to be fancy. It needs to be complete. Start with finished bag size and orientation: width by height, portrait or landscape, and whether the measurement is outside dimension or usable interior dimension below the zipper track. That distinction matters because the zipper and top header can consume 0.5 to 1.25 inches depending on construction.
Next, describe the product. Include item weight, shape, sharp edges, filled thickness, fill method, retail display needs, moisture sensitivity, and how often customers will open and close the bag. If the product is hand-packed, machine-packed, hung on a peg, shipped in a mailer, or stored in warehouse bins, say so.
Document material and construction. List film type, gauge, clear or frosted finish, flat or bottom-gusseted style, zipper type, hang hole, tear notch, vent hole, and tamper-evident feature if needed. If sustainability claims matter, ask what documentation is available. For paper-based components or mixed packaging programs, the Forest Stewardship Council is a useful reference for certified fiber sourcing, though FSC does not apply to standard plastic zipper film itself.
Then specify print. Send editable vector artwork when possible: AI, EPS, or editable PDF. Include number of colors, Pantone references or CMYK values, white underbase instructions, print location, maximum imprint area, print side, and required safety margin from side seals, bottom seals, zipper track, hang hole, and tear notch. If offset printing is part of another packaging component in the same brand system, share those color targets so the supplier understands the desired match, even if the bag itself uses flexographic or digital printing.
- Finished size: width x height, with units and tolerance if known.
- Usable space: interior area below zipper track.
- Material: LDPE, PP, blend, or laminated film.
- Gauge: for example, 2 mil, 3 mil, or 4 mil.
- Closure: standard zipper, slider, double-track, adhesive, or tamper-evident.
- Print: colors, underbase, location, imprint size, and safety margins.
- Order details: quantity, carton packing, delivery target, and approval contact.
Close the sheet with barcode or labeling needs, target delivery window, shipping destination, and the person who can approve proofs quickly. If two people need to approve brand color, name them before the proof arrives. Slow approvals are one of the most common hidden lead-time problems.
Common Mistakes That Make Clear Bag Printing Look Cheap
The first mistake is placing the logo too close to the zipper track, side seal, or bottom seal. Those areas see more distortion, pressure, and handling wear. Keep key artwork away from heat seals and closure features unless the supplier confirms the safe zone.
Tiny type is another problem. Hairline strokes, low-contrast colors, transparent effects, and fine reversed-out text often fail on flexible film, especially if the product inside has busy colors or textures. A logo that looks elegant on a white screen may look weak over mixed hardware, patterned fabric, or dark cosmetic products.
Skipping white ink underbase can also hurt the result. Light-colored logos printed directly on clear film may look translucent, and brand colors can shift visually depending on what sits behind them. White underbase adds cost, but it protects readability and color strength.
There is also a balance between over-specifying and under-specifying. Too many premium features can inflate cost without improving the package. A slider zipper, heavy gauge, hang hole, tear notch, vent hole, full-panel print, and special packout may be more than the product needs. On the other side, vague requests like “standard clear bag” can lead to the wrong gauge, closure, print method, or bag fit.
Artwork problems slow production more than people expect. Low-resolution images, missing fonts, RGB colors, no bleed, no safety margin, and logo files supplied only as screenshots all create extra prepress work. Send editable artwork and a simple marked-up placement guide together. Your future proofing schedule will thank you.
Quality-control checks should be defined before production, not argued about afterward. Common checks include finished size tolerance, zipper function, seal strength, ink adhesion, print position, color reference, barcode scan, haze or clarity, and carton count. For food or medical-adjacent uses, confirm the required documentation before quoting. “Can you send certificates?” is not a production spec.
Actionable Next Steps Before You Request a Quote
Before requesting pricing, measure the product. Measure width, height, and filled thickness. Then decide how the bag will be oriented: vertical, horizontal, peg-hung, laid flat in a shipper, or displayed standing with a gusset. Put the product into any current packaging you have and photograph it from the front and side. A supplier can read a lot from those photos.
Prepare two logo versions. One should be the preferred full-color version. The second should be a simplified one-color version. That gives you a clean comparison between brand impact and production cost. It also helps if the first artwork is too detailed for the print method or the MOQ target.
Ask the supplier to confirm print-safe zones, zipper-to-logo distance, film gauge recommendation, white ink needs, MOQ, proof type, estimated production timing, and carton packing in writing. If the bag will travel through parcel shipping or retail distribution, you can review transport testing concepts through ISTA, especially for products that may puncture or stress the package during movement.
Request material samples if hand feel, clarity, or zipper strength matters. A catalog image cannot tell you whether a 3 mil LDPE bag feels right for a premium kit or whether a PP zipper bag is too stiff for repeated use. Samples also show haze, scuff resistance, zipper feel, and how the product color affects logo readability.
Keep the buying process tight. Send the spec sheet, artwork, quantity targets, shipping destination, and approval contact at the same time. The fastest path is not a long email chain. It is clean dimensions, editable files, realistic quantity breaks, and proof approval timing before the quote is built.
FAQ
What details do I need to get printed clear zipper bags with logo print specifications?
Provide finished size, usable interior size, material, film gauge, zipper type, print colors, logo placement, order quantity, product weight, and retail display requirements. Send editable vector artwork when possible, such as AI, EPS, or PDF, so the prepress team can check line weight, color, and imprint area accurately.
Can clear zipper bags be printed without a white ink underbase?
Yes, but the logo may look translucent or change visually depending on the product behind it. Use white ink underbase when the logo needs strong contrast, accurate brand color, or readability over dark, colorful, or textured contents.
What is the best film thickness for custom printed clear zipper bags?
The best gauge depends on product weight, sharp edges, shelf presentation, and how often the bag will be handled. Light samples may work in thinner film, while hardware, cosmetics, kits, and heavier retail items often need a stronger gauge for structure and durability.
How does MOQ affect the price of logo printed clear zipper bags?
MOQ spreads setup costs across the run, including artwork checks, plates or screens, ink setup, press time, and bag conversion. Higher quantities usually reduce unit cost, but changing gauge, zipper style, or print coverage can reduce those savings.
How long does the process take for printed clear zipper bags?
Timing depends on artwork readiness, proof approval, material availability, print method, order quantity, and whether physical samples are required. The quickest timelines usually happen when the buyer confirms size, material, logo file, print colors, and shipping details before proofing begins.


