Why Clear Zipper Bag Material Matters More Than Most Buyers Think
Two clear zipper bags can look identical in a supplier photo. One arrives crisp, clean, and retail-ready. The other scratches during packing, clouds under warehouse lighting, or pops open after three uses. Same basic shape. Very different result.
This Get Printed Clear Zipper bags material comparison guide is for buyers who need to Choose the Right film before approving a quote. Price matters, obviously. So does thickness. But choosing only by those two numbers is how brands end up with packaging that technically matches the purchase order and still feels wrong in hand.
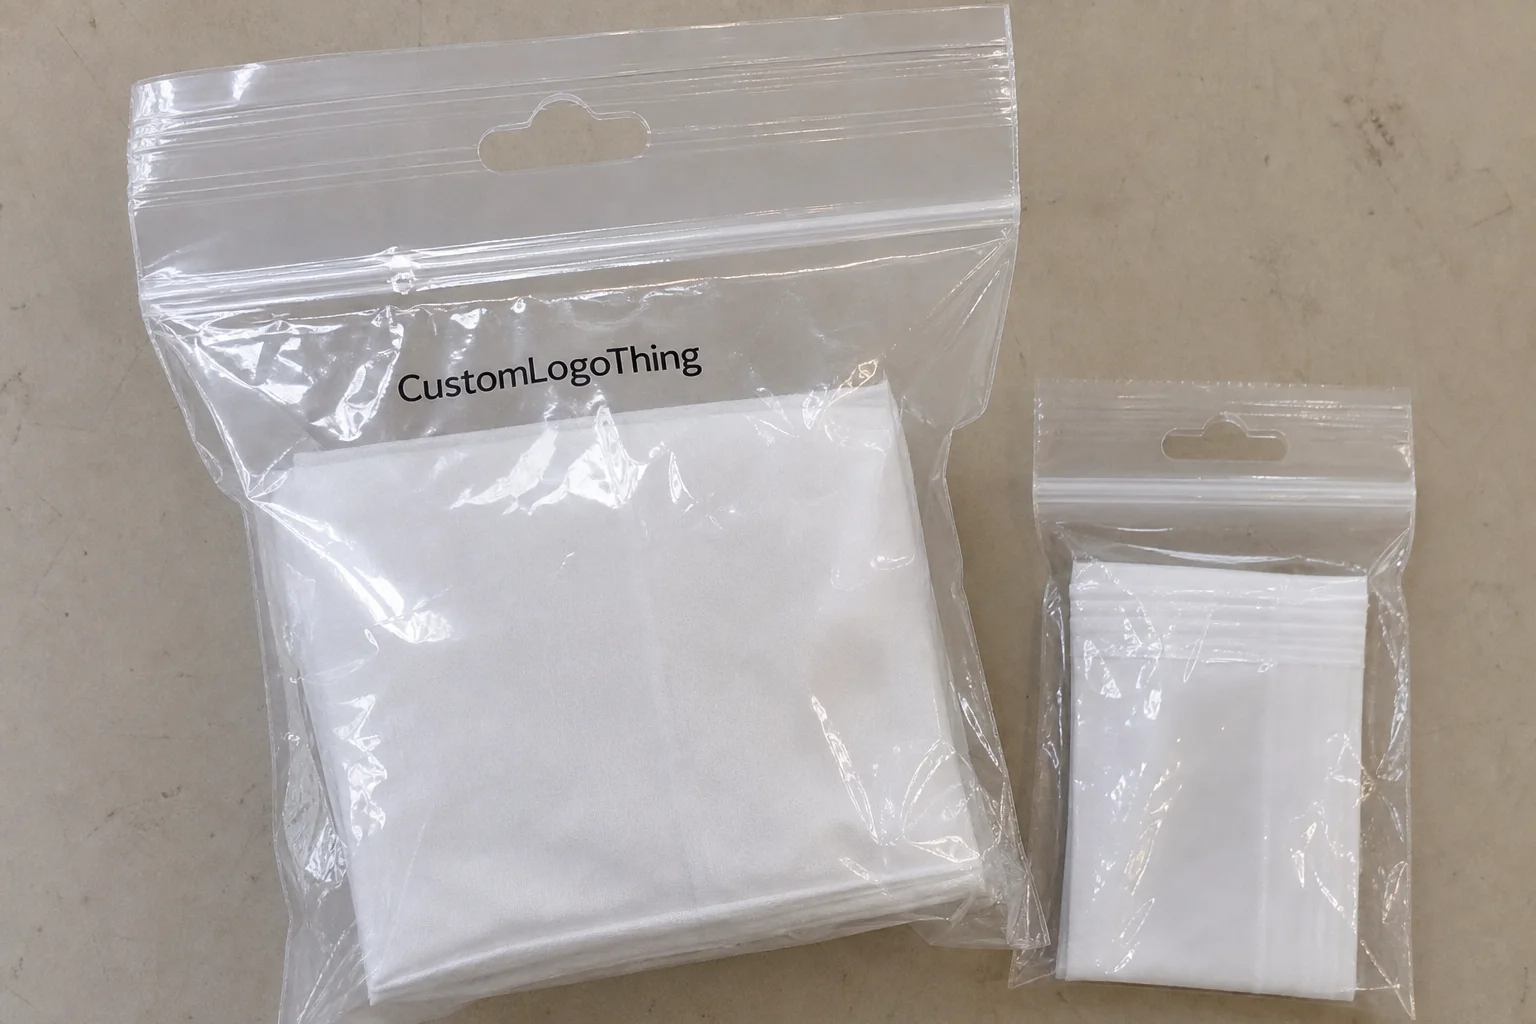
Printed clear zipper bags are reusable plastic pouches with a press-to-close zipper, a transparent or semi-transparent body, and custom printing. The print might be a logo, barcode, warning label, care instruction, size marker, product description, or simple decorative pattern. The bag may hold apparel, cosmetics, stationery, electronics parts, accessories, sample kits, retail bundles, or warehouse stock.
Material choice affects clarity, stiffness, odor, scratch behavior, zipper performance, print adhesion, recyclability claims, freight cost, and final unit price. Tiny details. Big consequences. Packaging is rude like that.
A soft hoodie does not need the same bag as a metal tool kit. A cosmetics pouch has different expectations than a basic warehouse poly bag. A retail accessory bag may need high clarity and a clean top header. A swimwear pouch may need a softer touch and better moisture tolerance. If the product is bulky, sharp, heavy, or frequently handled, the bag spec needs to say so.
A useful request is not “clear bag with logo.” That is barely a sentence, not a spec. A usable production brief includes material, size, thickness, zipper style, print method, print colors, quantity, packing method, delivery location, and deadline. If you are comparing these bags against corrugated cartons, kraft mailers, paperboard sleeves, or FSC certified retail boxes, remember that clear zipper bags do a different job: product visibility, resealability, lightweight containment, and sometimes post-purchase storage.
Practical rule: choose the bag around the product and sales channel, not around the cheapest quote. The cheapest quote often just hides the cost somewhere else.
The sections below compare the common materials, explain thickness and zipper behavior, cover print limitations, break down cost drivers, map the ordering process, and flag the mistakes that create ugly packaging problems.
Get Printed Clear Zipper Bags Material Comparison Guide: PE, PP, PVC, and EVA
The short version: PE is the flexible workhorse, PP is the crisp retail option, EVA is the soft premium-feel choice, and PVC is the glossy structured option with compliance baggage. Not glamorous. Useful, though.
PE, or polyethylene, is often the safest starting point for apparel, soft goods, and reusable storage bags. It bends easily, handles stuffing better than stiffer films, and resists tearing reasonably well for the cost. If warehouse staff are inserting folded garments all day, PE usually causes fewer complaints than a rigid film. Typical light retail bags may sit around 2 to 3 mil. Stronger reusable PE bags often land around 4 to 6 mil, depending on size and product weight.
PE can look slightly milky compared with PP. That is not always a problem. For socks, shirts, swimwear, and many soft goods, a little softness in the film can look cleaner than a glassy bag that creases at every fold. PE is also common enough that suppliers usually have multiple stock gauges and zipper profiles available.
PP, or polypropylene, gives better clarity and a crisper structure. It suits stationery, accessories, small retail goods, and products where presentation matters. The product color shows through clearly, which helps shelf appeal and barcode scanning. The tradeoff is crease behavior. PP can show hard folds, and sharp product corners may stress the film or seals faster than expected. It is not fragile, but it is less forgiving than PE.
PVC, or polyvinyl chloride, can look glossy, clear, and structured. It is used for cosmetic pouches, accessory kits, travel sets, and heavier reusable bags. The material has weight and visual shine, which some brands like. The problem is perception and compliance. PVC may be restricted by retailers, internal policies, or sustainability programs. If your sales channel cares about lower-impact packaging, recycled-content claims, or material phase-out lists, PVC may create extra review work nobody budgeted for.
EVA, or ethylene-vinyl acetate, feels soft, flexible, and slightly rubbery. It is usually frost-clear rather than glass-clear. That makes it useful for cosmetics, travel kits, swimwear, personal care sets, and pouches where hand feel matters more than perfect product visibility. EVA can feel more premium without shouting about it, which is rare in packaging and therefore pleasant.
| Material | Typical Look and Feel | Best Uses | Main Tradeoff | Cost Direction |
|---|---|---|---|---|
| PE | Soft, flexible, slightly milky clear | Apparel, soft goods, storage, sample kits | Less glass-like clarity than PP | Usually lowest baseline |
| PP | Crisp, structured, high clarity | Retail display, stationery, accessories | Can crease and feel stiff | Often slightly higher than PE |
| EVA | Soft, flexible, frosted clear | Cosmetics, travel kits, premium pouches | Lower transparency | Mid to high |
| PVC | Glossy, heavier, structured | Accessory pouches, cosmetic kits | Compliance and perception concerns | Often higher due to weight and handling |
“Clear” does not mean one thing. PP can look glassy. PE can look slightly hazy. EVA can look frosted. PVC can look glossy and heavy. Choose PE for flexible utility, PP for crisp display, EVA for soft premium pouches, and PVC only after confirming your retailer, buyer, or compliance team accepts the tradeoffs.
Thickness, Clarity, and Zipper Strength: The Specs That Decide Performance
Thickness gets abused as a shortcut. Buyers ask for “thick plastic” as if that solves everything. It does not.
Common zipper bag thickness ranges are easy enough to understand. Around 2 mil is light packaging, usually fine for temporary protection or low-stress retail use. Around 3 mil is a common everyday retail range. Around 4 to 6 mil works better for reusable bags, heavier products, and repeated opening. Some EVA and PVC pouches go thicker, but then you are paying for material weight, carton space, and freight.
Thicker is not automatically better. A 6 mil bag in a small format can feel stiff and clumsy, especially around the zipper. Extra gauge raises material cost, increases carton weight, and may slow packing because the bag does not flex around the product. For flat apparel, a well-sized 3 mil or 4 mil PE bag may perform better than an overbuilt pouch that fights every fold.
Clarity has its own tradeoffs. Higher clarity helps retail display, barcode scanning, product inspection, and online sample photography. Frosted or matte films hide scuffs, fingerprints, and handling marks better. A cosmetics brand may prefer frosted EVA because it feels softer and more polished. A stationery brand may choose clear PP because the product design needs to sell itself.
Zipper style matters more than most buyers expect. A standard press-close zipper is fine for many apparel and accessory bags. A double-track zipper improves closure confidence for heavier contents. Slider zippers add convenience, but they also add cost, bulk, and another component that can fail. Reinforced zipper seams help when the bag carries weight or gets opened repeatedly.
Alignment is brutal. A crooked zipper makes the whole bag look cheap, even if the logo is perfect. Customers notice. Retail buyers notice. Warehouse teams notice. So does the person in marketing who zooms in on every sample photo and ruins everyone’s afternoon.
- Side welds: affect how the bag handles pressure from packed products.
- Bottom seals: matter for weight-bearing and shelf stacking.
- Hanger holes: help with retail pegs, but they change top-panel layout.
- Vent holes: let trapped air escape during packing and shipping.
- Gussets: add depth for bulky items but require more careful artwork placement.
If the bag will hold rigid parts, sharp accessories, sample bottles, or powdery components, ask about seam strength and closure testing. Lab methods can help, but practical testing matters too. Pack the real product, close the zipper, stack the bags, shake the carton, and check where stress appears. For broader shipping durability, many brands reference transit protocols from ISTA, especially when the zipper bag sits inside a larger shipper.
Ask for sample bags in your target thickness before production. A 3 mil PP bag and a 3 mil PE bag do not feel the same. A small swatch can show surface quality, but a finished bag sample shows fit, zipper behavior, and seam strength. That tiny step can save you from 10,000 disappointing units.
Printing Options for Clear Zipper Bags: What Works and What Fails
Printing on clear flexible plastic is not the same as printing on kraft paper, corrugated cardboard, or a coated retail carton. The surface is slick, the background changes with the product inside, and ink opacity can make or break the design.
Screen printing works well for simple logos, bold graphics, and one- to three-color artwork. It can deliver strong opacity on clear plastic, especially for logos that need to stand out. Setup is often practical for moderate quantities, though the best option depends on the exact bag size, film, print area, and order volume.
Flexographic printing is common for repeat production, larger runs, and multi-color layouts. Once plates and setup are justified, unit pricing can be efficient. Flexo handles repeated patterns, warning text, care instructions, and brand panels well. The catch is setup cost. On a tiny run, plates do not magically become free. Shocking, I know.
Digital printing can help with prototypes, short test runs, or variable designs in certain formats. It is not always the best fit for high-volume flexible plastic bags because ink adhesion, curing, durability, and production speed vary by supplier and film. Use it only when the supplier has proven results on the exact material you plan to order.
Ink opacity matters because the bag is clear. Light colors can disappear against the product inside. Metallic effects may need a base layer. White logos often need a white ink underbase or heavier ink deposit to look intentional instead of faint and sad.
Artwork placement needs discipline. Keep print away from zipper tracks, seal edges, hanger holes, gussets, and high-friction fold areas. Leave space for the product to show if visibility is part of the packaging value. A giant logo panel on a clear bag can defeat the entire reason for using clear packaging. Yes, it happens. More than it should.
- Use vector artwork such as AI, EPS, or print-ready PDF.
- Specify Pantone colors if brand matching matters.
- Avoid tiny reversed text under 6 pt, especially on frosted film.
- Leave at least 3 to 5 mm safety margin from seals and zipper tracks.
- Reduce ink colors if budget is tight.
- Approve a digital proof, then request a physical print sample for high-risk artwork.
Glossy clear film shows smudges and scratches more easily. Frosted or matte material hides handling marks but reduces product visibility. Neither option wins every time. The right choice depends on whether the bag’s job is display, protection, reuse, brand feel, or all four.
Cost, MOQ, and Unit Cost Drivers for Printed Clear Zipper Bags
Pricing has more moving parts than buyers expect. Material type, bag size, thickness, zipper style, print method, ink colors, print coverage, quantity, tooling, packing method, and freight all affect the quote.
PE is usually the budget-friendly baseline. PP may cost more when you need higher clarity and a more structured retail feel. EVA and PVC often price higher because of film cost, weight, touch, or specialty handling. Larger bags cost more twice: once in material and again in shipping volume.
Custom printed zipper bags often start in the low thousands for efficient production. A realistic starting MOQ might be around 2,000 to 5,000 pieces for simple custom work, depending on supplier, size, material, and print method. Specialty materials, custom sizes, slider zippers, heavy-gauge film, or multi-color printing can push MOQ higher, sometimes toward 10,000 pieces or more.
Setup costs matter. Screens, plates, sampling, custom dies, dieline preparation, and prepress work get spread across the order. That is why 1,000 custom bags may look painfully expensive per unit, while 5,000 or 10,000 starts making more sense.
| Order Scenario | Likely Cost Behavior | Buyer Advice |
|---|---|---|
| 2,000 small PE bags, 1-color logo | Higher unit cost due to setup spread | Useful for testing if the supplier allows it |
| 5,000 medium PP bags, 2-color print | Better balance of setup and unit cost | Common retail-order sweet spot |
| 10,000 PE or PP bags, repeat artwork | Lower unit cost, freight still relevant | Best when demand and storage space are clear |
| EVA or PVC pouch with custom size | Higher film, tooling, and shipping cost | Request samples before approving bulk |
Increasing quantity usually lowers unit cost, but not magically. Material weight, ink coverage, carton dimensions, and freight still matter. Math remains annoying.
Hidden cost traps include overspecifying thickness, choosing four ink colors when one would work, ordering a custom size when a stock size fits, ignoring carton dimensions, and rushing production. Rush fees and air freight can wipe out the savings from a cheaper material.
Ask for two or three quantity breaks, such as 2,000, 5,000, and 10,000 pieces. You want to see the price curve, not guess from one quote. A proper quote should list bag size, material, thickness, print colors, zipper type, MOQ, setup charges, sample fees, production lead time, packing details, and shipping terms.
Process and Timeline: From Material Sample to Finished Printed Bags
The ordering process looks simple on paper: confirm product dimensions, choose material and thickness, select zipper style, prepare artwork, request a quote, approve the proof, approve a sample if needed, produce, inspect, and ship. Most delays happen before production starts.
Measure the packed product, not just the flat product. A folded shirt has thickness. A coiled cable creates pressure points. A cosmetics kit may need room for several components to shift slightly without stressing the zipper. Add space for zipper clearance, side seams, and easy insertion by warehouse staff. If staff need to wrestle every bag, labor cost quietly climbs.
A digital proof confirms layout, print size, color references, placement, zipper clearance, safety margins, and product visibility. A physical sample confirms hand feel, clarity, zipper function, actual fit, seam strength, and how the printed logo looks over the real product color. Those are different approvals. Do not treat them as the same thing.
Timeline ranges depend on complexity. A simple repeat order can move faster, especially if artwork, material, and tooling already exist. A new custom size with sampling, special material, multi-color printing, or international freight can add weeks. Many custom runs fall around 2 to 5 weeks after proof approval, but supplier capacity and shipping method matter. Air freight is faster and expensive. Ocean freight is cheaper and slower. Pick your pain.
Common delay points include late artwork, missing dielines, unclear Pantone colors, sample revisions, holiday production schedules, material shortages, and freight bottlenecks. Sustainability claims can add review time too. If you plan to mention recycled materials, post-consumer content, or recyclability, verify supplier paperwork and local guidance. The EPA recycling resources are a useful starting point, though packaging claims still depend on resin type, local collection programs, and end-market availability.
Build a decision calendar backward from your launch date:
- Product final measurement date
- Material swatch review date
- Artwork approval date
- Physical sample approval date, if needed
- Production approval date
- Ship date
- Warehouse arrival date
- Product launch or retail delivery date
Do not place custom bag orders after the product is already packed and waiting. That is not a strategy. That is panic with a purchase order.
Common Material Selection Mistakes That Create Expensive Bag Problems
Mistake one: choosing the clearest plastic without checking scratch resistance. High-gloss clear bags can look great for five minutes, then tired after rough handling, carton movement, or warehouse stacking. If the bag will be handled often, test scuffing before approving a glossy film.
Mistake two: using a thin bag for rigid or sharp products. A 2 mil bag may be fine for a lightweight fabric patch. It may be a terrible idea for metal hardware, electronics parts, or accessories with pointed corners. Corner punctures, seam stress, and returns cost more than the material savings.
Mistake three: approving artwork without testing it over the actual product color. Transparent packaging makes the product part of the design. A pale logo over a white T-shirt may vanish. A black logo over dark accessories may look muddy. Print samples over real contents whenever presentation matters.
Mistake four: ignoring zipper quality. Zipper failure is one of the fastest ways to make a reusable bag feel disposable and cheap. Open and close the sample at least 20 to 30 times. If it starts misaligning early, do not pretend bulk production will fix it.
Mistake five: assuming recycled-content or recyclable claims are simple. They are not. Verify resin codes, supplier documentation, local rules, and retailer compliance needs. If your brand is comparing clear zipper bags against biodegradable packaging or FSC certified paper options, be precise. Vague eco claims are how brands get themselves into trouble.
Mistake six: copying a competitor’s bag without understanding their material, thickness, packing method, or order volume. The outside can lie. Packaging loves doing that.
Troubleshooting usually points back to the spec. Cloudy bags may suggest material mismatch or poor film quality. Cracked seams may suggest thickness, sealing temperature, or side-weld issues. Poor ink adhesion may suggest weak surface treatment, incompatible ink, or insufficient curing. A stiff bag that fights the product may be too thick, too small, or simply the wrong resin.
Basic quality checks should happen before bulk approval and again at receipt. Check bag dimensions against tolerance, zipper alignment, seal consistency, print registration, ink rub resistance, odor, clarity, carton packing, and barcode readability if applicable. Pull samples from different cartons, not just the pretty top layer. Suppliers know how to send pretty top layers.
A good supplier should be able to explain why a material fits your product. If the answer is only “many customers buy this,” keep asking. Popular does not mean correct.
Build a Smarter Spec Before You Request Samples
Before contacting suppliers, create a simple spec sheet. It does not need to be fancy. It does need to be specific.
- Bag width and height
- Gusset size, if needed
- Product weight and packed thickness
- Material preference: PE, PP, EVA, or PVC
- Thickness target, such as 3 mil or 4 mil
- Zipper type: standard, double-track, slider, or reinforced
- Print colors and approximate print coverage
- Logo file format and Pantone references
- Quantity targets, such as 2,000, 5,000, and 10,000
- Deadline and delivery location
If you are unsure about material, review swatches for PE, PP, EVA, and PVC. Photos are not enough. Feel and clarity are hard to judge on a screen, especially with clear or frosted plastic.
Test with the actual product. Insert it, close the zipper, reopen it, stack it, ship it, rub the printed area, scan any barcode, and check visibility under real store or studio lighting. A bag that looks fine empty may look completely different once the product is inside.
Narrow choices by priority. Choose clarity for retail display. Choose softness for apparel. Choose stiffness for presentation. Choose thicker film for reuse. Choose simpler printing for tighter budgets. If sustainability messaging matters, ask for documentation before printing claims about recycled materials or post-consumer content.
Ask direct supplier questions: Which material fits this product weight? What MOQ applies to this size and print method? What lead time is realistic after proof approval? What zipper style do you recommend for repeated opening? What tolerance should we expect on size and print placement? What testing do you recommend for zipper strength and seam durability?
Use this guide as a buying checklist before approving material, quote, artwork, and production. Clear zipper bags look simple. They are not. The good ones are just specified properly.
FAQ
What is the best material to get printed clear zipper bags for apparel?
PE is usually the safest starting point for apparel because it is flexible, economical, and less prone to sharp creasing than rigid films. PP works well when crisp clarity and retail presentation matter more than softness. For premium apparel kits, compare thicker PE and frosted EVA samples before choosing.
How thick should custom printed clear zipper bags be?
Around 2 mil works for light temporary packaging, 3 mil is a common everyday retail range, and 4 to 6 mil is better for reusable or heavier items. Rigid products, sharp corners, and repeated opening usually need thicker material or stronger seams. Always test the actual packed product, because thickness on a quote does not guarantee the right hand feel.
Does this printed clear zipper bags material comparison guide apply to food packaging?
It applies to general material comparison, but direct food-contact packaging needs food-safe material documentation and regulatory review. Many clear zipper bags are used as outer packaging rather than direct food-contact packaging. Tell the supplier exactly whether food will touch the bag so they quote the right film and compliance paperwork.
What affects the quote most when ordering printed clear zipper bags?
Material, thickness, size, zipper style, print colors, print coverage, quantity, setup charges, and freight all affect the final quote. Very small custom runs are expensive per unit because plates, screens, samples, or prepress work are spread across fewer bags. Ask for multiple quantity breaks to see where the unit cost starts making sense.
How long does it take to produce custom printed clear zipper bags?
Simple repeat orders can move faster, while custom sizes, specialty materials, sampling, or complex printing add time. Many custom runs take about 2 to 5 weeks after proof approval, depending on supplier capacity and shipping method. Delays usually come from late artwork, unclear color specs, sample revisions, material availability, or freight timing.
How should I use a get printed clear zipper bags material comparison guide before ordering?
Use a Get Printed Clear Zipper Bags material comparison guide to narrow the material first, then confirm thickness, zipper style, print method, MOQ, and timeline. The best buying process is boring in a good way: compare samples, test the product fit, approve artwork carefully, and only then release bulk production.


