How to Buy Matte Zipper Bags: Packaging Insert Checklist
A matte zipper bag can look premium in two seconds. It can also lose the plot just as fast if the insert buckles, floats too low, catches in the zipper track, or faces the wrong direction. Use this how Buy Matte Zipper bags packaging insert checklist as a buyer’s working tool: bag fit, film structure, zipper function, insert stock, print specs, MOQ, lead time, and quote details all in one place.
Matte zipper bags combine resealable access with a softer, lower-glare surface. The closure lets customers open and reclose the pack. The finish photographs better than high-gloss film under many lighting setups. The right laminated structure can protect against moisture, aroma loss, puncture, and rough handling. The wrong structure? That just gives you a good-looking bag with weak performance. Packaging has a sense of humor like that.
The insert matters because the pouch artwork should not carry every instruction, warning, flavor note, warranty term, promo code, and usage detail. A printed card or folded insert can keep the front panel clean while still giving the customer the information they need. Retail buyers also like packaging that looks intentional, not crowded by six competing messages and a barcode shoved into the corner.
Practical rule: size the bag, product, and insert together. If the insert gets added after the pouch is already approved, the finished pack often feels improvised even when the printing is excellent.
Before requesting a quote, confirm the product dimensions, fill weight, pouch format, material needs, insert size, insert stock, zipper position, print method, carton packing, and target arrival date. Those details keep the conversation out of guesswork. They also reduce expensive proof revisions, especially on custom Printed Matte Zipper Bags with windows, gussets, or inserted cards.
What Matte Zipper Bags Are Best Suited For
Matte zipper bags are flexible plastic bags or pouches with a press-to-close resealable zipper and a non-gloss surface treatment. The finish softens glare, gives the film a smoother hand feel, and helps colors look more controlled. They sit inside the broader Plastic Bags category, but they are usually chosen when basic commodity packaging feels too plain.
Common uses include snacks, powdered mixes, supplements, pet treats, apparel accessories, craft components, sample kits, coffee-adjacent dry goods, and small hardware assortments. Light, flat products may work in a simple zipper bag. Products that need shelf presence usually need a stand-up pouch with a bottom gusset. Larger fill volumes may call for side gussets. Small parts sold on pegs may need a hang hole or euro slot.
A matte finish works well for muted color palettes, natural product branding, tactile presentation, and product photography. It reduces hot spots in ecommerce images and retail display lighting. It also pairs neatly with wider branded packaging systems that include labels, sleeves, mailers, or Custom Packaging Products across a product line.
Matte is not automatically the best choice. Products with aggressive oils, wet filling conditions, sharp edges, heavy abrasion, or strong fragrance may need extra coating, a different film structure, or compatibility testing. If product visibility is the main selling point, a clear window may matter more than a fully muted surface. Inserts also change the pack. They add stiffness, alter filling behavior, and may affect the order of assembly.
Material, Film Structure, and Zipper Details to Confirm
The film structure drives performance. Basic PE-based bags can work for simple dry goods, apparel, lightweight accessories, or items with modest barrier needs. Laminated PET/PE is common for stronger print appearance, better stiffness, and improved handling. Metallized laminations can increase moisture, oxygen, and light barrier for sensitive dry products. Clear window laminations allow product visibility, but the window has to stay away from seals, gussets, zipper tracks, and cut zones.
Many custom matte zipper bags fall roughly between 3 mil and 6 mil, depending on size, contents, and pouch style. A small flat accessory bag can feel fine at a lighter gauge. A stand-up pouch holding 8 oz to 16 oz of dry product often needs more stiffness so the bottom gusset opens properly and the front panel does not collapse around the insert. Dense hardware, granules, sharp components, or heavy products need puncture and drop handling checks rather than optimistic guessing.
Matte appearance can come from matte varnish, matte lamination, or a matte outer film layer. These are not identical. Matte varnish can be economical and attractive, but scuff resistance depends on the coating and handling. Matte lamination usually feels more refined and durable, though it can add cost and may complicate recyclability claims. A matte outer film can create a soft-touch surface, but ink density and color targets need careful proof review.
Zipper details deserve a separate line on the spec sheet. Confirm zipper placement, zipper width, seal width, tear notch position, reclose feel, and headspace above the zipper. If the bag will be top-filled and heat sealed after filling, there must be enough room above the zipper for equipment jaws and a clean seal. Some applications need child-resistant features, tamper-evident seals, or special closures. Raise those requirements before artwork starts. Late closure changes can wreck a dieline.
Optional features include rounded corners, hang holes, euro slots, vent holes, bottom gussets, clear windows, anti-static considerations, recyclable film options where feasible, and lot-code areas. If sustainability language is part of the project, ask for documentation and keep claims precise. The EPA recycling resources are useful for general recycling language, but actual curbside or store-drop-off acceptance depends on the material and local systems.
Give the supplier product weight, product dimensions, filling method, storage conditions, shipping method, and the insert loading sequence. Does the insert go in before the product, after filling, or at a separate co-packer? That one detail affects fit, labor, and quality checks. It is much easier to quote the right structure when the product is described like a real object, not “small dry goods” with a nice label.
Packaging Insert Checklist: Size, Stock, Print, and Placement
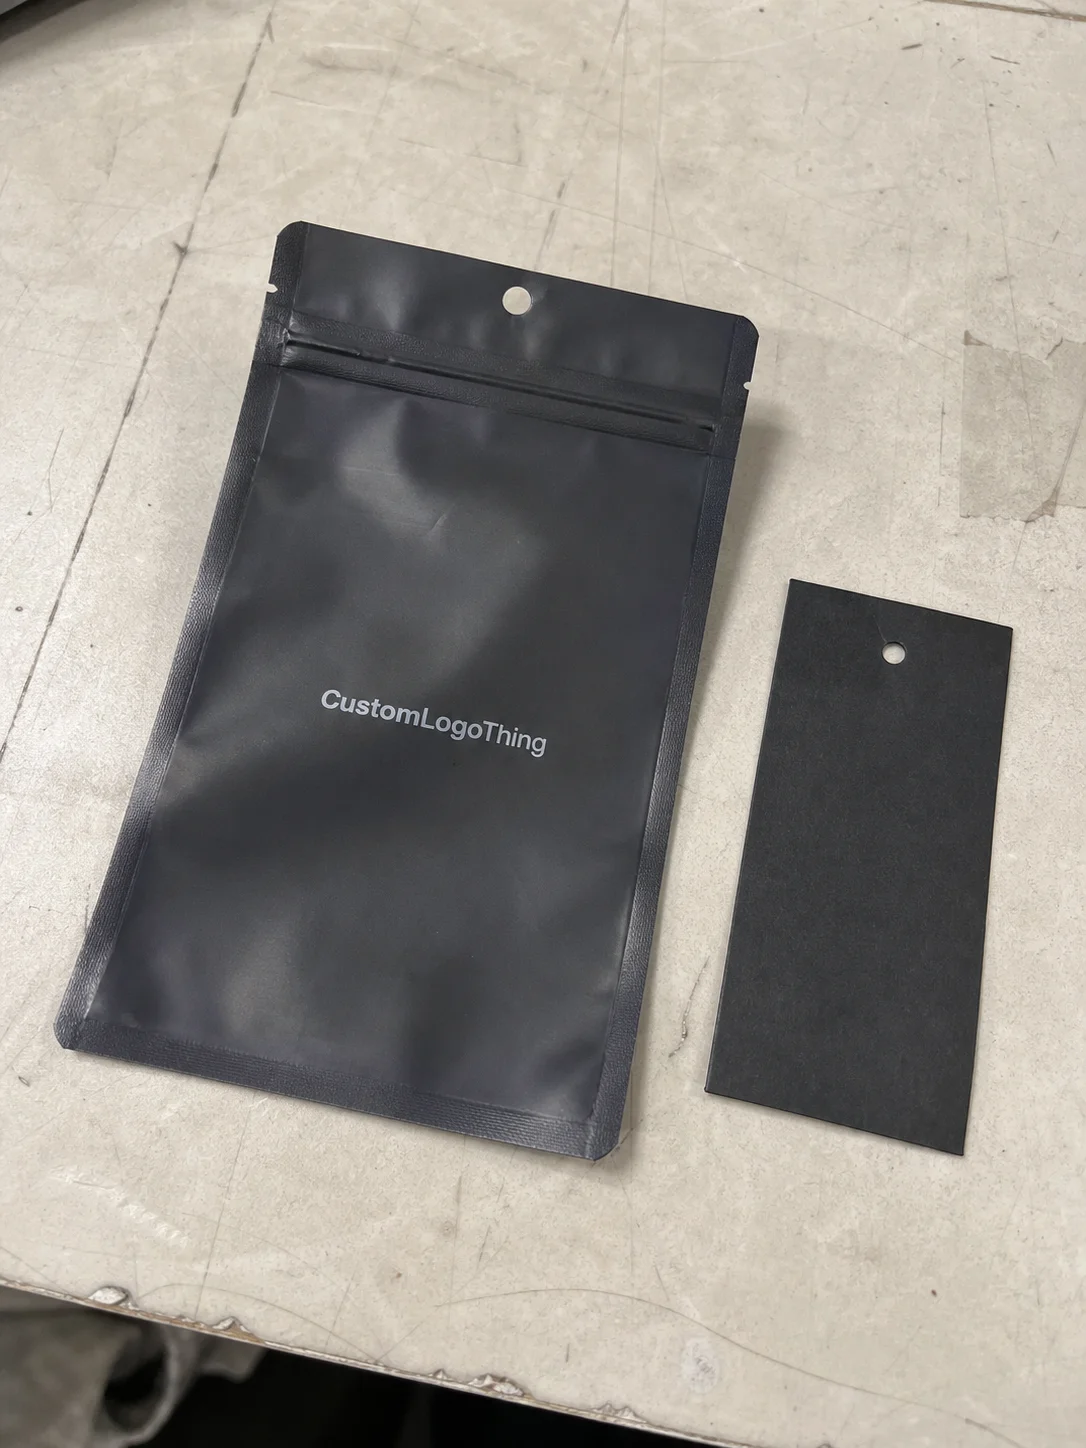
The insert needs its own specification. Finished dimensions, paper stock or synthetic stock, caliper, fold style, corner shape, print colors, coating, and visibility requirements should all be listed. A 350gsm card, an 80 lb text folded brochure, and a synthetic waterproof insert behave very differently inside the same pouch.
Fit comes first. The insert needs clearance on all sides so it does not buckle, distort the gusset, enter the heat-seal area, or catch in the zipper. As a working starting point, many buyers leave at least 3 mm to 6 mm of side clearance for a flat card. Increase that allowance for folded inserts, thicker stock, stiff coatings, or products that shift during packing. Tight looks tidy in a mockup. Tight can be miserable on a packing line.
Orientation also needs a decision. Portrait or landscape. Face-forward or back-facing. Flat card, folded brochure, instruction sheet, coupon, warranty card, or QR insert. If a window is included, the insert can support the display or fight it. A flavor card placed neatly behind a window can look intentional. A warranty card covering the product can look like somebody forgot how packaging works.
Paper can absorb moisture, oil, fragrance, or color migration from certain products. Dry snacks, bath salts, scented items, oily components, and products with loose powders should be tested with the actual insert stock. Coated paper, synthetic stock, or separation from direct product contact may be needed. In some packs, the safest plan is to keep the insert behind a product barrier or load it into a dedicated area.
Assembly questions affect price and risk. Who supplies the insert? Who prints it? Is it shipped separately to the filling location? Is the card inserted by hand, by the pouch supplier, or by a co-packer? Manual insertion is acceptable for many small runs, but it adds labor and another quality-control step. Automated insertion may require stricter size tolerances, flatter stock, and consistent fold registration.
Before bulk approval, send a dieline, insert proof, product sample, and loading mockup. Check the filled pouch, not only the empty one. If warnings, expiration details, lot information, market-specific language, or retailer-required copy appear on the insert, approve it with the same care as the main pouch artwork. The card may be inside the bag, but it is still part of the package.
Pricing, MOQ, and Unit Cost Factors for Matte Zipper Bags
Pricing depends on bag size, film structure, thickness, print coverage, number of colors, matte finish method, zipper type, gusset format, window requirement, insert handling, and total quantity. A blank stock zipper bag with a label is not priced like a custom printed matte laminated stand-up pouch with a window, tear notch, and inserted folded card. Different animal.
Separate tooling, plates, setup, proofing, and per-unit production costs. Small runs carry higher unit costs because printing, lamination, converting, and setup time need production efficiency. Custom Printed Matte Zipper bags usually have higher minimums than blank stock bags for that reason. A pilot run may be useful, but do not expect pilot pricing to match a reorder price.
As a broad planning range, simple custom printed matte zipper bags may start around a few thousand pieces. Specialized structures, high ink coverage, custom windows, recyclable film requirements, or insert kitting can push MOQs higher. Unit pricing varies heavily, but a small to mid-size custom pouch may land around $0.18 to $0.65 per unit at moderate quantities, before freight. Larger, thicker, barrier-heavy, or highly customized pouches can exceed that range.
| Cost Factor | What Changes the Price | Buyer Detail to Provide |
|---|---|---|
| Film structure | PE, PET/PE, metallized barrier, recyclable options, window films | Product type, shelf-life needs, moisture or oxygen sensitivity |
| Print and finish | Ink coverage, number of colors, matte varnish, matte lamination | Artwork files, brand colors, print sides, finish preference |
| Bag format | Flat bag, stand-up pouch, bottom gusset, hang hole, tear notch | Bag dimensions, fill weight, retail display method |
| Insert handling | Separate print, folding, trimming, kitting, manual insertion, QC | Insert size, stock, fold style, who supplies and inserts it |
| Order quantity | Setup spread, material yield, press efficiency, carton volume | Pilot quantity, reorder plan, target landed cost |
Inserts affect cost through separate printing, folding, cutting, packing, kitting, insertion labor, carton volume, and orientation checks. Ask for tiered pricing at quantities that match the launch plan, such as 2,500, 5,000, 10,000, and 25,000 pieces. Quantity breaks reveal where the real cost drop happens. Sometimes the jump from 2,500 to 5,000 is meaningful. Sometimes the better break is much higher.
For an accurate quote, provide bag dimensions, quantity, artwork, print sides, material preference, matte style, zipper type, insert specs, shipping destination, and target in-hand date. If you have a target landed cost, share it. A supplier may be able to adjust structure, size, finish, or packing method to help, but only if the cost target is known early.
Process, Timeline, and Production Steps from Quote to Delivery
The buying process is manageable when the specifications are complete. Submit the bag and insert details. Receive a quote. Confirm the dieline. Prepare artwork. Review the digital proof. Approve a sample or pre-production proof if needed. Move into production, complete quality checks, pack cartons, and ship. Each step protects the next one.
Timeline depends on specification complexity, artwork readiness, proofing speed, material availability, insert sourcing, order quantity, freight method, and whether the pouch includes special film, windows, or finishing. Many custom packaging projects take several business weeks from final proof approval. More technical pouches may need additional time for material sourcing, sampling, or transit. Rush decisions usually cost more than early planning. Shocking, I know.
Common delays are predictable. Missing dieline information, low-resolution artwork, unconfirmed barcode size, late compliance copy, insert stock changes, and last-minute bag dimension edits can all stall production. A barcode that scans on a PDF but fails after resizing on a matte pouch is not a minor issue if the product is going into retail.
Proofing should check color expectations, logo placement, zipper clearance, seal zones, window alignment, insert visibility, warning copy, barcode size, and carton label requirements. If the insert must face forward, state that in writing. If a co-packer needs a specific carton count or inner-bag bundle quantity, include that before packing instructions are set.
Repeat orders usually move faster when artwork, material, dimensions, and insert specs remain unchanged. Still, confirm the latest version of every file before production restarts. Product packaging changes through small edits: nutrition copy, regulatory language, promotional codes, retailer marks, flavor names, QR destinations, and expiration formats. One outdated insert can create a rework problem even if the pouches are perfect.
Build in receiving time, especially if the bags must arrive before a filling date, retail reset, trade show, subscription box pack-out, or seasonal launch. “Need it soon” is not a production schedule. A better request includes approved artwork timing, sample requirements, quantity, carton instructions, shipping destination, and the date the packaging must be in hand.
Quality Checks That Separate a Good Pouch from a Risky One
Flexible packaging quality is not just appearance. A pouch can print beautifully and still cause problems if the seal is weak, the zipper is misaligned, the tear notch fails, or the film structure is wrong for the product. Serious buyers check function and presentation together.
Review seal integrity, zipper alignment, zipper reclose strength, tear notch performance, print registration, matte finish consistency, scuff resistance, odor, cut accuracy, window placement, and carton packing. ASTM test methods may be relevant for seal strength, coefficient of friction, puncture resistance, or film properties, depending on the application. For shipping performance, especially if filled pouches move through parcel networks or retail distribution, ISTA procedures can help frame transport testing expectations.
Inserts need separate checks during production or assembly. Confirm the correct version, correct side facing out, clean corners, no ink transfer, no curling, no closure interference, and consistent placement. If the card shifts after filling, the pack may look uneven on shelf. If it enters the zipper area, customers may struggle to reclose the bag. Nobody wants a resealable package that fights back.
Filled samples are worth checking whenever possible. An empty pouch may stand nicely, while the filled pouch leans forward because the product settles below the gusset crease. Powders can create dust near the zipper. Snacks can trap air. Apparel can push the insert into a curved shape. Dense small parts can settle into one corner and stress the seal.
Compatibility testing matters for products with oils, fragrances, sharp edges, powders, or static-sensitive components. A matte surface may scuff during aggressive handling. Paper inserts may pick up fragrance or oil over time. Some inks or coatings may transfer if the insert rubs against the film under pressure. Not every project needs lab-level testing, but every project benefits from realistic handling samples.
Carton packing also deserves attention. Confirm carton count, bundle count, liner needs, orientation, carton labeling, and whether inserts are packed separately or already loaded. A well-made pouch can still arrive curled, crushed, or hard to count if packing instructions are vague. Quality control is not glamorous. It is just cheaper than explaining to a retailer why half the bags look tired before they are filled.
Next Steps Before You Request a Matte Zipper Bag Quote
Before requesting a quote, gather the practical details: product weight, product dimensions, desired bag style, fill method, matte preference, zipper needs, insert size, insert material, print colors, order quantity, delivery location, and target arrival date. If you have an existing pouch, measure the outside dimensions and the usable inside space, not only the front panel. The front panel lies. The zipper, seals, and gusset take up room.
Artwork should be prepared in vector format when possible, with linked images at suitable resolution and brand color references included. Add barcode requirements, regulatory copy, retailer packaging rules, and any package branding elements that need to match other items, such as labels, sleeves, mailers, or custom printed boxes. Consistency across product packaging helps buyers recognize the line faster and reduces redesign work later.
If the bag must fit closely or stand upright with a specific fill volume, send a product sample or detailed measurements. Product density matters. Eight ounces of loose tea, eight ounces of powder, and eight ounces of metal parts do not behave the same in a pouch. The insert adds another variable because it can stiffen the front panel, shift the center of gravity, or change how the product settles.
Decide who supplies the insert and who inserts it. Custom Logo Things can quote the complete requirement more accurately if the request states whether the insert is supplied by the buyer, produced with the bag order, inserted before delivery, or handled later by a co-packer. If future reorders are likely, mention that too. A launch quantity and reorder quantity may call for different pricing tiers or packing plans.
For the cleanest start, request quantity breaks and include any deadline tied to a retail launch, packing date, sales event, or seasonal shipment. A complete first request saves time because fewer assumptions need to be revised. Keep the checklist close while comparing quotes, samples, and proofs. The best matte zipper bag is not just the one that looks good in a rendering. It is the one that fits the product, holds the insert cleanly, survives handling, and arrives ready to fill.
FAQ
What information do I need before I buy matte zipper bags with packaging inserts?
Prepare bag dimensions, product weight, order quantity, artwork, film or barrier needs, zipper style, insert dimensions, insert stock, print requirements, delivery location, and target in-hand date. If the insert must sit in a specific position or show through a window, include a mockup or photo reference.
How does a packaging insert change the matte zipper bag size I should order?
The insert needs clearance so it does not bend, block the zipper, wrinkle the gusset, or enter the heat-seal area. A thicker folded insert may require a slightly larger bag or a different loading sequence than a single flat card.
What affects the cost of custom matte zipper bags the most?
Major cost drivers include bag size, film structure, material thickness, print coverage, matte finish type, zipper format, gusset style, quantity, and any insert printing or insertion labor. Tiered pricing shows where the unit cost improves at higher quantities.
Can matte zipper bags include both a window and a printed insert?
Yes, but the window size and placement should be planned around the product and insert so the bag does not look cluttered or hide important information. Window placement must also avoid zipper, seal, gusset, and cut areas on the dieline.
How long does matte zipper bag production usually take?
Timing depends on artwork readiness, proof approval, material availability, print complexity, insert requirements, order quantity, and shipping method. Repeat orders are typically simpler because the dieline, artwork, and material structure have already been confirmed.


