Choosing a patch looks straightforward until it lands on an apron that gets washed every week, a tote that spends its life on a packing table, or a retail tag that needs to survive handling without looking tired. A solid Logo Patches Material guide for ceramic studios has to do more than compare finishes. It needs to account for clay dust, glaze residue, heat, repeated abrasion, and the fact that studio branding often sits right beside hard work.
Ceramic studios ask a lot from their branded materials. The same logo may need to read clearly on staff apparel, look intentional on retail products, and stay presentable on packaging that is folded, stacked, shipped, and reopened. A patch can be visually correct and still fail if the material choice ignores laundering, texture, or the garment it will live on.
Why ceramic studios should think about patch materials before ordering
Patch material changes the way a logo behaves in the real world. It affects handfeel, edge durability, print or stitch clarity, and how the brand looks after repeated wear. That matters in a ceramic studio because the environment is unusually tough on textiles. People move from wheels to sinks to shelving to kilns, and the clothing picks up dust, moisture, and friction all day.
There is also a visibility problem that many buyers underestimate. A patch may be small, but it often carries the most concentrated part of the brand identity. If the type fills in, the border curls, or the color shifts after a few washes, the patch starts to look like a shortcut instead of a finished design element.
The most common patch families are familiar once you strip away the jargon:
- Woven patches use thread woven into a tight surface, which helps preserve fine detail.
- Embroidered patches build raised thread texture and read as more tactile and craft-driven.
- PVC/rubber patches are molded for bold contrast and high durability.
- Faux leather gives a boutique look with less upkeep than genuine leather.
- Genuine leather adds natural grain and an artisanal finish, but it is less forgiving in rough-use settings.
- Printed fabric handles more colors and gradients, especially when the artwork is complex.
- Heat-transfer labels can work for light applications, though they are not usually the best answer for repeated abrasion.
The best result usually comes from matching the patch to the job before worrying about aesthetics. A studio patch that looks elegant but cannot survive laundry is not premium; it is just under-tested.
“A patch that looks premium on a proof but curls after three wash cycles is not premium. It is just expensive.”
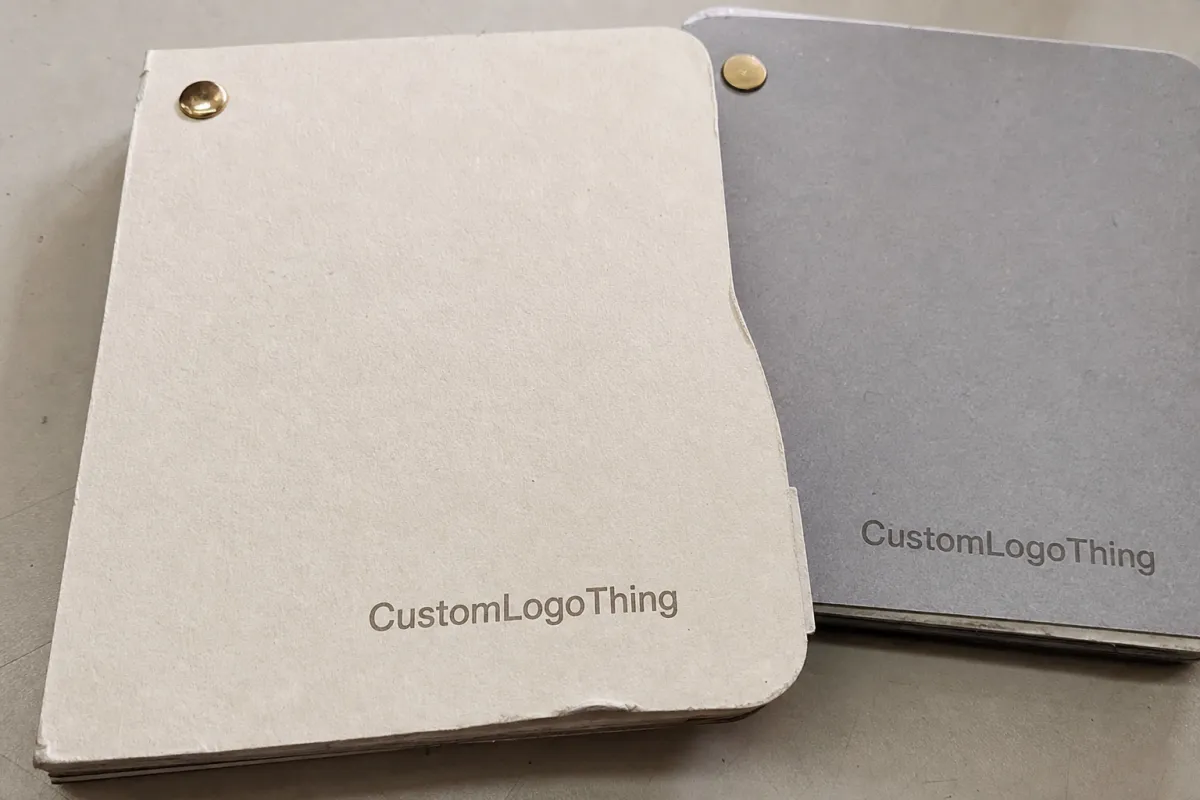
How logo patch construction works on clothing labels and studio apparel
Every patch has a few basic parts: face material, backing, edge treatment, detail resolution, and attachment method. Once you understand those pieces, it becomes much easier to compare suppliers and ask useful questions instead of judging samples only by color or texture.
The face material is the visible surface. The backing affects stiffness and attachment. The edge treatment influences whether the patch stays neat after wear. The attachment method determines how it is applied to aprons, bags, jackets, packaging, or other studio items.
For ceramic studio use, the attachment choice matters as much as the material:
- Sewn-on: the most reliable for aprons, jackets, and canvas totes. It takes more time to apply, but it handles washing and abrasion well.
- Iron-on: practical for lighter apparel and lower-volume application, though it can struggle on thick seams or heat-sensitive fabrics.
- Adhesive: useful for short-term placement, mockups, or packaging tests, not for items that will be washed or handled heavily.
- Hook-and-loop: useful for removable staff identification or event wear.
- Heat-seal: works when the fabric tolerates heat and the patch construction is built for it.
Backing changes the feel immediately. A stiff backing can help a woven or embroidered patch sit flat on canvas or denim, but the same stiffness can feel awkward on a softer tee or fleece layer. Softer backings are more comfortable, though very large patches can lose shape if the structure is too light.
Edge finish is easy to ignore and hard to fix later. Merrowed edges create a raised classic border and work well on traditional patch shapes. Laser-cut edges are cleaner for intricate outlines and more modern branding. Stitched borders sit in the middle and tend to be practical when durability matters but bulk does not.
Compatibility problems show up quickly in studio settings. Thick apron seams can interfere with adhesives. Heat-sensitive fabrics can reject iron-on or heat-seal methods. Tiny lettering can blur under embroidery, especially if the logo is scaled too small. That last issue is common: what reads clearly in a digital mockup may be much less legible at a 2-inch finished size.
Key material factors that affect durability, handfeel, and brand image
The hardest wear conditions in a ceramic studio are not limited to washing. The patch has to deal with abrasion, moisture, dust, handling, and repeated movement between work areas. Clay dust behaves like a fine abrasive. Glaze residue settles into texture. Aprons get stuffed into laundry bins, pulled over rough surfaces, and folded into shelves.
Abrasion resistance should come first for working gear. If the patch will go on an apron, tote, jacket, or utility bag, the face material and border need to resist fraying or cracking. Woven and PVC-style patches tend to hold up well here. Some printed finishes look clean at first but need gentler use.
Handfeel is the second filter. A patch can be durable and still feel wrong on the body. Bulky embroidery may irritate thin shirts or neck-adjacent placements. A hard molded patch can feel out of place on soft apparel. For interior labels or neck areas, softer woven or printed options usually sit better.
Brand image is where the material starts shaping the message. Embroidered patches usually read as warm and handmade. Faux leather feels more polished and boutique-oriented. PVC has a stronger, more graphic personality with crisp edges and bold contrast. Woven patches are often the safest choice when the logo includes small text or delicate linework.
Sustainability usually enters the conversation too, especially for studios that already use recycled packaging, FSC-certified paper, or lower-impact shipping materials. The patch itself does not need to be compostable to make sense in a lower-waste system. A durable label that outlasts the garment is often the better environmental choice than a fragile one that has to be replaced early.
For packaging and material recovery questions, sources from the Packaging Machinery Manufacturers Institute and the U.S. EPA offer useful context on material choices and end-of-life planning.
Logo patch material guide for ceramic studios: choosing the right option by use case
Once the patch is tied to a specific job, the decision becomes much clearer. A studio does not need one material for everything. In practice, the best Logo Patches Material guide for ceramic studios is the one that matches use case, wash frequency, and the brand tone without overcomplicating the order.
| Use case | Best material | Why it fits | Watch out for |
|---|---|---|---|
| Staff aprons | Woven or embroidered | Readable, durable, familiar craft look | Bulky embroidery on small logos |
| Retail staff uniforms | Woven or faux leather | Clean branding with a polished feel | Heat-sensitive garments and rough washing |
| Tote bags | Woven, embroidered, or PVC | Strong visibility and clear identity | Oversized patches that overpower the bag |
| Kiln mitts or utility gear | Sewn-on woven or heat-tolerant stitched label | Better for repeated handling | Materials that cannot tolerate heat exposure |
| Giveaway items | Printed fabric or simplified woven | Lower cost and flexible artwork | Low-detail printing that looks dull |
| Packaging wraps and inserts | Thin woven, printed tag, or faux leather tag | Premium tactile detail on kraft paper or corrugated cardboard | Heavy patches that bend packaging |
If the logo contains tiny text, woven usually performs better than embroidery. Woven construction can support tighter linework and cleaner small lettering. Embroidery works best when the design is simple and texture is part of the brand story.
Faux leather fits boutique-style branding, especially on aprons or packaging tags that will not face aggressive laundering. PVC is stronger visually and physically, but it can clash with softer, earth-toned studio branding if the rest of the identity is quiet and handmade.
There is no reason to force a material because it looks trendy in a sample book. A small logo with fine serif type should not become a thick embroidered badge. A patch used near high heat should not be made from a material that softens, warps, or cracks under stress.
Many studios do best with a two-tier approach: one standard patch for staff and operations, and one more polished version for retail goods or limited releases. That keeps the identity consistent while leaving room for margin on premium merchandise.
Cost, pricing, and MOQ: what ceramic studios should budget for
Patch pricing is shaped by material, size, number of colors, edge finish, backing, and quantity. Comparing quotes only by unit price is misleading. A 2.5-inch woven patch with a stitched edge is a different production job from a 3.5-inch embroidered patch with an iron-on backing, even if the artwork is similar.
For small to mid-size studio orders, setup and sampling can matter almost as much as the unit rate. Woven patches with simple color blocks are usually easier to price. Molded PVC shapes, dense embroidery, and designs that need digitizing or cleanup require more prep. If the artwork arrives in a low-resolution file, that can add another pre-production step before anything is manufactured.
Practical pricing ranges for custom work often fall roughly here:
- Simple woven patches: about $0.35-$0.90 per unit at higher quantities, with possible setup or sample fees.
- Embroidered patches: about $0.45-$1.20 per unit depending on size, stitch density, and edge finish.
- Faux leather patches: about $0.40-$1.10 per unit, especially when the shape is standard and the logo is one-color deboss or print.
- PVC/rubber patches: about $0.60-$1.50 per unit because molding and material complexity can raise the cost.
MOQ, or minimum order quantity, usually pushes the price up for smaller runs. That is not an arbitrary surcharge. The setup time, sample approval, stitching, die cutting, or molding has to be spread across fewer units, which raises the cost per piece.
Ceramic studios can keep the economics under control by standardizing one size and one core logo treatment wherever possible. If aprons, tote bags, and packaging inserts all share the same format, reorders become simpler and waste drops. A unified spec also lowers the chance of errors when staff changes or collections rotate.
Cost can often be managed better through design simplification than by shrinking the patch. Fewer thread colors, a cleaner outline, and slightly larger text usually improve legibility and keep the order in a better price band. Shrinking the logo until it is hard to read saves little and weakens the result.
Process and timeline: from artwork approval to finished patches
Most patch orders follow the same path: file review, artwork prep or digitizing, material selection, sample approval, mass production, trimming, backing application, and final inspection. The exact order shifts a bit by material, but the production logic is similar.
Clean vector artwork saves time. If you send an editable AI, EPS, or high-quality vector PDF with defined colors and final dimensions, the production side can move faster. If the file is a low-resolution JPEG with thin type and unclear color references, expect delays while the design is cleaned up.
Different constructions also move at different speeds. Simple woven patches tend to be quicker than embroidered patches because the weave can be planned efficiently once the artwork is approved. Molded PVC usually takes longer because the shape, color zones, and edge structure have to be built into tooling. Faux leather can also add time if the order includes debossing, stitching, or special backing.
For a realistic studio schedule, straightforward runs often take about 12-15 business days after proof approval. More complex constructions can take longer depending on queue length, sampling requirements, and revision rounds. Rush service is possible in some cases, but it works best when the artwork is already final and the spec is simple.
Before ordering, have these items ready:
- Final vector artwork.
- Preferred patch size in inches or millimeters.
- Placement target, such as apron chest, pocket, tote face, or packaging wrap.
- Desired backing and attachment method.
- Brand colors, ideally with Pantone references if available.
Packaging should be considered at the same time if the patch will be attached to inserts, wraps, or mailers. Kraft paper belly bands, corrugated cardboard, and FSC-certified stock all behave differently under weight and folding pressure. A patch that looks excellent on a sample board can still cause problems if it adds bulk, creates a snag point, or bends a mailer during transit.
Common mistakes ceramic studios make when ordering patches
The first mistake is choosing by appearance alone. A patch can look excellent in a render and still fail on a garment that gets washed frequently. The second mistake is ignoring the fabric underneath. A stiff backing that works on canvas may curl on soft cotton, and an adhesive that looks fine on paper may fail on a textured apron weave.
Small text causes trouble more often than buyers expect. If the logo includes a subline, website, or delicate tagline, embroidery can turn it muddy. Woven construction has limits too if the design is compressed too tightly. Tiny linework should be checked at actual size, not guessed from the artwork file.
Color overload is another trap. Too many shades raise cost, slow production, and make the patch visually noisy on a small surface. Ceramic studios often lean toward earthy, restrained branding, and a simpler palette usually fits that language better than a crowded one.
The last mistake is approving a sample without testing it on the real item. Put the patch on the apron, tote, or packaging board you actually plan to use. Fold it, wash it, handle it, and see how it sits. A five-minute test can prevent a much more expensive re-order.
Expert tips and next steps for a better patch order
Start with the real use case, not the mockup. Ask for one sample or proof, then place it on the actual garment or bag. That is especially useful for staff wear that will be laundered often, because wash performance reveals edge issues, stiffness, and color behavior that a desk review will miss.
Keeping two versions of the brand mark usually helps: a primary studio version and a simplified retail version. The primary version can carry more detail on aprons or jackets. The simplified version works better on small packaging labels, giveaways, and merchandise with limited space.
When fine detail matters, request a physical sample or a close production proof. Screen images can hide edge softness, minor color shifts, or backing stiffness. If the brand depends on precise linework or specific color matching, proofing is not optional.
Document the standard specs once the right version is approved. Save patch size, preferred backing, placement notes, and material choice so future reorders stay consistent even if staff changes or product lines shift. That kind of recordkeeping saves time and money over the long run.
For ceramic studios, the most practical next step is simple: gather final artwork, list every intended use, define a budget range, and compare materials against real wear conditions before asking for quotes. That is the cleanest way to use a Logo Patches Material guide for ceramic studios without overspending or ending up with labels that look good only on paper.
FAQs
What is the best logo patch material for ceramic studio aprons?
Woven patches usually work very well for ceramic studio aprons because they handle detailed logos, sit relatively flat, and hold up on cotton or canvas. Embroidered patches are a good choice if you want a more tactile, handmade look, but they can feel bulkier. If the apron gets washed often, make sure the backing and attachment method match the fabric, not just the logo.
Are faux leather patches durable enough for studio apparel?
Yes, faux leather can be durable enough for retail-facing apparel and lower- to moderate-wash use. It is a strong choice when the brand wants a boutique or artisan feel. I would avoid it for high-heat placement or rough laundering conditions, because the finish and edge behavior can suffer over time.
How do I choose between woven and embroidered patches for a ceramic brand?
Choose woven if your logo includes small text, thin lines, or fine detail that needs to stay crisp. Choose embroidered if texture and a craft-forward feel matter more than tiny design elements. If the logo has a lot of detail and needs to stay legible on a small label, woven is often the safer option.
What MOQ should a small ceramic studio expect for custom patches?
MOQ depends on the material, size, and construction, but smaller runs usually cost more per piece. If you need patches for multiple applications, standardizing one size can help make the order more efficient. Ask for pricing at a few quantity levels so you can balance budget, stock, and future reorders.
How long does custom patch production usually take?
Timeline depends on artwork readiness, sampling, and the patch material you choose. Simple designs usually move faster than multi-layer or highly detailed constructions. Having final artwork, brand colors, and clear placement instructions ready usually reduces delays and helps the order move through proofing faster.


