Buyer Fit Snapshot
| Best fit | printed foam inserts with logo for packaging buyers comparing material specs, print proof, MOQ, unit cost, freight, and repeat-order risk where brand print, material, artwork control, and repeat-order consistency matter. |
|---|---|
| Quote inputs | Share finished size, material target, print colors, finish, packing count, annual reorder estimate, and delivery region. |
| Proofing check | Approve dieline scale, logo placement, barcode or warning zones, color tolerance, and any recyclable or compostable wording before bulk production. |
| Main risk | Vague material claims, crowded artwork, or missing packing details can create delays even when the unit price looks attractive. |
Fast answer: Printed Foam Inserts With Logo: Branding, Fit, and Cost should be specified like a repeatable production item. The safest quote includes material, print method, finish, artwork proof, carton packing, and reorder notes in one written spec.
What to confirm before approving the packaging proof
Check the product dimensions against the actual filled item, not only the sales mockup. Ask for tolerance on folds, seals, hang holes, label areas, and retail display edges. If the package carries a logo, QR code, warning copy, or legal claim, reserve that space before decorative graphics fill the panel.
How to compare quotes without losing quality
Compare board or film grade, print process, finish, sampling route, tooling charges, carton quantity, and freight assumptions side by side. A lower quote is only useful if the supplier can repeat the same color, closure quality, and packing count on the next order.
Printed Foam Inserts With Logo: Branding, Fit, and Cost can sound like a narrow packaging topic until two otherwise identical products land on the table and one opens to a quiet, branded cavity while the other opens to plain foam. The outer carton, ship label, and product weight may all match. The interior changes the story the moment the lid lifts. That is the practical value of Printed Foam Inserts with logo: they protect the item and shape the first physical impression at the same time.
From a packaging buyer's seat, printed foam inserts with logo sit right at the overlap of cushioning, presentation, and brand identity. They can hold a product in the right direction, separate accessories, mark part numbers, and make a package feel planned instead of improvised. Premium electronics, tools, medical devices, and gift sets rely on that inner layer more than many teams realize. The exterior gets the camera-ready moment, yet the interior often carries the memory customers keep.
Printed Foam Inserts With Logo: the first thing customers feel
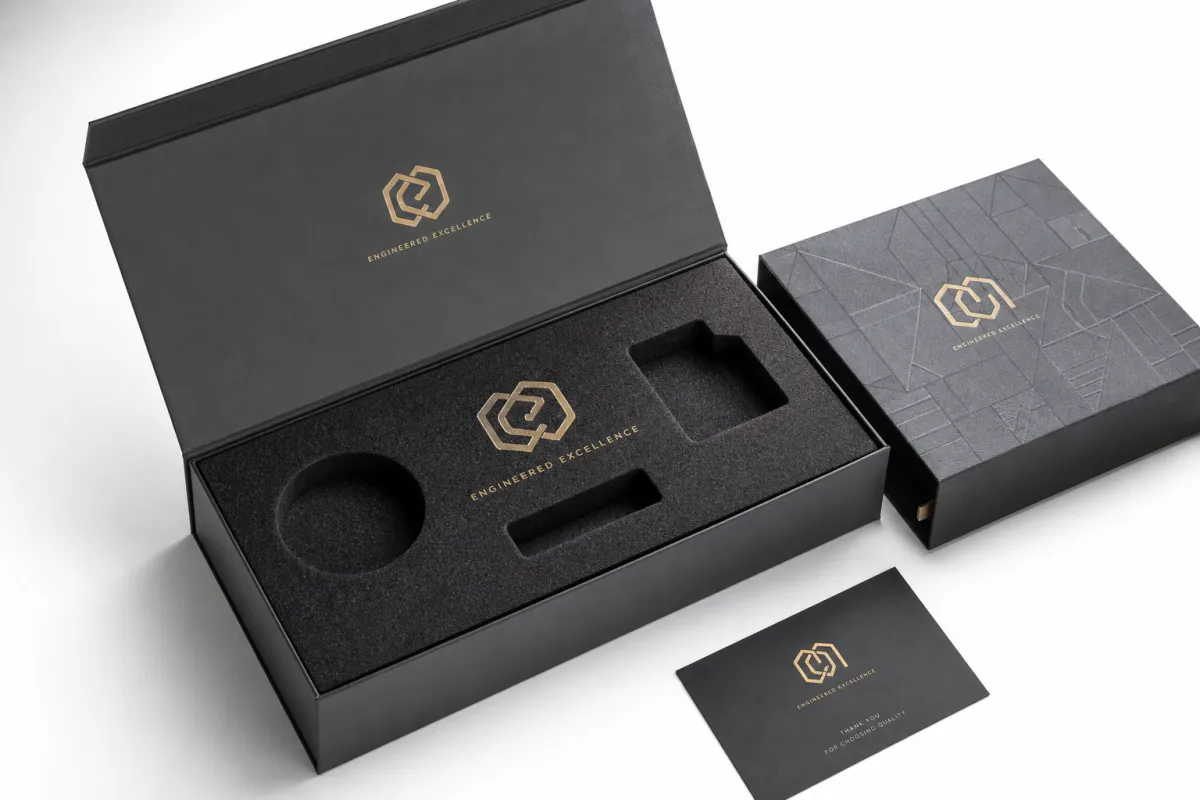
Picture a customer opening two cartons that look almost identical from the outside. One contains a plain die-cut foam cavity. The other uses printed foam inserts with logo to frame the product with a clean mark, a part identifier, and a short handling note. The second package feels more deliberate before the item is even touched. That is not marketing theatre. It is a real packaging effect, and it is one reason brands ask for printed foam inserts with logo in launches, retail kits, and direct-to-consumer shipments.
At the material level, printed foam inserts with logo are custom-cut cushioning parts that also carry branding, instructions, orientation cues, or product identification. The foam might be polyethylene, EVA, polyurethane, or cross-linked material, depending on weight, surface detail, and shipping conditions. The logo can appear as a spot mark, a repeated mark, a restrained graphic, or a larger branded panel. The goal stays the same in every case: protect the product and make the interior feel intentional rather than generic.
That matters because the insert is often the first in-box surface a customer sees. A plain exterior carton can keep print costs in check, while the inside still carries the brand message. In practice, printed foam inserts with logo work best when they support the product story. A luxury accessory may call for a quiet mark and a precise fit. A service kit may need printed labels for each pocket. A technical device may need part numbers, QR codes, or assembly cues. The branding feels useful when it connects to function.
Compared with unprinted foam, the branded version costs more, though not always by much relative to the full package value. Compared with paperboard or molded pulp, foam often gives stronger cushioning for fragile or high-value items, especially when the product has sharp corners, uneven geometry, or a sensitive finish. Paperboard has its place in recycling familiarity and flat-pack efficiency. Molded pulp can support sustainability messaging. Foam earns its keep when protection has to be precise. Printed foam inserts with logo add another layer: visual control. If that layer does not improve the unboxing, the fit, or the brand story, it is just decoration. If it does all three, the spend becomes easier to defend.
ISTA testing standards help keep teams grounded because packaging is not a mood exercise. Drop, vibration, and compression tests show whether the insert survives realistic distribution stress. A pretty cavity that fails a drop test still fails. That is why printed foam inserts with logo should be judged on function first, then presentation, then cost.
Printed foam inserts with logo also fit categories where unboxing is part of the product promise. Premium audio, compact electronics, retail tools, cosmetics sets, replacement parts, and equipment with accessories all benefit from that interior discipline. The logo does not need to shout. A restrained mark often does more by showing the brand paid attention to what happens after the carton closes. I have sat through enough sample reviews to know the quiet version usually ages better than the loud one.
How the process works from artwork to production
The process for printed foam inserts with logo usually starts with the product, not the artwork. That order matters. Before anyone finalizes a logo, the supplier needs item dimensions, weight, fragility level, accessory count, packing orientation, and shipping method. A 500-gram handheld device in a retail carton has very different needs from a 3-kilogram instrument packed for pallet freight. The insert has to follow the object, not a cleaned-up render of it.
Good suppliers ask whether the insert holds one item, multiple components, or a complete kit. They also want to know whether the customer removes the product once or repeatedly, because repeated opening changes the design. A one-time shipper can tolerate a tighter grip than a display package meant for demo use. That is one reason printed foam inserts with logo often begin as a brief that reads more like an engineering note than a marketing brief.
Foam selection usually comes before print finalization because density, color, and surface texture affect how branding looks and how durable it feels. A smoother EVA or cross-linked PE surface generally accepts cleaner graphics than a coarse open-cell foam. A black insert can make a white or silver mark read sharply, while a light gray insert may need stronger contrast to avoid looking faded. The logo method matters too. Direct print, hot stamp, and layered branding behave differently on foam, especially when the surface compresses under pressure. That is why printed foam inserts with logo should be treated as a material-and-process decision, not only a design one.
The usual production flow runs through these stages:
- Intake - The buyer sends drawings, product photos, dimensions, and performance targets.
- Material selection - The supplier recommends foam type, thickness, and density based on protection needs.
- Artwork setup - The logo, icons, or text are placed so they do not interfere with the cavity.
- Mockup or sample - A digital proof and often a physical sample confirm fit and appearance.
- Approval - The customer signs off on measurements, print placement, and tolerances.
- Cutting and printing - Foam is die-cut, CNC-cut, or routed, then branded with the agreed method.
- Inspection and packing - Finished inserts are checked for print position, edges, and dimensional consistency.
That sample stage deserves more attention than it usually gets. A digital mockup can show logo placement, but it will not reveal how a real product lifts out of the cavity, whether the foam edge feels too tight, or whether print alignment shifts after cutting. Physical samples catch those issues. For printed foam inserts with logo, one missed tolerance can create hundreds or thousands of unusable units.
"The best branded insert is the one customers barely notice until they realize how carefully everything is held in place."
Packaging professionals often review approvals in two layers: visual approval and fit approval. The first says the print looks right. The second says the product actually seats correctly, clears the lid, and can be removed without damage. If those approvals get collapsed into a quick yes, printed foam inserts with logo can turn into expensive rework. Careful teams ask for a fit check with the actual product, not just a CAD file.
Key design factors that decide fit, protection, and brand impact
The difference between a good insert and a frustrating one usually comes down to fit. With printed foam inserts with logo, the branding can look polished while the structure quietly misses the mark. That is the trap. The strongest insert brings presentation and restraint together, because the cavity has to hold the item securely during vibration, drop events, and warehouse handling. A foam cavity that is too loose lets the product move. Too tight, and the user struggles to remove it or damages a finished edge. Neither result feels premium.
Density is one of the first technical variables. Lower-density foam may work for lightweight items, but it compresses more under load and can lose shape sooner. Higher-density foam gives better support for heavier products or sharper cut edges, though it can feel stiffer and cost more. Thickness matters as well, especially if the product has protruding parts, a fragile finish, or an uneven underside. The wrong combination can create an insert that looks polished yet performs poorly once it enters the courier network. Printed foam inserts with logo should be built for that real-world abuse, not just a shelf display.
Logo placement is another design choice that affects readability and feel. A single mark centered in a clean open area usually reads better than scattered branding on every visible face. Busy interiors can make the package feel crowded and reduce the sense of precision. In many cases, one well-placed logo near the top layer or in the product recess is enough. If the insert also carries part names, orientation arrows, or accessory labels, those elements should be arranged like signage rather than decoration. The best printed foam inserts with logo give the customer information without asking them to decode the layout.
Contrast and scale matter more than many buyers expect. A small logo on a dark foam surface may disappear. A huge logo on a product cavity can feel like a billboard and make the package less refined. The middle ground usually works best: visible at opening distance, calm at product-pickup distance. That is one reason mockups should be reviewed at actual size instead of only on a laptop screen. Printed foam inserts with logo live in physical space, so the branding should be judged there too.
Environmental conditions can change foam performance more than brand teams realize. Heat can soften some foam formulations. Humidity can alter surface feel and, in some cases, print longevity. Repeated stacking in a warehouse can compress an insert before it ever ships. If the package will sit in storage for weeks or be opened repeatedly by dealers or field technicians, those usage patterns should shape the design. In certain categories, a foam that behaves well in a clean sample room will age differently in an actual distribution chain. Printed foam inserts with logo have to survive that full life cycle.
There is also a sustainability question, and it deserves a straightforward answer. Not every foam choice is equally easy to recycle, and local recycling rules vary. Some buyers prefer recycled content, lower-weight designs, or inserts that can be reused multiple times. Others need the highest possible protection and accept more material to get it. FSC applies more directly to paper components than foam itself, but the broader message still matters: packaging teams are under pressure to choose materials with more care. In that context, printed foam inserts with logo should be justified by performance, not habit.
- Dense foam supports heavier products and cleaner cut edges.
- Thicker foam helps manage protrusions and impact exposure.
- High contrast print improves logo legibility at opening distance.
- Simple placement usually feels more refined than crowded artwork.
- Reuse potential can matter in field kits and service packages.
One useful rule holds up across categories: if the logo makes the cavity harder to cut, harder to inspect, or harder to use, it is probably too ambitious. Printed foam inserts with logo should make the package better, not fight with it. In practice, the brands that get the strongest results start with protection criteria, then add visual treatment once the structural answer is steady.
Printed Foam Inserts With Logo: cost, pricing, MOQ, and quote drivers
Cost is usually the first question, and it is also the one most likely to get answered vaguely. That causes problems. Buyers need actual numbers, even if those numbers are ranges. For printed foam inserts with logo, pricing depends on foam type, part size, cut complexity, number of print locations, finishing requirements, and order quantity. A simple one-cavity insert in standard foam can price very differently from a multi-part kit with several branded faces and tight tolerances.
The practical breakdown is straightforward. Tooling and setup are often the fixed costs. Material and labor are the variable costs. Smaller runs spread the fixed costs across fewer units, which is why low MOQ orders can feel expensive. Larger runs reduce unit price, but only if the spec stays stable. If the logo changes, the cavity changes, or the insert needs a new print plate, the economics shift again. That is why printed foam inserts with logo should always be quoted with clear assumptions.
Prototype pricing is another area where buyers get surprised. A sample run may include design setup, die creation or CNC programming, material allocation, and proofing labor. Those costs do not always disappear in production; they are often absorbed in a different way. For planning, a small production run may land around $0.80-$2.50 per unit depending on foam and complexity, while larger volumes can fall lower, sometimes in the $0.18-$0.60 range for simpler constructions. Those figures are not universal, and any supplier claiming otherwise is overselling certainty, but they are useful enough to keep a budget honest. Printed foam inserts with logo should be priced against the total package value, not only against raw foam weight.
MOQ changes the picture quickly. A 300-piece order and a 5,000-piece order are not just different in volume; they are different in economics. The smaller run usually carries a higher per-unit charge because the setup work and design attention are concentrated. The larger run can justify better tooling, more controlled printing, and tighter inspection. That is why a supplier's minimum order quantity should be read with the spec beside it, not alone. Two quotes for printed foam inserts with logo can look similar while hiding very different assumptions about setup, waste allowance, and rejection rate.
Comparing quotes fairly is harder than it sounds. The lowest number may assume lighter foam, less print coverage, looser tolerances, or a longer lead time. Another supplier might include sample approval, revised artwork placement, or a stronger material that holds up better in transit. If those details are not aligned, the comparison misleads. A fair quote for printed foam inserts with logo should match these items exactly:
- Outer dimensions and cavity dimensions
- Foam type, density, and color
- Print method and print area
- Number of logo locations or text fields
- Sample cost versus production cost
- Packing format and shipping assumption
- Lead time from approval, not from inquiry
A quick comparison table helps make the differences visible:
| Option | Typical Use | Relative Cost | Best Fit For |
|---|---|---|---|
| Plain cut foam | Basic protection with no interior branding | Lowest | Price-sensitive shipments, simple products |
| Printed foam inserts with logo | Protection plus visible brand identity | Moderate | Premium retail, kits, electronics, gift packaging |
| Printed foam with multiple labels | Branding plus part identification or instructions | Moderate to higher | Multi-piece sets, service kits, technical equipment |
| Molded pulp with branding | Eco-leaning presentation with lighter cushioning | Varies | Products where sustainability messaging matters more than foam-style protection |
If a supplier will quote both the best-case and the realistic production scenario, that is a good sign. The best-case number shows ambition. The realistic number shows operational honesty. For printed foam inserts with logo, the second one is the better guide for budget planning because it is the one most likely to survive revision rounds and production variation.
Lead time should also be budgeted honestly. A typical project may spend several days in artwork review, another several days in sample approval, then move into cutting, printing, inspection, and shipping. Simple jobs can move faster, while complex jobs with multiple revisions may stretch much longer. If the product launch date is fixed, ask the supplier what can be compressed and what cannot. printed foam inserts with logo are usually delayed less by the cutting step than by unresolved approvals.
Step-by-step guide to ordering printed foam inserts with logo
The cleanest way to order printed foam inserts with logo is to treat the project like a packaging specification, not a one-off art request. Start with a product brief that includes photos, CAD files if available, finished dimensions, weight, accessory count, and the exact role the insert must play. Does it only protect during transit? Does it also present the item at retail? Must it support long-term storage? Those answers change the structure, and they change the branding options too.
Next, choose the foam structure before you define the logo treatment. That order matters. A tight product fit may leave only a small visible panel for branding. A more open cavity may allow larger print coverage but reduce restraint. If the logo comes first, the geometry often turns awkward. Good printed foam inserts with logo usually come from the product layout driving the graphic layout, not the other way around.
Once the structure is selected, ask for an initial layout or dieline. Check tolerances carefully. Look at hand clearance, finger access, product lift-out, and how the item sits after vibration. If the insert is for a kit, confirm that all accessories have individual cavities or clear retention logic. If the product has a screen, lens, or polished finish, confirm that the foam face will not rub the surface during packing. This is where printed foam inserts with logo either prove themselves or need adjustment.
Then move to proofing. A digital mockup helps with placement and proportion, but it is not enough. Request a physical sample whenever possible. Test it with the actual packing team, not only the design team. The pack line may expose issues that renderings never show: stiff insert edges, confusing orientation, too much grip, or a logo placed where the operator's hand naturally lands. For printed foam inserts with logo, operator feedback often separates a pretty spec from a usable one.
A sensible testing sequence looks like this:
- Visual check - Confirm logo placement, contrast, and overall presentation.
- Fit check - Verify cavity size, retention force, and removal ease.
- Pack-line test - See how quickly staff can load the product repeatedly.
- Transit test - Use drop or vibration testing if the product is fragile.
- Final sign-off - Lock the spec, artwork, and inspection criteria before production.
If the item is fragile or high value, testing should include real distribution methods. ISTA 3A, for example, is commonly used for parcel shipments and gives packaging teams a structured way to check performance in handling and transit conditions. For broader standards context, industry groups like ISTA and resources such as packaging.org help teams stay grounded in practical packaging thinking rather than purely aesthetic choices.
Before full production, document the final approved spec. That record should include dimensions, foam grade, color, print placement, approved artwork, reorder trigger, and inspection limits. If the project will be reordered later, this step saves time and prevents version drift. Printed foam inserts with logo can look identical on paper while changing in small ways from one run to the next, so the approved record matters more than many teams expect.
Finally, build in a reorder plan. If a product line is seasonal or likely to scale, save the dieline, print file, and sample photos in one place. That is the fastest route to repeat consistency. In practice, the companies that handle printed foam inserts with logo well treat the packaging spec as a controlled asset, not a forgotten file in a shared folder.
Common mistakes with printed foam inserts with logo
The most common mistake is designing for appearance first and protection second. It sounds harmless, yet it creates weak results. A cavity that looks elegant on a render can turn out too loose for transit or too tight for daily packing. Once that happens, the logo is the least of the problem. The product may scuff, the insert may crack at the edges, or the customer may need two hands just to remove the item. Printed foam inserts with logo only feel premium if the product stays safe and easy to handle.
Overbranding is another trap. More print does not automatically mean more value. Too many marks, labels, and decorative elements can make the insert feel busy and reduce legibility. In some cases, the packaging team thinks the insert needs to use every inch of surface, but the better choice is restraint. A single logo panel plus a clean part identifier often reads more refined than a dense graphic field. With printed foam inserts with logo, negative space is part of the design language.
Skipping sample testing is a fast route to avoidable cost. A digital proof cannot show compression, grip, removal force, or the real visual contrast between ink and foam surface. One small mismatch can force a revision round, delay launch, or create a packaging line bottleneck. If a supplier says the proof is enough and no physical sample is needed, that is a warning sign for complex printed foam inserts with logo programs.
Timeline errors happen more often than buyers admit. Teams usually remember the production date and forget the sample cycle, the revision loop, and the shipping time for approvals. If the insert is tied to a launch, the packaging schedule should be built backward from the ship date with enough room for one correction round. A project that sounds like a two-week job can turn into a four-week job once artwork changes, fit checks, and tooling updates are counted. That is normal. It is also why printed foam inserts with logo need a realistic calendar from the start.
Coordination failures are equally common. Packaging, marketing, operations, and procurement may all believe they are discussing the same insert while making different assumptions about print coverage, foam thickness, or SKU count. The result is confusion at approval time. One team wants a premium display. Another wants the fastest pack-out. Another wants the lowest unit price. Those goals can fit together, but only when stated clearly. Otherwise, printed foam inserts with logo become the place where cross-functional misunderstandings show up in physical form.
There is also a materials mistake that deserves mention: choosing foam because it feels premium rather than because it performs well for the product. Foam surface and color influence appearance, yes. Compression, density, and cut behavior matter just as much. A soft material may look luxurious and still fail under a heavier item. A firmer foam may seem less polished and still produce a better package. The smartest teams let test results decide. That is how printed foam inserts with logo stay useful over time, not just attractive on approval day.
"A branded insert should make the product feel more controlled, not more complicated."
Expert tips and next steps for printed foam inserts with logo
If you want printed foam inserts with logo to feel premium, use one strong visual area instead of scattering branding across every visible surface. Restraint usually reads as confidence. A clean logo panel, a precise cavity, and the right material choice will beat a crowded layout almost every time. Packaging buyers often assume more print means more brand presence. In practice, a simple mark often feels more considered because the insert does not have to compete with itself.
Ask for a sample set that includes both appearance and fit. A color proof tells you whether the logo is visible and the contrast is right. A fit sample tells you whether the cavity behaves well with the real product. You need both. If a supplier only offers one, that is not enough for a serious project involving printed foam inserts with logo. The goal is to see how the branding and the structure work together, because those decisions affect each other more than teams usually expect.
Use the actual packing team in the review. They notice things spec sheets miss. If the insert slows pack-out by even 10 seconds per unit, that can matter at scale. If a logo sits where a hand naturally lifts the product, the print may wear faster. If the foam grips too hard, operators may start forcing removal. Those are real operational details, and they are exactly why printed foam inserts with logo should be tested in the same environment where they will be used.
Build a reorder plan now, even if you only need the first run. Save the approved artwork, foam spec, cavity dimensions, color references, sample photos, and inspection notes in one place. If the insert succeeds, the next order should not require rediscovery. That matters especially for brands with multiple SKUs or seasonal releases. The more consistent your packaging records, the more consistent your printed foam inserts with logo will be from batch to batch.
Here is a practical short list before requesting quotes:
- Measure the product in its final finished state, not only from drawings.
- Decide whether the insert is for shipping, display, or both.
- Choose the foam type based on weight, fragility, and reuse needs.
- Ask for a physical sample, not just a digital proof.
- Compare at least three suppliers on fit, print quality, cost, and lead time.
If sustainability is part of the brief, say so early. Some buyers want recycled content. Others want lower weight. Some want reusability. The right answer depends on the product, the shipping route, and customer expectations. There is no single foam spec that solves every problem. That is why printed foam inserts with logo should be chosen for the actual business case, not for a generic premium label.
For Brands That Sell equipment, electronics, accessories, or premium sets, the smartest move is often to treat the insert as part of the product experience itself. The customer opens the box once. That moment carries disproportionate weight. A well-executed insert protects the item, supports the brand, and reduces friction in packing and unpacking. Done badly, it becomes an expensive piece of filler. Done well, printed foam inserts with logo quietly do three jobs at once: protect, organize, and communicate. That is why they deserve the same scrutiny as the product they hold.
What are printed foam inserts with logo used for?
They hold products in place during shipping, reduce movement and scuffing, and create a more polished unboxing moment. They can also separate accessories, replacement parts, or multiple components inside one package.
How much do printed foam inserts with logo usually cost?
Pricing depends on foam type, insert size, cut complexity, logo method, and quantity. Small runs usually cost more per unit because setup is spread over fewer pieces, and sample or tooling fees may be separate from production pricing.
What is the typical lead time for printed foam inserts with logo?
Lead time usually includes artwork review, sample approval, production, and shipping. Simple projects can move faster, but complex cavities, multiple print locations, or revision rounds can extend the schedule significantly.
Can printed foam inserts with logo be ordered in a small MOQ?
Yes, many suppliers will handle lower quantities, but unit price is usually higher. Small MOQ orders work best when the insert design is straightforward and the print setup is not complicated.
How do I choose the right foam for printed foam inserts with logo?
Match foam density to product weight and fragility, choose a smoother surface if you need crisp print detail, and think through shipping conditions, reuse needs, and sustainability goals before locking the material.
For brands that want packaging to pull its weight, printed foam inserts with logo are rarely just a decorative upgrade. They are a fit decision, a protection decision, and a cost decision all at once. Get the spec right, test it with the real product, and keep the branding restrained enough to support the function. The clear takeaway is simple: approve the physical sample before you approve production, because that is the point where printed foam inserts with logo either earn their place or get in the way.


