Buyer Fit Snapshot
| Best fit | Printed Padded Mailers for Jewelry Sample Approval projects where brand print, material claims, artwork control, MOQ, and repeat-order consistency need to be specified before quoting. |
|---|---|
| Quote inputs | Share finished size, material target, print colors, finish, packing count, annual reorder estimate, ship-to region, and any compliance wording. |
| Proofing check | Approve dieline scale, logo placement, barcode or warning zones, color tolerance, closure strength, and carton packing before bulk production. |
| Main risk | Vague material claims, crowded artwork, missing packing details, or unclear freight terms can make a low unit price expensive after revisions. |
Fast answer: Printed Padded Mailers for Jewelry Sample Approval should be specified like a repeatable production item. The safest quote records material, print method, finish, artwork proof, packing count, and reorder notes in one written spec.
Production checks before approval
Compare the actual filled-product size with the drawing, then confirm tolerance on folds, seals, hang holes, label areas, and retail display edges. Reserve space for logos, QR codes, warning copy, and material claims before decorative graphics fill the panel.
Quote comparison points
Review material grade, print process, finish, sampling route, tooling charges, carton quantity, and freight assumptions side by side. A quote is only useful when the supplier can repeat the same color, closure quality, and packing count on the next order.
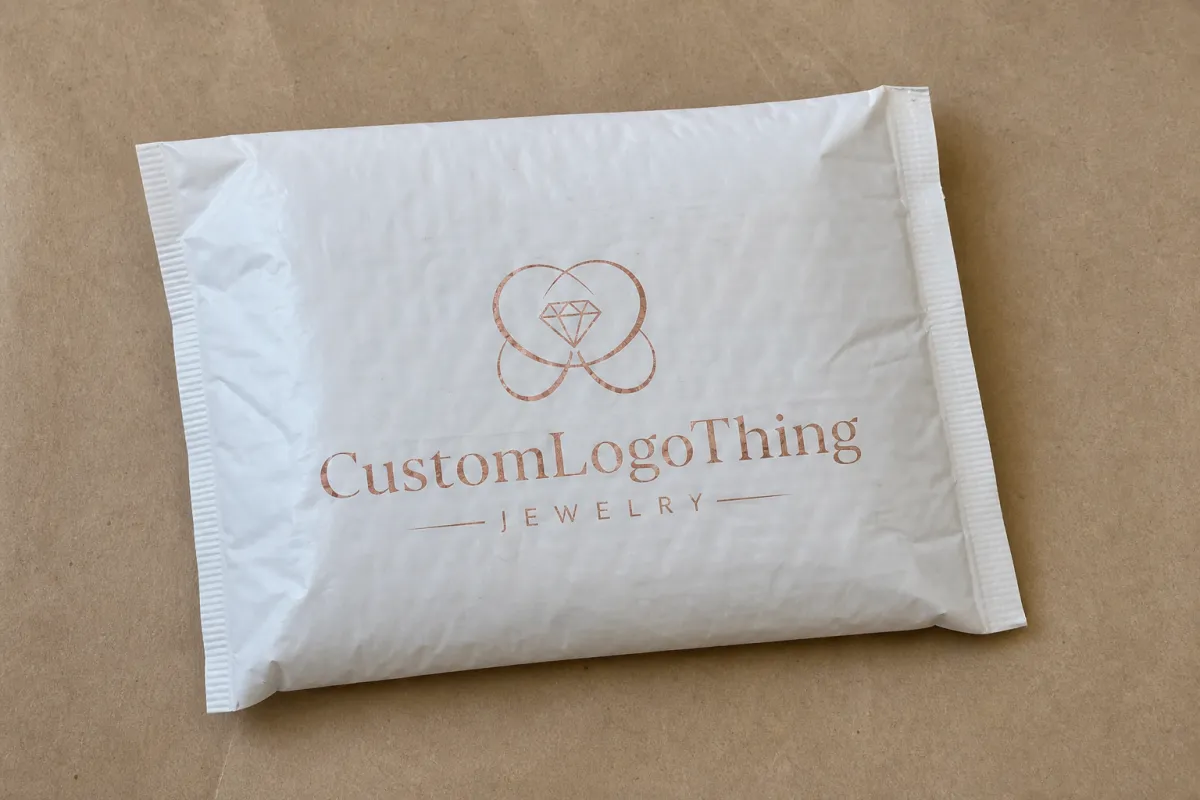
Printed Padded Mailers for Jewelry Sample Approval
Printed Padded Mailers for Jewelry packaging prototype sample approval is a long phrase, and a very real one. It describes the stage where a packaging idea has to prove itself in the hand, not just on screen. That matters more than people like to admit. A mailer can look polished in a PDF and still fail the moment a ring box, velvet pouch, or bracelet card goes inside. Fit. Closure. Cushioning. Print. Surface feel. The sample is where those details stop being theoretical.
For jewelry brands, the outer mailer is not filler. It is the first branded surface a customer touches after the order ships. If the artwork sits too close to the fold, if the seal opens unevenly, or if the padding collapses at the corners, the package stops feeling premium very quickly. That is the whole point of sample approval: catch the ugly stuff before it multiplies across a production run.
A screen proof can confirm layout, but only a physical sample tells you whether the structure, print, and fit still hold together once the real jewelry packaging is inside.
Sample approval replaces assumptions with something you can inspect. It lets a buyer review the mailer as a real shipping component, not as a flat file on a laptop. That means checking structure, print finish, closure feel, cushioning, and how the mailer handles shipping stress before production starts. For brands balancing branded packaging, retail packaging, and shipping protection, that step can prevent a reprint, a bad launch photo, or a flood of complaints from customers who notice the problem before you do.
What Printed Padded Mailers Are and Why Sample Approval Matters
Printed Padded Mailers are lightweight outer mailers with built-in cushioning. They protect small goods while carrying brand graphics on the outside. For jewelry, that usually means a compact format like 4 x 8, 5 x 10, or 6 x 9 inches, depending on whether the shipment holds a ring box, pendant pouch, bracelet card, or a small gift set. The job sounds simple: protect the item, present the brand, and survive shipping without damage or ugly wear.
That simplicity is misleading.
Jewelry packaging is small, which means small dimensional changes matter a lot. A mailer that looks roomy in a file can become too tight once the real inner box is added. A piece that looks premium in mockup form can wrinkle at the seams, scuff at the fold, or feel flimsy once it is sealed, stacked, and handled a few times. The sample stage shows those problems before they turn into expensive ones.
For many buyers, the sample also answers practical questions that a proof never can. Does the adhesive strip close with enough pressure? Does the outer face show fingerprints after handling? Does the padding cushion a rigid box corner, or does it flatten too easily? Does the print stay crisp on a matte kraft surface, or does the ink sink in and dull the brand color? Those details decide whether the final pack feels sharp or tired.
The sample stage also shows whether the mailer fits into the larger packaging system. If the brand already uses custom printed boxes, insert cards, tissue paper, pouches, or a branded sticker seal, the outer mailer should not feel like it came from a different project. It does not need to match everything exactly. It does need to belong in the same family.
- Fit tells you whether the jewelry box shifts, rattles, or compresses.
- Print placement tells you whether the logo lands where customers expect it.
- Surface behavior tells you whether the finish scuffs, wrinkles, or fingerprints easily.
- Closure feel tells you whether the adhesive strip and flap feel secure or flimsy.
- Transit durability tells you whether the mailer still looks composed after handling.
If the sample stage is skipped or rushed, the brand may find problems only after the full production run is already underway. That is a bad place to discover that the mailer is 2 mm too narrow, that the flap overlaps the logo, or that the seal barely holds when the package is stacked. Small mailers have less room to absorb structural mistakes than larger retail packaging formats, which makes approval more valuable, not less.
A useful rule of thumb: if the outer mailer is meant to protect a boxed ring, necklace pouch, or bracelet set, the sample should be tested with the exact inner item, not a similar one. Close enough is not close enough. Jewelry packaging lives and dies on those small differences.
There is also a brand perception issue hiding inside the engineering. A jewelry customer may not know why a mailer feels “off,” but they notice it anyway. A crooked logo, a weak seal, or a bulky edge reads as cheap, even if the product inside is excellent. Packaging does not get a pass for effort.
How the Sample Approval Process Works for Jewelry Mailers
The approval process usually starts with artwork and dimensions. A buyer sends the logo files, copy, Pantone targets if needed, and the target size for the mailer. The vendor then prepares a digital proof so the team can check placement, text, bleed, fold lines, and any print-safe zones. Helpful? Absolutely. Final? Not even close.
The next step is the physical sample. That sample should be built as close as possible to the intended production spec, because a jewelry mailer that is off in size or material can distort the review. If the final shipment includes a ring box, the sample should include that exact ring box. If the final shipment needs a pouch, insert card, or thank-you card, those pieces should be tested together. The goal is to evaluate the full stack, not a watered-down version with half the real parts missing.
A clean review usually follows a simple path:
- Confirm the artwork proof and basic dimensions.
- Request a printed sample or pre-production sample.
- Test the sample with the real jewelry packaging inside.
- Check print quality, closure performance, padding, and visual alignment.
- Collect notes from marketing, operations, and quality control if more than one team signs off.
- Approve only after the written spec matches the physical result.
Proof approval and sample approval are not the same thing. Proof approval confirms what the layout should look like on paper or screen. Sample approval confirms what the product feels like in the hand and how it behaves in transit. A digital proof can show a centered logo. It cannot tell you whether the seal pulls unevenly, whether an edge crushes under a box corner, or whether the print looks muddy under shipping light.
That is why many teams treat sample approval as a gate, not a checkbox. It protects the launch budget and the brand image at the same time. If the first sample is wrong, a revision may be needed. Sometimes it is minor, like shifting a logo 3 mm. Sometimes it is bigger, like widening the mailer to fit a thicker box. Either way, catching the issue early usually costs far less than finding it after the order is approved.
The best jewelry mailer samples are tested with the same insert, box, and seal method that will be used in production; anything less is only a partial check.
Brands that already buy Custom Packaging Products usually know the value of hands-on approval. The same logic applies to outer shipping formats like Custom Poly Mailers, where structure and print need to be judged together instead of treated like separate problems.
For teams that want a deeper benchmark, shipping tests often borrow from established package standards. ISTA publishes widely used package testing methods at ista.org, and those drop, vibration, and compression checks are a practical reference point for small parcel packaging. If your mailer uses fiber-based or paper-based components and you want sourcing that supports responsible forestry claims, the chain-of-custody framework at fsc.org explains those standards clearly.
In a real buyer scenario, this might mean the operations team loves the proof, but the sample fails because the adhesive strip grabs too quickly and the flap wrinkles the logo. The fix is not philosophical. It is structural. That is exactly why a hands-on sample exists.
Key Design, Protection, and Branding Factors to Check
Size is the first thing to check because jewelry packaging usually needs a snug fit. A mailer that is too loose lets a box slide around during transit. A mailer that is too tight can crush the presentation or stress the closure. In many jewelry programs, the best fit leaves just enough room for the product and any card insert while keeping everything stable when the mailer is rotated, tipped, or stacked.
Then there is the print area. On a small mailer, a few millimeters matter. Logo placement, copy placement, and the relationship between the artwork and the flap can change the whole look. Put artwork too close to a fold and the design starts looking distorted once the mailer is assembled. Oversize the logo and the piece feels crowded instead of elegant. For branded packaging, that balance is part of the value.
Print quality matters more than many buyers expect. A design with bold solids, metallic accents, or fine typography needs clean registration and consistent ink coverage. A matte surface tends to soften colors. A glossy finish can make artwork read brighter but can also show scuffs more easily. A good sample tells the team whether the finish supports the retail packaging story or fights it.
Protection is the other half of the job. Jewelry is light, but the packaging around it still needs to resist dents, edge crush, seam failure, and surface rub marks. Padding thickness, tear resistance, and closure strength all matter. A self-seal strip should close firmly without warped edges or patchy adhesion, and the mailer should not pop open after a few handling cycles. If the product includes a rigid box inside, that corner can create a stress point, so the outer mailer needs enough resilience to handle it.
Material choice matters too. Some brands want a clean kraft look that supports a natural, lower-plastic image. Others want a smoother printed face with a more polished visual result. For paper-based mailers, common specs include a 120-160 gsm outer kraft face with a 2 mm to 3 mm bubble lining, or a 150-200 gsm coated paper face laminated over a protective inner layer. For printed presentation components that sit with the mailer in a sample kit, 350 gsm C1S artboard is still a common benchmark because it shows how crisp fine typography and solid brand colors can look on a coated face. If the packaging design includes a recycled content claim, a paper-based structure, or fiber sourcing language, the spec should be documented before production. That keeps the message aligned with the actual materials used in the product packaging.
That kind of specificity also helps the review team avoid vague debates. Instead of saying the sample feels “a bit soft,” the team can compare padding thickness, board caliper, seal strength, and face stock. Instead of guessing whether the print looks “lighter,” the buyer can compare it against a Pantone target, a printed control sample, or an agreed tolerance window.
- Dimensions: Confirm the inside fit with the actual jewelry box or pouch.
- Artwork: Check logo sharpness, safe zones, and print alignment.
- Finish: Review matte, gloss, or soft-touch behavior under real handling.
- Padding: Make sure cushioning is even and not compressed at the corners.
- Closure: Test the flap seal for pull strength and clean closure.
- Material claim: Document any recycled, paper, or FSC-related sourcing language carefully.
There is also a presentation question that jewelry buyers should not ignore. Fine jewelry may call for a restrained look, while fashion jewelry can handle bolder graphics. If the mailer is part of a launch kit or gift set, the outer package should reinforce the story the inner box already tells. That is where packaging design and package branding meet actual logistics.
For some brands, the sample review includes a quick compatibility check with the whole shipping set: mailer, inner box, protective tissue, card, sticker, and any promotional insert. That is smart. A mailer can technically fit the product and still feel wrong if the graphics clash with the rest of the system. Protection is the baseline. Coherence is the part customers notice.
One practical rule: if the team cannot explain why a sample feels right, the spec is probably not written well enough yet. That is not a failure. It is a signal.
Process and Timeline: From Artwork Proof to Final Sign-Off
A realistic approval timeline depends on how organized the artwork and decision-making process is, but the flow usually looks like this: proof review, sample creation, transit, internal review, edits if needed, and final sign-off. The fastest step is usually the digital proof because it can be checked within one to two business days. The slower part is the physical sample, since it has to be produced, packed, and shipped before anyone can inspect it in person.
In a typical run, a printed sample may take about 12 to 15 business days from proof approval to final sample delivery, depending on size, print coverage, material choice, and shipping distance. A simple black logo on kraft stock often moves faster than a full-bleed, multi-color design with tight registration. If the team asks for a second revision, add time for the revised sample and another round of review. That is why a launch with a fixed ship date should always leave room in the schedule. Jewelry brands often build in extra time because the packaging decision may involve marketing, operations, merchandising, and quality control, and each group may want a say.
Multiple reviewers can help, but only if one person owns the final call. Without that, the process drifts. One person wants a darker logo, another wants a bigger flap, and a third wants the text moved away from the edge. Those are not pointless comments, but they can turn a simple approval into a long thread of conflicting notes. A single owner keeps the review tied to the actual goal: a mailer that matches the approved package branding and can move to production without confusion.
It helps to define the approval criteria before the sample arrives. A buyer can set a simple checklist like this:
- Does the jewelry box fit without shifting?
- Does the closure seal cleanly and hold?
- Is the print centered and readable?
- Do the colors stay within the accepted tolerance?
- Does the surface stay free of scuffs after handling?
- Does the mailer survive a basic transit check without deformation?
That last point deserves attention. Many teams perform a basic informal transit check even if they are not running a full lab program. A short drop from desk height, a few corner compressions, and a visual inspection after shaking or stacking can reveal a surprising amount. If the launch is high value or the route is rough, teams can adopt more formal test logic inspired by ISTA methods. The goal is not to turn packaging approval into a lab report. The goal is to see whether the mailer behaves like a real shipping container instead of a display sample.
The best timeline planning also accounts for internal calendar pressure. A product drop tied to a season launch, influencer send-out, or event kit can push the team to review samples too quickly. That is where mistakes happen. If the buyer knows the outer packaging needs final approval before the rest of the shipment can be packed, the sample should arrive early enough to allow one revision cycle without putting the launch at risk.
Sample approval is a scheduling tool as much as a quality control step. It tells procurement when to release the order, gives operations time to prepare inserts and cartons, and keeps the artwork process from wandering after the first sign-off. Good packaging programs do not treat the sample like a side note. They treat it as the point where print, structure, and shipping reality meet.
Cost, MOQ, and Quote Factors to Compare
Pricing for printed padded mailers can swing quite a bit because several variables move together. Material grade, print complexity, size, padding level, finish, and quantity all affect the final number. A simple one-color logo on a kraft-style mailer will usually cost less than a full-bleed design with multiple colors, tight registration, or a special surface treatment. The more the mailer looks like a custom branded packaging piece, the more print and setup work start to matter.
For a realistic benchmark, a run of 5,000 pieces often lands around $0.15 to $0.24 per unit for a simple printed padded mailer, depending on size and print coverage. Heavier coverage, larger formats, foil, or specialty finishing can push the price higher. Smaller runs usually cost more per unit because setup gets spread across fewer pieces. If the order is under a few thousand units, the unit price can jump fast. That is not unusual. It is just how setup math works.
MOQ is another major factor. Smaller runs usually carry a higher per-unit cost because the setup work is spread across fewer pieces. Larger orders often reduce the unit price, but they also raise inventory commitment. For jewelry brands, that tradeoff is real. If the collection is permanent, a larger order can make sense. If the design is tied to a seasonal promotion or limited release, a lower MOQ may be safer even if the unit price is higher.
Compare total landed cost rather than unit price alone. That means looking at sample charges, freight, setup costs, revision fees, and any remake risk if the first sample is not approved. A quote that looks cheaper on paper can end up costing more once shipping and repeat sampling are added. For a buyer managing retail packaging budgets, the real comparison is the full cost of getting approved, delivered, and ready for use.
| Approval Stage | What It Confirms | Typical Turnaround | Typical Cost Range |
|---|---|---|---|
| Digital proof | Artwork placement, text, bleed, and basic layout | 1-2 business days | $0-$25, often included |
| Blank structural sample | Size, fold behavior, closure feel, and basic fit | 3-7 business days | $20-$60 plus freight |
| Printed mockup sample | Color, logo placement, finish, and overall presentation | 7-14 business days | $50-$150 plus freight |
| Pre-production sample | Near-final spec before bulk production | 12-15 business days from proof approval | $80-$250 plus freight |
Those numbers are practical ranges, not fixed quotes, because the actual price depends on the print method, the substrate, the quantity, and whether the vendor needs special tooling or a dedicated revision. Even so, the table gives buyers a usable way to compare vendors without getting distracted by the lowest unit price and nothing else.
When you request quotes, ask every supplier for the same information. Otherwise the comparison is messy. A strong quote request should cover size, material, print colors, finish, MOQ, sample cost, freight, lead time, and whether one revision is included. If a supplier cannot define those points clearly, the quote is hard to trust and harder to compare against other product packaging options.
For some jewelry brands, the best answer is not the cheapest mailer. A slightly higher-cost piece can protect the brand image, reduce customer complaints, and avoid a second production run. That matters even more when the mailer is the first branded surface a customer touches after the order arrives. A clean outer package can carry more value than the unit price suggests.
One more practical detail: ask whether the vendor’s quoted lead time starts from artwork submission, proof approval, or deposit receipt. Those are not the same thing, and mixing them up creates avoidable schedule pain. A quote that says 12 to 15 business days from proof approval is useful. A quote that says 12 to 15 days without naming the trigger point is not.
If the supplier is vague about revision limits, assume revisions are not included until they say otherwise in writing. Silence is not a pricing strategy. It is a headache waiting to happen.
Common Mistakes That Slow Approval or Raise Reorders
The biggest mistake is approving a sample without testing it with the actual jewelry packaging. A mailer that looks balanced when empty may feel awkward once a ring box or bracelet case is inside. A pouch can slide differently than a rigid box, and a small insert card can change the way the closure lands. The physical assembly has to be tested as a unit.
Another common problem is assuming color will match the screen. Screen brightness, material texture, ink absorption, and finish all affect the final look. A deep black can read softer on a matte surface, while a bright brand color may look more muted on kraft stock. The right move is to define the target in writing. A Pantone reference, a printed comparison sample, or a clearly stated tolerance window keeps the conversation honest.
Skipping size verification gets expensive fast. Jewelry brands often use several SKUs, and each one may have a slightly different outer box or pouch. A mailer that works for a ring box can be too narrow for a bracelet set. If the packaging program has more than one jewelry size, each fit should be tested instead of assuming one template covers everything.
Vague feedback slows production just as much as a bad sample. Comments like “make it nicer” or “the logo feels off” do not give manufacturing teams enough direction to fix the issue. Better notes sound like this: move the logo up 4 mm, darken the ink by one shade, widen the mailer by 2 mm, or increase padding at the lower seam. Specific notes actually help.
Last-minute revisions are another common source of extra cost. If the sample is close but not correct, the team may need another sample, another freight charge, and more review time. That delay matters even more if the jewelry launch date is fixed and the outer packaging sits on the critical path. A small issue caught early is manageable; a small issue caught after approval becomes a schedule problem.
There is also a quieter mistake that shows up in branded packaging programs: letting the outer mailer drift away from the rest of the identity. If the mailer’s typography, color family, or finish feels disconnected from the inner box or insert card, the shipment loses coherence. That does not always show up in a spec sheet, but customers feel it. The package should look like one system, not a pile of unrelated parts.
Another avoidable problem is approving based on a sample that was not built with the same material spec as the intended run. A review piece made from lighter stock or a different liner can hide the exact issue the team should be looking for. If the final mailer is supposed to use an 80 gsm kraft face with a 3 mm bubble lining, the sample should not quietly substitute a thinner version just to get something out faster. That kind of shortcut creates false confidence.
Clear notes save time. Specific notes save money. In packaging approvals, the difference between those two can be the cost of a second sample.
Expert Tips and Next Steps for a Cleaner Approval Round
The cleanest approvals usually start with a written checklist. A good checklist turns a subjective review into a practical sign-off process. It does not need to be long, but it should cover the things that actually matter: dimensions, fit, print quality, finish, closure strength, surface durability, and brand alignment. Once those pass-fail points are written down, the review moves faster and the decision is easier to defend internally.
Photograph the sample with the actual jewelry packaging inside. Those photos give everyone on the team the same reference, which matters when marketing, operations, and leadership are not sitting in the same room. Annotated images are even better because they show exactly where the issue sits. If a logo is too low, a seam looks wrinkled, or a flap overlaps too far, the visual note cuts through the guesswork.
Testing under real handling conditions is another good habit. A few controlled drops from desk height, a short stacking check, and a close visual review after opening and closing the mailer several times can reveal weak points quickly. If the shipment route is tougher, or if the mailer will ride with heavier small goods, a more formal test plan based on small parcel practice is worth the time. Even a modest test can show whether the padding and closure feel right.
For sourcing decisions, ask whether the material supports the story you want to tell. If the brand wants recycled content, paper-based structure, or forestry-backed claims, confirm that before the quote is approved. If the brand wants a premium visual finish, choose the print process and surface treatment with scuff resistance and color consistency in mind. Materials are not just a line item. They shape the customer’s first tactile impression.
One of the easiest ways to reduce back-and-forth is to lock a single spec sheet before bulk production. That sheet should match the approved sample exactly, including size, print, color target, closure type, padding notes, and any special finish. Once that document is final, the vendor, buyer, and production team have one shared reference. If a question comes up later, the spec sheet and sample can be compared side by side.
From a practical buying standpoint, the smartest path looks like this:
- Review the proof and confirm the layout.
- Test the physical sample with the actual jewelry packaging.
- Document any sizing, print, or finish changes in writing.
- Confirm quote details, MOQ, and lead time again after revisions.
- Approve production only after the final sample and spec sheet match.
That process keeps the project under control. It also gives the brand a cleaner story to tell internally, because the approval is based on evidence rather than a hunch. For jewelry brands that treat the outer mailer as part of the overall product packaging experience, that discipline shows up in fewer complaints, fewer reorders, and a better unboxing moment.
If you are building a launch around printed Padded Mailers for Jewelry packaging prototype sample approval, the rule is simple: evaluate the sample as a real shipment component, not as a design exercise. When the fit is right, the print is clean, and the structure protects the piece without feeling bulky, the mailer does its job and the brand looks polished the moment the package leaves the warehouse.
Before you sign off, compare the physical sample against the written spec one last time. If the sample and spec do not match, the spec wins only after the sample has been corrected or the change is documented. That single habit prevents a lot of expensive confusion.
Frequently Asked Questions
How do printed padded mailers for jewelry packaging prototype sample approval usually work?
You usually start with artwork and dimensions, then review a digital proof before asking for a physical sample. The sample is tested with the actual jewelry box, pouch, or insert cards so fit, cushioning, and branding can be checked together. Any corrections are noted before production is approved.
What should I check on a jewelry mailer sample before I approve it?
Check size, closure strength, print placement, and color accuracy first. Then test the sample with the real jewelry packaging it will ship with, including boxes, pouches, and cards. Look for scuffs, weak sealing, uneven padding, or any presentation issue that would feel off to a customer.
How long does sample approval take for printed padded mailers?
Artwork proofing is usually the fastest step, while physical sample creation and shipping take longer. For many projects, the full path from proof approval to a usable printed sample runs about 12 to 15 business days, then add time for internal review. A buffer helps if a revision or second sample is needed.
What affects the price of printed padded mailers for jewelry packaging?
Material type, print complexity, order quantity, and finishing choices are the biggest pricing drivers. MOQ matters too, because smaller runs usually cost more per unit. For a 5,000-piece run, a simple printed padded mailer often lands around $0.15 to $0.24 per unit, depending on size and print coverage. Shipping, sample fees, and setup charges can change the total quote as well.
Can I approve a prototype if the color is close but not exact?
Yes, if the brand agrees to a clear color tolerance before approval and writes that tolerance down with the other spec details. It is smart to approve the structure and print placement separately from final color expectations when needed. That way printed Padded Mailers for Jewelry packaging prototype sample approval stays a controlled decision rather than a guess, and production can repeat the accepted result without confusion.
What if the sample looks good empty but fails with the jewelry inside?
Do not approve it. Empty samples can hide fit problems, closure strain, and corner pressure that only show up with the actual jewelry box or pouch inside. Ask for a revised sample built with the real packout, then retest the full assembly before moving forward.
Do I need a lab test for every jewelry mailer order?
Not always. A full lab program makes sense for higher-value shipments, longer transit routes, or programs with stricter compliance requirements. For many standard runs, a controlled in-house check with the real product, some drop testing, and a careful visual review is enough to catch the common failures.
What documents should match the approved sample?
The final spec sheet should match the approved sample exactly: size, artwork, color target, closure method, padding notes, and any special finish or sourcing claim. If the vendor changes anything after approval, that change should be recorded in writing before production starts.


