Retail Launch Custom Poly Mailer Bags Sample Approval Checklist
Most packaging failures do not start with the artwork file. They start when a bag that looked correct on screen turns out to be a little too tight, a little too glossy, or a little too fragile once it is actually packed, sealed, stacked, and handled. The retail launch Custom Poly Mailer Bags sample approval checklist exists to catch those problems before they become a rushed reprint, a warehouse workaround, or a missed shelf date.
A sample should be treated as a working prototype, not a decoration. It needs to prove that the finished size fits the real product, the closure behaves the way fulfillment expects, and the print still looks right after the bag has been folded, filled, and moved through normal handling. A mailer can pass a visual proof and still fail the launch if the adhesive strip pulls weakly, the seams show stress, or the logo shifts when the bag is packed.
A sample is approved when it survives the pack test, the handling test, and the realities of your fulfillment flow.
That is why sample approval matters financially. Fixing a size mismatch or a print issue before production is usually much cheaper than reworking inventory after the order is already scheduled. For retail packaging, the goal is not only a bag that looks branded. It is a bag that behaves consistently from the first packed unit to the last.
What to check first on a retail launch sample
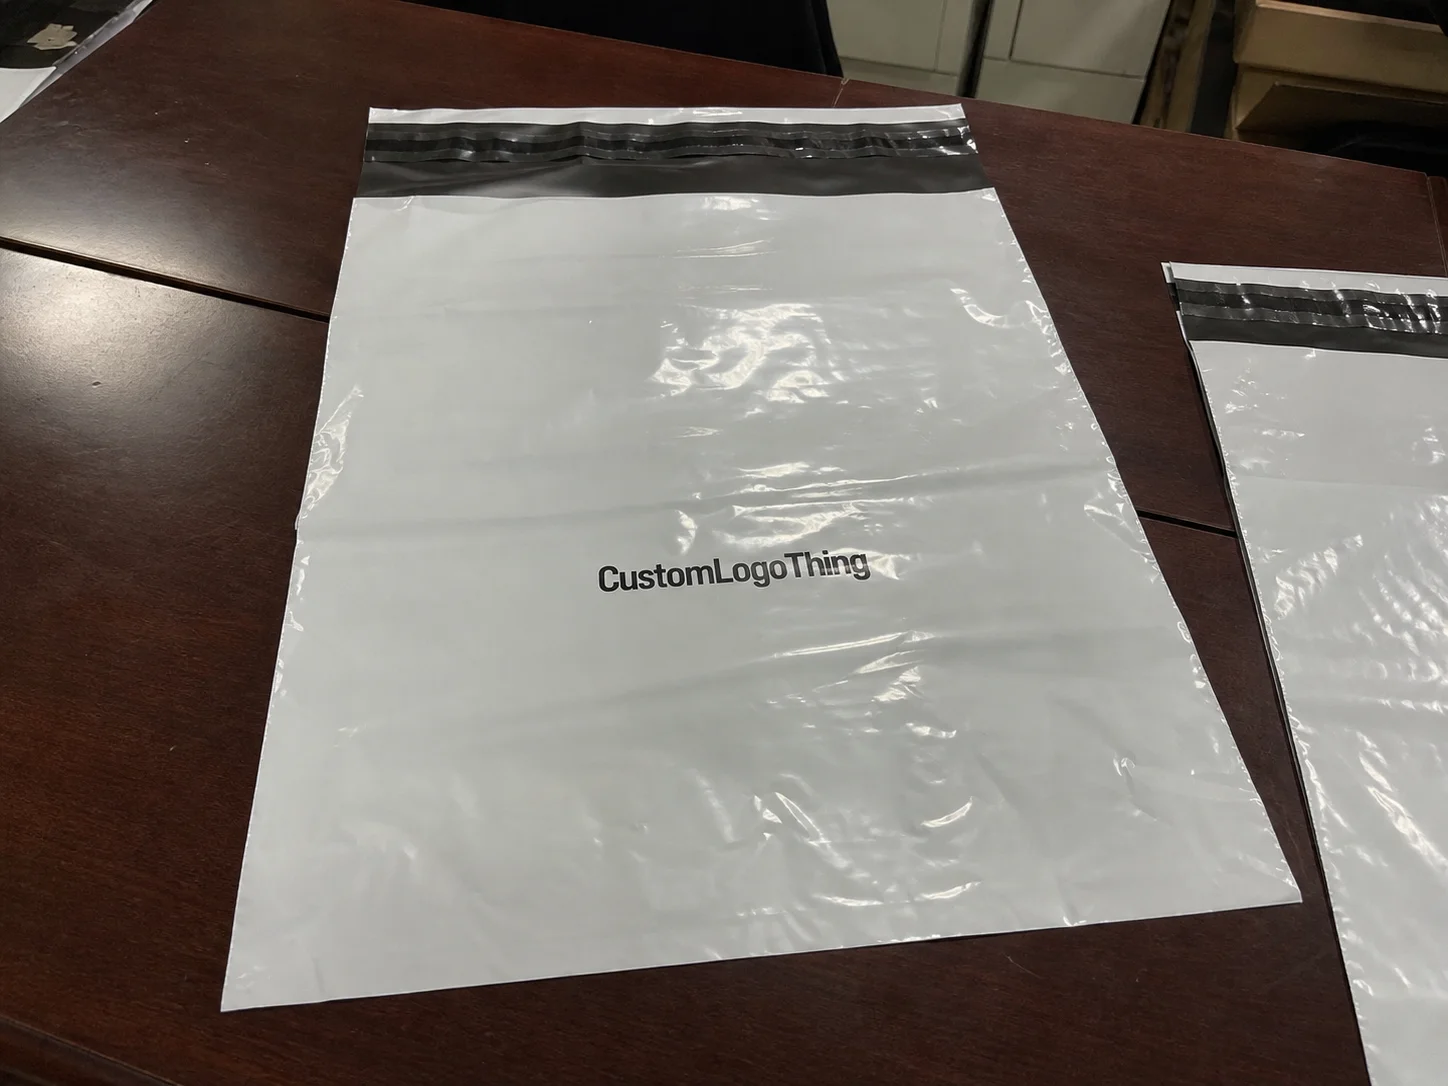
Start with the parts of the sample that can disrupt the launch fastest. Finished size matters more than the flat dimension on a spec sheet, because a bag that looks right on paper can still be too tight once the product, insert, and seal margin are all inside. Closure style matters too. A peel-and-seal strip, a tamper-evident tear, and a resealable flap all change how the bag behaves in the warehouse and how it feels when the customer opens the order.
Use the first sample as a rehearsal for production. Pack the exact item, not a substitute. If the product is soft goods, check whether corners curl or whether the film bows in a way that throws off the logo placement. If the item is boxed, test the full pack-out with inserts, labels, and any return card. The point is not just to see whether it fits. The point is to see how it fits after the bag has been handled like a real order.
The first pass of the retail launch custom Poly Mailer Bags sample approval checklist should focus on these items:
- Finished size with the real product inside, not an estimate.
- Seal integrity at the side seams and closure strip.
- Print placement after the bag is folded, filled, and sealed.
- Scuff resistance on the surfaces that will rub against cartons.
- Handling behavior during a basic pack-and-drop test.
If a brand is comparing a poly mailer to other branded packaging formats, the same discipline applies to custom printed boxes. A dieline can look correct in a PDF and still behave differently once weight, pressure, and movement are introduced. Poly mailers are less rigid, so the bag itself becomes part of the product experience. That is why teams should approve with their hands as well as their eyes.
Confirm bag specs before comparing artwork
Before anyone comments on color, line weight, or logo spacing, the bag specification has to be fixed. Finished size should be chosen around the warehouse workflow, not around the design file alone. A 10 x 13 inch mailer may sound correct, but once the item, insert card, or inner box goes in, the usable depth and seal margin determine whether the bag closes without stress. That is where practical sample review begins.
Material structure matters just as much. Film thickness, usually expressed in mils or microns, changes both feel and performance. A lighter bag may be enough for a low-friction apparel shipment. A heavier gauge is often a better fit for hard goods, sharp corners, or longer transit routes. Closure style matters in the same way. A standard self-seal strip behaves differently from a tamper-evident strip or a dual-adhesive, return-capable design.
Design should be checked against the real geometry of the bag. Gussets, side seams, die-cut handles, tear notches, and white-ink underlayers can all shift where the logo should sit. A centered design on a flat dieline can end up looking slightly high once the mailer is filled. That is not unusual. It does need to be planned for. A layout that looks balanced on screen and a layout that looks balanced in hand are not always the same thing.
If the launch involves several pack components, a simple compatibility test keeps the review grounded:
- Pack the exact product in the exact insert or inner wrap.
- Seal the bag the way fulfillment will seal it.
- Stack three to five packed samples in a carton.
- Check for bowing, seam stress, and print distortion.
If the sample passes that sequence, the launch is in good shape. If it fails, the correction is often straightforward: a slightly larger size, a different film gauge, or a minor seal adjustment. Those are easier changes to make now than after the goods are already scheduled for receipt.
For teams sourcing mailers alongside other formats, compare options in our Custom Poly Mailers lineup and broader Custom Packaging Products selection.
Print, color, and finish checks that hold up in transit
Color should be checked against a physical standard, not only a screen preview. Film surfaces change the way ink sits, and lighting can make the same black look warm, cool, or muddy depending on the finish. If a brand is sensitive to color accuracy, request a hard proof or a sample printed on the same substrate. That matters more for premium retail packaging than many buyers expect, because a close-but-not-right logo often reads as unplanned rather than economical.
Registration and line sharpness should be inspected at the actual production size. Tiny copy, legal text, return instructions, and barcodes can all break down if the artwork was scaled poorly. A 6-point disclaimer may be readable on a desktop file and still look weak once the bag is folded or handled. For that reason, the most fragile elements deserve a separate check: barcode quiet zones, QR code contrast, and the smallest text on the back panel.
Finish affects more than appearance. Matte, gloss, and soft-touch surfaces wear differently in transit and in distribution centers. Gloss tends to show fingerprints and scuff lines faster. Matte can hide minor handling marks, but it may also soften fine detail. Soft-touch finishes feel premium, though they need more care if the mailer will rub against corrugate or other bags. For e-commerce and retail packaging alike, the sample should survive being slid across a table, stacked in a carton, and carried for a few minutes without showing obvious damage.
A simple handling check can reveal a lot. A basic rub, stack, and drop sequence is often enough to show whether the bag keeps its appearance long enough to support the brand promise. If the pack combines mixed materials, it is also worth reviewing sustainable packaging expectations through packaging.org so the team understands how material choice affects design, recovery, and communication. For general transport testing principles, ISTA is a useful reference point.
Use this short review set during approval:
- Confirm color against a printed reference or approved PMS target.
- Check whether black ink looks dense enough on the chosen film.
- Verify that metallic, white, or spot effects still read cleanly after sealing.
- Rub one sample lightly against kraft carton board to see how fast scuffing appears.
One of the most common surprises is how much the finish changes the perceived value of the order. A bag that costs only a few cents more can shift the brand impression enough to matter on shelf, in fulfillment photos, and in unboxing content.
Sample, revision, and production timeline
A clean timeline belongs inside the retail launch Custom Poly Mailer Bags sample approval checklist because delays usually happen in review, not in fabrication. Start by mapping the sequence: artwork handoff, proof review, sample fabrication, internal signoff, revision if needed, and release to production. Once that flow is written down, everyone can see where the clock is actually being spent.
The slowest step is often not the factory. It is waiting for a decision from someone who was not in the original sample review. That is common in retail programs where marketing, operations, and merchandising all touch the same pack. If the brand team wants a specific shade, the operations team wants faster packing, and the retailer wants cleaner compliance text, the sample can bounce around for days unless one person owns final approval.
Lead time changes when structure changes. A new film build, a different adhesive, a revised gusset, or a new tear notch can force a fresh setup. Add a new print plate or a changed white underprint, and the schedule stretches again. That is not a problem if it is planned. It becomes a problem when the launch date is fixed and packaging is still being debated.
Most teams should build one revision buffer into the calendar. If the launch is seasonal, or if the bag has to reach stores and a fulfillment center at the same time, even a small delay can ripple into merchandising, inventory staging, and photography. Think in business days, not optimistic calendar guesses. A straightforward sample can move quickly, but approval chains usually set the real pace.
If the project also includes inserts, labels, or secondary packs, coordinate them together. It is common for the mailer to be approved while the label spec is still changing, which creates rework later. The tighter the packaging system, the less room there is for isolated decisions. The sample should prove the full pack, not only one component.
Cost, MOQ, and quote details to lock down
The quote needs to be read like a spec sheet, not like a headline. Unit price depends on size, film thickness, print color count, finish, closure type, and packing configuration. A mailer with one or two print colors and a simple seal strip is a different cost structure from a thicker, full-coverage design with perforation or extra functional features. If the team is comparing vendors, make sure the comparison uses the same production assumptions.
MOQ matters because smaller runs almost always carry higher unit costs. Setup spread, tooling, and print preparation have to be absorbed somewhere. For a typical launch, a 5,000-piece order may sit in a very different price band than a 20,000-piece order, even if the design looks similar. In many programs, a quoted range like $0.18 to $0.28 per unit at 5,000 pieces can be realistic for a standard build, but that moves with size, ink coverage, and freight. Treat that as a starting point, not a promise.
A useful sample-stage pricing review looks like this:
| Option | Typical MOQ | Indicative Unit Range | Best Use |
|---|---|---|---|
| Standard 1-2 color mailer, lighter film | 5,000 | $0.18-$0.28 | Simple apparel or accessory launches |
| Heavier gauge mailer, stronger seal, more ink coverage | 10,000 | $0.24-$0.40 | Retail orders with more handling or sharper product edges |
| Premium finish, special closures, or custom features | 10,000+ | $0.35-$0.60+ | Brand-led launches where appearance and tactile feel matter |
Watch the hidden cost items. Plate or setup fees can change the true landed price, especially if artwork is revised after sampling. Repeat sample charges add up too. Freight is another place where people get surprised; a lower unit cost can be wiped out by a larger shipping bill or a rush move. If the project requires last-minute changes after approval, expect the vendor to reprice the work. That is normal, and it is another reason the retail launch custom Poly Mailer Bags sample approval checklist should be locked before the PO goes out.
The cleanest quote is the one that shows everything needed to land the order: unit price, tooling, sample charge policy, freight assumptions, carton count, and delivery window. When a quote is vague, the final invoice usually fills in the blanks later.
Common sample approval mistakes that delay launch
The easiest mistake is approving from a PDF. A file can show that the artwork is aligned, but it cannot show whether the film stretches under load, whether the seal pulls cleanly, or whether the bag scuffs when stacked against carton board. That is why the sample approval process has to include a physical test.
Another common miss is skipping the real product test. A sample that fits an empty insert card is not the same as a sample that fits the actual SKU, the tissue wrap, the barcode label, and the return information. Tight-fit problems show up quickly: wrinkling, edge curl, bowed side seams, and inconsistent sealing. If the product is soft or flexible, the bag may look fine until the last piece is inserted and the structure starts to shift.
Teams also lose time by forgetting logistics details until the order is already moving. Carton quantity, pallet pattern, receiving requirements, and storage constraints should be confirmed before approval, not after. A launch can be delayed by something as simple as a carton count mismatch or a warehouse requirement that the product arrive in a different case pack. That work is boring, but it protects the schedule.
Legal copy and machine-readable elements deserve the same attention. If the barcode is too close to a seam, if the QR code is placed across a fold, or if the return address sits where the adhesive strip can cover it, the sample is not ready. The same applies to compliance text. A visually strong mailer still fails if operations cannot scan it or the customer cannot read what they need to read.
One more mistake: approving by committee without a clear owner. If three people give verbal yeses and one person still has a concern, the sample is not approved. Put the decision in writing and make the final version obvious. In packaging design, ambiguity is expensive.
What to do after approval
Once the sample passes, freeze the approved spec in writing. Include finished size, material thickness, print file version, finish, closure style, carton count, and any packing instructions. That document becomes the reference point for production, and it keeps the factory, buyer, and warehouse aligned on the same version. For retail packaging, that is often the difference between a clean launch and one that drifts as people make assumptions.
Send back a marked-up sample or a formal approval note that shows exactly what was accepted. If there were minor corrections that were accepted, list them. If nothing should change from the approved version, say that clearly. Good sample control is part of package branding because it protects the look the customer will actually receive.
Before releasing the PO, confirm the production schedule, freight method, and delivery window. If the bags need to arrive by a specific merchandising date, build that into the written order rather than leaving it as a verbal expectation. The last thing a launch manager wants is a technically approved bag that arrives after the shelf date. For launches that include more than one component, coordinate the mailer with any labels, inserts, or secondary packaging so the full system lands together.
Keep the same approval discipline across Custom Packaging Products, not only the mailers. A tighter process means fewer surprises after production starts.
Here is a practical handoff list before release:
- Signed approval tied to the exact sample.
- Final artwork file and version number.
- Confirmed size, material, and finish.
- Shipping details, carton count, and receiving notes.
- Final pass through the retail launch custom poly mailer bags sample approval checklist.
Used well, the checklist protects time, money, and brand consistency. It keeps the team focused on what actually matters: a mailer that fits, prints cleanly, survives handling, and supports the launch without forcing a last-minute rewrite of the packaging plan.
FAQ
What should be on a retail launch custom poly mailer bags sample approval checklist?
Check finished size, material thickness, seal strength, print placement, and closure performance against the actual packed product. Confirm barcode readability, legal copy, and shipping compatibility before you sign off.
How many sample rounds are normal before approving custom poly mailer bags?
One round is common when the size and artwork are already finalized; two rounds is normal when color or structural changes are needed. Add time for extra revisions if the launch team has not agreed on a single reference sample.
What usually changes the price after sample approval?
Thicker film, more print colors, special finishes, lower MOQ, and new tooling are the most common price drivers. Freight, rush timing, and rework after approval can also move the final landed cost.
How long does sample approval and production usually take?
A straightforward sample review can move quickly, but revision cycles and signoff delays often add the most time. Production starts only after final approval, so timeline control depends on how fast stakeholders review and respond.
Can I approve a poly mailer sample if the print looks right but the bag feels too light?
No, the bag should pass a real handling test so you know it protects the product during packing and transit. Ask for a thickness or material adjustment, then recheck the packed sample before releasing production.