Why a Cap Sample Fails Even When the Mockup Looks Perfect
A cap can look polished on screen and still feel wrong in your hand. That is why a Retail Merch Caps sample approval checklist belongs in the buying process before anyone releases a purchase order.
Digital mockups hide the annoying stuff. Stitch sheen. Crown height. Brim shape. Panel tension. A 3D puff logo that looks bold in a rendering may look swollen on a low-profile cap. Flat embroidery that looks clean at 2.8 inches wide may lose detail once thread replaces pixels. Retail caps are unforgiving because customers touch them, try them on, and judge them fast.
Approval is not just “Do we like the design?” That question is too soft. The better question is: Will this cap sell, fit, survive handling, and represent the brand correctly on shelf? Those are different standards.
A physical sample catches what digital proofs usually miss: logo scale, embroidery density, crown shape, color shift under store lighting, closure comfort, label placement, and packaging presentation. The cap is small, so every flaw sits right there on the front panel. No hiding place. Rude, but true.
One weak approval can become 500, 2,000, or 10,000 wrong caps. Most production problems are not dramatic. They are small details nobody locked down: the patch sits 6 mm too low, the thread is too shiny, the brim curve is too aggressive, or the cap feels cheap because the sweatband is thin and scratchy.
Approval is a buying decision, not a design compliment. If the physical cap does not match the retail goal, it is not approved. Close enough is how boxes of unsellable merch happen.
What a Sample Approval Actually Locks In
An approval sample is the physical reference for bulk production. It controls the cap body, fabric weight, crown structure, panel count, brim shape, decoration method, logo position, labels, hangtags, and packaging direction. If the final shipment gets inspected, the approved sample is the thing everyone points to.
That means approval notes need to be specific. “Looks good” is useless. “Approved with front embroidery centered 62 mm above brim seam, PMS 186C thread accepted, black snapback closure, inner woven label approved” is much better. Slightly boring? Yes. Also commercially smarter.
A sample proves the chosen specification can work. It does not prove every future production unit will be perfect. Bulk tolerances still matter. For caps, buyers often allow about +/- 3 mm for logo placement, +/- 5 mm for some fit-related measurements, and minor shade variation within an approved range. Your acceptable range depends on the factory, material, decoration method, and retail channel. Put it in writing, not in someone’s memory.
The signoff group should include merchandising, design, sourcing, and any retail partner with authority to reject the finished goods. If a store buyer cares about hangtag position or barcode placement, get that input before final approval. Late opinions are expensive opinions.
The approval record matters as much as the cap itself. Keep a dated photo set, the spec sheet, the quote version, the final comments, and the physical sample number. If the item becomes a reorder, that record saves time and arguments. It also stops the classic “I thought the old cap was a little darker” debate. Nobody wins that debate.
Sample Approval Process, Timeline, and Turnaround
A clean sample process starts before the first cap is made. Send a spec sheet or tech pack with artwork files, PMS color targets, decoration size, cap style, fabric, closure, label placement, and packaging needs. Then get the quote. Then build the sample. Then review photos. Then review the physical cap. Then revise if needed. Then approve.
Not glamorous. Very effective.
Simple domestic embroidered cap samples often take about 5-10 business days after artwork and digitizing are approved. More complex styles, custom patches, specialty fabrics, or offshore sampling can run 2-4 weeks. Custom woven labels, molded rubber patches, special trims, recycled fabric documentation, or FSC paper hangtags add time. The Forest Stewardship Council is a useful reference if your packaging or hangtag program requires certified paper sources.
What slows the process most? Missing vector files. Vague color targets. Undecided closure type. Artwork that looks good as a flat logo but cannot embroider at the requested size. Also, committee feedback. Five people waiting to “just take a quick look” can burn a week.
Set deadlines for each review stage. Photo feedback within 24 hours. Physical sample review within 48 hours of delivery. Revision notes due the same day the review is complete. If nobody owns the timeline, the timeline owns you.
| Cap Sample Type | Typical Sample Cost | Common Timeline | Best Use |
|---|---|---|---|
| Basic embroidered stock cap | $35-$85 plus shipping | 5-10 business days | Fast promo or retail merch with standard fabric and closure |
| Custom patch cap | $60-$150 plus patch setup | 10-18 business days | Leather, woven, rubber, or embroidered patch programs |
| Fully custom cap | $120-$300+ | 2-4 weeks | Custom fabric, private label, special structure, retail packaging |
| Pre-production confirmation sample | Often included or $50-$125 | 3-7 business days after final specs | Final check before bulk cutting, sewing, or decoration |
Bulk production should not begin until the final approved sample is documented and stored. Photo approval alone can work for a minor reorder check, especially if the factory, fabric, and decoration are unchanged. For a new retail cap program, physical approval is safer. Screens lie. Fabric does not.
Fit, Structure, and Decoration Checks That Matter Most
Start with silhouette. Crown height, panel count, brim curve, and structure decide whether the cap feels premium, sporty, workwear, streetwear, or bargain-bin sad. A 5-panel camper, a structured 6-panel snapback, and an unstructured dad cap can carry the same logo and look like three different brands.
Check crown height with the cap on a real head, not just on a table. Low-profile caps may sit around 2.75-3.25 inches at the front crown, while structured snapbacks often sit higher. The exact number depends on the pattern and size, but the point is simple: the logo must land correctly when worn.
Decoration deserves a hard look. Embroidery should be clean, not puckered. Small text usually needs to be at least 0.2 inches tall to remain readable in thread, and very thin lines may need to be thickened during digitizing. For 3D puff embroidery, blocky artwork works better than delicate script. For patches, inspect edge stitching, adhesive feel, heat-press marks, and alignment. A patch tilted by 3 degrees will bother customers even if nobody can explain why.
Color needs two lighting checks: daylight and retail-style warm indoor light. Thread reflects differently than twill, canvas, corduroy, and polyester blends. A red logo that matches in daylight can look orange under warm LEDs. If the brand color is strict, use PMS references and approve a physical thread or fabric standard.
Fit testing should include at least 3-5 people if possible. Different head shapes expose different problems: tight sweatbands, awkward pinch points, too-shallow crowns, closure tabs that dig in, or a brim that looks oversized. A cap that feels fine for 30 seconds may annoy someone after 20 minutes. That matters for retail returns and repeat sales.
Do not ignore the inside. Check seams, sweatband material, eyelets, top button security, closure function, seam tape, and care labels. A cap can have a gorgeous front embroidery and still feel cheap because the inner finish is rough. Customers may not describe it that way, but they feel it.
Packaging is part of the quality check, especially for structured caps. For shipping and retail handling, basic distribution testing principles from ISTA can help if caps ship in branded cartons or display packaging. Crushed crowns and bent brims are not charming. They are preventable.
Cost, Pricing, MOQ, and Quote Traps
Separate sample cost from bulk unit cost. A $45 sample can still lead to a $4,000 mistake if the wrong version gets approved. Sample fees cover setup, handling, decoration testing, and sometimes rush labor. Bulk pricing is a different math problem: material, labor, decoration time, trims, packaging, shipping, duties, and margin.
For basic Custom Logo Caps, small bulk runs might land around $6-$12 per unit depending on quantity and decoration. More retail-ready caps with premium fabric, custom patches, woven labels, hangtags, and individual polybags can run $9-$18+ per unit at moderate quantities. Fully custom retail caps can go higher, especially under 500 pieces. Not always, but those ranges are useful for planning.
MOQ pressure is real. Low quantities give flexibility but raise unit cost. Larger orders may unlock better pricing, but they also multiply the pain if the sample is wrong. A 144-piece test run may cost more per cap, while 1,000 pieces may reduce unit price by 15%-35%. That discount looks cute until the logo sits too low across the entire run.
Ask whether sample fees are refundable or credited back on the bulk order. Some suppliers credit the sample fee after you meet a minimum order quantity. Others do not. Also check digitizing, patch tooling, mold charges, shipping, revision fees, and pre-production sample costs. Hidden add-ons are not magic. They are line items wearing camouflage.
Compare quotes only against the same spec sheet. If one supplier quotes 100% cotton twill with flat embroidery and another quotes brushed cotton, 3D puff, woven label, hangtag, and polybag, the cheaper quote tells you almost nothing. Same cap. Same artwork. Same closure. Same packaging. Then compare.
Cheap is not a strategy. A low unit price with vague specs usually means the supplier is choosing the details for you. Sometimes that works. Often it does not.
Step-by-Step Retail Merch Caps Sample Approval Checklist
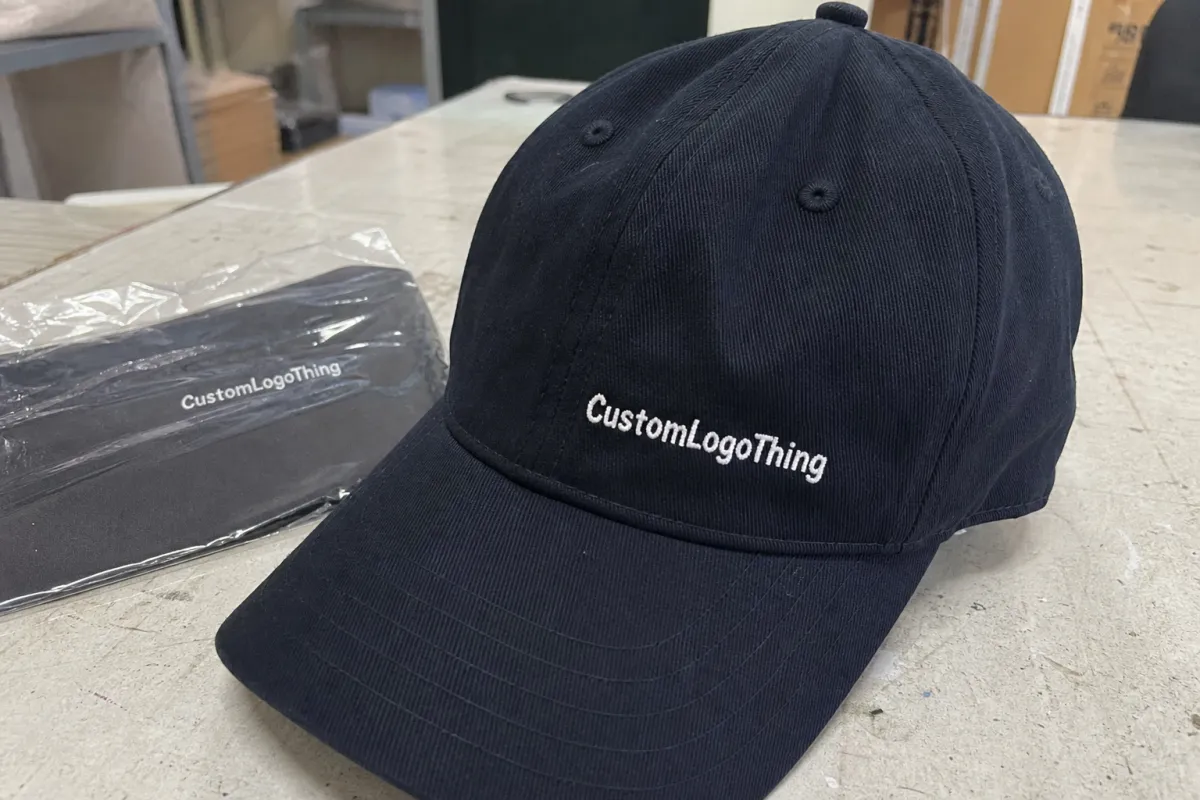
Use this retail merch Caps Sample Approval Checklist before final signoff. Print it, copy it into your project board, or turn it into a shared approval form. The format matters less than the discipline.
- Confirm the written spec. Include cap style, panel count, crown profile, fabric, closure, size range, decoration method, artwork file name, PMS references, label placement, packaging, and barcode needs.
- Check artwork and decoration. Measure logo width and height, confirm placement from the brim seam, inspect stitch density, review thread sheen, and verify patch edges or applique finish.
- Inspect from 6 feet away. Retail customers often see the cap on a peg, shelf, or display before they touch it. If the logo looks too small, too low, or off-center from a distance, fix it.
- Inspect up close. Look for loose threads, puckering, skipped stitches, uneven panels, glue marks, dirty fabric, crooked labels, and rough seam finishing.
- Wear test the cap. Adjust the closure, tilt it, lightly stretch it, and check whether the logo still sits correctly. Watch for pressure points and a sweatband that feels cheap.
- Review color in two lighting conditions. Use daylight and warm indoor light. Photograph the cap beside the approved color standard.
- Check packaging. Confirm hangtag, polybag, carton count, sticker placement, fold method, and any retail display requirements.
- Document approval or revision. Use clear photos, markup notes, measurements, and yes-or-no decisions. “Please improve” is not a production instruction.
A good checklist separates must-fix issues from preferences. Must-fix: logo is 8 mm too low, thread color misses the approved standard, crown collapses badly, patch is crooked. Preference: brim could be slightly softer, hangtag string might look nicer in black. Do not mix those in one vague paragraph.
Record the final approved version with a date, sample number, approver names, and final quote reference. If the production team has to guess which sample won, the process failed.
Common Approval Mistakes That Blow Up Production
The first mistake is approving from a mockup only. A mockup can show direction, but it cannot prove fit, texture, stitch behavior, or crown shape. If the order is tiny, maybe you accept the risk. For retail merch, physical samples earn their keep.
The second mistake is ignoring small defects because the sample is “close enough.” One loose thread is not the end of civilization. But puckering around the entire logo, a patch that shifts off center, or a sweatband that feels scratchy should trigger a revision. Small sample problems often become consistent bulk problems.
The third mistake is skipping inside details. Customers may not study the seam tape like packaging nerds do, but they feel quality. A rough sweatband, crooked care label, or messy inside stitching can make a $28 retail cap feel like a giveaway item. That hurts margin and brand perception.
The fourth mistake is failing to define acceptable variation. Bulk goods are not lab specimens. Fabric lots shift, thread tension varies, and handmade steps introduce small differences. Still, you can define tolerance: logo placement within +/- 3 mm, no visible stains, no broken stitches, carton quantity of 24 or 48 units, approved hangtag placement maintained.
The fifth mistake is approving before checking packaging. Caps can look great loose and terrible in a polybag. Brims bend. Crowns crush. Hangtags cover the logo. Carton packing can flatten structured caps if the case count is too aggressive. For retail presentation, packaging is part of the product, not an afterthought taped on at the end.
One more: changing the spec after approval without restarting the review. Switching from cotton twill to recycled polyester, from flat embroidery to 3D puff, or from snapback to buckle closure changes the product. Treat it as a new sample condition. Annoying? Yes. Cheaper than a bad run? Also yes.
Expert Tips Before You Release the PO
Use one internal signoff sheet. Include the spec, sample photos, measurement notes, date, quote number, and approver names. Keep it boring and complete. Boring paperwork protects good merchandise.
Store the approved sample in a labeled bag or box. Add the sample number, item name, supplier name, approval date, and bulk PO reference. Do not leave the approved cap on someone’s desk where it can get worn, lost, or “borrowed” by the person who always borrows samples. You know the one.
Ask for one last production confirmation before the PO releases. It should repeat the approved decoration method, color callouts, label details, packaging, case pack, and shipping assumptions. If the supplier replies with a different fabric or a missing label note, stop. Fix the document before production starts.
If the sample is close but not right, request a revision. Paying for a wrong bulk run is the most expensive shortcut in the room. A revision may add 5-10 business days domestically or 1-3 weeks offshore, but that delay is usually easier to explain than 1,000 caps nobody wants to sell.
Before releasing the PO, run the approval checklist one more time. Compare the cap against the written spec, confirm the final version is the one everyone approved, and make sure the quote matches the product in your hand. Then production can move without guesswork.
FAQ
What should be on a retail merch caps sample approval checklist?
A Retail Merch Caps sample approval checklist should include cap style, fabric, closure, crown shape, brim curve, logo size, logo placement, label details, and packaging. Add fit notes, PMS or thread color references, stitching quality, and tolerance limits so approval does not become vague. Store the final approved sample photos with the checklist so production has a clear reference.
How many sample rounds are normal for retail merch caps?
One or two rounds is common when the spec sheet is clear and the decoration is straightforward. Expect more rounds if you are changing materials, using special patches, adjusting crown shape, or fine-tuning fit. If sampling drags, the cause is usually weak specs, unclear artwork, changing buyer feedback, or a decoration method being pushed past what it can cleanly do.
What if the cap sample is almost approved but not quite there?
List the exact fixes in writing and separate must-fix issues from nice-to-have comments. Do not approve a sample just to save time if the fit, color, or logo placement is visibly off. Ask for a revised sample or a controlled pre-production check before releasing the order.
Are sample fees usually credited back on bulk cap orders?
Sometimes, but not always. The quote should say whether the sample fee is refundable, credited after a certain MOQ, or completely separate. Check whether digitizing, tooling, shipping, and revision charges are included in the base sample fee or billed separately. Treat a credited fee as a bonus, not a promise.
How do I approve caps for retail if store lighting changes the color?
Compare the sample in daylight and under warm indoor light before signing off. Take photos beside the approved color standard and view them on more than one screen if possible. If the cap relies on a precise color match, specify the acceptable shade range before production starts and include that note in the approval record.

