A soap Printed Poly Mailers Artwork Proof checklist is not glamorous. It is the part of the order that keeps a clean package from becoming an expensive apology. Most bad runs do not begin at the press. They begin earlier, when someone glances at a proof, sees a nice-looking layout, and misses the details that actually control the finished bag.
That is where the money gets burned. A proof can hide a wrong size, a logo too close to the seam, a barcode that will never scan, or tiny legal copy that disappears on flexible film. By the time production starts, those mistakes are no longer cheap to fix. They are reprint territory, and reprints are never as painless as they sound in a quote thread.
The Costly Mistake Happens Before Printing Starts
The largest losses on printed poly mailers usually come from weak artwork review, not from bad presswork. A printer can run a technically solid job and still deliver the wrong result if the approved file was wrong from the start. One missed seam, one flipped panel, or one line of copy in the wrong place can turn a routine order into a scramble.
That is why this checklist is useful for more than one department. Brand teams care about the look. Operations cares about schedule and packing flow. Purchasing cares about the quote staying where it was supposed to stay. First-time buyers care about not guessing their way through a proof and hoping the factory “understands.” The factory understands the file. It does not read intent.
If the proof looks polished but the dieline is wrong, the mistake is still approved.
Think of the proof as the last low-cost checkpoint before production. It is there to answer one question: will the mailer protect the soap, present the brand correctly, and work in the real packing workflow? Pretty is nice. Accurate is what saves the order.
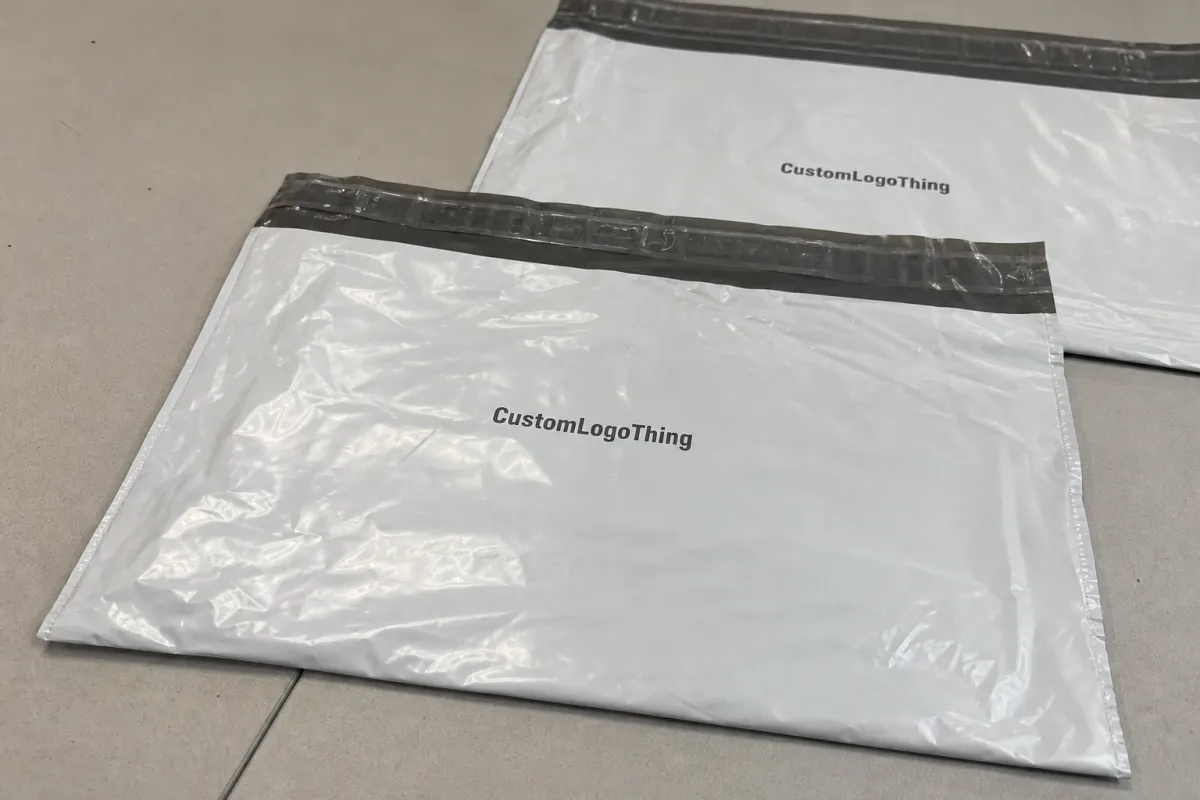
What a Poly Mailer Proof Actually Shows
A proper proof is a production preview, not a sales graphic. It should show the actual bag size, print area, copy, and notes tied to the order. On a poly mailer, that also means checking the front and back panels, closure flap, seal zones, and any area that may shift once the bag is formed or filled.
That matters because film does not behave like paper. A design can look centered on screen and still drift once the bag is made. A logo can sit too close to a weld. A QR code can look crisp on a monitor and still fail when printed on glossy plastic. Even small changes in bag size can make a layout feel crowded or oddly empty.
This is also where buyers confuse a mockup with a proof. A mockup is helpful early on, but it can hide bleed problems, flatten color issues, and make placement look cleaner than production will allow. A proof should match the actual dimensions and the actual print method. If you are comparing packaging formats, the Custom Poly Mailers page shows the base structure, and the Custom Packaging Products page helps when the mailer has to coordinate with inserts, cartons, or labels.
A proof still has limits. It can confirm layout, copy, and placement, but it does not guarantee exact tactile feel or perfect color matching unless the printer is working with tighter controls and the same substrate. That is normal. Buyers get into trouble when they ask a proof to do more than it can.
For shipping durability claims, standards bodies like ISTA are a better reference than marketing copy. If a supplier says the mailer will hold up in transit, ask what test method or quality check backs that up. A nice sentence is not a test result.
Process, Timeline, and Lead Time Expectations
The usual workflow is simple enough: artwork intake, preflight check, proof creation, buyer revisions, final approval, production, packing, and shipping. The part that stretches is rarely the manufacturing step itself. Clean files move quickly. Messy files sit in review. Internal approvals can slow things down even faster than a bad dieline.
Fast proofing usually happens when the artwork is already production-ready. In that case, a first proof can come back in 24 to 72 hours. If fonts are missing, images are low resolution, or placement notes are vague, expect extra days. Every revision has to be checked against the bag size, print method, and any special ink requirements.
Lead time depends on complexity. One-color print on standard film is much simpler than multi-color artwork with white ink on dark plastic. Full-wrap graphics, special sizes, heavy ink coverage, and custom finishing all add setup work. A straightforward run may ship in roughly 10 to 15 business days after final approval. More complex orders often need 15 to 20 business days or more, depending on factory queue and order size.
The delay that frustrates buyers most is usually not on the supplier side alone. Marketing wants one more tweak. Ops is waiting for warehouse confirmation. Purchasing wants a cleaner price. Then the “quick” launch sits in approval limbo. Keep the soap Printed Poly Mailers Artwork Proof checklist visible during internal review, not just when the supplier asks for a signature.
Paper inserts, labels, and outer cartons can introduce their own paperwork and timeline issues. If the program includes fiber-based components, FSC is the right reference for those materials. Film mailers and paper packaging do not share the same claim structure, so the proof trail should not treat them like they do.
Cost, Pricing, MOQ, and Quote Variables
Pricing for printed poly mailers usually comes down to a handful of real variables: bag size, film thickness, print coverage, number of colors, number of printed sides, and how much setup the artwork requires. A 2.0 mil mailer with one-color print is a different product from a 3.0 mil mailer with full coverage, white ink, and dark-film underprinting. The difference shows up in both price and timing.
MOQ matters too. Lower minimums usually cost more per unit because the setup cost is spread across fewer bags. That is not a mystery. It is just math. If a supplier will run 500 or 1,000 pieces, the per-piece price is usually higher. Pricing tends to get more efficient around 3,000 to 5,000 units, and it often improves again at 10,000-plus if the artwork stays stable.
| Proof Option | What It Shows | Typical Cost Impact | Best Use |
|---|---|---|---|
| Standard digital proof | Layout, copy, placement, and basic print notes | Often included or $0-$50 | Clean artwork and routine reorders |
| Revision round | Updated artwork after buyer comments | $25-$75 if extra work is needed | Minor changes to text, size, or logo position |
| Physical preproduction sample | Better read on color, film, and placement | $40-$150 plus shipping | Heavy coverage, white ink, or strict brand color control |
| Rush proof | Faster review window | 10%-30% surcharge in some programs | Tight launches and short approval windows |
Quote traps usually show up in the details. Freight is one. Rush fees are another. So are extra proof rounds, spot color requests, custom sleeves, or coordinated cartons that were never included in the first estimate. A quote can look great until the final line items arrive. Buyers who ask for full landed cost instead of only unit price usually avoid the awkward follow-up email.
As a loose market frame, many custom poly mailers land somewhere around $0.18-$0.40 per piece on mid-size runs, depending on size, film, and coverage. Very small runs can sit higher. Larger runs can come down. The real number depends on the factory, the artwork, and whether the order is built for efficiency or convenience.
Soap Printed Poly Mailers Artwork Proof Checklist
Use this soap Printed Poly Mailers Artwork Proof checklist before approving anything. It is not flashy. It is the kind of list that keeps the launch from getting derailed by a tiny error everyone missed because the proof “looked fine.”
- Confirm the file format. Ask whether the supplier wants PDF, AI, or layered source files. Fonts should be outlined, linked images should be embedded, and the file should open cleanly without missing artwork.
- Check the actual bag size. Match the artwork to the ordered dimensions, not the mockup dimensions. A 10 x 13 inch mailer and a 12 x 15 inch mailer are not close enough to improvise on.
- Review bleed and safe zone. Keep essential text and logos away from edges, folds, seals, and the flap. Anything too close to the perimeter risks trimming or distortion.
- Inspect seam and fold placement. Make sure the logo is not landing on a weld, edge seal, or closure area where it can disappear when the bag is formed.
- Verify brand copy. Check spelling, punctuation, URLs, QR codes, SKU numbers, and legal text. One wrong character can make the whole job look careless.
- Check color handling. Ask how the printer is managing CMYK conversion, spot colors, white ink, and dark-film underprinting. If you only have a screen preview, treat color as directional unless you have a physical sample.
- Watch small type. Thin lines, tiny disclaimers, barcodes, and QR codes can blur or fill in on flexible film. If it needs a magnifying glass on screen, make it larger.
- Confirm thickness and finish. Film gauge, gloss, matte, and opacity change how the artwork reads. A 2.5 mil matte bag will not behave like a lighter glossy one.
- Check the orientation. Make sure the bag opens the way the packing line expects. A perfect layout is still wrong if the front panel or top edge is flipped.
- Match the proof to the purchase order. Quantity, size, color count, and print side should agree with the PO. If the proof and the order disagree, stop there and correct it before approval.
The fastest way to use the checklist is to mark directly on the proof and answer every question in writing. If the supplier has to infer your intent, approval has not really happened. The issue has only been delayed until production.
Common Proof Mistakes Buyers Miss
The most common miss is approving a nice-looking proof without checking the dieline. That is how logos end up too close to a seal or vanish into an edge zone. Another frequent mistake is trusting the screen to show the true color. It will not. Monitors are bright, office lighting varies, and “looks fine to me” is not a production standard.
Small copy causes problems too. Thin rules, tiny legal lines, and barcode-sized graphics can blur once they hit flexible film. If the legal text is hard to read at arm’s length, it is too small. If the QR code depends on perfect contrast and the bag is dark and glossy, the code needs a stronger treatment.
Pretty proof, wrong dieline. That is how an order gets expensive.
Version control creates another quiet failure. Someone replies inside a long email thread, approves the wrong attachment, or assumes the old reorder file still matches the current branding. That mistake feels harmless right up until production starts. A clear file name, a single approval document, and one final sign-off point are worth far more than another round of “just to confirm.”
Different teams also inspect different parts of the proof. Branding checks the logo. Operations checks the pack flow. Purchasing checks the price. That can work well, but only if someone checks the whole thing. A proof is not approved because one person liked the color and another liked the cost.
Expert Tips and Next Steps After Approval
The cleanest approvals usually come from a three-pass review. One person checks brand accuracy. One person checks production specs. One person checks how the mailer fits the shipping or warehouse process. That sounds basic because it is basic, and basic is often where the money gets saved.
Use one approval sheet with the final artwork, final notes, and final confirmation that the proof matches the purchase order. Save it where the whole team can find it later. Reorders are where sloppy file control gets expensive, because nobody remembers which version was actually approved and the factory is not going to untangle the internal naming system for you.
Archive the master proof, supplier notes, and approved dimensions before release. If the next run uses the same bag but a different design, label it clearly. If the next run changes the bag size, start the soap printed Poly Mailers Artwork Proof Checklist from the top instead of pretending last time covers this one. It usually does not.
The real job is simple: keep the artwork accurate, keep the schedule honest, and keep the packaging consistent. If one thing deserves extra attention, it is the proof. A bad proof is how small packaging mistakes grow into big production costs. Use the checklist, ask the annoying questions, and you will approve with fewer surprises.
Frequently Asked Questions
What should be on a soap printed poly mailers artwork proof?
At minimum: exact bag size, print placement, bleed, safe zone, final copy, logo version, and notes on seams, flap areas, QR codes, and color handling. If any of those are missing, the proof is incomplete.
How many proof rounds are normal for printed poly mailers?
One clean round is common when the files are already production-ready. Two rounds is normal if the layout needs small adjustments. More than that usually means the artwork was not prepared for production.
How long does proof approval usually take before production starts?
Fast approvals can happen in 24 to 72 hours if the file is clean. Missing fonts, unclear notes, or internal brand reviews can stretch that timeline. Production lead time usually starts after final sign-off, not after the first draft.
What affects the price of soap printed poly mailers the most?
Mailer size, film thickness, print coverage, number of colors, number of sides printed, and MOQ drive most of the cost. Rush timing, shipping, and special ink or finish requests can move the quote fast.
Can I approve the proof if the color looks a little off?
Not unless you have a color standard or approved sample to compare against. Ask how the printer is matching color before you accept the file. If brand color matters, get a clearer reference instead of guessing and hoping the proof will fix it later.


