A strong soap trucker Caps Material Sample guide does more than confirm a color match. It exposes the things that decide whether a cap feels cheap, solid, breathable, or simply off. Two trucker caps can share the same art and still land in different price tiers because the front-panel build, mesh density, sweatband, and visor insert do different jobs.
That is the part buyers learn the hard way. Photos compress everything into a flat image. A sample gives back the missing dimensions: how a foam front rebounds after a squeeze, whether the mesh feels open or flimsy, how the closure sits against the head, and whether the brim keeps its shape after being packed and unpacked. For a product that is often judged in seconds, those details matter.
The smartest review is not limited to the logo. It covers the shell, the inside, and the way the cap behaves in use. A swatch can help with fabric selection, but a full cap sample shows the real story. If a supplier only sends a fabric card, that is useful as a first checkpoint, not a final decision tool.
A sample should answer one question plainly: if nothing else changed, would this still be the cap you want to sell?
What a soap trucker caps material sample guide reveals
A practical soap Trucker Caps Material sample guide separates surface appeal from build quality. On a product sheet, a foam-front trucker and a twill-front trucker may look close enough to pass a quick internal review. In hand, they behave differently. Foam fronts usually feel lighter and more nostalgic, while a fabric front often gives embroidery a firmer base and a cleaner silhouette.
Mesh is the next signal. A tighter polyester mesh usually looks more refined and helps the crown hold shape better. A looser mesh increases airflow and feels more casual, but the wrong open weave can make the cap read lower-value than intended. There is no universal winner. The right mesh depends on whether the cap is meant for promotions, retail, workwear, or a brand that wants a more polished trucker profile.
Small components change the wearing experience more than most buyers expect. A brushed poly-cotton sweatband feels different from a stiff synthetic one. A plastic snapback is economical and common, while a fabric strap or metal slider can shift the cap’s perceived quality upward. Stiffness in the brim board, consistency in the crown panels, and seam finish inside the hat all affect comfort after an hour, not just first impressions.
Decoration testing belongs in the sample phase, not after approval. Embroidery can look sharp on a stable front panel but distort foam if the stitch count is too dense or the placement is too close to the edge. A woven patch often hides minor fabric irregularities better than direct stitching. Screen print can work well on smoother surfaces. Heat transfer may be fine for short runs, but edge lift, gloss, and cracking should be checked before production begins.
That is why sampling is less about approval and more about evidence. It replaces assumptions with something measurable: a cap that feels soft but holds its profile, a cap that breathes better but looks less premium, or a cap that looks beautiful on a render and disappoints once it is worn. The sample tells you which tradeoff you are actually buying.
How the sampling process and timeline work
Sampling starts with a spec sheet, and the better the spec sheet, the fewer surprises later. Before any cut is made, the buyer should define the crown profile, front-panel material, mesh type, closure style, decoration method, target color, and the feel they are trying to achieve. Words like “premium” or “soft” are too vague by themselves. A supplier can only translate them into a build if the brief is specific.
After that, the supplier chooses the materials and builds one of three things: a swatch card, an undecorated sample, or a decorated sample. Swatches are fast if stock is available, often in a few business days. A full assembled sample usually takes about 7 to 15 business days. Decorated samples can take longer if the job needs digitizing, patch setup, or custom color work. Changes after the first round often add another week or more, especially when the front material or closure changes.
Internal review is another point where projects slow down. Marketing may focus on appearance, operations may care about repeatability, and sales may care about what the cap says about the brand price point. If only one person reviews the sample, blind spots remain. If everyone reviews it without a scoring method, the feedback turns into debate instead of direction. A single approval owner with a simple checklist usually keeps the process moving.
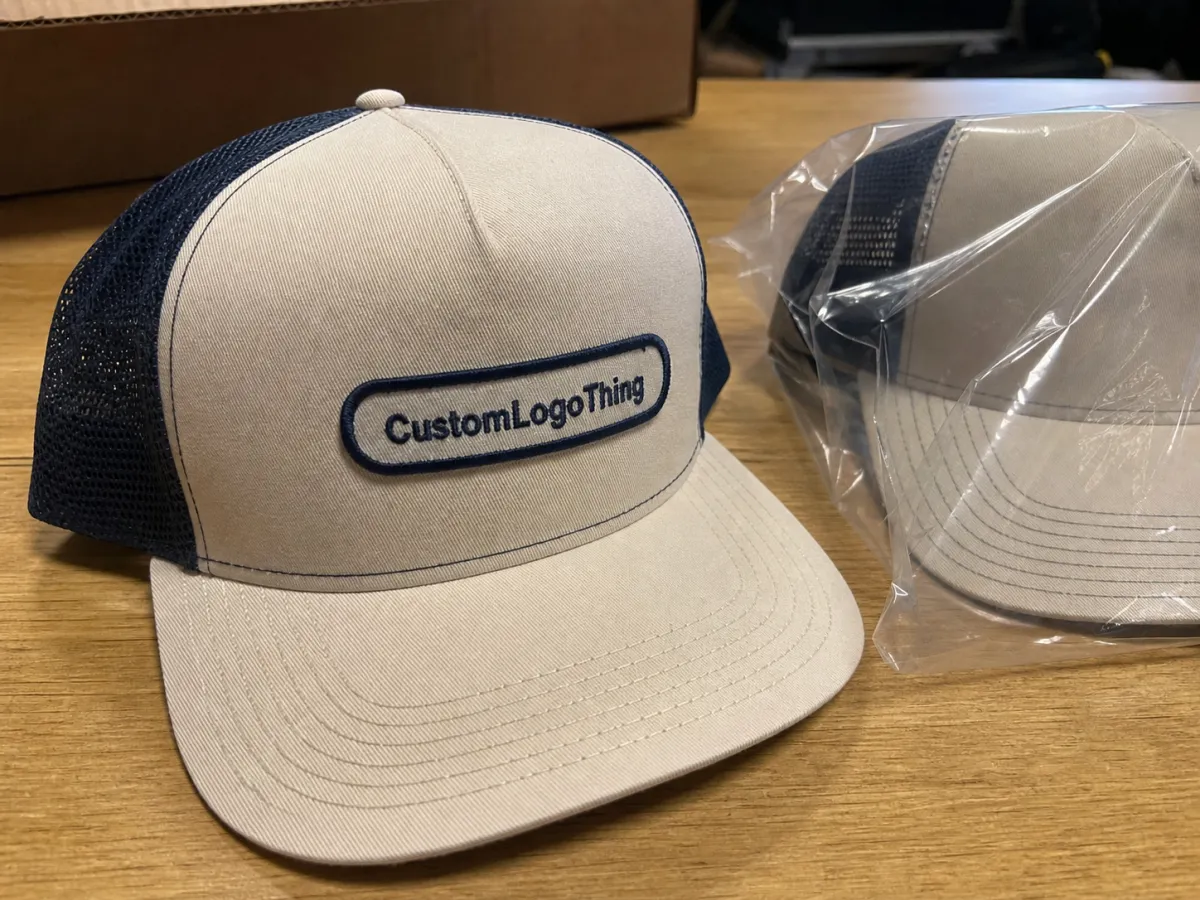
Packaging can be part of the sample test too. A cap arriving in a corrugated cardboard mailer with basic protection tells you something different from a sample packed with inserts, tissue, or a more deliberate presentation. If the product will ship long distances or sit in a retail environment, ask what protection is used against crush and abrasion. Standards from groups like ISTA are a useful reference point for thinking about transit damage, even for small sample shipments.
If the package includes printed inserts or sleeves, this is the time to ask whether recycled materials, FSC certified paper, or biodegradable packaging actually fit the order. Those choices only help if they align with the route, budget, and brand position. A sustainable material story is weak if the package arrives battered or inflates the sample cost beyond reason.
Material factors that change feel, print quality, and wear
The front panel usually decides the cap’s personality. Foam fronts create the classic trucker look: light, slightly lofty, and easy to decorate with simple graphics. Cotton twill feels more substantial and usually gives a more finished result in the hand. Polyester blends sit between the two and can help with color consistency if the run needs to look identical across multiple production batches.
Structure changes the result as much as fabric does. A front panel with buckram or fused interfacing keeps embroidery cleaner and helps the cap hold shape during shipping. A softer build may feel more relaxed, but it can slump after packing or show more distortion after repeated handling. That is not automatically a flaw. For some buyers, a softer cap is exactly the point. For others, the ability to recover shape matters more than anything else.
Mesh deserves close attention because it affects breathability and value perception at the same time. Large openings increase airflow but can also look cheaper if the weave is uneven or too sparse. A denser mesh often reads more refined, though it adds a little weight and can reduce the airy feel some buyers want. If the cap is priced for retail rather than giveaways, a tighter mesh usually earns its keep.
The inside build often decides whether the cap feels good after a short wear test. A taped seam can reduce irritation. A softer sweatband can make the cap much easier to keep on for hours. Rough stitching, uneven seam allowance, or a crown that pulls oddly under tension can ruin a sample that otherwise looks strong on a table. Buyers who skip the inside check tend to discover those issues only after the bulk order arrives.
Decoration compatibility should be tested against the chosen shell. Embroidery works best on a stable front that can accept the needle work without puckering. Woven patches tolerate more fabric variation and usually give a clean finish across more material types. Screen printing is better on smoother surfaces. Heat transfer can be efficient for lower quantities, but edge lift and cracking should be checked against handling and wear, not just against a photo approval.
There is also a presentation issue that affects perceived quality. A premium-cap sample mailed in a plain, weak pack can feel disappointing even if the cap itself is solid. A simple corrugated cardboard mailer with kraft paper protection can still look disciplined if the inserts, print, and packing method are intentional. For brands using recycled materials or post-consumer waste content in the packaging story, the sample should reflect that honestly, not just mention it in a spec sheet.
Cost, pricing, and MOQ tradeoffs for sample runs
Sample pricing is rarely just the price of one cap. It includes setup, material sourcing, decoration prep, and the extra time involved in building something that may never go into production. A simple swatch card can be inexpensive. A production-accurate decorated sample can cost almost as much as a small first run, especially if the design needs a custom patch, multiple logo colors, or a special closure.
| Sample type | Typical unit cost | Usual turnaround | Best use |
|---|---|---|---|
| Material swatch card | $12-$25 | 3-7 business days | Color, hand feel, and basic material selection |
| Undecorated assembled cap | $25-$45 | 7-12 business days | Fit, crown shape, mesh density, and closure check |
| Decorated sample cap | $45-$90 | 10-18 business days | Embroidery, patch placement, and final brand review |
| Revised sample | $30-$75 | 5-12 business days | Comparing material changes after first feedback |
The MOQ picture is just as important. Standard custom trucker cap programs often sit around 100 to 300 pieces, but that number can move if the design needs special fabrics, private labeling, unusual closures, or packaging changes. A sample built at very low quantity may look expensive compared with the eventual bulk order because setup is spread across fewer units. That is normal. It only becomes a problem when buyers compare the sample price to a full production quote without accounting for setup.
Some suppliers credit sample fees back against the final order. Others do not. Shipping is often excluded unless the agreement says otherwise. It is worth asking which part of the sample charge is a true development cost and which part can be deducted later. That distinction matters because a cheap sample that misses the target can cost more in time and revision cycles than a more expensive sample that gets approved immediately.
A clean comparison sheet helps. List the unit cost, setup fees, shipping, revision costs, and expected waste on the first production run. Then compare samples side by side, not just on unit price. The right sample is the one that reduces risk, not the one that looks least expensive on a quote.
Step-by-step: from spec sheet to sample comparison
A useful spec sheet is direct. Start with the crown profile, front-panel material, mesh style, closure, decoration method, target color, and the exact hand feel you want the buyer to notice. If the cap needs to feel soft but still hold shape, say so. If the logo has to sit flat across a foam front, say that too. The fewer assumptions the supplier has to make, the fewer revision rounds you will need.
Whenever the budget allows, request two samples: one that follows the core spec exactly, and one that tests a material upgrade or downgrade. That comparison reveals whether the nicer fabric truly earns a higher price or whether the simpler build already delivers the look the brand needs. A side-by-side test is often more useful than a single “best guess” sample.
Review the samples on a real head, not just on a table. Check fit on more than one size if possible. Study stitch alignment, visor curve, mesh openness, crown tension, and color under daylight. Then do a short wear test. Fifteen or thirty minutes is enough to expose pressure points, heat buildup, or a sweatband that feels rough once the cap is actually on.
A simple scorecard keeps the review grounded:
- Fit: Does the crown sit correctly and adjust cleanly?
- Feel: Does the fabric read soft, firm, or overly synthetic?
- Decoration: Does the logo look sharp, balanced, and durable?
- Build: Are the seams, closure, and visor consistent?
- Brand fit: Does the cap match the target retail or promo price?
That kind of checklist sounds basic, but it prevents a common failure: people remembering a sample differently after several conversations. A cap that seemed premium in the first meeting can feel ordinary once a lower-cost option arrives. A structured review protects the buyer from that drift.
Common mistakes that make samples misleading
The biggest mistake is judging the cap only by appearance. A sample can look polished and still fit awkwardly, run hot, or collapse after a little handling. A strong-looking front panel may hide weak structure. A clean embroidery sample may still sit badly if the base fabric is too soft for the stitch density used.
Another common error is skipping decoration testing. A blank cap may pass every visual check, then fail once embroidery is added. Foam fronts are especially sensitive to needle load and placement. If the artwork is detailed or dense, that test should happen before production, not after an order has already been approved.
Comparing a decorated sample to an undecorated production spec can also create false confidence. The decoration can hide fabric weaknesses, and the final bulk material may be thinner, lighter, or less stable than the sample suggests. That mismatch is expensive because it shows up late, after the buyer has already committed.
Feedback quality matters as much as the sample itself. “Make it better” is not useful. “The mesh is too open,” “the front panel is too soft for embroidery,” or “the sweatband needs a smoother hand” gives the supplier something concrete to change. Specific notes save time and usually produce a better second round.
Clean sample reviews separate preference from defect. “I do not like it” does not help much; “the visor feels flimsy and the crown sits too high” does.
There is one more trap: ignoring the package. If the cap sample will be shown to retailers or internal buyers, the presentation should not conflict with the brand story. FSC certified paper, kraft paper wrap, recycled materials, and even biodegradable packaging can support the message, but only when the solution fits the budget and transit route. The FSC site is a practical reference if the project needs paper sourcing guidance.
Expert tips and next steps before you place the order
Ask for three things before you approve production: a swatch card, a full cap sample, and a decorated reference photo set. The swatch confirms the material. The assembled cap shows the shape and comfort. The photos preserve context once the sample starts moving around the office, the showroom, or the client meeting.
Review the sample under daylight, retail lighting, and on a real head size range. Each one catches different problems. Daylight exposes color drift. Retail lighting can make contrast look better or worse than it really is. Real wear exposes pressure, heat, and closure behavior after adjustment. A cap that survives only one of those tests is not ready.
Before signing off, confirm the final price, lead time, packaging details, and rework policy in writing. These are the details that tend to cause friction later because they are assumed instead of documented. Shipping terms, extra cartons, insert cards, and revision allowances can move the total cost more than the material price itself. If the cap is part of a larger merchandise order, lock the packaging plan early so a missing insert spec does not delay the whole run.
The best buyers treat sampling as a short production rehearsal. They are not trying to win a design argument; they are trying to reduce risk. That is the real value of a soap trucker Caps Material Sample guide. It helps a team compare materials honestly, spot weak construction before the order is placed, and approve only after the cap, the branding, and the package all work together.
What should a trucker cap material sample include?
A useful sample should show the front-panel fabric, mesh back, sweatband, closure, stitching, and decoration method so the buyer can judge the full build. If branding is part of the order, ask for both an undecorated material sample and a decorated version to check color, texture, and embroidery or print performance.
How long does a trucker cap sample usually take?
A basic swatch or simple material sample is usually faster than a fully assembled cap. Custom colors, embroidery, or patch work add time. Faster approvals usually happen when the spec sheet is complete before sampling starts, because fewer changes are needed after the first review.
Does the sample cost apply to the final order?
Sometimes yes, but it depends on whether the supplier treats sampling as a credited development expense or as a separate charge. Before approving the sample, confirm in writing which fees are refundable, which are credited, and whether shipping or tooling is excluded.
Which material works best for a soap trucker cap sample?
There is no single best option. Foam fronts feel classic and light, while polyester blends and twill often deliver a cleaner, more durable finish. Choose based on the decoration method, comfort target, and price point, not just on how the cap looks in a photo.
What should I compare when reviewing sample caps side by side?
Compare fit, crown shape, mesh openness, stitch quality, print or embroidery clarity, sweatband comfort, and how the cap holds shape after handling. Use daylight and a real wear test, since those checks reveal problems that are easy to miss on a flat sample table.


