If you buy knit headwear on a repeat schedule, a subscription Woven Label Beanies material sample guide is not a nice-to-have. It is the difference between approving a label that looks polished on a screen and approving one that actually works on a cuff, seam, or fold. Screens do a decent job of showing art. They do a lousy job of showing friction, stiffness, curl, or the tiny bit of edge irritation that makes people take a beanie off after ten minutes.
The sample is where the real decision happens. A woven label is small, but it sits exactly where wearers touch the product most: near the skin, near the edge, and under constant stretch. That is why material samples matter more than the mockup thread count in a PDF. The right sample tells you whether the logo stays legible, whether the backing feels clean, and whether the label still behaves after sewing and washing. The wrong one tells you all of that after production, which is a much more expensive lesson.
For buyers who source repeatedly, the sample process should be boring in the best way. Clear brief. Fast feedback. One approved reference. No guesswork. If you need a baseline for trim styles, the Custom Labels & Tags page is a practical starting point, and the main Custom Logo Things site keeps the broader order context in one place. The goal is not to make the sample look fancy. The goal is to make the final order predictable.
Subscription woven label beanies material sample guide: what material samples prove
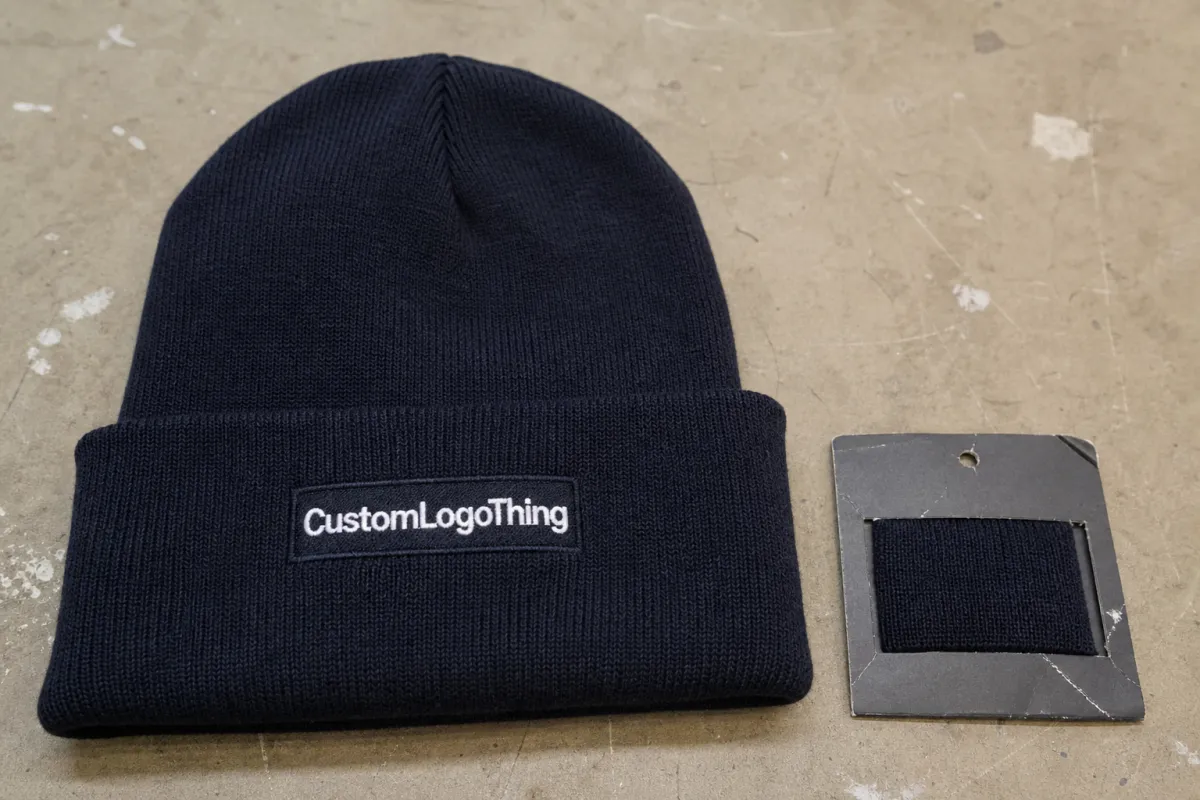
A woven label sample proves more than color. It shows weave clarity, thread density, edge finish, backing feel, and how the artwork holds together once the label is stitched to a soft, stretchy garment. That matters because beanies are not flat. They bend, fold, compress in shipping, and get pulled on by the cuff more than any brand deck will ever admit.
A label can look crisp in digital artwork and still fail in fabric. Fine letters close up when the weave is too loose. Thin borders disappear when the yarn spread is too wide. Sharp edges can scratch skin. Backings that feel harmless in hand can turn stiff once they are folded into a rib knit cuff. A physical sample shows those failures early, which is exactly when they are still cheap to fix.
Color is another trap. On a monitor, two shades may look close enough. On thread, they can feel miles apart. Warm tones read differently under retail lighting. Dark colors lose contrast faster than buyers expect. If the beanie body and the woven label are supposed to look coordinated, the sample should be compared under daylight, indoor white light, and the kind of warm store lighting that makes everything look slightly more expensive than it is.
A label that is “fine on screen” usually means nobody has asked it to survive fabric yet.
There is also the issue of fit on the actual product. A woven label tested flat on a desk tells you almost nothing about how it will read on a cuff, a side seam, or a front patch position. Placement changes everything. A label that feels balanced in isolation may twist once it is sewn into a thick knit. A sample lets you test the real use case, not the convenient one.
That is the value of a subscription woven label Beanies Material Sample guide: it turns a vague approval into a controlled test. For repeat programs, the sample becomes a reference object as much as a proof. It preserves hand feel, edge behavior, and scale. That is the part people forget until the second reorder goes off script.
Process and lead time: from sample request to approval
The process works best when the brief is complete before anyone touches a loom. Send the size, fold style, color target, weave direction, beanie construction, and intended placement together. If the beanie is cuffed, oversized, brushed, or rib-knit, say so. A supplier cannot make a realistic sample if they are guessing how the label has to sit on the garment.
Good sample work usually follows a simple pattern: brief review, material selection, sample build, shipping, internal fit test, and final approval. The weak point is rarely the sample itself. It is the comment loop. One person wants a softer edge. Another wants a tighter weave. A third asks for a different backing after the first version is already in transit. That is how a five-day sample plan turns into a three-week argument.
Lead time depends on queue position, revision count, shipping lane, and whether you have a reference sample ready. If you can send an existing label, a clear photo, or a previous beanie style, the first sample is more likely to land close. If not, expect more than one option. That is not failure. It is normal production reality, which rarely fits into a neat slide deck.
For shipping, treat the sample like a small production lot. Flat label cards can travel in slim sleeves. Multi-swatch kits need sturdier packaging, because bent samples are hard to judge and easy to misread. If you want a basic handling benchmark, the guidance from ISTA is useful. It is not overkill. It is just what sane people do when they want the sample to arrive in the same shape it left.
A realistic timeline for a standard woven label sample is often 8-15 business days from complete brief to physical receipt, depending on material complexity and shipping distance. Rush jobs can move faster, but that usually means someone else is paying for the chaos later. Build in review time on your side as well. The sample does not help if it sits untouched in a shared inbox while production slots disappear.
Key fabric, weave, and backing factors that affect wear
Material choice sets the tone. Polyester is the most common option because it holds detail well, resists wear, and keeps a clean edge. Cotton can feel softer and more natural, but it usually sacrifices sharpness on small type. Recycled blends are worth considering if the brand has a sustainability requirement, although the final hand feel depends on the yarn mix and weave density. None of those options is automatically better. The right answer depends on the branding goal and where the label sits on the beanie.
Weave density is the next decision point. Tighter weaves improve fine text, narrow borders, and small marks that need a clean read. Looser weaves can feel softer and may be fine for simple logos, but they blur fast when the art gets busy. If the design has tiny letters, thin strokes, or a detailed outline, the sample should include a denser option. Otherwise you are approving a decoration that only works from a distance and only under forgiving light.
Backing matters more than people expect. It controls comfort, flex, and how much the label disturbs the knit fabric around it. Heat-cut edges are clean and efficient, but they can feel firmer on skin. Folded edges soften the profile but add a little bulk. Sew-in labels are reliable, though the stitching needs to be neat or the edge will pull. Adhesive backings are usually a poor fit for beanies because knit fabrics move too much for that kind of shortcut to hold up.
Placement changes the requirements again. A cuff label can tolerate a bit more structure because the fold supports it. A side-seam label needs a lower profile or it becomes an annoyance. A front patch position asks for stronger visual impact and better read distance, which means the weave has to hold the logo together at a glance. Same artwork. Different behavior. That is why testing the real placement matters more than approving a pretty swatch.
Care performance should be part of the sample review, not a post-approval afterthought. Beanies get compressed in bags, worn in wet weather, washed, dried, and shoved into coat pockets. The label should survive all of that without curling, fading, or turning scratchy. If the care instructions call for cold wash and air dry, test the sample that way. If the label fails after one wash, it is not ready for production. No mystery there.
For premium packaging programs, the label sample should also be compared with the outer pack. Kraft paper, recycled paperboard, and FSC-certified carton stock usually align better with a controlled brand story than a random mix of plastics and glossy inserts. Buyers ask for recycled content more often now, but the packaging spec still needs to match the product spec. A clean label inside a sloppy package just creates a split personality.
Cost, pricing, and MOQ drivers for sample orders
Sample pricing usually reflects setup work, not just raw material. Color count, weave complexity, backing choice, fold style, and revision rounds all push the cost around. A simple two-color woven label may be cheap to sample. A multi-color design with tiny text, a custom fold, and a soft backing is a different story. That is not a supplier trying to be dramatic. It is production math wearing a plain shirt.
MOQ behaves differently in sample work than in production. On a small sample run, loom setup and coordination dominate the cost. That is why a sample can look expensive per unit even when the raw material cost is tiny. Many buyers see that number and assume markup. Usually it is just the cost of making a custom process behave for a handful of pieces.
For production, the MOQ for custom woven labels often sits somewhere around 100-500 pieces per label style, though the exact floor depends on width, color count, and machine setup. Beanie programs with multiple colorways can push that higher. If the label is only one part of a larger subscription system, the cheapest option on paper is often the most expensive one after rework, inventory mismatch, and delayed approvals.
| Sample option | Typical sample fee | Best for | Main trade-off |
|---|---|---|---|
| Single woven label proof | $18-$35 | Quick visual approval | Limited comparison value |
| Two-material comparison set | $35-$75 | Softness vs. detail testing | More review time |
| Full custom sample pack | $75-$150 | Premium retail programs | Higher setup and shipping cost |
There are straightforward ways to keep sample spend under control. Reduce unnecessary color variants. Combine feedback into one decision-maker. Ask for one clean approval round, not three rounds of “almost there.” If the question is softness versus detail retention, request exactly two material options. Five nearly identical swatches do not create clarity. They create a table full of confusion.
Ask the supplier to split out sample fee, shipping, revision charge, and production unit cost. Clean quotes make better decisions because they show where the money is going. If the quote is vague, the process will be vague too. That usually ends the same way: more sample rounds, more waiting, and a stack of labels nobody wants to approve.
Step-by-step review checklist before you approve production
The review stage should be practical. Start with the sample under three lighting conditions: daylight, neutral indoor light, and warm retail light. A woven label can look crisp in one setting and muddy in another. If the brand mark depends on contrast, test it where customers will actually see it, not just where it looks flattering on a desk.
- Place the sample on the actual beanie cuff or knit panel.
- Stretch and release the fabric several times.
- Check whether the logo distorts, shifts, or loses legibility.
- Feel the edge against bare skin for scratchiness or stiffness.
- Inspect the reverse side for bulk, puckering, or seam tension.
- Photograph the approved version under the same lighting each time.
The stretch test matters because knitted fabric is unforgiving. A label may sit perfectly flat on paper and then buckle once it is sewn to a thick ribbed cuff. That is especially true with compact logos and fine type. The smaller the lettering, the more the sample needs to be tested on the actual substrate. Desk approval is not approval. It is just a nice way to postpone the problem.
Comfort deserves equal weight. If the edge scratches, curls, or digs into the skin, customers will notice fast. Some will fold the beanie differently. Some will stop wearing it. Some will remove the label if the construction allows it. None of those outcomes help the brand. The right sample should feel like part of the product, not a small piece of hardware stuck onto it.
Document the approval clearly. Keep one physical reference, one photo set, and one spec sheet with size, fold, backing, color target, and placement. Use the same named file or paper reference across design, purchasing, and production. A single version of the truth saves time later, especially when staff changes or inboxes get messy. It also keeps reorders from becoming detective work.
Common mistakes that make beanie samples miss the brief
The biggest mistake is trusting screen color too much. Thread is not pixel-based. A mark that looks balanced in a design file can shift warmer, cooler, duller, or flatter once it is woven. If the artwork is brand-sensitive, compare the sample with a physical reference. A monitor is fine for layout. It is not a color court.
Skipping the actual beanie test is another classic miss. A sample that looks clean flat may twist, compress, or pucker once it is sewn to a thick knit. Bulkier winter beanies make this more obvious because the fabric stretch is stronger and the stitch line has more work to do. If the sample never touches the real product, the approval only covers half the problem.
Vague briefs create avoidable rework. Missing fold style, no backing choice, no tolerance range for color, and no master file name all lead to confusion. So does sending five versions without identifying the one that matters. If sourcing, design, and operations each hold a different favorite file, the sample request will drift before anybody notices. That is how a label order becomes a meeting.
Comfort and wash performance are easy to underrate. A label can look polished and still fail if it scratches, frays, or changes shape after laundering. I have seen teams obsess over logo alignment while ignoring edge feel, then act surprised when buyers complain about the trim. The complaint was always there. They just did not test for it.
Overcomplicating the comparison set is the final trap. If the team cannot explain what each sample is supposed to prove, the review is too broad. Two options with a clear question beat six options with fuzzy instructions. That is not minimalism. It is just how decisions work when people want to move forward instead of hosting a committee for every thread.
Expert tips and next steps after sample approval
Once the sample is approved, freeze the spec. Build a reference packet with the approved label, dated photos in consistent lighting, and a one-page sheet listing size, fold, backing, placement, and color target. Keep it somewhere useful, not somewhere “secure” that nobody can find later. Reorders live or die on the quality of that reference.
If the line has seasonal changes or premium tiers, ask for one alternate material sample before the order starts. A winter release may need a softer hand. A retail-exclusive version may justify tighter weave detail or a cleaner edge. One extra comparison now is cheaper than reopening the whole development cycle later. That is especially true for a subscription model, where repetition matters just as much as novelty.
Write down what cannot change and what can. If budget tightens, should weave density move, backing change, or artwork stay locked? If nobody answers that question early, someone will answer it late, and late answers are always more expensive. Clear priorities shorten lead time because they reduce pointless back-and-forth.
Set reorder triggers based on stock cover and production lead time, not optimism. A label issue is easiest to solve when inventory is still healthy. Once stock gets thin, every correction becomes urgent and every delay feels bigger than it is. The simple equation is usually enough: if your remaining weeks of cover are close to your production plus transit time, the reorder window is already open.
That is the quiet value of a subscription woven label Beanies Material Sample guide. It protects the final look, the feel, and the timeline. More than that, it keeps the same decision logic in play across purchasing, design, and production. Consistency is boring. It is also what keeps custom headwear from turning into a small, expensive mess.
FAQ
What should a woven label material sample for beanies include?
It should show the actual weave, edge finish, backing, and color options, not just a flat mockup. The sample needs enough size to judge legibility and comfort once it is sewn or folded onto a beanie. Ask for notes on material content, recommended placement, and any limits on small text so the physical sample can be compared against the real production spec.
How long does a subscription woven label beanies sample order take?
Most of the timing comes from queue position, revision count, and shipping distance. A complete brief shortens the cycle because the supplier does not need to chase missing details. A realistic planning window is often 8-15 business days for the sample itself, then whatever time your team needs for review and sign-off.
What drives the cost of beanie label sample pricing?
Color count, weave complexity, backing type, fold style, and revision rounds usually drive the price. Rush shipping and multiple material options can add more. Small sample orders often carry a higher setup burden per piece because the loom and coordination work are spread across fewer units.
How do I test a label sample on a stretchy knit beanie?
Attach it to the actual beanie fabric or cuff, then stretch and release the knit several times. Check whether the design distorts, whether the edge scratches, and whether the label sits flat after movement. Review the sample under different lighting so you can see how the color reads in stores, photos, and normal indoor use.
What should I do after I approve the final sample?
Freeze the spec sheet, store the signed sample, and share the same reference with purchasing and production. Keep dated photos in one folder and set reorder thresholds before stock gets tight. If the next order needs the same result, the approved sample should be the starting point, not a memory exercise.


