A soft toy outfit can look perfect on the sample table, then arrive at retail looking tired after one carton ride. The difference is rarely dramatic at first glance. It is usually a 2 mm squeeze at the seam, a corner pressing into clear film, a zipper track hiding the logo, or an insert card that is too stiff for the bag around it.
A practical toy PVC Garment Bags Packaging Insert checklist prevents those small failures from spreading across 2,000, 5,000, or 20,000 units. It fixes the relationship between the garment, the PVC bag, the insert card, the closure, the warnings, and the carton before money is committed to bulk production.
What a Toy PVC Garment Bags Packaging Insert Checklist Prevents
The trouble often starts after the “good” sample. A doll dress, plush accessory set, or child-size dress-up costume looks neat when laid flat. Once it is packed into a clear PVC bag, squeezed into an export carton, handled by a warehouse, and hung on a peg, the packaging starts telling the truth.
The insert may bow. The PVC may whiten at the corners. The garment may slide down and hide the artwork. A barcode that looked fine on the dieline may sit partly under the zipper fold. None of these problems sounds expensive in isolation; together, they make the product look cheaper than the item inside.
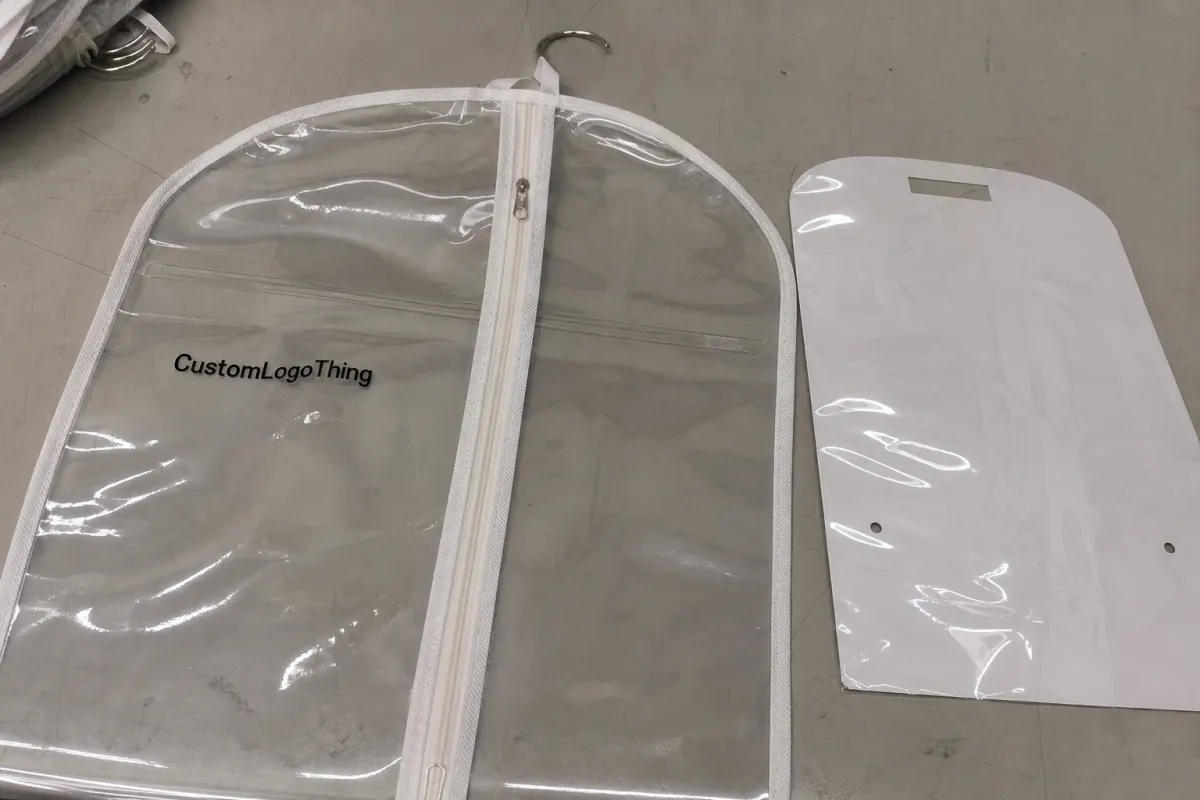
Toy PVC garment bags are clear or semi-clear flexible plastic bags used for doll clothes, plush outfits, toy costumes, small apparel kits, and accessory bundles. Buyers use them because they give visibility, basic moisture resistance, retail structure, and branding space without fully boxing the product. The insert is the quiet part doing much of the work. It can hold the garment shape, carry graphics, separate small components, support a hang hole, reserve space for safety copy, and reduce shifting during transport.
Packaging floor rule: if the insert fights the bag, the bag usually loses. PVC shows pressure, whitening, creasing, and corner stress long before the buyer understands what caused it.
Many teams underestimate the insert because it feels like “just a card.” It is not. It is part display board, part structural brace, part information panel, and part quality-control reference. A checklist gives purchasing, design, compliance, production, and inspection the same set of facts instead of five competing assumptions.
How PVC Bags, Insert Cards, and Toy Garments Work Together
The package behaves like a small system. The PVC film gives visibility. Heat-sealed seams define the usable pocket. The zipper, snap, hook-and-loop flap, or fold-over closure controls access. The insert gives the soft product enough backbone to look organized on a peg, shelf, or e-commerce photo.
Common structures include flat zip bags for light doll clothing, slider zipper bags for repeated opening, snap-button bags for simple retail handling, hook-and-loop flap bags for a softer presentation, handle bags for larger dress-up sets, and header-style PVC Bags with Hang Holes for peg display. Each version changes clearance around the insert, especially near zipper tracks, folded flaps, snap points, and reinforced hang-hole areas.
PVC is clear and flexible, which is why toy garment brands use it, but it is not forgiving. It creases under pressure, shows scuffs under retail lighting, and reacts badly to sharp insert corners. For many toy garment packs, PVC thickness sits in the rough range of 0.15 mm to 0.35 mm, depending on bag size, display method, product weight, and how much handling the pack must survive. A single doll skirt does not need the same film support as a multi-piece dress-up kit with shoes and a tiara.
Insert formats vary just as much. A simple white card can stiffen the pack. A printed art card can carry product packaging graphics, barcode, warnings, and SKU information. A folded insert can create depth. A die-cut backing board can hold the garment with ties. A belly band can keep fabric centered while leaving more product visible. A tray-like paperboard support can separate shoes, bows, or other small parts so they do not collect at the bottom.
The balance is visibility with restraint. Buyers want to see fabric, color, trims, and accessories. Too much empty PVC around a small garment makes the item feel underfilled. Too much insert hides the garment and turns the package into a card with a product attached.
Safety space needs planning early. Small parts warnings, age grading, choking hazard panels, suffocation warnings, recycling marks, and country-of-origin statements may need to fit on the insert or the bag. Requirements vary by product type, destination, and retailer review, so final wording should come from the buyer’s compliance team. For transport testing awareness, ISTA is a useful authority. If certified paperboard is requested, FSC guidance may apply to sourcing claims.
Key Specs to Confirm Before You Request a Sample
Before sampling, confirm the finished outside size, usable inside size, PVC thickness, seam allowance, closure style, gusset depth if needed, hang-hole size, handle shape, corner radius, print area, and final display method. Will the pack hang, stand, lie flat, or ship inside a larger gift set? That one decision changes the insert more than many people expect.
Finished size and usable size are not the same measurement. A 180 mm by 240 mm bag does not give the garment a full 180 mm by 240 mm pocket. Seams, zipper tracks, header areas, folded flaps, snap positions, and rounded corners all take space. A simple drawing should call out both dimensions, not just a loose “bag size.”
The insert needs its own specification set: board thickness, coating, print colors, lamination, fold lines, die-cut holes, product tie points, rounded corners, barcode location, warning label location, and whether it must be removable or fixed. A light retail pack often uses 300 gsm to 400 gsm C1S board. Heavier sets may need thicker paperboard or a folded construction rather than a single stiffer sheet, because stiffness without flexibility can transfer pressure straight into the PVC.
Send the actual toy garment if possible. If that is not available, send a measured mockup with flat width, flat height, folded size, and packed thickness. Soft goods compress differently depending on fabric weight, elastic, trims, sequins, hang tags, and accessory bundles. A fluffy plush cape and a thin doll T-shirt may share similar flat dimensions and behave completely differently inside a pocket.
Print planning deserves early attention. Clear PVC printing often has opacity limits, and white ink backing may be needed if a logo must stay bright. Spot color matching is possible, but registration tolerance and print method should be discussed before artwork is treated as final. In many cases, a printed insert is more economical than heavy printing on the bag, especially for detailed graphics, barcodes, multilingual text, or frequent SKU changes.
A useful checklist includes tolerances, not only perfect target measurements. Heat sealing, film cutting, and paperboard die cutting all have normal variation. Define acceptable limits before production: insert width plus or minus 1 mm, bag width plus or minus 2 mm, print registration plus or minus 1.5 mm, or a hang-hole position tolerance that still works on the retailer’s peg. Numbers like these look small on a spec sheet. On a clear bag, they decide whether the finished pack looks deliberate or slightly wrong.
Process and Timeline from Artwork to Bulk Packing
A clean process usually runs in this order: confirm product measurements, choose the bag structure, prepare dielines, place insert artwork, review safety and retail information, quote the job, make a sample, revise if needed, approve the pre-production sample, then move into bulk manufacturing and packing. Skip one of those steps and the correction tends to land later, when it costs more.
Timeline depends on clarity at the start. If the buyer provides garment dimensions, target quantity, artwork files, insert requirements, barcode placement, shipping method, and SKU count early, quoting can move quickly. If the supplier has to guess packed thickness or wait for compliance copy, the calendar stretches before a single bag is made.
The sample stage should check fit, visual balance, zipper function, hang-hole strength, seam placement, insert stiffness, corner pressure, and whether the garment still looks appealing after packing. A plain structure sample may be enough for size and fit. A printed sample takes longer because color proofing, screens, plates, or digital print setup may be involved, depending on the print method.
Typical lead-time drivers include custom die-cut inserts, special zippers, color-matched PVC, multiple SKUs, mixed artwork, retailer compliance review, and export carton requirements. For straightforward PVC bag and printed insert projects, sampling often takes 5 to 10 business days after clear specs. Bulk production may run 12 to 25 business days after proof approval, depending on quantity and print complexity. Those ranges are not a guarantee; they are a planning reality check.
The best buffer is better specification work at the beginning, not extra guessing time at the end. Seasonal toy launches, catalog drops, and retailer delivery windows leave little room for avoidable sample revisions.
Cost, MOQ, and Quote Details That Change Unit Price
Unit cost is shaped by connected choices: PVC thickness, bag size, closure hardware, seam count, print coverage, insert board grade, insert printing, die-cut complexity, packing method, order quantity, and shipping volume. A larger bag is not only more film. It can mean a larger insert, larger cartons, more air shipped, and more labor to keep the garment positioned neatly.
MOQ can be driven by film purchasing, printing setup, insert printing, die cutting, or production line changeover. Five garment styles using the same bag size but different insert cards may price differently from one universal insert, even if the physical PVC bag is identical. Standardizing the bag and changing only the card can sometimes reduce MOQ pressure, especially for mid-size product programs.
Setup costs may include printing plates, cutting dies, sample fees, color matching, and special packaging tests. These costs spread more efficiently across larger runs. As a rough planning range, a simple PVC zip bag with printed insert might land around $0.18 to $0.45 per unit at 5,000 pieces. A thicker slider bag with a die-cut printed board, multiple tie points, and individual barcode variation may run higher. Freight, carton cube, and inspection requirements can move the final landed cost enough to change the best option.
| Option | Typical Use | Cost Influence | Practical Watchout |
|---|---|---|---|
| Plain PVC bag with printed insert | Most doll clothes and light accessory sets | Often best value for multi-color branding | Insert must be sized so corners do not mark the film |
| Printed PVC bag with plain insert | Simple logo-forward branded packaging | Setup rises with print coverage and colors | Clear film may need white ink backing for opacity |
| Thicker PVC with die-cut card | Retail hanging packs or heavier dress-up kits | Higher film, board, die, and labor cost | Hang-hole and zipper areas need stress review |
| Universal bag with SKU-specific insert | Multiple styles in one product line | Can reduce bag MOQ pressure | Card artwork control becomes the key variable |
Ask for structured quote options. Compare one PVC thickness against another, printed bag against printed insert, and single-SKU packing against assorted carton packing. One flat number rarely shows where the value sits. If other formats are being considered, the Custom Packaging Products range can help compare PVC bags, insert cards, and related retail packaging side by side.
Step-by-Step Checklist for Building the Packaging Insert
Start with the real product. Measure the toy garment flat, folded, and packed with accessories. Decide how much compression is acceptable without wrinkling fabric, bending trims, hiding embroidery, or flattening decorative bows.
- Define the insert purpose. Is it a presentation board, information card, stiffener, divider, hang support, brand panel, or several of these at once?
- Choose the bag structure first. Set insert dimensions after zipper tracks, seams, snap buttons, flap folds, and hang-hole reinforcements are known.
- Build in clearance. Leave space from heat-sealed edges and closure hardware so the board does not fight the PVC.
- Round the corners. Bottom corners and zipper-side corners should be softened to reduce poking, whitening, and pressure marks during carton compression.
- Map artwork in layers. Separate brand space, product visibility, warning text, barcode, SKU, country of origin, recycling marks, and multilingual copy.
- Test with product inside. The empty bag tells only half the story; fabric bulk, hang tags, shoes, and small accessories change everything.
- Approve from several angles. Review the front, back, side, hanging position, opened position, and carton-packed condition.
A reliable toy PVC Garment Bags Packaging Insert checklist should also specify who approves artwork, who approves fit, and who signs off on compliance text. Those are not always the same person. Separating those approvals prevents the familiar problem where the marketing team likes the look, but the warehouse later finds that the pack does not hang straight or scan correctly.
If package branding already exists for related products, keep the insert consistent with that system. A toy garment bag may sit beside custom printed boxes, header cards, or paper sleeves, so color, logo scale, and typography should feel related without crowding a small clear pack.
Common Mistakes That Make Toy Garment Packaging Look Cheap
Oversizing is one of the most common problems. Too much empty space around a tiny garment makes the product feel thin, even if the item is well made. A 120 mm garment floating inside a 180 mm-wide bag can look underfilled unless the insert layout gives it structure and purpose.
Undersizing creates the opposite problem. The insert pushes into the seams, the zipper bows outward, or the garment looks crushed before the customer opens it. Clear PVC makes the stress visible.
Sharp insert corners and rough die-cut edges are small details with large consequences. They can leave pressure marks on clear film, create small tears under carton stacking, or make the bottom corners look cloudy. A 3 mm to 5 mm corner radius is often enough for light cards, although the right radius depends on board thickness and bag size.
Artwork crowding is another value killer. If warnings, barcode, logo, care details, selling copy, and multilingual text are squeezed into one small panel, the pack becomes harder to read and less premium. Glare can make that worse. A high-gloss insert behind glossy PVC may look bright on screen but reflect retail lights and product photography lamps.
Closure interaction is easy to miss. Zipper tracks, sliders, snaps, and flap folds all occupy space. They can hide branding, interfere with hang-hole placement, or press into the insert. Approving an empty sample is risky because real garment thickness and packing method can change the behavior of the pack.
For quality control, add visual acceptance points to the checklist: no sharp corner pressure, no blocked barcode, no hidden warning panel, no zipper distortion, no loose garment shifting beyond an agreed limit, and no carton compression damage after a short internal packing check. These checks do not replace formal testing, but they catch the packaging flaws buyers tend to notice first.
Actionable Next Steps Before You Send the Project Out
Prepare the quote request like a production folder, not a casual message. Include product photos, flat garment measurements, packed thickness, target retail display method, desired bag style, insert function, artwork files, quantity, number of SKUs, destination, and any approved compliance text. If there is a required inner pack, carton quantity, or master carton limit, include that too.
Make a rough mockup before paying for a custom sample. Use paper, clear film, or a temporary sleeve to test whether the garment looks better folded, centered, backed by a card, or held with small ties. Ten minutes with scissors and tape can save one full sampling round.
Mark must-have versus flexible specifications. A fixed barcode size, required warning panel, or retailer hang-hole position may be non-negotiable. PVC thickness, insert finish, zipper style, or board grade may have a workable range. Suppliers can quote smarter options when they know where they have room to adjust.
Ask for two or three structured versions instead of one vague price: standard PVC with printed insert, thicker PVC with plain insert, or universal bag with SKU-specific card. If the program may expand into boxes, mailers, or other product packaging, it is sensible to compare formats through Custom Packaging Products so the visual system stays consistent.
Review the packed sample like a customer. Hold it at arm’s length. Hang it. Stack it. Open and close it. Check the insert corners. Read the warnings. Confirm the garment still looks worth buying after the package has done its job. The checklist should become the final reference point for sample approval, production setup, quality inspection, and reorder consistency.
FAQs
What should be included in a toy PVC garment bag insert checklist?
Include finished bag size, usable inner size, PVC thickness, closure style, insert dimensions, board thickness, corner radius, print layout, warning text, barcode location, hang-hole position, packed garment thickness, carton packing method, and approval tolerances. A complete toy PVC Garment Bags Packaging Insert checklist should cover both the empty structure and the packed product condition.
How thick should PVC be for toy garment bags with inserts?
The right thickness depends on bag size, garment weight, display method, and closure style. Lighter toy outfits may use thinner flexible PVC, while heavier dress-up sets or retail hanging packs often need thicker film to resist creasing, zipper stress, and seam distortion. Many projects fall somewhere around 0.15 mm to 0.35 mm, but the packed sample should confirm the choice.
Is it cheaper to print on the PVC bag or on the packaging insert?
Printing the insert is often more economical for detailed color graphics, SKU changes, barcodes, and safety copy. Printing on the PVC bag works best for simple logos, repeated branded packaging elements, or designs that need to remain visible after the insert is removed.
What causes inserts to damage clear PVC garment bags?
Common causes include sharp insert corners, oversized boards, rough die-cut edges, stiff board stock, heavy carton compression, poor fit around zipper tracks, and coatings that scuff against the inside surface of the PVC.
How can I prepare a toy PVC garment bags quote request faster?
Send product measurements, photos, target quantity, number of SKUs, bag style preference, insert artwork or rough layout, retail display needs, required warning text, shipping destination, carton requirements, and any sample deadline. Clear inputs help the supplier price structure, print, insert, and packing accurately.

