Cosmetics Unstructured Dad Hats Digital Proof Checklist
The first mistake buyers make is treating the proof like a formality. An unstructured dad hat is soft, curved, and forgiving in a way that sounds helpful until a logo sits 12 millimeters too low and suddenly looks heavy. That is why the cosmetics unstructured dad hats Digital Proof Checklist matters. It is the point where artwork, fabric, placement, and budget stop being abstract and become a production decision.
For cosmetics brands, salons, launch kits, and retail staff uniforms, the hat has to do more than carry a logo. It has to feel easy to wear, look credible on camera, and survive repeated handling without looking cheap. A good proof keeps those goals aligned before any sewing, embroidery, patch cutting, or packing begins.
What follows is the practical version: what the proof should show, how it is made, where orders usually slow down, and which checks prevent the most expensive revisions. The aim is fewer surprises, not a prettier mockup.
What the checklist actually covers
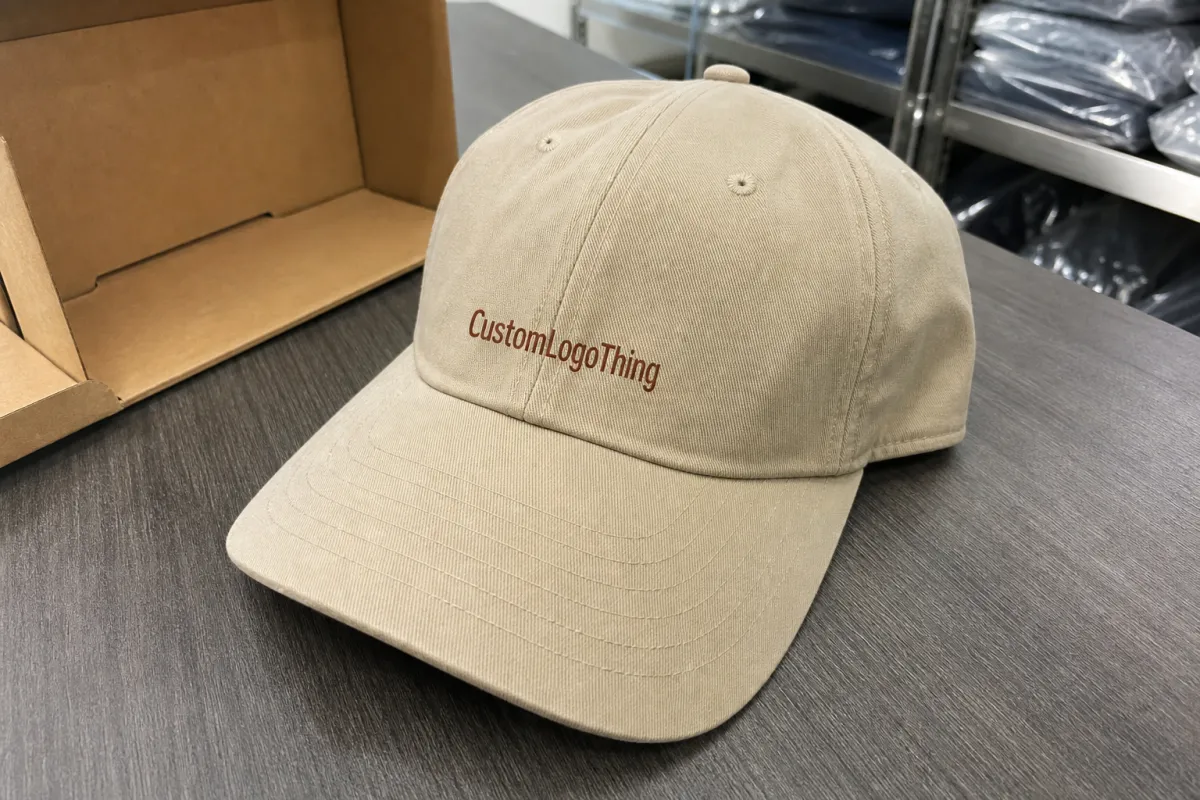
Unstructured Dad Hats are usually six-panel caps with a soft front crown, low-to-mid profile, and an adjustable closure. They are commonly made from cotton twill, brushed cotton, or garment-washed fabric. That relaxed build is exactly why cosmetics teams like them. They read less corporate than a structured cap and usually sit better with clean, minimalist branding.
The proof has to reflect that softness. A flat logo pasted on a standard cap template is not enough if the front panel folds gently under pressure or the brim curves more than expected. The best digital proof shows the hat color, decoration method, logo placement, and closure type at minimum. If the order includes a woven patch, printed patch, or side hit, each placement should appear separately.
A useful proof also includes the size of the decoration area. That matters because what looks balanced in a mockup may be too large for embroidery once the crown starts to curve. A 3.25-inch logo can look clean on one cap and awkward on another, depending on stitch density, font weight, and panel shape. Small details are not small on a soft crown.
For a beauty brand, the proof is also a brand-control document. Retail staff will wear the hat under fluorescent light. Customers will see it in motion. Influencer photos will flatten or exaggerate contrast depending on the camera. A proof that leaves room for interpretation is not really finished.
Approve the placement as carefully as the artwork. On an unstructured cap, the curve changes the whole read of the logo.
How the digital proof process works from art file to approval
The workflow is straightforward, but only when the buyer sends clean inputs. A supplier typically needs vector artwork, the exact hat style, decoration method, quantity, color references, and delivery destination. If any of those pieces are vague, the proof may still be produced, but the revision count usually climbs.
Here is the sequence most buyers will see:
- Submit the art file. AI, EPS, and vector PDF are the best starting points. A PNG or JPG can work for reference, but it often needs redraw or tracing before production.
- Confirm the cap spec. Panel count, fabric, closure, and crown style should be written down before mockup work begins.
- Review the digital proof. Check placement on the curved front panel, not just the logo itself.
- Send revision notes. Use precise comments such as “raise the mark 6 mm,” “switch to Pantone 186 C thread,” or “reduce width by 10 percent.”
- Approve in writing. Final approval should be explicit. “Approved for production as shown” is much safer than “looks good.”
The difference between a mockup and a production spec matters here. A mockup helps everyone agree on appearance. A spec sheet tells the factory what to make. A reliable supplier connects those two documents so the proof and the order form do not drift apart. If the proof omits stitch count, decoration size, or thread reference, ask for those notes before approving.
Buyers often underestimate how much time is lost when the art file is not ready. If fonts are not outlined, colors are not referenced, or the logo exists only in a screenshot, the proof stage becomes a cleanup stage. That is where a simple order starts looking complicated.
For cosmetic merchandise, the safest habit is to treat the proof as a measurable document, not a vibe check. Ask for front and back views if the closure matters. Ask for dimensions if the logo sits near a seam. If the supplier can add a placement overlay or ruler marks, even better. Those details reduce arguments later.
Fit, fabric, and decoration choices that change the final hat
Fit changes perception faster than most buyers expect. A structured cap pushes the front panel upright. An unstructured dad hat relaxes against the head, so the same logo can look lower, wider, or more casual. That difference matters in cosmetics, where the brand tone may need to sit somewhere between polished and approachable.
Fabric changes the result too. Garment-washed cotton feels softer and usually gives the hat a lived-in look. Brushed chino twill tends to hold shape a little better and can make embroidery edges appear cleaner. Heavier twill carries a more substantial feel, which can help if the brand wants the hat to read as a retail item rather than a giveaway. The tradeoff is comfort and breathability.
Closure style affects both fit and finish. Strapbacks are common because they work across many head sizes. Metal slides can look neater. Buckles have a more classic feel. If the hats are for events or influencer mailers, an adjustable closure reduces sizing risk and keeps the order usable across a wider group.
Decoration method is where many budgets quietly change. Embroidery is the most common choice because it adds texture and tends to hold up well. But it has limits. Very small text can fill in. Thin lines may break up. Dense logos can lose clarity when stitched on a soft crown. As a rule, designs with multiple tiny details are safer as woven patches or larger appliqued pieces than as direct embroidery.
Printed patches can handle more color variation, but they often look flatter. Woven patches produce cleaner edges and preserve detail better than stitching alone, though they add a setup step and another surface to approve. Direct print can work on some caps, but the fabric finish, ink system, and wash resistance should be confirmed before anyone treats it as the default.
The practical rule is simple: the softer the cap, the more carefully the logo has to be reduced. A cosmetics Unstructured Dad Hats Digital Proof checklist should call out exact thread references, placement dimensions, and whether the artwork can survive the curve without distortion. For many beauty brands, a smaller and cleaner mark looks more expensive than a crowded one.
What to verify on the proof before sign-off
Most proof errors are not dramatic. They are small. A logo sits a little too low. A thread color is close, but not close enough. The back closure is shown in the wrong material. A proof that looks fine at a glance can still create a costly correction once production starts.
Check the following before approving:
- Placement: Measure logo distance from the brim and center seam, especially on curved front panels.
- Size: Confirm width and height in inches or millimeters, not just “large” or “medium.”
- Decoration type: Embroidery, woven patch, printed patch, or direct print should be named clearly.
- Thread or print color: Pantone references help, but thread matching is approximate and should be expected to vary slightly.
- Hat base: Fabric, wash finish, crown profile, and closure type should match the quote.
- Secondary branding: Side mark, back text, woven label, sweatband print, hangtag, or size sticker should be listed if included.
That last item gets missed often. Buyers approve the front logo and forget the rest. Then a back label, inside taping, or side panel mark appears at production and nobody agrees whether it was included. The safest proof is one that shows every decorated surface the customer will see or touch.
One more thing: keep feedback in one place. A comment thread in email, a marked-up PDF, and a separate chat message can lead to conflicting instructions. Production teams work faster when the revision history is linear and one version is clearly approved. If the supplier sends proof version 3, reply to version 3 with numbered notes.
Thread behavior deserves attention too. White thread on navy fabric does not read the same way as white thread on sand or blush. Dark threads on washed caps can appear softer than expected. Metallic thread can look premium, but it also catches imperfections. The proof should flag those realities rather than pretending every material behaves like a screen graphic.
Production timeline: quote, proof, sample, and shipment steps
Speed depends less on the decoration process than on the quality of the brief. A simple quote can move quickly. The delays usually begin once the artwork needs correction or the buyer starts changing the brief after the proof has already been built.
A typical timeline looks like this:
Quote confirmation usually takes one to three business days if the spec is clear. Proof creation can take another one to four business days. Revisions add time, and that is where schedules drift. After final approval, digitizing, sample preparation if needed, production, quality control, and packing follow in sequence.
For straightforward orders, production often falls in the 12 to 18 business day range after final approval. More complex decoration, larger quantities, or peak-season scheduling can stretch that to three or four weeks. International freight adds its own layer of uncertainty. Domestic courier delivery is usually faster, but only if the cartons leave on time.
Physical samples are worth requesting when the order has a real launch deadline or the logo is unusually detailed. A sample can catch problems that a proof cannot, especially with stitch density, patch edge finish, or fabric tone. The cost is time. Depending on complexity, sample development may add several extra days or a full week before production even starts.
There is a reason experienced buyers often ask for one decision-maker. Five approvers sound protective, but they can create five different opinions about crown height, logo size, or hat color. One approver can still gather input from the team. The supplier should receive one final answer.
Packaging also deserves a quick check. Caps are not fragile like glass bottles, but crushed cartons, poor stacking, or damp transit conditions can still hurt the order. If the shipment includes multiple SKUs, retail inserts, or bundled cosmetics materials, ask how cartons will be labeled and whether any transit testing was done. ISTA standards are useful when an order moves through more than one handling step.
Pricing, MOQ, and unit cost drivers for custom cosmetic hats
Hat pricing is driven by a small set of variables, and the order becomes easier to compare once those variables are visible. Quantity is the biggest one. Setup cost comes next. Then decoration complexity, fabric quality, closure hardware, packaging, and freight method shape the final quote.
MOQ, or minimum order quantity, matters because setup costs need to be spread across enough units to keep the price workable. A run of 100 hats will usually cost more per piece than 500 or 1,000, even if the logo is identical. That is not inflation in the abstract. It is the math of production setup.
| Decoration option | Typical unit cost | Common setup cost | Best fit |
|---|---|---|---|
| Single-location embroidery | $3.20-$5.80 at 300-500 units | $35-$75 digitizing | Clean cosmetic branding with a premium feel |
| Woven patch with sew-on application | $3.80-$6.90 at 300-500 units | $40-$120 patch setup | Detailed logos and sharper edge definition |
| Printed patch or transfer | $3.40-$6.20 at 300-500 units | $30-$90 art setup | Multi-color artwork or softer visual style |
| Multi-location branding | $4.50-$7.80 at 300-500 units | Varies by placement | Retail staff, event teams, and premium kits |
These numbers are directional, not universal. A heavier fabric, a more complex patch, a rush order, or an expensive shipping lane can shift them quickly. Tariffs and seasonal congestion can move freight costs as much as the decoration method moves unit cost. The useful comparison is not “cheap versus expensive,” but “what changed between these two quotes.”
Budget items that get forgotten most often are digitizing, sample charges, freight, and last-minute revisions. Some suppliers also charge when the buyer changes artwork after the proof has already been finalized. That is fair if the revision happened late. It is avoidable if the brief is complete the first time.
One practical observation: a simple, well-sized logo on a good cap base often looks stronger than a crowded design on a weak base. Buyers sometimes try to solve visual identity problems with more decoration. On dad hats, restraint usually wins.
Common proofing mistakes that derail custom dad hat orders
Poor artwork is still the biggest issue. A low-resolution file can be acceptable for reference, but it is not production-ready. Missing fonts, unconverted text, and vague color references force the supplier to guess. Guessing is expensive. It also increases the chance that the proof diverges from the brand guideline.
Another mistake is approving the cap before checking the curve. A design that looks balanced on a flat artboard can sit too low or too wide once it is mapped onto a soft front panel. The proof should show the hat from more than one angle if the logo is large or close to a seam.
Vague feedback creates more damage than outright errors. “Make it pop” does not help a production team. “Move the logo 5 mm higher and increase the width by 8 percent” does. That level of specificity reduces revision cycles and makes later approvals easier.
Buyers also forget secondary items: a woven side label, inside print, back embroidery, sizing sticker, hangtag, or custom packaging insert. Any one of those details can change both the proof and the price. If it matters to the final product, it belongs on the proof.
Finally, many teams split feedback across too many channels. The result is a trail of contradictory notes. Keep one revision thread, one approved file, and one decision-maker. That discipline saves more time than most people expect.
Most production mistakes begin as communication mistakes. The cap just makes them visible.
Final sign-off checks that save rework
Before the approval goes out, make one last pass with the production realities in mind. Check the logo against the crown curve. Check the thread color against the hat fabric. Check the closure style against the order form. Check the decoration size against the smallest readable detail in the artwork.
If the logo includes thin serif lettering or fine line art, ask whether the design needs simplification. Small stitched details can close up on soft cotton, especially after washing or handling. A cleaner version often performs better than a perfectly faithful one.
Review the proof for these practical items:
- Legibility: Can the logo still be read at arm’s length?
- Edge quality: Are patch borders, stitch edges, and seams clearly defined?
- Color consistency: Does the hat color support the brand palette instead of fighting it?
- Wearability: Does the closure and crown profile suit the intended audience?
- Order accuracy: Do the quantity, ship date, and packaging notes match the quote?
Keep the approved proof, artwork file, and spec sheet together. That archive matters for reorder speed, but it also protects the next run from drifting into a slightly different version of the product. For brands that keep using the same merch style across campaigns, that record becomes the real checklist.
The cosmetics Unstructured Dad Hats Digital Proof checklist does its best work when it reduces uncertainty before the first stitch is made. The proof should not just show a nice-looking cap. It should answer the questions a production manager would ask: what is the decoration, where does it sit, how does it fit, what does it cost, and what can go wrong if the wrong version gets approved?
What should a cosmetics unstructured dad hats digital proof checklist include?
It should include cap style, fabric, closure, decoration method, exact logo size and placement, thread or print color references, quantity, shipping destination, and final approver details. If the order includes a side mark, back text, inside label, or hangtag, those items should appear on the proof as well.
Why does an unstructured dad hat proof look different from the finished cap?
The crown is soft, so the logo sits on a curved surface rather than a rigid front panel. That changes how tall, wide, and centered the art appears. Fabric texture, stitch density, and closure weight can all shift the final look.
How long does digital proof approval take for custom dad hats?
If the artwork is clean and the order details are settled, proof approval can happen in a day or two. Revisions add time quickly when files are incomplete or the team keeps changing direction. A single approver usually keeps the process moving.
What drives the cost of cosmetics-branded unstructured dad hats?
Quantity, setup cost, decoration method, fabric quality, and shipping are the main drivers. Embroidery, patch type, and extra branding locations can raise the price, while rush production and small MOQs usually push unit cost higher. A quote is easiest to judge when setup and unit pricing are shown separately.
What is the safest way to avoid proof revisions on a hat order?
Send vector art, give exact placement instructions, specify color references, and assign one final approver. Ask for measured proof notes if the logo is close to seams or the artwork has fine detail. That combination removes most of the common back-and-forth.


