Electronics Logo Patch Beanies digital proof checklist sounds administrative, but on a knit cuff it is often the difference between a crisp brand mark and a patch that looks one size too large. A logo that reads cleanly on a laptop screen can lose clarity fast once it is reduced to beanie scale, especially if the artwork depends on thin lines, tiny type, or a delicate icon.
That is why the proof is not decoration. It is a manufacturing decision point. If the placement, patch size, stitch density, backing, and color references are not settled here, the order can drift into avoidable rework later.
Electronics Logo Patch Beanies Proof Basics
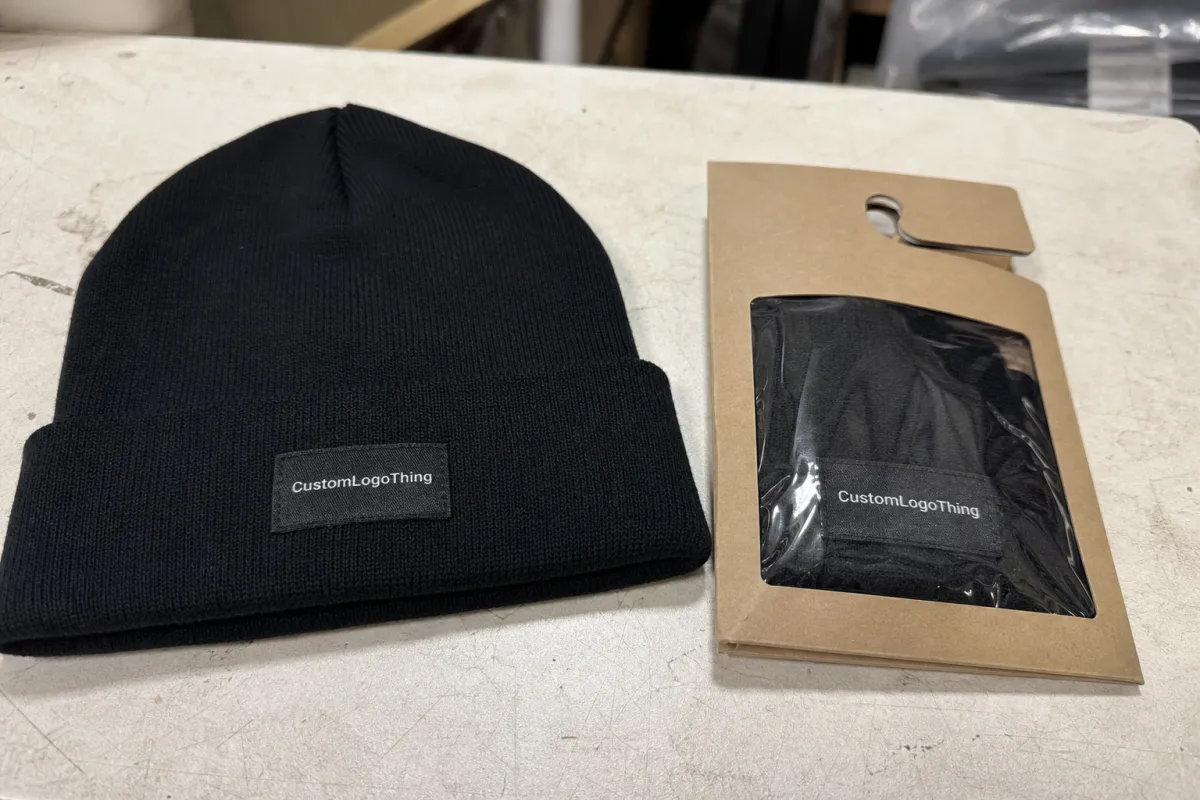
A beanie proof does real risk control. A small placement error on a knit cuff can look much bigger than the same error on a flat garment mockup, because the eye reads the cuff edge, the curve of the headwear, and the logo all at once. That is especially true for electronics brands, where a mark may include a wordline, an icon, and one or two fine strokes that do not tolerate scale changes well.
From a packaging and production buyer’s point of view, the proof is the first place to compare intent against manufacturability. If the patch is meant to be 2.5 inches wide, the proof should show that clearly. If the logo needs to sit centered on the cuff, the proof should show the centerline, not just a generic mockup. The more visual the proof looks, the more tempting it is to treat it like marketing. Don’t. It is closer to a spec sheet in image form.
Good suppliers usually show patch style, placement zone, and key notes together, which helps the buyer separate what is fixed from what is still open. If the order also includes packaging or custom inserts, the same logic applies there. You can cross-check decoration options with the Manufacturing Capabilities overview so the proof matches the actual build method, not an idealized version of it.
A proof that looks polished can still be wrong. If the logo starts too close to the cuff seam, or the patch is oversized by even 0.25 inch, the finished beanie can feel off-brand before anyone notices why.
That is the practical mindset to bring into an electronics Logo Patch Beanies digital proof checklist. It is not about approving a pretty image. It is about verifying the technical choices that make the image producible.
What a Digital Proof Shows Before Production Starts
A digital proof should answer four questions quickly: what the artwork is, where it goes, how it will be built, and what could go wrong. If it does not answer those questions, ask for annotations. A clean mockup with no notes is often less useful than a busier proof that calls out patch shape, embroidery limits, and color references.
Look for the artwork area first. Then check the patch shape. A circle, shield, rectangle, or woven label can change how the logo breathes inside the frame. Electronics logos often use a tight geometry, and that geometry can be lost if the patch border is too thick or the safe area is too small. A badge that looks balanced at 4 inches wide may feel cramped at 2.25 inches.
Next, read the technical notes. Does the proof specify thread color, woven construction, merrowed edge, heat-seal backing, hook-and-loop, or sew-on application? Those details matter because they affect both look and durability. For outdoor or retail-facing programs, I would also ask whether the production team has checked garment compatibility and shrink behavior, since knit fabrics respond differently than woven apparel.
Understand the limits, too. A digital proof can show placement and layout, but it cannot fully recreate the stretch of rib knit, the gloss of a patch surface, or the brightness of a monitor. Color on screen is only a reference. That is why the best proofs include a Pantone callout or at least a controlled reference image.
If the order includes paper packaging components, ask for specs that match the rest of the job. FSC-certified paper stock is a sensible request for hangtags or inserts, and it is easy to verify at fsc.org. For shipping cartons or retail distribution, handling expectations can be checked against ISTA test guidance so the packout is not just pretty, but durable in transit.
Pricing Factors, MOQ, and Quote Triggers
Pricing for Logo Patch Beanies usually moves in a few predictable ways. The first is patch construction. Embroidered patches tend to be cheaper than woven or PVC-style options, but they can lose fine detail sooner. The second is stitch or thread complexity. More colors, tighter detail, and higher stitch counts usually push the unit price up. The third is order size. MOQ matters because setup costs, digitizing, and proofing are spread across fewer pieces on a small run.
For a typical decorated beanie order, buyers often see setup fees in the $45-$150 range and unit pricing that can move from roughly $0.85-$2.20 per beanie for the patch itself, depending on quantity and construction. That is a wide spread on purpose. A 250-piece run with a detailed woven patch will not price like a 5,000-piece order with a simple embroidered mark. The proof is where those differences become visible instead of surprising.
| Patch option | Best fit | Typical setup | Typical unit impact |
|---|---|---|---|
| Embroidered patch | Bold logos with fewer fine lines | $45-$90 | Lower at mid-to-high MOQ |
| Woven patch | Tight text, icons, and thin detail | $55-$110 | Moderate, often worth it for readability |
| PVC or silicone patch | High-contrast retail look | $80-$150 | Higher, especially on small runs |
Quote triggers are easy to miss. If the buyer changes the patch backing from sew-on to adhesive, adds a second placement point, requests Custom Retail Packaging, or asks for a rush schedule after the first proof, the price can change. The same thing happens if the artwork needs cleanup before digitizing. A straight-line logo is cheap to produce. A logo that has to be rescued from a low-resolution JPG is not.
In practice, the fastest way to keep the quote stable is to lock the details before the proof gets approved. Quantity, artwork, patch style, and ship method should all be sitting in the same message. If one of them changes later, the cost usually follows.
Digital Proof Process and Approval Timeline
The workflow is usually simple, but the timing gets complicated fast. Artwork intake comes first. Then the supplier creates the initial digital proof. After that, there may be one or more revision rounds. Only when the final proof is approved does production move forward. That sounds obvious. It is not always how orders get handled.
Ask for timing up front. A first proof often arrives in 1-3 business days, depending on artwork quality and how many details need to be resolved. Revision rounds may take another 24-48 hours each if the buyer responds quickly. Production itself can run about 12-18 business days after sign-off for a standard order, though larger quantities or specialty patch materials can extend that window.
The slowdowns are rarely mysterious. Missing vector files, uncertainty about Pantone matching, and delayed internal approvals account for a lot of drag. If the order is tied to a launch, conference, or team drop, map the proof schedule backward from delivery. A buffer is not wasteful; it is the only thing that keeps a fixed date from turning into a guess.
Approval also depends on the right person seeing the right file. One buyer can be ready, while marketing still wants a placement tweak and operations wants a carton change. That is how orders sit for days without moving. A single decision maker, or at least a clearly named approver, shortens the cycle more than most people expect.
If the supplier can explain where the proof sits in the broader workflow, that is a good sign. It means they understand the order as a production chain, not just a design file. For a custom beanie run, that mindset matters as much as the artwork itself.
Electronics Logo Patch Beanies Digital Proof Checklist
Here is the practical electronics logo patch beanies Digital Proof Checklist I would use before approving anything. It keeps the conversation focused on the decisions that actually affect the finished product, not the ones that only look urgent on a screen.
- Confirm the artwork file. Vector files are ideal, usually AI, EPS, or print-ready PDF. If the proof is based on a low-resolution image, ask for cleanup before approval.
- Check logo size and patch dimensions. Make sure the patch width, height, and safe area are stated clearly. On beanies, a small shift can change the whole balance of the cuff.
- Verify placement. Look for centerline position, distance from the cuff edge, and any seam avoidance notes. Placement should be precise enough that another person could reproduce it.
- Review color references. Compare against Pantone, HEX, or an approved brand image. If the proof does not say which reference controls, ask.
- Check the patch build. Embroidered, woven, PVC, or silicone each changes detail level, hand feel, and price. Tiny text usually favors woven construction.
- Confirm backing and attachment method. Sew-on, heat seal, adhesive, or hook-and-loop all behave differently in production and in wear.
- Review quantities and size assortment. A proof can hide a logistics mistake if the size breakdown or color count is wrong.
- Check packaging and ship-to details. If the order includes retail boxes, inserts, or carton labels, those need approval too.
That list is the heart of the electronics Logo Patch Beanies digital proof checklist. If a proof passes those eight checks, the chance of rework drops sharply. If it fails two or three of them, the safest move is to ask for another revision before the order is released.
One practical shortcut: use the proof to identify what cannot change without cost, and what can still flex. That distinction saves everyone time. It also helps the buyer keep internal feedback grounded. A request to move a patch by 0.125 inch is a different conversation from a request to rework an unreadable logo.
If you need a production-friendly sanity check, the team’s Manufacturing Capabilities page can help match patch type to artwork complexity. That is often the fastest way to tell whether the design is ambitious, realistic, or somewhere awkwardly in between.
Common Mistakes That Lead to Rework
The most common mistake is approving too quickly on a phone screen. Small text may still look acceptable on a mobile display, but disappear on a larger monitor later. Color drift also hides in a bright screen. So does patch scale. A 2.75-inch badge can feel fine in a thumbnail and look oversized once it is actually sitting on a ribbed cuff.
Another frequent error is treating digital color as final color. Screen brightness, knit texture, and thread sheen all change the way a logo reads. That is not a defect in the proof. It is a limitation of the medium. The buyer who understands that limitation asks better questions before approval.
Vague placement instructions create another problem. “Front and centered” sounds clear until the sample shows centered relative to the beanie body, not the cuff seam. If the logo must sit high, low, or offset for brand reasons, spell it out. The production team can only build what the proof tells them to build.
Finally, some orders stall because the approval chain is unclear. If one person is collecting feedback and another person is supposed to give final sign-off, the proof can ping-pong for days. The simplest fix is procedural: name the approver, set the deadline, and state that edits after approval may trigger a new proof cycle.
Those are not dramatic failures. They are ordinary process errors, which is exactly why they show up so often. The good news is that they are easy to prevent once the review process becomes disciplined.
Expert Tips for Faster Approvals and Better Results
Separate must-haves from nice-to-haves before you send feedback. That single move cuts revision noise. A patch backing that affects durability is not the same as a subjective preference about whether the logo sits 2 millimeters higher on the cuff.
Ask for annotation when the logo has fine electronics details. Arrows, notes, and callouts sound dull, but they prevent assumptions. If the design includes a tiny circuit-line icon or a narrow wordmark, one note can save a whole round of corrections.
Keep one internal decision maker if possible. Consensus sounds safe. It is often slow. A single approver can gather comments, weigh tradeoffs, and issue a clean yes or no instead of a chain of partial approvals that never quite settle.
Have a backup option ready. If the first proof shows that the logo is too detailed for the chosen patch size, you may need a woven patch instead of embroidery, or a slightly larger placement zone. That is not a failure. It is the proof doing its job early enough to still be useful.
Also, keep the broader logistics in view. If the program includes ship-to-retail cartons, ask whether the carton plan follows a handling standard such as ISTA. If the job includes printed inserts or hangtags, FSC-certified stock is worth considering. These details are not glamorous, but they reduce downstream friction.
The best approvals feel boring, and that is a compliment. Nothing surprises anyone. No one is scrambling because the art was too small, the cuff placement was vague, or the color standard was never stated. That is the target.
Next Steps Before You Approve the Final Proof
Before you approve, gather the final vector file, brand color references, quantity, delivery deadline, and ship-to details in one place. If those inputs are scattered across emails and chat threads, the next revision is likely to inherit the same confusion. Clean inputs make cleaner proofs.
Then compare the proof against your internal notes. Is the patch size right for the cuff? Does the logo still read from a normal viewing distance? Are the backing type and finish aligned with the way the beanies will actually be used? Those are the questions that matter more than a polished mockup.
If the proof matches the order plan, give explicit approval. If it does not, send a numbered revision list. Clear yes-or-no feedback moves faster than a paragraph of general concerns. In packaging and apparel production, vague feedback almost always costs time.
The takeaway is simple: use the electronics logo patch beanies digital proof checklist to make the proof the last place you discover a problem. Check the size, placement, color, patch build, and timeline before you sign off, and the order is much more likely to land the way you pictured it.
What should I check first on a logo patch beanie digital proof?
Start with placement, size, and logo legibility. If those three are off, color and finish details matter less because the design already misses the mark.
How does MOQ affect electronics logo patch beanie pricing?
Lower quantities usually raise unit cost because setup and digitizing are spread across fewer pieces. More complex patches can push pricing up even if MOQ stays the same.
How long does the proof-to-production timeline usually take?
A first proof often arrives in 1-3 business days. Production commonly starts only after final approval, so slow feedback can add more delay than proof creation itself.
What artwork files should I send with my beanie order?
Send vector files if you have them, plus Pantone, HEX, or other approved color references. Include any placement notes so the proof reflects the real production plan.
What causes the most delays after a proof is sent?
Missing decision makers, unclear color expectations, and incomplete shipping details cause a lot of back-and-forth. Tight instructions and one final approver usually speed things up.


