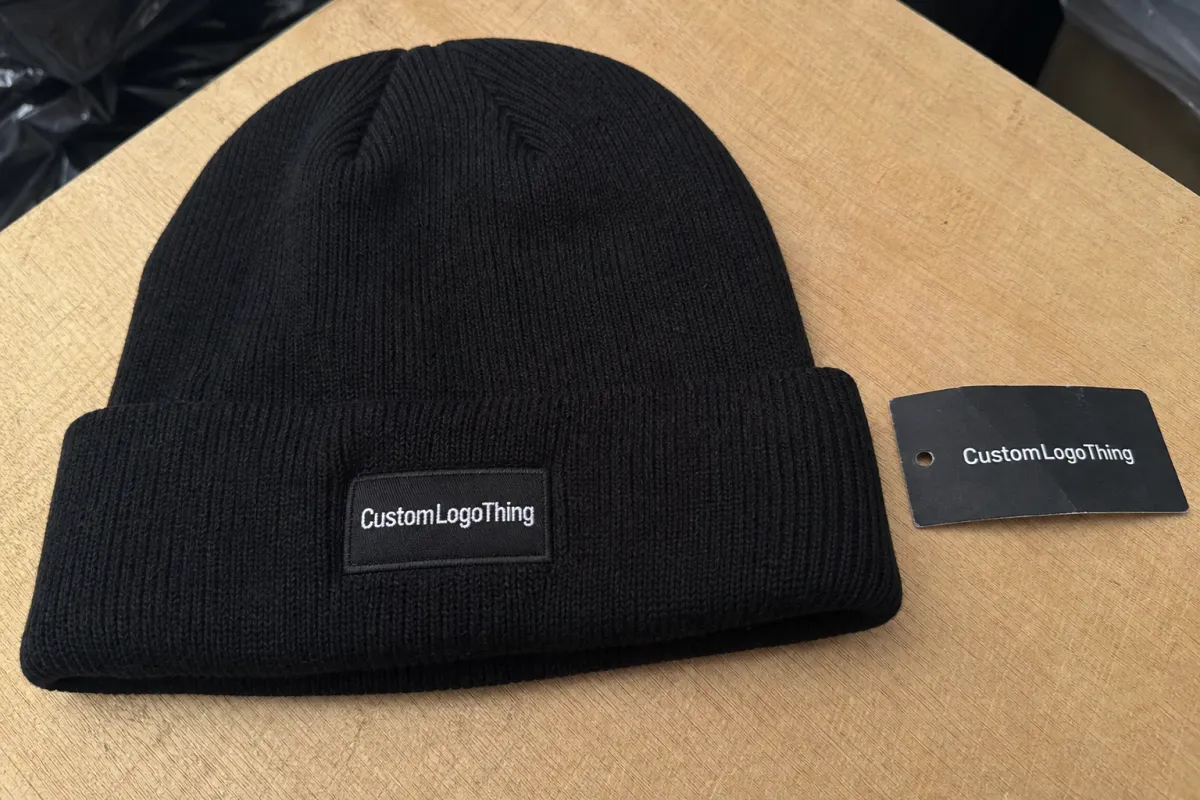
A beer Logo Patch Beanies unit cost review gets useful fast once you stop treating the beanie as a single item and start pulling the order apart into parts: the knit body, the patch, the setup work, and the quantity tier. That is where the real money moves. The beanie shell usually changes less than buyers expect. The patch spec and the approval path change more.
On a small run, a simple woven patch on a standard cuffed beanie may sit in one cost band, while a custom-shaped leatherette badge, extra color breaks, or a patch with tiny lettering can push the unit price up before the first carton is sealed. That is why the first useful review is not about how good the mockup looks. It is about which details actually change the quote.
Beer Logo Patch Beanies Unit Cost Review: What Moves the Number Fast
The fastest way to read pricing is to split the order into base beanie cost and decoration cost. A standard acrylic cuffed beanie is usually pretty stable across suppliers. The patch is where the quote starts to move. Once you add artwork prep, cutting or tooling, sewing labor, and QC time, the patch can matter more than the knit itself.
Three variables usually dominate the unit price: quantity, patch construction, and artwork complexity. If the logo has fine lines, small type, or several color changes, the factory may need a different patch method to keep the mark readable. That can raise cost faster than changing the knit rib from 1x1 to 2x2.
Patch choice matters because each material brings a different production burden. A woven patch stays flat and handles small detail well. An embroidered patch has texture and a more tactile feel, but fine text can get mushy if the art is too busy. Leather and leatherette patches read premium on retail shelves, though custom cuts and backing options often add cost. TPU and rubber-style patches can look sharp, but tooling and molding requirements usually make them the priciest of the common options.
The quote usually gets expensive in the places buyers ignore first: patch shape, artwork cleanup, and how many times the spec changes before approval.
Lock the logo size, patch type, placement, and target quantity tier before asking for pricing. Leave finish details flexible only if you are comparing options. A supplier cannot price labor and waste accurately while the spec is still moving around. At that point, you are getting a guess with a logo on top.
For brewery merch, a practical range often looks like this: the knit body might shift by about $0.20-$0.40 per piece between common yarn builds, while the patch can add $0.25-$1.20 depending on size, finish, and setup. On lower-MOQ orders, the gap feels bigger because fixed charges are spread across fewer units.
Patch Styles and Knit Builds That Change the Finished Look
The finished look depends on the patch and the knit body working together. A cuffed beanie gives the logo a stable front-and-center position, which is why it is the default for most patch programs. A slouch beanie feels looser and more casual, but the same patch can look smaller because the crown drape changes the visual weight. Rib-knit bodies hold shape better and usually give the cleanest patch placement.
Here is the short version of the most common patch options:
| Patch option | Visual effect | Typical unit cost impact | Best use case |
|---|---|---|---|
| Woven patch | Flat, crisp, good for small text | Usually lowest or near-lowest | Clean brewery logos with detail |
| Embroidered patch | Textured, tactile, slightly raised | Moderate increase | Simple marks and bold branding |
| Leather or leatherette patch | Warm, premium, retail-friendly | Moderate to higher increase | Merch lines with a more upscale feel |
| TPU or rubber-style patch | Modern, smooth, strong contrast | Often higher because of tooling | Bold logos with clean edges |
Woven patches are usually the safest move when the logo includes small lettering. The linework stays tighter, and the patch edge stays cleaner. Embroidery works better when the artwork is simpler and the brand wants more texture. Leather and TPU-style patches are more about shelf presence than budget. They look great on display, but that premium look is not free.
Patch size and placement matter just as much as material. A compact patch on the cuff is easier to sew and easier to keep visually balanced. A larger patch can crowd the knit body and make the beanie feel top-heavy. Center-cuff placement is the standard because it is efficient and easy to read. Crown placement can look more fashion-forward, but it usually adds handling risk unless the panel shape is friendly to the patch outline.
Fine text is where a lot of orders get into trouble. If the slogan or brewery name is too small to survive the chosen patch method, the cheapest-looking sample is the one that still reads well after production. That often means a flatter woven build instead of a more textured option that looked better on screen.
Specs Buyers Should Lock Before They Request a Quote
A clean quote starts with a clean spec sheet. The more complete the input, the less back-and-forth the supplier needs, and the faster the unit cost becomes real instead of theoretical. For a beer logo patch Beanies Unit Cost Review, the basics are not complicated, but they need to be explicit.
- Yarn type: acrylic, acrylic/wool blend, recycled yarn, or another knit base.
- Cuff height: standard fold, deep cuff, or a shorter fashion cuff.
- Patch dimensions: width, height, and whether the patch is square, round, oval, or custom cut.
- Artwork format: vector file preferred, with notes on line thickness and small text.
- Color count: body colors, patch colors, thread colors, and any contrast trim.
- Fit target: one-size adult, youth, or extended coverage.
- Back finish: stitched, heat-applied, or sewn-on patch backing.
- Packaging need: bulk packed, folded with insert, hangtagged, or retail-ready.
Color complexity deserves its own mention. A two-color patch is easier to control than a five-color patch with gradients, small separations, or a lot of tiny edges. Even when the art is technically possible, more colors usually mean more setup time and more room for error. In this product category, the quote often reflects how efficiently the look can be repeated, not just how nice the mockup appears.
There is also a real difference between tooling fees and setup charges. Tooling fees cover custom shapes, dies, molds, or special cutting paths. Setup charges cover art prep, digitizing, proofing, and production preparation. They are not the same thing. If a quote lumps them together, ask for a breakdown before you compare suppliers. Otherwise the numbers look cleaner than they are.
Send pricing requests with enough information to stop the guessing. A useful checklist is simple:
- Logo file in vector format.
- Desired beanie style and color.
- Patch material preference.
- Patch size and placement.
- Quantity target and backup tiers.
- Deadline, shipping destination, and packaging notes.
Exact specs create better pricing. That is not a slogan. It is just how production math works. Less uncertainty means less padding in the quote.
Pricing, MOQ, and Unit Cost Breakpoints to Compare
MOQ is where a lot of buyers lose the plot. A simple patch beanie may support a lower minimum than a custom TPU badge or a heavily customized knit pattern, but the more useful question is where the price starts to make sense. A solid beer Logo Patch Beanies unit cost review should show at least two quantity tiers so you can see the breakpoint instead of guessing it.
These ranges are illustrative, not promised. Yarn choice, patch style, and production country all push the numbers around. Still, they are close enough to help a buyer read the quote:
| Quantity tier | Typical cost per piece | What usually happens here | Buyer takeaway |
|---|---|---|---|
| 100-199 units | $4.20-$6.00 | Setup charges hit hard; MOQ pressure is high | Good for testing, not the best unit cost |
| 300-499 units | $3.10-$4.50 | Labor and patch setup spread more evenly | Often the first useful bulk tier |
| 1,000+ units | $2.20-$3.30 | Material and labor spread improve sharply | Best cost per piece if the design is stable |
The breakpoint matters because one-time charges look small until they are divided across a short run. A $250 tooling fee barely shows up on a thousand-piece order. On 150 pieces, it changes the mood of the whole quote. Packaging inserts, barcode labels, and split shipments can do the same thing. Those costs do not look dramatic line by line, but they quietly change the landed cost.
Read every quote all the way through. You want to see sample fees, setup charges, tooling fees, the per-unit price, and the shipping assumption. If the quote says FOB factory or ex works, make sure freight, duty, and local delivery are handled the same way across every supplier you compare. Otherwise the lowest quote is just the least complete one.
Ask for two tiers whenever possible. If you are thinking 300 pieces, ask for 300 and 500. If you are leaning toward 500, ask for 500 and 1,000. That is the quickest way to see whether the first tier is just covering production overhead or whether the next tier unlocks a real drop in unit cost.
Process, Timeline, Lead Time, and Approval Milestones
A normal order follows the same path: artwork review, digital proof, sample approval, bulk production, quality check, and packing. If the spec is clear and the buyer responds quickly, the process is pretty manageable. On a standard run, I would expect roughly 12-15 business days from proof approval to bulk completion in a controlled workflow. Sample time and shipping sit outside that window.
The schedule stretches when artwork is incomplete or when the buyer keeps changing placement after proofing starts. Color matching can also slow things down, especially if the patch face, knit body, and labels all need to line up with brand standards. A pre-production sample makes sense when the order is larger, the artwork is detailed, or the retail launch depends on exact visual consistency. For small giveaway runs, a digital proof is often enough if the spec is simple.
Rush orders are only realistic when the design is simple, the yarn colors are standard, and the supplier has open capacity. Things get messy when custom patch tooling is still missing or when the buyer wants a physical sample before approving the bulk run. If the deadline is tight, ask which part of the schedule can actually be compressed. Not every stage can be shortened without dragging finish quality down with it.
For retail-bound shipments, packaging can matter almost as much as the beanie itself. If cartons are going straight to stores or fulfillment centers, ask whether the pack-out method lines up with transit testing standards such as those published by ISTA. If the order includes paper inserts or hangtags, using FSC-certified paper is a clean way to keep the presentation credible without adding much complexity.
The approval milestones that keep the schedule on track are simple: final art signoff, size confirmation, packaging confirmation, and shipment instructions. Miss one and the lead time usually creeps. Hit all four and the order tends to move the way the production planner expected from the start.
How We Keep Custom Beanie Orders Consistent in Production
Consistency is where the value shows up. A sample that looks good but drifts across the last cartons is not a good order, even if the quote looked attractive. In a beer logo patch Beanies Unit Cost Review, reliability matters because rework, delays, and replacement shipments usually cost more than the original savings. Cheap is only cheap if the run holds together.
The main quality checks are straightforward: stitch consistency, patch alignment, color repeatability, and clean finishing inside the cuff. The patch should sit flat unless the spec intentionally asks for a raised look. The logo should stay centered within a narrow tolerance. The batch should read consistently from top cartons to bottom cartons. Shade variation happens in knit goods, so the supplier needs to compare against the approved standard instead of assuming the run will match itself.
Clear art files reduce problems before they start. A vector logo helps the factory preserve shape. A written spec sheet helps everyone check the same details. If the buyer changes placement, label style, or packaging after approval, the production team needs that update in writing. Verbal changes are how small issues turn into expensive ones.
Inspection should catch loose stitching, patch lift, uneven tension, and visible shade swings before shipment. A practical flow checks a sample panel first, then reviews a mid-run carton, then confirms the packed goods against the approved sample. That does not eliminate every issue. It does catch the common ones before they leave the building.
Reliability saves money. Fewer surprises mean fewer revisions and less wasted time chasing fixes. The lowest quote on paper is not much help if the patch drifts, the order lands late, or the packaging looks off on the shelf. For seasonal promos and retail launches, that kind of miss hurts twice: once in time, once in margin.
The cheapest unit price is only worth chasing after the spec is stable, the timeline is realistic, and the production checks are clear. Otherwise the order is built on hope, and hope is not a pricing strategy.
FAQ
What affects beer logo patch beanies unit cost the most?
Patch construction, logo complexity, and order quantity usually have the biggest effect on the final unit price. Backing type, placement, and any custom shape or premium finish can also move the cost upward. The cleanest quote comes from locking artwork, size, and quantity tier before asking for pricing.
What MOQ should I expect for custom patch beanies?
MOQ depends on the knit base, patch type, and whether the artwork needs special setup. Simple styles often support lower minimums than highly customized builds or multiple color versions. Ask for more than one quantity tier so you can see where the best value starts.
Which patch style is the best value for a brewery promo order?
A woven or embroidered patch is often the most cost-efficient choice when the logo is simple. Leather or specialty patches can improve shelf appeal, but they usually raise unit cost. The best value depends on whether the goal is giveaway volume, staff wear, or retail presentation.
How long does a patch beanie order usually take after approval?
A standard production window is often about 12-15 business days after proof approval, not counting sampling or shipping. The schedule moves faster when the artwork is complete and the approval steps are tight. Rush orders are possible, but only when the design is simple and tooling is already resolved.
What files do you need before quoting a custom beanie order?
A vector logo file is best, along with the desired quantity, patch size, and preferred beanie style. Color references, placement notes, and packaging requirements help tighten the quote. If the buyer has a target unit price, sharing it early helps the supplier recommend the right build.
The cleanest buying decision usually comes from a simple formula: stable artwork, realistic quantity tier, patch style matched to the logo, and a quote that separates setup from recurring cost. Get those pieces aligned and the price starts making sense. Miss them, and even a decent-looking sample can hide an overpriced order.


