For a subscription boxes Frosted Zipper Plastic Bags print method comparison, the real question is not which press is newest or cheapest. It is how the film changes the artwork before the first drop of ink lands. Frosted polyethylene and polypropylene scatter light, soften contrast, and make a clean logo behave a little differently than it does on a carton or a coated label.
That difference matters more than most mockups reveal. A design that looks crisp on white paper can turn hazy on semi-opaque plastic, especially once the bag is filled and the product becomes part of the background. Fine type, thin rules, and soft gradients are the first things to suffer. Bold shapes and clear spacing hold up better.
The best comparison starts with the bag structure itself: film gauge, haze level, zipper style, gussets, seal margins, and whether the artwork will print on the outside or inside surface. If those variables are not settled, the press decision is premature. The printer cannot fix a layout that ignores the zipper track or places critical copy across a fold.
"On frosted film, the method that wins is usually the one that respects the substrate first and the artwork second."
For general packaging standards and transit context, references from Packaging.org and ISTA are useful, but the buying decision still comes down to opacity, registration tolerance, ink laydown, and whether the finished bag survives handling without looking patchy or overworked.
Start with the film, not the press
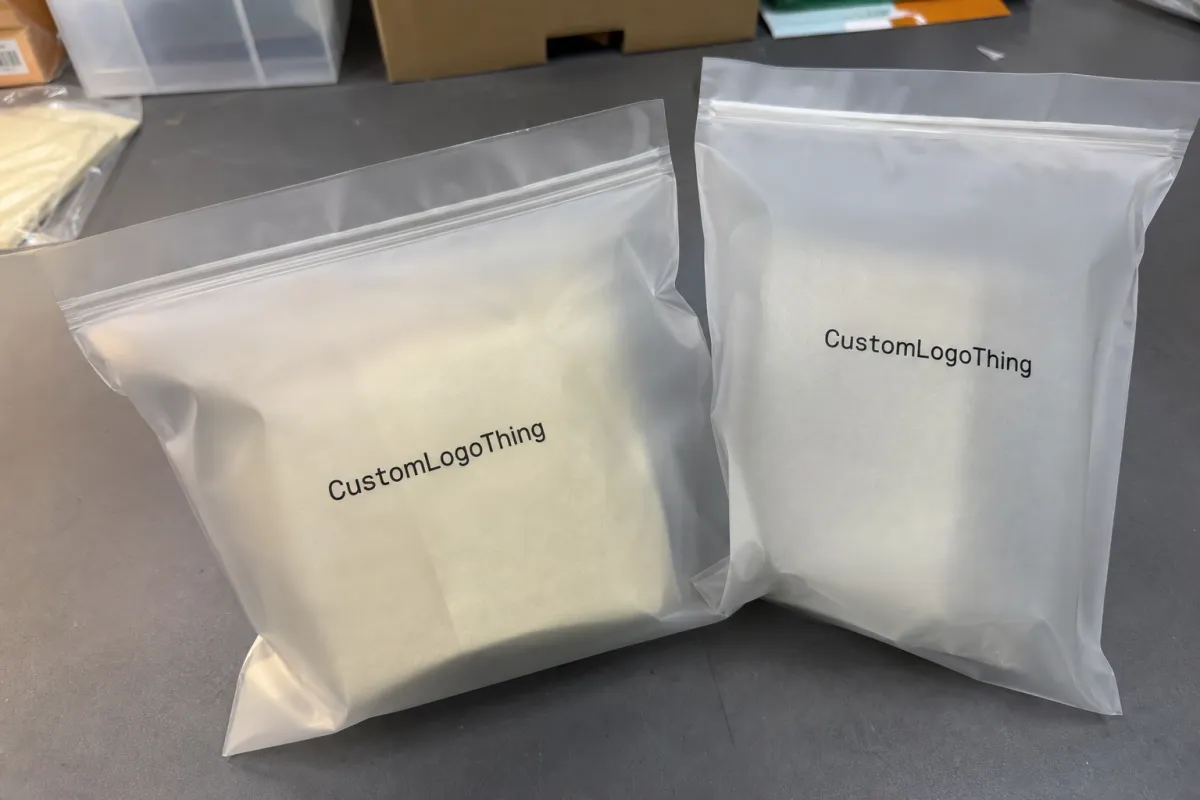
Frosted Zipper Bags are popular for a reason. They feel cleaner than a plain clear poly bag and more refined than a heavy opaque pouch. The soft surface suggests premium packaging without fully hiding the product inside. That same softness, though, changes how ink reads. On a frosted substrate, contrast drops and edges blur faster than they do on paperboard.
Material choice matters here. A 2.5 mil film and a 4 mil film do not behave the same way under the press, and PE does not print exactly like PP. Corona treatment, slip additives, and haze level can all affect ink adhesion and visual sharpness. A buyer can approve the same artwork on two frosted films and get two noticeably different results.
Geometry matters too. Zipper tracks are not decorative borders. Side gussets and seal zones are not blank space. A design that looks perfectly centered on a flat dieline can shift once the bag is filled and the seams pull the material out of shape. That is why a sample with the actual product inside is more useful than a polished PDF.
For subscription programs, the bag often has to do several jobs at once. It may carry the brand mark, protect the contents, and still look presentable after warehouse handling. One month may need a bold shelf-facing logo; another may need a quieter presentation that fits a premium mailer. A good print method supports that variation without making every version expensive to produce.
As a rule, frosted film rewards strong contrast, controlled color counts, and artwork that leaves room for the bag structure. It does not reward delicate detail for the sake of detail. A soft gray gradient might look refined on screen. On the bag, it can disappear into the haze.
How flexo, digital, and screen printing behave on frosted film
Flexographic printing is usually the best fit for higher-volume, repeatable work. It uses plates and spot color separations, which means setup takes more time up front, but once the job is dialed in, the results are consistent. On frosted bags, flexo performs well when the artwork is built around solid shapes, limited color counts, and a clear strategy for white ink or underbase coverage.
Flexo is less forgiving than many buyers expect. If the file is muddy or the tolerances are tight, the method will not hide the problem. Still, for stable artwork and larger runs, it often gives the most predictable result per unit cost.
Digital printing is the faster path for short runs, seasonal variants, and frequent artwork changes. It removes plate-making from the schedule, which shortens setup and makes low-quantity orders easier to justify. That flexibility is useful for subscription boxes because artwork often changes by flavor, tier, or month.
The tradeoff is coverage and consistency on frosted film. Some digital systems handle the substrate well, but translucent bags can expose weakness in low-opacity builds, especially when the artwork depends on subtle tonal shifts. Digital is strongest when the design has clear edges, not when it needs near-photographic softness to carry the message.
Screen printing usually lays down the heaviest ink film. That makes it a strong choice for bold logos, direct spot color, and a tactile premium look. It can feel richer than the other methods because the ink sits up a little more. The drawback is speed: screen setup is slower, color count matters, and complex artwork becomes expensive fast.
White ink changes the equation across all three methods. A white underbase can lift the art and make a logo readable on a hazy surface, but too much white can flatten the frosted character that makes the bag appealing in the first place. Reverse printing is another option. It places the artwork on the inside surface, which protects the design from scuffing and keeps the exterior cleaner, though it does add production complexity.
The practical comparison is straightforward. Flexo tends to win on repeatability and volume. Digital tends to win on speed and variation. Screen printing tends to win on bold coverage and a heavier visual presence. None of those is automatically best. The right answer depends on the bag size, ink colors, film type, and how much visual strength the brand actually needs.
Cost, MOQ, and unit pricing tradeoffs
Any useful subscription boxes Frosted Zipper Plastic Bags print method comparison has to look past the headline unit price. Setup charges, tooling, color separations, proofing, freight, and rework risk can move the real cost more than the press rate does. A quote that looks low on paper may turn expensive once the extras are included.
| Print method | Typical MOQ | Typical setup cost | Approx. unit price at 5,000 pcs | Best fit |
|---|---|---|---|---|
| Flexo | 5,000 to 10,000+ | $250 to $900, depending on plate count | $0.08 to $0.22 | Stable artwork, larger runs, repeat orders |
| Digital | 500 to 2,000+ | $0 to $150 for prepress and setup | $0.18 to $0.55 | Short runs, versioning, seasonal launches |
| Screen | 1,000 to 5,000+ | $75 to $200 per screen | $0.15 to $0.40 | Bold spot color, heavy coverage, premium presence |
These are planning ranges, not fixed market prices. A heavier white flood, more color separations, special zipper hardware, tight PMS matching, or reverse printing can move a job into a different cost band quickly. A 3 mil frosted bag with one or two colors is not the same purchase as a 4 mil pouch with a full white base and a multi-SKU artwork system.
Quantity changes the logic. Digital often looks expensive at larger volume but makes sense for low quantities because the setup stays light. Flexo usually becomes more attractive as the run increases because the tooling cost spreads across more units. Screen printing can sit in the middle, although labor and color count can push it higher than expected if the artwork is complex.
The safest quote is the one that separates setup, per-unit price, freight, sample charges, and any tooling that would otherwise hide inside a vague line item. Buyers also benefit from asking whether the quoted film gauge, zipper style, and print area are identical across methods. If those are different, the comparison is cosmetic, not real.
Another cost trap is rework. A slightly more expensive method that holds registration and opacity the first time may save more than a bargain run that requires replacement. A missed launch date costs more than most print upgrades ever will.
Print process and timeline from file prep to delivery
The production path is usually predictable, but only if the artwork is clean. It starts with file review and spec confirmation, then proofing, then plate or screen creation if the job needs it, followed by press setup, printing, curing, inspection, and packing. Every one of those steps can add time if the file is not ready or the color needs another pass.
Good prepress work saves days. Vector logos hold up better than low-resolution images, bleed needs to extend beyond the finished bag size, and the safe area should stay clear of the zipper, gussets, and heat seals. If the design uses white ink, the printer needs to know whether that white is a base, a highlight, or a full flood layer. Those are different builds, not interchangeable preferences.
Digital usually has the shortest path because it skips plate-making. Simple jobs can move in roughly 7 to 12 business days after approval, though file corrections or sample changes can stretch that. Flexo and screen work often land closer to 12 to 20 business days because the tooling and setup happen before production starts. Rush service is possible in some cases, but it narrows the room for proofing and quality control.
Quality control should include more than a quick visual check. For frosted bags, the useful checks are registration, opacity, zipper clearance, seal alignment, barcode readability if needed, and color density under both daylight and warehouse lighting. A print that looks fine in a photo booth can look washed out under fluorescent lights. That is a real issue for subscription programs that reach customers through storage, packing, and transit.
Shipment planning matters as well. If the printed bags are one piece of a larger kit, the packaging needs to survive compression, stacking, and movement through a fulfillment line. Guidance from ISTA is relevant because the bag is often part of a system, not a standalone item. A clean print run still fails if the bags scuff, warp, or arrive late.
Common mistakes that make printed frosted bags look off
Most weak outcomes begin with artwork that was designed for the wrong surface. Thin type, low-contrast photos, and airy gradients may look elegant on a monitor. On frosted film, they can become hard to read or simply too soft to carry the brand. The bag is not failing the art; the art is failing the bag.
- Ignoring seams, gussets, and zipper hardware, which can split a logo or drag key copy into a fold.
- Approving a design on a white mockup and assuming the same contrast will appear on translucent film.
- Choosing the lowest quote without checking opacity, registration tolerance, or ink adhesion on the actual substrate.
- Waiting too long to request a sample, leaving no room to adjust coverage or placement.
- Using decorative type that is too thin for a frosted surface and too small once the bag is filled.
One practical rule prevents a lot of this: design for the filled bag, not the empty bag. A flat dieline can hide problems that show up only after the product goes inside. What looked centered in prepress may appear high, crowded, or slightly skewed once the gussets open and the zipper pulls the top edge into shape.
"A white PDF proof is only a starting point; the real test is how the ink behaves on the actual frosted film."
Another mistake is treating all frosted films as if they print the same. They do not. One material may hold contrast well and another may need a heavier underbase just to stay legible. Even small changes in haze, slip, or gauge can change the result enough to matter at retail distance.
Expert tips for a cleaner, more retail-ready finish
Keep the design disciplined. A tighter hierarchy, fewer type sizes, and stronger color blocks usually read better on frosted plastic than a busy layout with multiple small elements. On this substrate, restraint often looks more expensive than decoration.
Spot color is often the cleaner choice for logos and short copy because it holds shape better than a complicated CMYK build. That does not mean full color never works. It does mean the file should be built around the material, not copied directly from a carton or label layout that was designed for a brighter surface.
Use white ink carefully. A full white flood can make the art pop, but it can also erase the translucent character that makes frosted film appealing. A partial underbase under the logo, or a controlled white hit only where contrast is needed, often gives a better balance between clarity and softness. The best result is usually the one that looks intentional rather than overprinted.
Reverse printing is worth considering if the bags will be handled a lot during kitting or store movement. The graphic sits on the inside surface, so the exterior stays cleaner and scuff resistance improves. The tradeoff is complexity. Not every plant can run reverse work efficiently, and the proofing process becomes more important.
Request a sample on the actual film whenever possible. A render on screen can hide problems with opacity, line weight, and registration. A physical sample shows whether the logo survives underwarehouse lighting, whether the zipper interferes with the top margin, and whether the white base is strong enough without turning the bag chalky.
Quality-control checks should be specific. Look for color shift from bag to bag, edge roughness on text, zipper clearance, seam distortion, and how the print behaves when the bag is flexed. A print that looks perfect while flat can crack, smear, or look uneven once the bag is filled and moved. That is the difference between a good proof and a good production run.
Next steps before you request a quote
The fastest way to get a meaningful price is to send a complete spec. Include bag dimensions, film type, thickness, zipper style, quantity, number of SKUs, print area, ink colors, and whether the job needs white underbase or reverse printing. The more complete the spec, the less the quote depends on assumptions that will have to be corrected later.
Then decide what matters most. Lowest unit cost, shortest timeline, strongest opacity, and the most premium finish are not the same goal. A brand launching a seasonal kit needs a different answer than one reordering the same bag for six months straight. The method should follow the use case, not the other way around.
- Ask for at least two print methods on the same bag spec so the tradeoffs are visible.
- Request line-item pricing for setup, unit cost, freight, sample charges, and any tooling.
- Get a proof or sample on the same frosted substrate whenever possible.
- Confirm safe zones around zippers, seals, and gussets before artwork approval.
- Write the spec in one place so purchasing, design, and fulfillment are aligned.
A clean comparison does not rely on guesswork. It relies on the same film, the same artwork intent, and the same expectations for color, opacity, and handling. Once those variables match, the differences between flexo, digital, and screen printing become much easier to judge.
The strongest result is usually the one that survives the real-world test: packing, shipping, opening, and handling. If the bag still looks sharp after that, the method choice was probably right.
Common questions buyers ask before approving a printed Frosted Zipper Bag run.
Which print method is best for subscription box frosted zipper bags?
Flexo is usually the strongest choice for larger repeat orders with stable artwork and a clear need for lower unit cost at volume. Digital is often better for short runs, versioned designs, or launch testing because the setup is lighter and faster. Screen printing can be the best option when the design needs bold spot colors and a thicker ink laydown on the frosted surface.
Can full-color artwork work on frosted zipper plastic bags?
Yes, but the film changes the way color reads. Frosted plastic softens contrast, so full-color art usually needs stronger edges, careful separations, and often a white underbase. Detailed photos and gradients can work, but they should be tested on the actual substrate instead of judged only on a white-paper proof.
What affects cost most on frosted zipper bag printing?
Setup charges, color count, and whether the job needs plates or screens usually have the biggest effect on price. Quantity matters because higher volume spreads setup across more bags, which lowers the unit cost. Extras such as white ink, reverse printing, special finishes, and rush timelines can move the quote quickly.
How long does production usually take for printed frosted subscription bags?
Digital jobs are usually the fastest because they can skip plate-making. Flexo and screen printing generally need more setup time, so they often take longer overall. A realistic schedule should include file approval, proofing, production, inspection, and shipping so the bags arrive before the subscription ship date.
Should the artwork be printed inside or outside on frosted bags?
Outside printing is simpler and usually better for immediate shelf impact. Inside, or reverse, printing can improve scuff resistance and keep the outer surface cleaner, but it adds complexity and may raise cost. The right choice depends on how the bag will be handled, stored, and presented in the final subscription box.


