Book Soft Touch Poly Mailers Bulk Order Planning Playbook
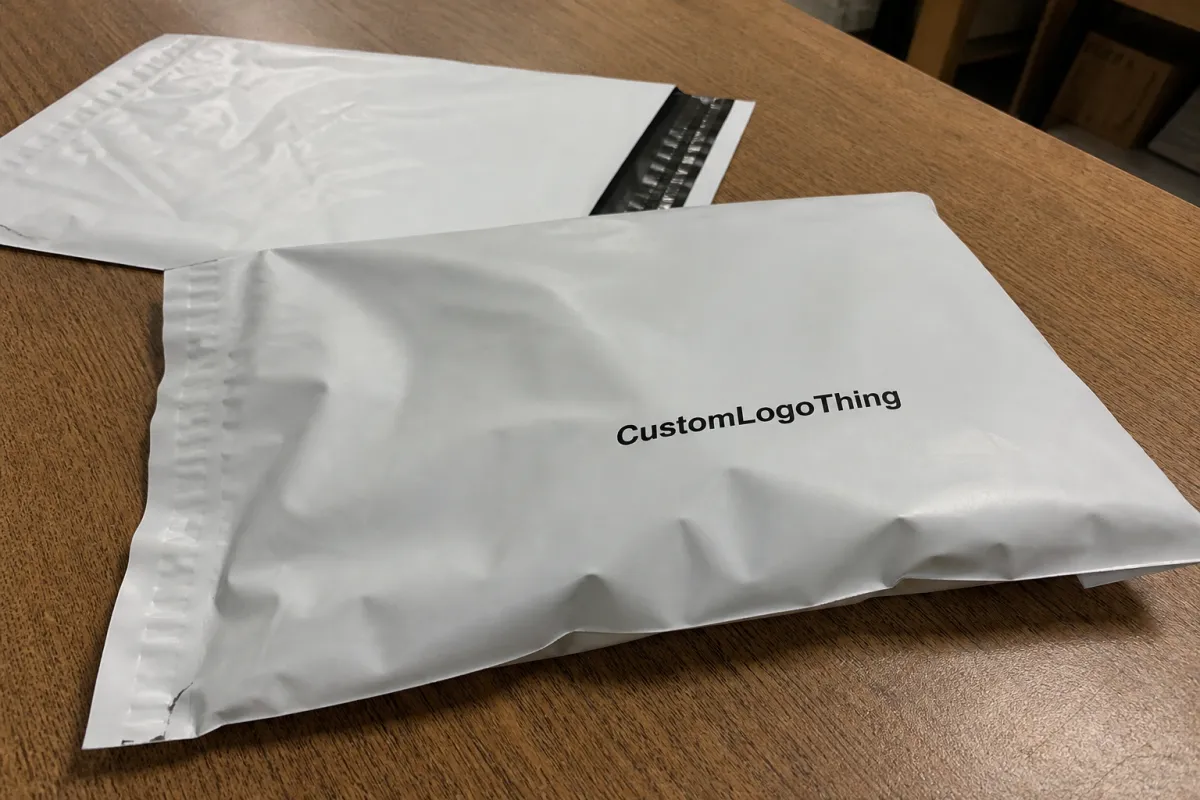
Good soft-touch mailers do one job fast: they make the brand feel more expensive before the customer even opens the package. The tricky part of book soft touch poly mailers Bulk Order Planning is not the idea of a premium finish. It is making sure the mailer arrives in the right size, holds up in transit, and prints cleanly instead of looking dull, scuffed, or slightly off-brand. If you already know you need a custom format, start with Custom Poly Mailers or browse Custom Packaging Products.
That matters because the mailer is often the first branded surface a customer touches. Apparel, beauty kits, gifting programs, and subscription packs all live or die on that first impression. Once the outer box is gone, the mailer is doing the selling. So the buying decision should revolve around fit, film thickness, and print coverage, not just a pretty render.
Why Soft-Touch Mailers Win in the Mailbox
A soft-touch finish earns its keep when the package needs to feel deliberate, not disposable. In practice, that works well for light apparel, small accessories, premium samples, cosmetics, and gift sets where the exterior is visible long enough to matter. If the pack is going straight into a plain corrugated shipper, fine. But if the mailer is the shipper, the outer surface has to do the heavy lifting.
Here is the part buyers sometimes miss: the finish is only half the story. A mailer can look high-end in the proof and still arrive with scuffed corners, muddy dark tones, or a weak seal. That is why book Soft Touch Poly Mailers Bulk Order Planning should start with the route, not the mockup. Carrier handling, carton stacking, and warehousing all affect what the customer actually receives.
The cost drivers are usually simple. A tighter fit saves film and keeps the contents from sliding around. A heavier gauge improves handling resistance. More print coverage raises setup and press time. Those three factors explain most of the pricing spread you will see, which is why vague requests tend to get vague quotes.
The cheapest-looking mailer is usually the one that was planned around a render instead of a shipping lane.
One more practical point: the premium look only works if the mailer lands clean. A finish that feels smooth in hand but rubs easily during transit is a bad trade. That is why buyers who care about repeat orders should ask for sample units, not just a digital proof. If you are building volume programs, the repeatability matters more than the first impression.
- Best fit use cases: apparel, gift programs, beauty bundles, subscription inserts
- Biggest risk: scuffing, wrong dimensions, and poor seal performance
- Main buying levers: film gauge, size, print coverage
Inside the Mailer: Film, Finish, and Print Choices
A soft-touch poly mailer usually has four parts that matter: the outer soft-touch layer, the inner poly film, the adhesive closure, and optional features like a tear strip or a second seal. Ask for those details early. If the supplier only gives you a pretty mockup, you are still missing the spec sheet. That is how reorders go sideways.
The finish itself can be applied to the full exterior or just the face layer, depending on the build. Some mailers keep the back side standard gloss or matte to control cost. That is not automatically a problem, but you should know it before quoting. If your product photography depends on a uniform look, the back panel matters more than people think.
Print choice changes the whole job. A simple one-color logo is usually the cleanest, lowest-risk route. Dark backgrounds with light type need tighter print control. Full-bleed graphics look strong when the film and inks cooperate, but they also expose every weak edge. On soft-touch surfaces, a white underlay is often the difference between a sharp color and a dead-looking one.
For bulk runs, practical extras matter more than brand teams like to admit. Barcode panels, return-label zones, warning copy, and insert allowance all affect layout. If the package needs a scannable area, keep it clear. If it carries folded apparel and a thank-you card, make sure the fill does not bulge so much that the seal has to fight the contents.
Before you approve artwork, confirm these items on the drawing:
- outer dimensions and usable length
- seal width and adhesive type
- print safe area and bleed
- tear notch or tear strip location
- front-only or full-wrap print coverage
For teams that want a broader packaging lineup, this is also where Wholesale Programs can make sense. One supplier handling several pack styles usually means fewer file mistakes and fewer shipping headaches.
Sizing, Gauge, and Seal Strength for Real Shipments
Fit first. Always. Measure the packed item, not the product alone. Folded tees, bundled kits, rigid inserts, and return cards all change the real footprint. A mailer that looks correct on paper can still be tight at the opening or too loose once the contents are inside.
Oversizing is expensive in a few different ways. You burn more film, the contents move around in transit, and the pack looks sloppy even if the print is perfect. Oversize also pushes dimensional weight in some shipping lanes, which is a polite way of saying the carrier charges you for air. Nobody needs that.
Gauge is where buyers should think in risk terms. Lighter film can be fine for low-risk apparel and low-friction shipping. Heavier film or reinforced seams make more sense for multi-item kits, retail resale, or any order that is likely to be handled a lot. If you are unsure, ask for samples in two thicknesses and compare them with an actual packed unit.
Seal strength matters just as much as finish. The adhesive should survive normal handling, pressure in case packs, and reasonable temperature swings. Weak seals often fail at the flap edge or during warehouse staging, not just in transit. If the closure is marginal, the whole order is marginal.
Use this specification checklist on every approval sheet:
- flat width and usable length
- gauge or film thickness target
- seal width and adhesive type
- print area and safe zone
- tear strip, gusset, or special closure details
If you need a transit benchmark, ask whether the sample or production spec was tested against ISTA methods. For materials tied to paper inserts or outer cartons, FSC chain-of-custody requirements may also matter. Those standards do not solve everything, but they do give you a cleaner way to compare suppliers.
| Quantity Tier | Typical Unit Price Range | Best For | Notes |
|---|---|---|---|
| 2,500 pcs | $0.22-$0.38 | Launches, pilot programs, seasonal drops | Higher setup share per unit; good for testing size and print |
| 5,000 pcs | $0.16-$0.28 | Established SKUs and mid-volume reorders | Often the sweet spot for cost and flexibility |
| 10,000 pcs | $0.12-$0.22 | Stable demand and repeat programs | Freight, palletization, and storage start to matter more |
| 25,000 pcs | $0.09-$0.18 | Large-scale retail or subscription operations | Negotiate shipping terms and packaging efficiency early |
Pricing, MOQ, and Unit Cost Levers
Pricing is not random. It moves with size, gauge, print colors, finish complexity, custom features, and whether you are running one SKU or several. A larger mailer uses more raw material. A heavier film costs more. More colors mean more setup. None of that is mysterious; it is just production math.
MOQ exists because the factory is paying for setup, plates, press time, and trimming before the first usable unit ships. That is why the lowest order size is rarely the cheapest per piece. Smaller runs can be useful, but they usually carry more overhead per unit. Buyers often ask for a minimum quantity as if it were a suggestion. It is usually the point where the line still makes sense.
From a purchasing point of view, landed cost beats unit price every time. Freight, duties, labeling, carton counts, pallet build, and rerun risk can wipe out a quote that looked attractive on paper. If one supplier is $0.02 cheaper but ships a month later or has weak QC, that is not a win. That is a future problem with a nicer spreadsheet.
There are smart ways to lower cost without making the pack look cheap. Standardize dimensions across related SKUs. Reduce the color count if your design allows it. Avoid unnecessary special coatings. And if one size can cover two packing scenarios with a slightly different insert, that often saves more than trying to squeeze a perfect bespoke dimension out of every program.
Here is the range I usually see on the buyer side:
- Small run: best for launch risk, not best per-piece pricing
- Mid-volume run: usually the best balance of unit cost and flexibility
- Large run: lowest unit cost only works if storage and cash flow are ready
Process, Timeline, and Production Steps
The order flow should be boring. That is a compliment. Inquiry, spec review, artwork proof, sample approval, production, quality control, packing, freight booking. If any of those steps is fuzzy, the schedule starts slipping. And once shipping slips, everyone acts surprised for no good reason.
Most delays come from a handful of predictable problems: vague dielines, slow proof sign-off, last-minute artwork edits, and address or carton-count changes after production starts. The worst version is when a brand approves a rough mockup and then tries to change the label zone after the line is already running. That is not a revision. That is a rework.
Timing depends on where the order sits in the queue, but sample approval can move quickly if the specs are clean. Full production needs more buffer, especially on overseas runs. Add freight time, customs processing, and warehouse receipt. If the pack is tied to a launch, build backward from the arrival date, not the date you wish the art team had finished.
The cleanest path is to set milestone gates. Lock dimensions first. Confirm film and finish next. Approve the pre-production sample before the main run. That way, if something is off, the correction happens on one sample instead of ten thousand units. Old-fashioned? Sure. Effective? Also yes.
A practical timeline often looks like this:
- Proofing: 1-3 business days if files are ready
- Sample approval: 3-7 business days, depending on revisions
- Production: often 10-20 business days for custom runs
- Freight: depends on route, carton count, and destination
If you need prep help before requesting a quote, the quickest reference is the FAQ page and a one-page spec sheet. A good supplier can price faster when the dimensions and artwork are not a guessing game.
How to Vet a Supplier Before You Commit
Do not buy on slogans. Ask for evidence. A serious supplier should show film specs, seal quality, print capability, and real product photos. Better yet, they should be able to explain why one gauge fits your order and another does not. If the answer is just “premium quality,” keep looking.
Repeatability is the real test. Ask how they track batches, retain samples, and document QC. If the first run is good but the reorder drifts in color or seal strength, your packaging system is broken. Reorder consistency is where good suppliers separate themselves from loud ones.
Communication matters, but accuracy matters more. A quick quote that ignores size, print zones, or ship-to terms is not helpful. I would rather wait a day for a correct estimate than chase a bad one for a week. Fast mistakes are still mistakes.
Also ask about the boring extras. Can they custom pack? Can they apply barcodes? Can they mix SKUs in case packs? Can they handle export paperwork cleanly? These are not glamorous questions, but they save money and sanity. If your order touches multiple channels, this is where a supplier either becomes useful or becomes a bottleneck.
Use this short filter before you commit:
- clear spec sheet with measurable details
- sample or pre-production proof available
- QC notes and batch records on request
- reasonable response time with correct information
- ability to support reorders without file chaos
Next Steps to Lock the Spec and Request Quotes
Start with a one-page spec sheet. Put the dimensions, target thickness, finish, print colors, quantity, ship-to, and latest acceptable delivery date on one page. If you cannot explain the order on one page, the supplier will probably interpret it for you, and that usually costs more than you planned.
Then clean up the artwork. Share the correct file format, note the bleed, mark the safe zones, and flag any barcode or label areas that need to stay open. If there are color references, include them now. Do not wait until proof stage to mention that the logo has to sit three millimeters lower because the team noticed it in a meeting.
Request pricing at multiple tiers. Ask for 2,500, 5,000, and 10,000 units if those levels fit your demand. That gives you a clear view of the break point between setup-heavy pricing and better unit economics. It also tells you whether storage starts to become the real cost driver.
Finally, decide whether the mailer is campaign-tied or stock-ready. Campaign-tied runs need tighter date control and less optimism. Stock-ready programs can absorb more lead time but should still be ordered with a buffer. If you want the cleanest buy, compare landed cost, approve the sample after fit and finish pass, and then move the book soft touch poly mailers Bulk Order Planning package into production with no loose ends.
How many units should I plan for a soft-touch poly mailer bulk order?
Start with forecasted demand, then add a reorder buffer so you do not pay rush freight for a preventable gap. If the mailers support a launch or seasonal drop, include extra units for spikes, misprints, and sample losses. Ask for pricing at several quantity tiers so you can see the real break point before you commit.
What size should I choose for a soft-touch poly mailer bulk order?
Measure the packed item, not the product alone. Inserts, folded apparel, and bundles change the finished size fast. Leave enough room for easy insertion, but not so much slack that the contents slide around. Sample fit tests are worth the time, especially if you are also adding labels or return information.
Does the soft-touch finish affect print quality or durability?
Yes, it can. The finish changes how ink sits, so dark solids, fine lines, and full-bleed art should be checked on a sample before production. Durability depends more on film gauge and handling than the finish alone. If the design is heavy or detailed, ask whether a white underlay or thicker film is needed.
How long does a soft-touch mailer order usually take?
Timeline depends on proof approval, sample sign-off, production capacity, and freight method. The slowdowns usually come from artwork changes, unclear specs, or late shipping instructions. Build more buffer into full custom runs than repeat orders, especially if tooling or carton counts need to be refreshed.
What should I prepare before requesting a quote for soft-touch mailers?
Have dimensions, quantity, thickness target, finish preference, print colors, and destination ready. Include artwork files, logo placement notes, and any zones that must stay clear for labels or barcodes. Share your target delivery window so the supplier can quote the right production and freight path the first time.
If you want the cleanest outcome, treat book soft touch poly mailers bulk order planning like a purchasing exercise, not a design exercise. Lock the spec, confirm the sample, compare landed cost, and then place the order with enough time for production, freight, and one calm reorder instead of two rushed ones.


