Bucket Hats Sample Approval Checklist for Bulk Orders
The bucket hats Sample Approval Checklist is where a concept becomes a production decision. A mockup can show the idea, but only a physical sample tells you whether the hat fits, holds shape, and survives decoration and packing without losing the intended look.
Bucket hats are simple only until the details are on the table. Crown depth can shift the silhouette, brim balance can tilt the whole profile, and logo placement can look correct on artwork while sitting wrong on the finished hat. The sample is the point where those issues become visible and still affordable to fix.
If it only looks good flat on a table, it is not approved. It is just resting.
What a Bucket Hats Sample Approval Checklist Actually Catches
Most failures hide in the details buyers do not see in a product image. A bucket hat can look balanced in a render and still sit awkwardly once the crown is on a real head. A checklist forces the review beyond "looks fine" and into measurable checks: crown height, brim width, seam symmetry, logo placement, and how the hat recovers after folding.
The practical value is straightforward. If the crown is too shallow, the hat loses shape and rides high. If the brim is too stiff, it can feel overbuilt. If the brim is too soft, it collapses and reads cheap. On six-panel construction, one twisted seam can make the entire hat feel off-center. The same applies to embroidery tension: a dense logo may look sharp on screen but create rippling in cotton twill or washed canvas.
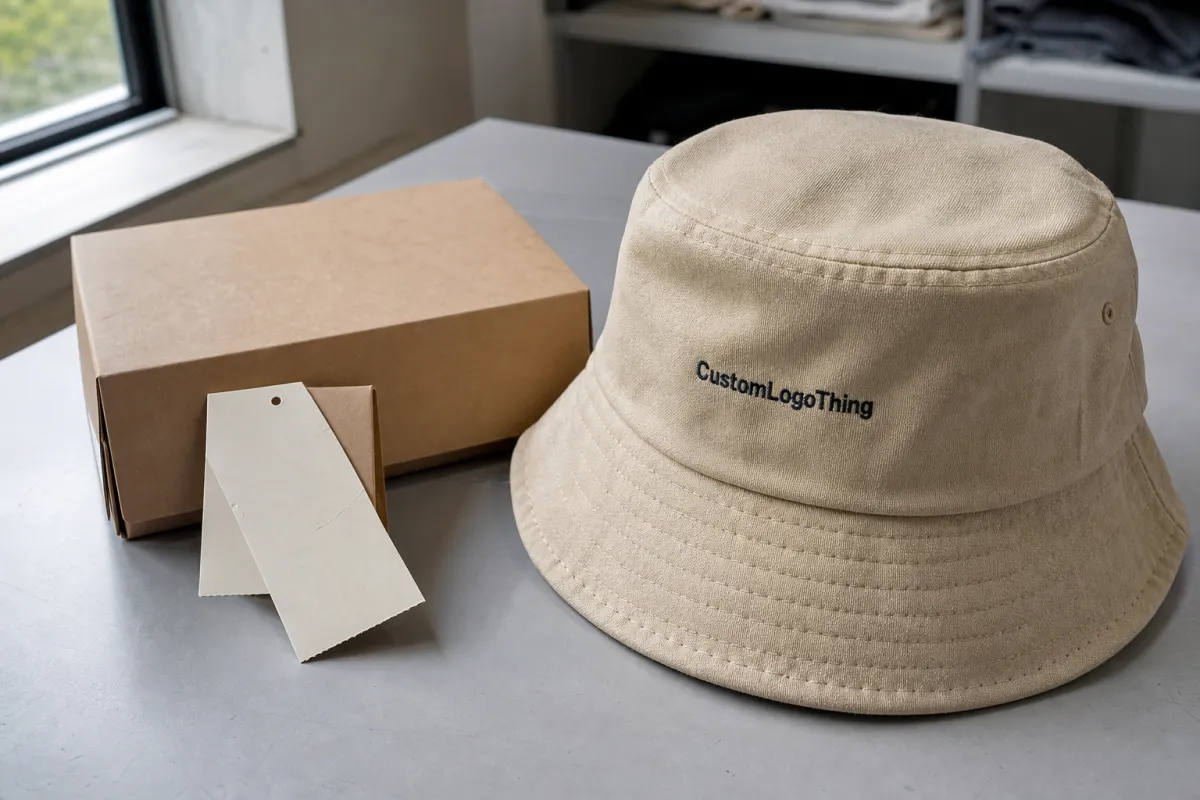
Packaging deserves the same attention. A hat that looks clean in a sample photo can arrive creased if it is folded too tightly, packed with the wrong insert, or boxed in a way that crushes the brim. For transit and compression testing, ISTA is a useful benchmark. If the order includes paper hangtags, inserts, or carton cards, verified sourcing standards like FSC matter as well.
The checklist matters because it catches design problems, production problems, and packing problems before they become bulk inventory.
Sample Approval Process and Timeline
A clean sample process starts with a complete spec. The factory needs crown height, brim width, panel count, closure type, fabric, decoration method, label positions, and packaging instructions. Vague requests slow everything down. "Make it like the reference, but better" is not direction.
Typical sampling follows a predictable path: first sample, buyer review, revision notes, revised sample, and final pre-production sample. Bulk production should start only after that final approval. Timing depends on complexity. A straightforward embroidered sample using available fabric can often move in 5-10 business days. A more complex build with custom fabric, special dye work, woven patches, or structural changes usually takes 10-20 business days before the sample is ready to sign off.
Several things extend the timeline:
- Fabric sourcing, especially for custom-dyed cotton, washed twill, nylon, or performance blends.
- Decoration changes, such as switching from embroidery to patch work or print.
- Trim delays, including labels, closures, sweatbands, binding, and custom tape.
- Pattern edits, especially changes to crown depth, brim angle, or panel count.
Sample speed and bulk speed are not the same thing. A fast sample may simply mean the factory had the right materials on hand. A slow sample may reflect sourcing, not weak production capacity. Buyers should ask what changed, what is still pending, and what exactly qualifies as approval. That avoids the common trap where a photo is treated as sign-off before the structure has been checked in hand.
If the sample depends on a specific fabric lot or trim lot, confirm whether the bulk order will use the same materials or an approved equivalent. Dye lots, stitch density, and finishing behavior can shift even when the spec looks unchanged on paper.
Fit, Fabric, Stitching, and Decoration Checks
This is the core of the bucket Hats Sample Approval Checklist. Fit comes first. Measure the head circumference and compare it to the spec. Adult bucket hats commonly sit around 58-60 cm, though the market, target customer, and intended use can push that smaller or larger. Crown depth matters just as much. Too tall, and the hat can feel boxy. Too shallow, and it loses the relaxed profile that makes the style work.
Brim review should be slow and practical. Measure width at several points. Check whether the brim hangs evenly or twists toward one side. A brim that looks symmetrical on a table can behave differently after the fabric relaxes. Cotton twill and canvas usually hold shape well. Washed cotton has a softer hand and a less rigid edge. Nylon is lighter and more casual, but shine level and surface finish need control or the hat can look overly synthetic. Performance blends are useful for quick-dry or outdoor use, though the tradeoff is often a less natural feel.
Fabric weight is worth checking, not guessing. Many buyers work in the range of 180-260 gsm for cotton twill and 200-320 gsm for heavier canvas styles. Lighter fabrics can fold more easily, but they also wrinkle faster and may lose structure unless the brim has reinforcement. That is fine if the product brief calls for softness. It is a problem if the brand expects a firmer silhouette.
Decoration deserves separate scrutiny. Embroidery should be dense enough that the base fabric does not show through, but not so heavy that it pulls the panel into waves. Woven patches need clean edges and stable stitching. Prints should match the approved artwork at normal viewing distance, not just under macro close-up. If the logo placement is meant to sit 20 mm above the brim seam, do not accept a casual drift because the sample is "close enough."
Check all visible labels too. Main label, care label, size label, and country-of-origin information need to match the approved spec. Missing or incorrect labeling is one of the easiest ways to create customs delays or retail problems later. It is also one of the easiest items to overlook when everyone is focused on the front logo.
Finally, wear the sample for a few minutes. Turn your head. Bend slightly. Look in a mirror under natural light, not just studio light. If the brim digs in, the crown collapses, or the balance feels off, the issue will not disappear in bulk. Comfort failures are usually obvious once the hat is worn, and they are costly because they show up after purchase, not before.
Cost, Pricing, MOQ, and Quote Traps
A useful quote separates the sample fee, bulk unit cost, decoration setup, packaging, shipping, and revision charges. If those items are blended into one number, the comparison is weak. You may be looking at a cheap headline price that becomes expensive after the first revision or packaging change.
MOQ changes the economics quickly. A one-piece sample is always expensive relative to bulk because all the setup cost sits on a single unit. At moderate volume, a basic custom bucket hat often lands around $3.50-$6.50 per unit. Smaller runs or more complex builds commonly move into the $7-$12 range. Add premium embroidery, custom sweatbands, woven labels, special packing, or a more demanding fabric, and the figure rises again.
Common quote traps are predictable:
- Setup fees for embroidery, patch work, or special trim that were not obvious at the start.
- Color charges tied to print or stitch changes.
- Revision fees that appear after the first correction.
- Packaging costs for inserts, tissue, polybags, or branded cartons.
- Shipping exclusions that make the quote look better than it is.
Here is a simple comparison that helps separate real value from fake savings.
| Sample option | Typical fee | Typical turnaround | Best for | Main risk |
|---|---|---|---|---|
| Basic embroidered sample | $25-$60 | 5-10 business days | Simple logo placement checks | May not reveal structure issues |
| Patch or woven label sample | $35-$85 | 7-12 business days | Decoration and edge finish review | Texture can shift in bulk |
| Revised pre-production sample | $50-$120 | 10-20 business days | Final approval before mass production | Takes longer, but lowers bulk risk |
If one supplier appears 15% cheaper but charges separately for every correction, carton change, and pack adjustment, the comparison is not real. Compare the same spec, the same fabric, the same decoration method, and the same approval conditions. Anything less is noise.
Step-by-Step Approval Workflow for Buyers
The best approval process is disciplined, not dramatic. Start with one spec sheet, one reference image set, and one final decision-maker. If three people are sending conflicting notes, the factory will follow the clearest instruction they can understand, not the one buried three emails deep.
- Verify measurements. Check crown height, brim width, head circumference, and tolerances against the approved spec.
- Review structure. Look at panel alignment, seam finish, brim balance, sweatband placement, and how the hat holds shape.
- Inspect decoration. Confirm artwork size, placement, stitch density, color match, patch finish, or print clarity.
- Check labeling. Main label, care label, size label, and origin details should all match the approved artwork and content.
- Review packaging. Confirm folding method, carton count, polybag use, and any inserts or hangtags.
- Document revisions. Use clear photos and exact instructions so there is no guessing on the next sample.
Feedback needs to be actionable. "Make it better" helps no one. "Shift the logo 8 mm left, reduce embroidery density on the first letter, and raise crown depth by 5 mm" gives production a path forward. Specificity saves time, reduces misunderstanding, and makes approval traceable.
Keep version control tight. The approved sample, the final spec sheet, and the approved packing note should live together. A surprising number of production errors come from one old file hanging around after newer ones were already sent. The easiest way to avoid that mess is to keep one clean approval packet and retire the rest.
Common Mistakes That Blow Up Hat Approvals
The first mistake is approving from photos only. Photos are useful for art placement, but they cannot tell you how stiff the brim feels, whether the sweatband scratches, or whether the hat sits level on an actual head. A bucket hat can photograph well and still wear badly.
The second mistake is vague feedback. If the hat looks off, say why. Is the logo too large, too low, too shiny, or too dense? "Off" is not production language. It leaves too much room for interpretation.
The third mistake is skipping wear testing. A few minutes on a head will reveal more than staring at a table. Look for balance, pressure points, and how the brim behaves when the wearer moves. If the shape collapses or the fit feels awkward, the issue is real.
The fourth mistake is rushing the sign-off because the team is tired of revisions. That is how close-enough samples become full inventory. A small deviation in the sample becomes a large deviation in 2,000 or 5,000 units. Math does not soften that outcome.
Approve the sample because it matches the spec, not because the project feels overdue.
Packaging mistakes can be just as damaging as fit mistakes. If hats are folded too aggressively, stacked too high, or packed in cartons that compress the brim, the order can arrive warped even if the sample passed a visual check. For programs that travel a long distance or pass through rough handling, carton compression and fold method should be tested before production is released.
Expert Next Steps Before You Release Production
Before bulk production starts, build a final approval packet. Include approved sample photos, exact measurements, Pantone references, artwork files, packaging notes, and tolerance limits. If the vendor has to search through scattered emails, you have already created a risk you do not need.
Set tolerances in writing. A common approach is size within 5 mm, logo placement within 3 mm, and color within an agreed range under daylight. Those numbers do two things. They give the factory a target, and they protect you when someone later claims the bulk is "basically the same." Basically is not a specification.
Confirm the commercial details before cutting starts:
- Bulk timeline from final sample approval to shipment.
- Carton spec and pack count per box.
- Rework terms if the first bulk output misses the approved standard.
- Approval language so review notes are not mistaken for final sign-off.
If the order is high value or the design is sensitive, a small pilot batch can be smart. It catches problems with color drift, stitching consistency, and packing before the full run is locked. That kind of discipline protects margin better than almost any other step.
Use the bucket hats sample approval checklist one last time before releasing production: fit, fabric, stitching, decoration, labels, packaging, and written sign-off. That sequence keeps the order grounded in evidence rather than optimism, and evidence is what keeps bulk production from drifting away from the sample you actually wanted.
How long does bucket hat sample approval usually take?
Simple samples can move in about 5-10 business days. New fabrics, revised patterns, or special trims usually take longer, especially if the factory needs to source materials before sewing a revised version.
What should I check on a bucket hat sample before approving it?
Check fit, crown depth, brim width, seam symmetry, logo placement, label accuracy, and packaging. Wear the hat for a few minutes as well; many shape and comfort issues only show up once it is on a head.
Does approving the sample lock in the final price?
Only the approved spec is locked. Changes to fabric, decoration, labels, packing, or revisions can still affect the quote. Ask for a written breakdown so the sample fee and bulk cost stay separate.
Can I approve bucket hat samples from photos only?
Photos help with artwork placement and quick screening, but they do not show structure, stiffness, or fit reliably. Use photos for reference, then confirm with a physical sample before bulk approval.
What happens if the sample fails the checklist?
Send precise revision notes and marked-up photos so the factory knows what to change. Avoid partial approval unless the remaining issues are minor, documented, and genuinely acceptable for the final product.


