The candle embroidered beanies Digital Proof Checklist matters because a beanie can look balanced in a mockup and still fail once thread meets stretch knit. Flat artwork does not show how a cuff pulls the logo upward, how dense stitching changes the hand feel, or how a small shift in placement changes the way the hat reads on a person. Those are not cosmetic details. They decide whether an order ships cleanly or comes back with corrections, extra fees, and a delayed delivery window.
Buyers often focus on the logo itself and miss the surface beneath it. Knit beanies move. Acrylic behaves differently from wool blends. A ribbed cuff can swallow fine detail, while a looser jersey knit can distort under heavy stitch coverage. A proof has to account for those physical limits, not just the artwork on screen. If the file looks tidy but the production notes are vague, the risk is still high.
That is why a proof should function like a production control document. It should answer what is being stitched, where it sits, how large it is, which thread references are being used, and whether the order details still match the quote. Anything less leaves too much room for interpretation.
Why a digital proof catches expensive stitch mistakes
Most embroidery mistakes on beanies are subtle. They are not the kind that jump off the screen. They show up as a logo that sits 3 mm too high, a thread color that reads colder than the brand guide, or lettering that fills in because the stroke was too thin to stitch cleanly. Those errors are easy to miss in review and expensive to fix after production starts.
The proof is the first place to catch those problems. Placement is the most obvious. A design centered on a flat artboard may land off balance on a cuffed beanie, because the wearer sees the logo in relation to the brim, not the file edges. Scale is close behind. A 2.5-inch mark might sound small, but on a compact front panel it can crowd the seam allowance or compress fine detail beyond legibility. Color is the last trap. Thread and knit surfaces do not reflect light the way printed ink does, so screen color is only a reference.
Experienced buyers read proofs for failure points, not just appearance. Does the logo still make sense if the beanie stretches across a head? Will the stitch direction support the shape, or fight it? Is the artwork simplified enough for embroidery, or did someone try to force print-level detail into yarn? Those questions catch problems before a sample run turns into a remake.
- Small placements magnify a 1-2 mm error into a visible shift.
- Thread color often looks warmer, duller, or brighter than the digital file.
- Dense fills can stiffen soft knit and pull the fabric into a ripple.
A proof is not decoration. It is the last low-cost chance to stop a costly stitch mistake.
How the proofing process works from file upload to approval
The process is usually simple on paper. The buyer sends artwork, confirms the hat style, and receives a digital proof showing size, placement, and decoration details. Then the buyer reviews the file, requests any changes, and approves it for production. The simplicity ends there, because the quality of the input decides how many revisions are needed.
Vector artwork is the safest starting point. AI, EPS, and PDF files preserve edges better than low-resolution images and make it easier to convert the design into stitches. A supplier can work from a JPG if needed, but the proof will often reveal weak edges, blurry text, or shapes that need redrawing before digitizing. That adds time. It also increases the chance that the approved proof no longer looks like the original concept.
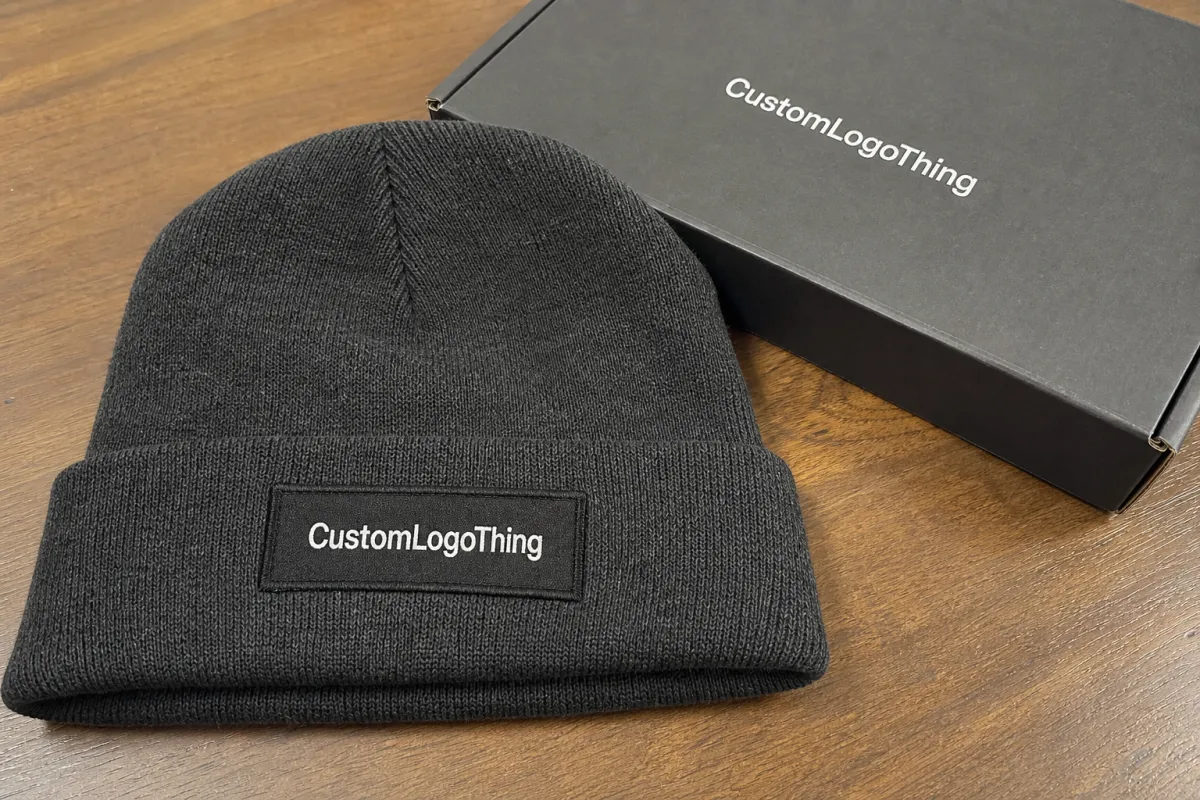
A good proof should show more than a thumbnail mockup. It should show the beanie style, embroidery location, approximate dimensions, thread or yarn callouts, and any special notes tied to packing or labeling. If the supplier uses multiple embroidery methods or hat bodies, the proof should identify which version is being approved. A generic template is not enough.
- Submit the artwork in vector format when possible.
- Confirm the exact beanie style such as cuffed, slouchy, pom, or recycled knit.
- Review the proof for placement, size, color references, and stitch direction.
- Send one consolidated response so comments do not conflict.
- Approve only after the proof matches the quote, quantity, and ship plan.
The fastest approvals usually come from clean files, clear instructions, and one person responsible for sign-off. When three departments send separate edits, the order slows. That is not production friction; it is process friction. The supplier can only build from the latest approved version.
Artwork, yarn, and placement specs that drive approval
Artwork quality affects everything downstream. Strong logos with bold shapes, thick strokes, and simple lettering usually translate well into embroidery. Fine serif type, hairline rules, and layered gradients usually do not. Embroidery needs structure. If the design depends on small internal gaps or delicate curves, the digitized version can close up, wobble, or lose definition once it is stitched into a textured knit.
Placement is equally important. A cuffed beanie gives one visual field; a full-coverage knit gives another. A logo placed too close to the seam may distort as the fabric flexes. One placed too high can look like it is floating. The most natural-looking proofs often sit slightly lower than a strict geometric center, because the human eye reads the design on a worn hat, not on a flat template. That distinction matters more than people expect.
Material choice changes the proof too. Acrylic is common because it is affordable and stable, but it can show puckering if the stitch density is too high. Wool blends often feel better and hold shape well, yet they can behave differently under tension. Recycled yarns may have slightly more texture variation, which can shift how contrast reads. Heathered knit surfaces create visual noise, so fine lines that might work on a plain body can disappear here.
Thread behavior is another piece buyers underestimate. Satin stitches work well for letters and smooth curves, but they have limits. If the shape is too narrow, the stitch may not hold cleanly. Fill stitches create more coverage, yet they add weight and can raise the logo off the surface. The proof should show whether the design is being simplified to suit the material rather than forced into an idealized version.
- Artwork type: vector files reduce redraw risk.
- Text size: tiny lettering often needs enlargement or removal.
- Coverage: more stitches usually mean more stiffness and more labor.
- Backing: the stabilizer choice affects shape retention on soft knit.
- Reference point: cuff, body, or front panel should be identified in writing.
If the brand color must be exact, ask how the supplier is matching it. Pantone references are useful, but embroidery usually relies on the closest available thread or yarn match, not a literal ink conversion. That means a dark red can drift maroon, a neutral gray can skew blue, and a bright tone may look slightly muted once stitched. A proof cannot eliminate that risk; it can only make it visible before approval.
Candle embroidered beanies digital proof checklist: what to verify
A practical candle Embroidered Beanies Digital Proof Checklist should be short enough to use under deadline and specific enough to catch the errors that create rework. The order below reflects what tends to cause the most expensive problems first: wording, placement, size, color, and operational details. That sequence is not glamorous, but it works.
- Spelling and marks - Check every word, punctuation mark, trademark, and copyright symbol.
- Logo shape and spacing - Compare the proof to the approved brand file, not memory.
- Placement - Confirm distance from seams, cuff edge, and centerline.
- Size - Verify the width and height against the actual hat style, not a generic mockup.
- Color references - Confirm whether the supplier is using Pantone, a closest-match thread chart, or a limited palette.
- Quantity and size split - Check unit counts, colorways, and any mixed-size runs.
- Packaging notes - Reconfirm bagging, inserts, hang tags, barcodes, and carton counts.
- Timeline - Make sure approval still supports the requested ship date.
Do not approve a proof because it feels close enough. Close enough becomes expensive once production begins. If the quote called for 500 black cuffed beanies with a single front emblem, the proof should say that plainly. If the job includes a woven label, a second embroidery location, or special retail packaging, those elements need to appear in the file. Missing operational details can delay an order even when the logo itself is correct.
A useful internal habit is to label every item on the proof as must fix, acceptable with note, or approved as shown. That keeps feedback specific. A vague comment like "make it a little bigger" creates interpretation risk. A specific note like "increase logo width from 2.25 inches to 2.5 inches and keep the center 1 inch above the cuff seam" is usable.
Pricing, MOQ, and quote details that change unit cost
Pricing for embroidered beanies is rarely flat. The logo size, stitch count, thread colors, and digitizing work all affect the final number. Order quantity matters just as much. Setup costs spread thin across a larger run, but they weigh heavily on a smaller one. That is why MOQ changes the economics so quickly.
For rough planning, blank acrylic beanies often fall around $3.50-$7.00 per piece at moderate volumes. Decorated units commonly land near $6.50-$12.00 or more, depending on stitch coverage, thread count, and decoration complexity. Digitizing or setup may add $25-$75 per logo. Rush production, special labeling, and retail packaging can push the number higher. These are typical ranges, not promises, and they move with order size and seasonality.
| Proof or production option | Best for | Typical cost impact | What to verify |
|---|---|---|---|
| Digital proof only | Standard orders with clean artwork | Lowest upfront cost | Placement, size, color notes, quantity |
| Digital proof + revision round | Brand-led orders that need closer visual control | Moderate if revisions are included | How many revision rounds are included and who approves them |
| Physical sample or strike-off | Complex logos or brand-critical color matching | Higher cost and longer lead time | Sample fee, shipping, and whether the charge is credited back |
Read the quote line by line. Setup. Digitizing. Sample charge. Rush fee. Shipping method. Revision policy. Packaging add-ons. If any line is vague, ask for clarification before approval. A cleaner proof process does more than protect quality. It reduces duplicate freight, repeat digitizing, and avoidable rework. Those costs are easy to ignore at the start and painful to absorb later.
Lead time and turnaround: what affects the production schedule
Proof turnaround and production turnaround are separate clocks. A supplier can send a proof quickly and still miss the ship date if the approval loop drags on or if the order needs a pre-production sample. Buyers often ask how fast the first proof arrives, then stop there. That misses the larger schedule.
Five variables usually drive lead time: revision rounds, stock availability, order size, decoration complexity, and whether the job needs a sample or strike-off. Seasonality matters too. Holiday and promotional periods compress factory capacity. A five-day window in quiet months can stretch to two weeks or more once production lines are booked. Business days and calendar days also need to be separated clearly. "10 days" means very different things depending on transit method, weekends, and whether the supplier is counting from proof approval or from order placement.
Packaging can add another layer. If the order includes insert cards, hang tags, barcode labels, or custom cartons, those components need to align with the embroidery schedule. That is also where transit testing becomes useful. ISTA methods help frame how goods hold up during movement, vibration, and compression. If print materials or cartons are expected to carry responsible sourcing claims, check FSC chain-of-custody requirements before approval. Those checks are small compared with the cost of reprinting a run that cannot be documented correctly.
- Assign one approver so comments do not fragment across departments.
- Consolidate edits into one reply instead of scattered messages.
- Resolve color questions early before the final proof is issued.
- Confirm stock on the exact beanie style, not a similar silhouette.
The cleanest timeline is usually the one with the fewest surprises. That sounds plain because it is.
Common proofing mistakes that cause rework or delays
The most common error is approving a proof before the team is actually aligned. One person wants speed, another wants a smaller logo, and a third is still asking about packaging. The proof gets signed anyway. Once production starts, that half-finished approval turns into a delay, because the supplier has already built around a version that was never truly final.
Color assumptions cause trouble too. Screen color is not thread color. Thread sits on textured material, catches light differently, and can read warmer, cooler, or duller than expected. Heather knit, dark bases, and metallic thread make the mismatch more obvious. If the shade matters, ask for written thread confirmation or request a physical sample. A monitor cannot verify that for you.
Artwork complexity is another repeat offender. Thin outlines, tiny icons, and low-contrast type often look good in a mockup and then collapse in stitching. The embroidery head needs enough room to form the shape cleanly. If the design is too detailed for the space, the result can look crowded or distorted even if the machine runs correctly. That is a design limitation, not just a machine problem.
Administrative misses are easier to ignore and just as damaging. Quantity splits, size counts, packing instructions, and carton labels all need to be correct. A proof can be visually right and still fail on the count sheet. That is why the candle embroidered beanies Digital Proof Checklist has to include both the artwork and the paperwork.
- Unresolved comments left open at approval time.
- Color guesses made from screen images instead of thread references.
- Artwork too small to stitch cleanly on a knit surface.
- Packaging details missed until the carton stage.
Next steps before you approve the order
Before signing off, compare the proof against the order spec line by line. Check the artwork, placement, beanie style, quantity, color references, and packing notes together. If one detail feels off, request a revision before the file is locked. A short delay at proof stage is cheaper than a correction after production.
It also helps to keep the approved proof, quote, and revision notes in one place. Reorders move faster when the same reference set is used again. Without that record, teams end up debating the same logo position, thread choice, and packaging details months later. For orders with multiple decoration steps, that paper trail matters even more.
For buyers who need embroidery, digitizing, and finishing to stay under one production path, the supplier’s process matters as much as the mockup itself. The proof should tell you what is being made and what still carries risk. That honesty is more valuable than a polished image that hides the weak spots.
Run the candle embroidered Beanies Digital Proof Checklist one final time, then approve only when placement, size, color, quantity, packaging, and timeline all line up with the plan.
Frequently asked questions
What should I check first on a candle embroidered beanies digital proof?
Start with spelling, logo shape, and placement. Those errors are the most expensive to fix after production begins. Then compare the proof with the brand file for color references, size, and any legal marks. If anything is unclear, request a revision before approval so the supplier is not guessing.
How many proof revisions are normal before approval?
One or two rounds are common if the artwork is clean and the instructions are specific. More revisions usually mean the design needs simplification, the measurements are unclear, or the decision-makers are not aligned. A single consolidated response keeps the order moving.
Does a digital proof show the exact thread color on beanies?
Usually not. It shows a digital approximation or a labeled thread reference, not the stitched thread itself. Ask whether the supplier uses Pantone matching, closest-thread matching, or a limited thread library. For brand-critical color, request a physical sample or written color confirmation.
What usually changes the price on embroidered beanies?
Complex logos, more stitch coverage, and multiple thread colors increase labor and machine time. Lower order quantities raise unit cost because setup and digitizing are spread across fewer pieces. Rush turnaround, extra revisions, and specialty packaging can also add to the quote.
How can I speed up turnaround without causing mistakes?
Send a clean vector file and one spec sheet with placement, color, and quantity notes. Assign one approver so feedback is not split across multiple people. Approve only after the proof matches the exact order; fast approval is not worth a costly remake.


