The pouch shapes the first approval impression before anyone touches the garment. A solid Zipper Pouches for Apparel sample approval checklist forces the team to check clarity, stiffness, gloss, fit, labeling, and closure performance before those small packaging details start changing how a buyer reads the sample.
That may sound like packaging people getting precious. It is not. A cloudy pouch can make a clean white tee look tired. A rigid bag can flatten a soft knit in the wrong places. A missing revision label can send a whole sample round back into doubt.
The garment may be correct. The approval package still tells the reviewer whether the supplier is organized.
What Zipper Pouches for Apparel Sample Approval Must Prove
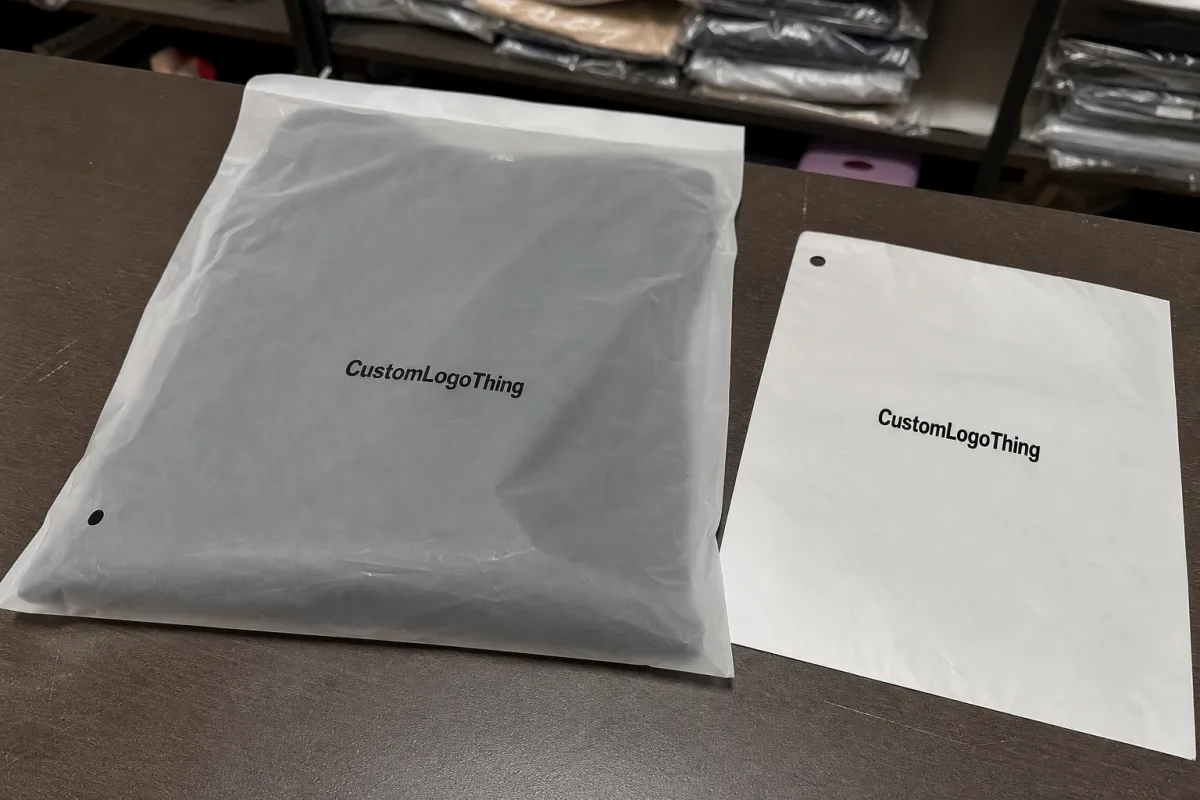
Zipper Pouches for Apparel sample approval are reusable, closable presentation bags used to protect prototypes while keeping them visible, sorted, and easy to reseal. They sit between a basic polybag and a finished retail pouch. Their job is simple: hold the folded garment, allow quick inspection, keep dust and handling marks away, and carry the right identifying information.
The buyer-side use case is less simple. Design, sourcing, merchandising, and QA may all handle the same sample set. One person checks silhouette. Another confirms trim color. Someone else looks for seam puckering, shade consistency, graphic placement, or care label position. If five sizes and four colorways are moving through the same office, the pouch becomes part of the control system.
Here is the mistake: treating the pouch as a disposable wrapper after the garment has already done its job. For approval work, the pouch is part of the sample presentation. It needs to protect the product, yes, but it also needs to reduce friction during review.
- Visibility: the reviewer should see fabric color, fold quality, stitching, and trim placement without fighting haze or glare.
- Organization: style code, colorway, size, revision level, and date fields should be easy to find at a glance.
- Handling: the pouch should open and close repeatedly without tearing, stretching, or losing seal tension.
- Consistency: every round should use the same pack-out rules so one sample does not look more finished than another.
A practical checklist should prove that the packaging supports faster review, cleaner handling, and fewer resubmits. It should answer a blunt operational question: can this sample travel, sit on a desk, be opened, be repacked, and still look controlled?
How the Pouch Supports Review, Handling, and Sign-Off
The workflow is usually predictable. The garment is folded to the approved pack method, an insert card or spec card is added, the pouch is sealed, the revision is labeled, and the sample moves from the sample room or production team to the buyer’s desk. If the pack is right, the reviewer can start immediately. If the pack is sloppy, the first few minutes get wasted figuring out what is inside.
Clear panels help because apparel approval starts visually. A reviewer can inspect front panel placement on a hoodie, embroidery position on a cap, stripe alignment on a knit, or whether a contrast zipper is visually fighting the body fabric. They may still open the pouch, but they do not need to open every pouch just to identify it.
Resealability is the quiet advantage. A pressure zipper or slider zipper lets reviewers pull the sample, examine it, return it to the same pack, and keep the set tidy for the next person. That matters during line reviews, where samples move from a conference table to a showroom rack, then back into storage. A standard open-ended polybag often fails here because it wrinkles, stretches, or loses its adhesive strip after one or two openings.
Packaging callout: for apparel samples, the pouch does not need to look expensive. It needs to preserve review condition. If a garment cannot be removed and repacked cleanly three to five times, the pack is probably too fragile for approval use.
The pouch also works alongside other identification tools. Hang tags, size stickers, carton labels, barcode labels, and internal approval cards can all have a role. For example, a 10 x 13 inch pouch may hold a folded children’s sweatshirt with a 4 x 6 inch insert card, while a small label area near the zipper carries the style number and revision code.
Keep the system simple. The more places the same information is repeated, the more chances there are for mismatch. Nobody needs three conflicting revision codes on one sample. That is how approval meetings get weird.
A strong Zipper Pouches for Apparel sample approval checklist should follow the actual review path, not just the package drawing. Fold it. Seal it. Label it. Open it. Reseal it. Put it under showroom lighting. Pass it to another person and see if they know exactly what they are reviewing.
Material, Size, Zipper Style, and Print Specs That Matter
Material choice controls hand feel, clarity, protection level, and price. Common apparel sample pouches use PE, EVA, PVC-free clear films, or layered film structures. PE is widely used and cost-efficient, often around 80 to 150 microns for light to midweight garments. EVA usually feels softer and more flexible, which can help with premium knits or pieces that should not look sharply compressed. Layered films can improve clarity or puncture resistance, but they usually add cost.
Clarity matters more than many teams expect. A glossy film may look sharp in a sample photo but throw glare under LED showroom lighting. A frosted or matte finish can reduce glare, but it may soften color accuracy. If the garment uses subtle shades such as bone, oatmeal, sage, washed black, or pale blue, ask for a physical pouch sample and view it under the same lighting used for review.
Size planning should start with the folded garment, not the garment measurement chart. Measure the actual folded width, height, and thickness after the insert card is added. Then allow enough room for loading and resealing. For a folded tee measuring 9 x 11 inches, a 10 x 13 inch pouch may work. For a bulky fleece measuring 12 x 15 x 2 inches folded, a larger gusseted pouch may be needed.
Too tight creates creases. Too loose lets the sample slide around and arrive looking careless. Neither one is charming.
Zipper and Closure Checks
Do not ignore the zipper. Weak closures create dust exposure, rebagging, and sample returns that nobody budgeted for. Slider zippers are easier for frequent opening, especially with bulkier garments, but they add cost and can snag if poorly specified. Press-to-close zippers cost less and work well for lighter items, as long as the seal tracks line up cleanly and do not require excessive force.
For repeated handling, test the closure through at least 10 open-close cycles. Listen and feel. A good closure gives a clean tactile response, not a mushy half-seal. If the pouch has a hang hole or reinforced header, check that the zipper does not sit so close to the top that fingers struggle to grip it.
Print, Labeling, and Special Conditions
Print should support approval, not compete with the garment. A one-color logo, a white writable block, and small fields for style, size, colorway, and revision often do more good than a large all-over print. If custom printing is used, confirm ink adhesion with rub testing, especially on slick films. Packaging teams that need formal testing language may refer to ASTM methods for film and adhesion performance; the standards catalog at ASTM International is a useful reference point.
Special concerns depend on the apparel. Static buildup can be irritating with lightweight synthetics. Moisture resistance matters for samples moving through humid storage or long freight lanes. Recycled content may support internal sourcing goals, although higher recycled content can change clarity, stiffness, and availability. For paper insert cards or FSC-marked board components, the Forest Stewardship Council is the reference buyers usually recognize.
Cost, Pricing, MOQ, and Unit Cost for Sample Runs
Pricing is driven by five main items: material thickness, pouch dimensions, zipper style, printing complexity, and whether the order uses stock sizing or custom tooling. A plain stock PE zipper pouch may be a low-cost choice for early samples. A custom printed EVA pouch with slider zipper, reinforced header, and tight color matching will land higher.
For planning, simple stock clear pouches might run around $0.08 to $0.18 per unit in moderate quantities. Custom printed approval pouches often fall around $0.18 to $0.45 per unit for runs near 5,000 to 10,000 pieces, depending on size, print coverage, film gauge, and freight. Smaller runs can be much higher because proofing, setup, and press preparation are spread across fewer pieces. Very large or highly customized pouches can exceed those ranges.
MOQ is where buyers need discipline. Ordering 500 custom pieces may sound neat until the unit cost lands. Ordering 20,000 may drop the unit price, then leave shelves full of pouches if the logo, size system, or sample process changes. A balanced first order often covers one to two development seasons of expected sampling, plus a 5% to 10% buffer for damaged pouches, resubmits, and late sample additions.
| Option | Best Use | Typical Cost Range | Watchouts |
|---|---|---|---|
| Stock clear PE zipper pouch | Early development samples, internal QA, low-volume sorting | $0.08-$0.18 per unit | Limited branding; size may not match folded pack exactly |
| Custom printed press-to-close pouch | Buyer approval rounds, showroom sample sets, branded presentation | $0.18-$0.35 per unit | Artwork changes after proof can add cost and time |
| Slider zipper pouch | Repeated review cycles, bulkier garments, frequent opening | $0.28-$0.55 per unit | Hardware adds cost and should be tested for snagging |
| Special film or recycled-content pouch | Sustainability programs, premium samples, specific handling needs | $0.30-$0.70+ per unit | Clarity, stiffness, and availability can vary by film structure |
Freight deserves its own line in the quote. Pouches are light, but they take carton space, and air shipping a bulky low-value item can make a cheap pouch expensive fast. Ask for carton count, carton dimensions, gross weight, and pack density. If samples move by courier in small batches, even a half-inch reduction in pouch size can reduce dimensional weight across repeated shipments.
Read quotes carefully. Does the price include digital proofing? Physical samples? Plate or screen charges? Revision rounds? Carton labels? Testing? The commercial terms belong on the approval checklist because packaging that looks inexpensive at first can get ugly after two artwork revisions and a rushed shipment.
Production Steps and Lead Time From Proof to Shipment
The production path starts with a spec sheet. Confirm the inside usable dimensions, film thickness, material type, zipper style, print colors, artwork placement, label area, carton pack quantity, and tolerance. Tolerances matter. A pouch listed as 10 x 13 inches may have a seal area, zipper track, or header that reduces usable space, so ask whether the measurement is external or internal.
After specs come artwork and proofing. A clear digital proof should show logo placement, print size, revision fields, warning text if any, zipper direction, and the safe area around seals. If the pouch will carry a writable panel, confirm what pen type works on that surface. Some glossy films reject ordinary ink, which turns a tidy label plan into a smudged mess.
Lead time depends on customization. Stock pouches can sometimes ship within a few business days if inventory is available. Custom printed pouches often need 10 to 20 business days after proof approval for production, inspection, and packing. Special film, custom zipper hardware, or strict color matching can push longer. These ranges are not guarantees; they depend on supplier capacity, material availability, and approval speed.
Most delays are preventable. Missing folded dimensions, low-resolution logo files, unclear Pantone references, late copy changes, and internal sign-off bottlenecks all slow the job. The annoying part is that the pouch order may get blamed, even though the actual delay started with incomplete inputs. Build a buffer before sales meetings, showroom appointments, and line reviews so the pouch arrives with the garments, not after them.
If the samples will be shipped through parcel or small carton networks, consider basic transit performance. Drop, compression, and vibration exposure can affect how sample packs arrive. For formal distribution testing, ISTA publishes widely used package testing procedures. Not every sample pouch needs lab testing, but the thinking is useful: pack the pouch the way it will actually travel, then judge the result.
Step-by-Step Zipper Pouches for Apparel Sample Approval Checklist
A useful checklist starts with the garment, not the bag. Packaging cannot rescue a poor sample. Verify fit, size, color, seam quality, trim placement, print registration, embroidery density, care label position, and any detail the buyer is likely to question. If a sleeve rib is wrong or a snap color is off, the pouch should help identify that issue, not hide it.
- Confirm the sample identity. Match style code, size, colorway, season or line name if used, and revision level against the internal approval record.
- Check the fold method. Fold the garment exactly as the review team expects to receive it, with collars, sleeves, hoods, or trims positioned consistently.
- Measure the packed sample. Record folded width, height, and thickness with inserts included, then compare those measurements to the pouch’s usable space.
- Test the fit. The garment should slide in without force, seal without bulging, and stay positioned after light handling.
- Review visibility. Look through the pouch under office or showroom lighting and confirm color, silhouette, and key trim locations remain readable.
- Open and reseal. Cycle the zipper several times and make sure the track does not split, warp, or require awkward hand pressure.
- Verify labels and inserts. Style code, revision number, size, colorway, handling instructions, and approval notes should match exactly.
- Log the decision. Record who approved the sample, what pouch spec was used, and whether changes are needed before the next round.
Run that list on every size set and colorway, not only on the first sample that looks good. Colorways can behave differently inside the same pouch. A black fleece may show lint and static. A pale woven blouse may show every crease. A structured jacket may need more depth than the spec sheet suggests.
The physical repack test is usually the most revealing. If a reviewer cannot remove the garment, inspect it, and return it neatly within a minute or two, the pack is slowing the approval process. The goal is not ceremony. The goal is controlled speed.
Common Mistakes That Slow Sample Sign-Off
The most common packaging mistake is choosing a pouch that changes the way the garment reads. Too glossy, and the reviewer fights glare. Too cloudy, and color looks dull. Too stiff, and soft goods look flattened or overly compressed. A pouch should frame the sample, not distort it.
Poor sizing is next. A tight pouch wrinkles apparel and may bend collars, plackets, padded cups, or structured seams. An oversized pouch lets the sample shift during transit, which creates a messy first impression. For apparel sample approval, the best pouch usually has just enough room for the folded garment, one insert, and easy resealing.
Labeling errors can be worse than material errors. Incorrect revision codes, missing size markers, old artwork, or unclear style IDs create doubt. Once a reviewer wonders whether the sample is the latest version, the approval clock slows down. Even if the garment is correct, the team may wait for confirmation before signing off.
Skipping a physical test is another expensive shortcut. A drawing cannot tell you zipper feel. A spec sheet cannot show whether a frosted finish makes a sand-colored garment look gray. A quote cannot prove that the pouch repacks cleanly after three reviews. Ask for a plain mockup, a printed proof, or both before releasing a meaningful run.
Planning mistakes add cost too. Underestimated MOQ, forgotten lead time, late copy changes, and artwork revisions after proof approval can trigger fees or missed dates. If sustainability claims are being discussed, be careful with wording and documentation. The U.S. Environmental Protection Agency offers general packaging and waste resources at EPA.gov, and claims should be checked against applicable rules and internal legal guidance.
A disciplined zipper pouches for apparel Sample Approval Checklist catches these mistakes while they are still cheap to fix. Once production is complete and the samples are in transit, even a small label error can turn into a full rework exercise.
Expert Checks Before You Place the Order
Before ordering, run a pre-order audit. Confirm sample dimensions, fold method, insert size, label rules, pouch quantity, colorway count, size count, and the number of approval rounds expected. If one style has six sizes and four colorways, and each set needs design, sourcing, merchandising, and QA copies, the pouch count rises quickly. Add a buffer, but do not buy a mountain of custom inventory before the system is proven.
Request both a plain mockup and a printed proof if the order justifies it. The plain mockup confirms size, film feel, closure, and pack-out. The printed proof confirms brand mark, label fields, ink opacity, and readability. That two-step review often saves money because it separates mechanical fit problems from artwork problems.
Standardize a simple approval worksheet. It does not need to be complicated. Track pouch size, material, gauge, zipper type, print colors, label fields, quote number, MOQ, unit cost, lead time, carton pack, approver, and final sign-off date. Save photos of the packed sample from the front, back, and sealed edge. Those images help the next round match the approved presentation without relying on memory.
A practical test is simple: compare two pouch specs, get one physical sample of each, pack the same garment both ways, review them under the same lighting, then record the winning settings. Keep that record with the garment approval file, not buried in an email thread. The next sample round will move faster because the team has a real reference.
The best checklist is not long for the sake of looking thorough. It is a repeatable control tool. It keeps the garment visible, the revision clear, the closure dependable, and the review process calm enough that people can focus on approving the product instead of sorting out the package.
FAQ
What size zipper pouch works best for apparel sample approval?
Choose a pouch that fits the folded garment with enough room for an insert card and easy resealing. Avoid oversized bags that let the sample slide around, and avoid tight bags that crease fabric or distort shape. Match the pouch size to the folded packing method, not only the garment size on the spec sheet.
Should apparel samples use clear or matte zipper pouches?
Use clear pouches when visual inspection matters most, especially for color, stitching, trim placement, and presentation. Choose matte or frosted options when glare makes review harder or when a softer presentation is preferred. Ask for a physical sample if the finish affects how the garment color reads under showroom lighting.
How do zipper pouch specs affect sample approval pricing?
Thicker film, custom printing, specialty zipper hardware, and tighter tolerances all raise unit cost. Small runs usually carry higher pricing per pouch because setup and proofing costs are spread across fewer pieces. Standard sizes and simpler artwork often give the best balance between approval quality and budget control.
What lead time should I expect for branded sample pouches?
Stock pouches can move quickly if inventory is available. Custom-branded runs usually need time for proofing, printing, inspection, and packing, often 10 to 20 business days after proof approval. Lead time can increase if artwork is incomplete, sizing changes late, or a revision requires rework.
What should I confirm before ordering zipper pouches for apparel samples?
Confirm garment dimensions, fold method, labeling rules, and whether the pouch will hold inserts or only the apparel. Verify the material, zipper style, print area, MOQ, quote inclusions, and lead time before approving the order. Keep the final record so the same zipper pouches for apparel Sample Approval Checklist setup can be repeated without confusion.


