If you are comparing event merch Custom Poly Mailer bags print method comparison options, start with this reality: the same logo can look premium, rushed, or flat-out bargain-bin depending on the print method, the film finish, and how much punishment the bag takes before anyone opens it. People judge event merch fast. At a booth. In a hotel lobby. On social media. No one is standing there admiring your production notes.
That is why the print decision matters more than most buyers expect. A clean two-color bag can look sharper than a noisy full-color design if the film, ink, and artwork all match the job. A beautiful design can also look cheap if the supplier ignores white ink, film thickness, or seam placement. Packaging design is not just about the artwork. It is about how the artwork survives on a moving, flexing piece of plastic.
event merch custom poly mailer bags print method comparison: what buyers miss
Most buyers look at price first and artwork second. That is backward. In a proper event merch Custom Poly Mailer bags print method comparison, the first question is how the bag will be handled after the event. Will it be handed out at registration and tossed into a tote? Shipped to attendees? Saved as part of retail packaging? Or opened on camera for an unboxing clip? The answer changes the right print method.
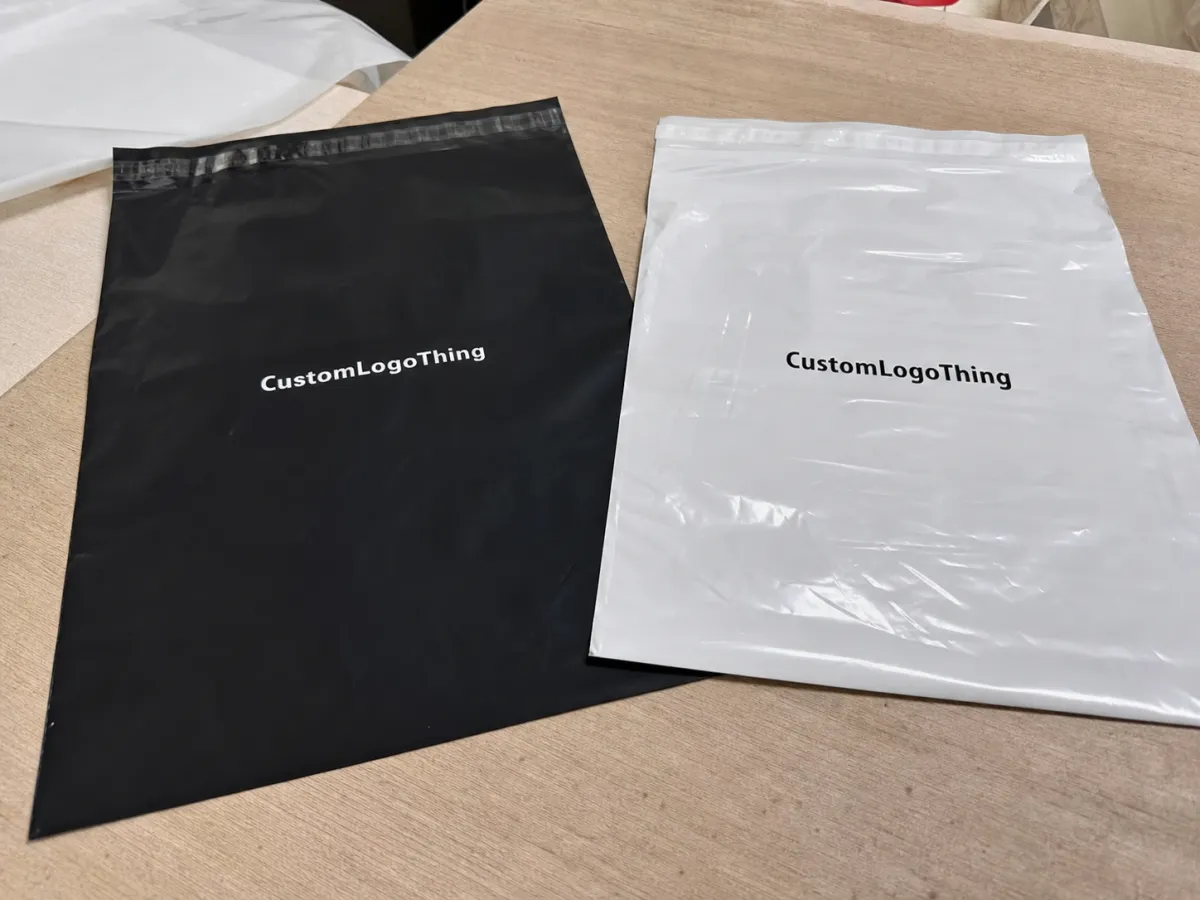
Color choice matters too. A black or tinted mailer can make bright brand colors pop, but only if the printer uses a strong white base layer or a process that handles opaque ink well. On translucent film, a pale logo can disappear. On glossy film, fine lines may look crisp from three feet away and messy at arm's length. Buyers often approve a flat PDF and then wonder why the finished bag feels softer. That is not a mystery. It is print physics.
A good mailer should not scream, "We saved five cents and hoped no one would notice." It should feel intentional the second someone touches it.
For event merch, the bag is part of the brand story. It carries the same weight as product packaging, and sometimes more, because it is the first thing people touch. That is why smart buyers compare design detail, bag color, order size, and the amount of handling the mailer will see before it reaches the customer.
Think in practical terms: simple logos, big type, strong contrast, and a finish that fits the brand. If the event is premium, a thicker film and cleaner print finish pay off. If the event is a fast giveaway, simplicity usually wins. Fancy artwork on a flimsy bag is just expensive disappointment.
How flexo, gravure, screen, and digital printing work
These methods all put ink on poly film, but they do it in very different ways. On flexible packaging, the process matters because plastic does not behave like paper. Unlike offset printing on cartons or inserts, a mailer film stretches, bends, and seals. The printer has to work with that movement, not pretend it is printing on a brochure.
Flexographic printing uses raised plates that transfer ink onto the film. It is common for long runs, simple logos, and repeatable spot-color work. Once the plates are made, the press can run quickly, which helps when the order volume gets serious. Flexo usually handles 1 to 4 spot colors well and gives solid results on brand-heavy mailers, especially when the artwork is bold and the line work is not overly fine.
Gravure printing uses engraved cylinders. It is the heavy hitter for large runs and rich ink coverage. The setup cost is higher, but the color depth and consistency can be excellent. If you need a smooth, saturated background or a more polished retail packaging feel across tens of thousands of bags, gravure can make sense. Not every supplier offers it, and not every event needs it. Sometimes people pay for a Ferrari to go get coffee.
Screen printing pushes ink through a mesh stencil. It is slower, but the ink layer is thick and opaque, which is useful on darker bags or when you need a strong white base. Screen works well for simple artwork, bold text, and small to mid-size quantities. It can also feel more tactile, which some brands like for package branding.
Digital printing sprays the image directly onto the film without plates. That makes it attractive for short runs, fast changes, or artwork that keeps shifting. It is the most flexible option for a creator drop or a test batch of Custom Poly Mailers. The tradeoff is that digital can cost more per unit at volume, and not every line, gradient, or white-ink request is a perfect fit. Still, for short runs, digital printing is often the cleanest path.
Here is the practical comparison buyers actually need:
- Flexo: best for stable artwork, medium to high quantities, and strong unit economics once plates are paid for.
- Gravure: best for very large runs and deep ink coverage, but the setup cost is hard to justify on small orders.
- Screen: best for opaque spot colors, white ink, and bold branding on darker film.
- Digital: best for short runs, quick changes, and low MOQs.
In a real event merch Custom Poly Mailer bags print method comparison, the winner depends less on theory and more on your quantity, artwork complexity, and how many bags you can reasonably store after the event.
Cost, MOQ, and unit price
Pricing is where buyers get fooled the fastest. A quote that looks cheap can hide plate costs, proof charges, freight, or a painful minimum order quantity. The quote that looks expensive may actually be the better deal once setup is spread across the run. That is why you need to compare the full landed cost, not just the press line.
The rough breakpoints usually look like this:
| Print method | Typical setup cost | Usual MOQ | Typical unit price range | Best fit |
|---|---|---|---|---|
| Digital | $0-$75 | 100-1,000 | $0.45-$1.20 | Short runs, art changes, test orders |
| Screen | $50-$150 per color | 500-2,000 | $0.30-$0.80 | Bold logos, opaque ink, darker films |
| Flexo | $80-$250 per color | 3,000-5,000 | $0.18-$0.45 | Simple branding, mid to high volume |
| Gravure | $500-$1,500+ per color | 20,000+ | $0.08-$0.22 | Large campaigns, premium coverage, volume pricing |
Those are working ranges, not gospel. Film thickness, bag size, number of ink colors, custom sizing, and whether the job needs a white underbase can push the price up or down. A 2.5 mil bag with one-color branding is a very different job from a 3 mil mailer with full-coverage art on both sides. And yes, extra colors cost money. Shocking concept, I know.
When you review a quote, ask what is included in the unit price, whether proofs are free, and what triggers a rerun. Ask if freight is separate. Ask if samples are stock or custom. Ask if the supplier is quoting from the exact dieline or just guessing from the artwork. Guessing is not a production plan.
A smart buyer also checks whether the MOQ matches the event risk. If the event is one weekend and the leftovers will sit in storage for a year, a lower MOQ can be worth the higher unit cost. If the bags will be used across multiple launches, a higher MOQ often pays back quickly.
Process and turnaround: from art file to finished bags
The production path is usually straightforward, but only if the artwork is clean. Most delays happen before the press starts, not during the run. That is why file prep matters so much in branded packaging and retail packaging work.
- Artwork review: the supplier checks the file format, logo quality, and print placement.
- Dieline confirmation: the bag size, seams, seal area, and safe zones are confirmed.
- Proofing: you review a digital proof or sample proof for color, copy, and layout.
- Approval: nothing should move forward until the proof is signed off.
- Printing and curing: ink is applied and allowed to set properly for the chosen method.
- Finishing and packing: bags are sealed, packed, and prepared for ship-out.
Turnaround times vary by method. Digital jobs can often move in 5-10 business days after approval if the file is ready and the schedule is open. Screen-printed runs are often 7-12 business days. Flexo jobs usually land in the 10-15 business day range once plates are made. Gravure tends to run longer, often 15-25 business days or more, because the setup is heavier and the run usually has to justify the prep.
Rush orders get delayed for boring reasons: low-resolution art, missing bleed, late copy changes, or a buyer who says "approved" but then sends a new logo at 4:57 p.m. The press is not the villain here. The file is.
Before production, ask for three checkpoints: dieline confirmation, bleed and safe-area review, and a final sign-off before the run starts. If the supplier also tests shipment strength, that is a plus. For transit validation, I like to see whether they can speak to an ISTA transit test or a similar packaging standard. That matters if the mailers are going through real shipping lanes, not just a handoff at a booth.
Choosing the right print method for each event merch use case
Different event jobs call for different tradeoffs. A small creator drop does not need the same setup as a national conference kit. That sounds obvious, but I keep seeing buyers shop every job like it is the same. It is not.
Small creator drops: Digital printing is usually the cleanest choice. You get low MOQ, faster approval, and the ability to test a design before you commit to a large run. If the artwork changes every release, digital saves you from paying for plates you will only use once.
Trade show giveaways: Flexo or screen printing usually makes more sense if the logo is simple and the order is medium-sized. You want bold visibility, decent unit cost, and a bag that looks good when someone carries it across the show floor. This is where simple one- or two-color branding often beats a fancy full-photo design.
Retail-style VIP kits: Gravure or high-quality flexo can be worth the spend if the kit needs a polished, premium feel. If the mailer is part of a larger package branding system with Custom Packaging Products or even custom printed boxes, the finish should match the rest of the set. Mismatched packaging design makes the whole kit feel cheaper than it is.
High-volume registration packs: Flexo is usually the practical answer. You get good consistency, acceptable unit cost, and enough flexibility to handle sponsor logos or event marks without turning the job into a design circus.
If the bag is going to be opened and discarded quickly, do not overpay for a print method that exists mostly to impress other packaging people. If the bag is part of the gift itself, the print finish deserves more budget. That is the difference between a utility bag and product packaging that carries brand memory.
In a real event merch Custom Poly Mailer Bags print method comparison, the right method is the one that fits the audience, not the one that sounds the fanciest in a sales email.
Common mistakes that make poly mailers look cheap
Cheap-looking mailers usually fail for predictable reasons. None of them are mysterious, which is annoying because it means they were avoidable.
- Using low-resolution artwork: a logo that looks fine on screen can turn fuzzy once it is stretched across a flexible bag.
- Printing tiny text: thin type and hairline rules disappear quickly on film, especially on glossy surfaces.
- Ignoring color behavior: a bright color on a translucent or tinted bag will not behave like the same color on white stock.
- Forgetting seam zones: text or icons placed too close to seals get distorted or cut off.
- Overpacking the bag: if the contents stretch the film too hard, even a great print job looks sloppy.
The biggest color mistake is expecting a bright brand color to match perfectly without a white base layer. On darker bags, that is how you get muddy logos and angry marketing managers. If the supplier says the base color will shift the printed result, listen. They are not being dramatic. They are explaining reality.
Another common miss is approving a proof that looks great on a laptop and then assuming the physical bag will mirror it. A screen is a backlit rectangle. Poly film is not. Gloss, matte, and soft-touch all change how the ink reads to the eye.
If the event merch bag is part of a larger campaign, the same warning applies to inserts and collateral. FSC-certified paper can be a smart match for the paper side of the kit, especially if the packaging is meant to feel considered rather than disposable. The packaging decision is not just one bag. It is the whole handoff.
Expert specs that improve print quality and brand feel
The easiest way to improve print quality is to make production easier. Start with a vector logo. If you need color accuracy, give the supplier Pantone targets instead of vague "close enough" expectations. Specify front panel, back panel, and seal side placement clearly. A good supplier can handle a lot, but they cannot read your mind. Nobody can, despite the recurring industry belief that they should.
For film, 2.25 to 3 mil is a common practical range for event mailers. Lighter bags can work for soft goods and low-stress handouts. Thicker film gives a more substantial feel and better tear resistance. If the contents have edges, metal parts, or heavier inserts, the thicker side usually wins.
Finish also changes the perceived value. Glossy film usually reads brighter and more retail-forward. Matte feels quieter and more modern. Soft-touch can be attractive, but it adds cost and does not automatically make the bag better. If the design is simple and the colors are strong, a clean glossy mailer can look excellent without extra fuss.
For special kits, ask whether the bag needs tamper evidence, a gusset change, or extra seal strength. Those details matter if the product is moving through event merch logistics, not just getting handed out on site. The best branded packaging feels sturdy before anyone even sees the logo.
I also recommend a simple test run whenever the order is new or the design is complex. Compare one sample of each print method if the supplier can do it. That small spend can save a large mistake. A sample should tell you whether the type holds, whether the white base is strong enough, and whether the finish matches the tone of the event.
For suppliers that also handle broader Custom Packaging Products, ask how the mailer will sit alongside the rest of the kit. A mailer that looks great by itself can still clash with the insert card or the box if the whole system was never planned together. Package branding works better when the pieces speak the same visual language.
One more thing: if the order will ship, ask whether the bag has been checked against an EPA recycling resource or local film-recovery guidance if recyclability is part of the brief. That does not change the print method, but it does affect how the finished bag fits into the buyer's sustainability story. Honest claims beat vague green fluff every time.
Next steps: compare quotes and lock the production plan
The fastest way to avoid a bad purchase is to build a side-by-side quote sheet. Keep it boring and exact. Include print method, MOQ, unit price, setup fee, lead time, sample policy, freight, and any color-change surcharge. If one supplier is cheaper but takes four extra weeks and charges for every proof revision, that is not a cheaper quote. That is a trap wearing a spreadsheet costume.
Send each supplier the same questions:
- Which print method do you recommend for this art and quantity?
- What file format do you want, and do you need vector art?
- Where are the highest-risk areas for color shift or registration drift?
- What part of the quote is fixed, and what can change after proofing?
- Can you provide a sample or a press reference before full production?
Then compare the answers, not just the prices. A supplier who explains the tradeoffs clearly is usually easier to work with than one who promises perfection and leaves you to sort out the damage later. For event merch, that matters. Deadlines are real. So are budgets. So is the fact that nobody remembers the bag if it arrives ugly.
The decision rule is simple: choose the method that balances brand impact, schedule, and budget for your event merch Custom Poly Mailer bags print method comparison. If the run is small, digital is often the smartest move. If the order is large and the art is simple, flexo or gravure can cut the unit cost hard. If the design needs strong opacity on dark film, screen printing deserves a look. Pick the process that fits the job, not the one that sounds impressive in a quote email.
Which event merch custom poly mailer bags print method is cheapest?
The cheapest unit price usually comes from longer runs and simpler artwork, not from the print method alone. Flexo or gravure often wins at volume, while digital can be cheaper for small orders because setup costs stay low. Always compare total landed cost, freight included.
What print method gives the sharpest logo on poly mailers?
Sharpness depends on the artwork, film type, and process, but digital printing and high-quality flexo are common picks for crisp logos. Fine text needs extra care on flexible film, so ask for a proof if the design is detailed. A white underbase can make dark bags look much cleaner.
How do I choose the right MOQ for event merch bags?
Pick the smallest MOQ that fits your event risk, storage space, and reorder plan. If you will use the bags across multiple events, a higher MOQ can make sense because setup cost gets spread out. For one-off launches, do not overbuy just to shave a few cents off the unit price.
How long does custom poly mailer printing usually take?
Digital jobs can often move in about 5-10 business days after approval. Screen printing is often 7-12 business days, flexo around 10-15, and gravure can take 15-25 or more. Late artwork changes and slow approvals cause more delays than the press itself.
Can I use full-color artwork on custom poly mailer bags?
Yes, but method choice matters because some processes handle gradients and photo-style art better than others. If the bag is tinted or translucent, expect a white base layer or a color shift unless the supplier plans for it. Test the design on a sample before you commit to the full run.


