Buyer Fit Snapshot
| Best fit | Custom Foam Lined Rigid Boxes projects where brand print, material claims, artwork control, MOQ, and repeat-order consistency need to be specified before quoting. |
|---|---|
| Quote inputs | Share finished size, material target, print colors, finish, packing count, annual reorder estimate, ship-to region, and any compliance wording. |
| Proofing check | Approve dieline scale, logo placement, barcode or warning zones, color tolerance, closure strength, and carton packing before bulk production. |
| Main risk | Vague material claims, crowded artwork, missing packing details, or unclear freight terms can make a low unit price expensive after revisions. |
Fast answer: Custom Foam Lined Rigid Boxes: Design, Cost, and Fit should be specified like a repeatable production item. The safest quote records material, print method, finish, artwork proof, packing count, and reorder notes in one written spec.
Production checks before approval
Compare the actual filled-product size with the drawing, then confirm tolerance on folds, seals, hang holes, label areas, and retail display edges. Reserve space for logos, QR codes, warning copy, and material claims before decorative graphics fill the panel.
Quote comparison points
Review material grade, print process, finish, sampling route, tooling charges, carton quantity, and freight assumptions side by side. A quote is only useful when the supplier can repeat the same color, closure quality, and packing count on the next order.
Custom Foam Lined Rigid Boxes: Design, Cost, and Fit
A premium carton can still miss the mark in a very ordinary way: the product shifts, a corner scuffs, the insert feels too tight, and the box that looked polished on a render arrives acting like a compromise. That is the real reason Custom Foam Lined rigid boxes keep showing up in product packaging programs. They do two jobs at once. They protect. They present. If either side is off by even a few millimeters, the whole package feels less considered than it should.
From a packaging buyer's point of view, custom foam lined rigid boxes are less about decoration and more about control. The rigid shell gives the structure, while the insert holds the product in place so the opening experience feels intentional rather than improvised. That matters for electronics, cosmetics, glassware, jewelry, medical devices, premium gift sets, and any retail packaging program where the first impression has to match the product value. It also matters for branded packaging, because the box becomes part of the product story instead of a disposable afterthought.
If you are comparing custom printed boxes, molded pulp, corrugated shippers, and rigid presentation formats, the real question is not only which one looks best. It is which package controls movement, supports the finish, and still fits the budget. That question sits at the center of custom foam lined rigid boxes, and it is why they are often chosen for launches, kits, and high-value items that need both a premium reveal and a lower damage rate. For broader packaging options, it helps to review Custom Packaging Products early, because structure choices shape the whole production path.
Custom Foam Lined Rigid Boxes: What They Really Solve
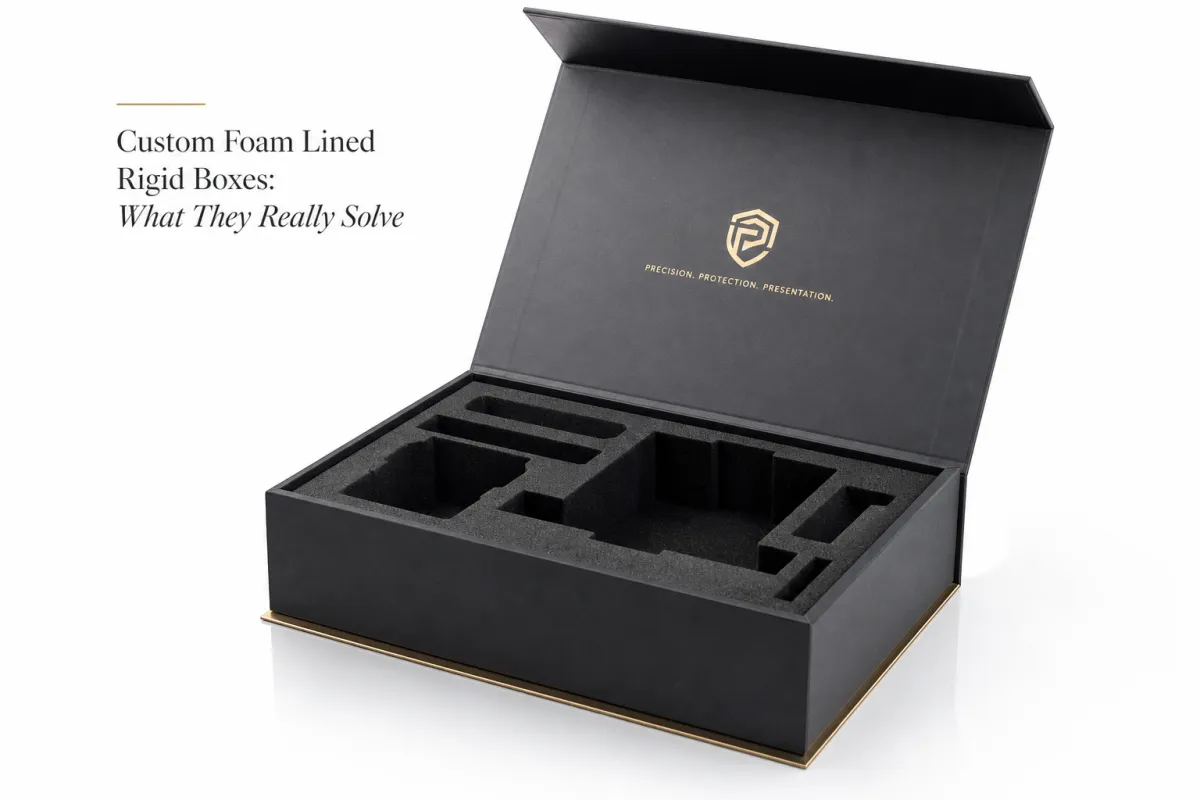
The simplest way to describe custom foam lined rigid boxes is this: they are rigid set-up boxes with a foam insert cut to hold a product snugly. That sounds plain, but the impact is not plain at all. The rigid board resists crushing, the wrap gives the outside a finished appearance, and the foam handles the delicate part by keeping the item from bouncing around inside the box. In practice, that combination is why this format shows up so often in premium package branding projects.
A lot of packaging problems start with movement. A bottle with a tight cap can still scuff if it has a few millimeters of play. A device can survive a short drop but fail when a corner catches the insert edge. A jewelry set can look luxurious and still arrive with a loose clasp floating under the lid. Custom foam lined rigid boxes solve those issues by immobilizing the product and absorbing part of the shock load before it reaches the item itself.
The other half of the story is perception. Buyers do not separate protection from presentation; they experience them together. If the insert looks sloppy, the box feels cheaper. If the foam is too hard, the product feels annoying to remove. If the cutout is too wide, the item appears undersecured. A good custom foam lined rigid box creates a controlled reveal: open the lid, lift the product, spot the accessory, and understand immediately where everything belongs.
That is why the format fits so many categories:
- Electronics: chargers, smart accessories, audio devices, small instruments, and demo kits.
- Beauty and cosmetics: serum bottles, perfume, curated sets, and gift collections that need clean presentation.
- Glassware: bottles, decanters, labware, and fragile sample sets.
- Jewelry: watches, bracelets, cuff links, and display-ready presentation pieces.
- Medical devices: diagnostic tools, small components, and regulated kits that benefit from organized compartments.
- Corporate gifting: branded sets, awards, and launch boxes where custom foam lined rigid boxes support the story as much as the protection.
One of the most common buyer mistakes is assuming a premium outer wrap automatically equals premium packaging. It does not. A beautiful shell with a loose insert still feels wrong. Custom foam lined rigid boxes solve that mismatch by making the inside perform like the outside looks. That is a small distinction, but it changes how people judge the whole package.
A box can look impressive and still be functionally weak. In packaging, fit is not a detail; it is the core of the experience.
If you are working through a product launch, this is where custom foam lined rigid boxes often beat generic packaging. The product is fixed. The cavity is engineered. The sequence of the reveal is planned. That level of control is hard to get from off-the-shelf cartons, and it is why brands often move toward custom rigid packaging options once they need fewer returns and a more consistent unboxing experience.
I have seen teams spend weeks perfecting a foil stamp on the lid, then discover that the actual frustration came from a foam cavity that was two sizes off. The outside got the attention, but the inside did the damage. That is the kind of thing that tends to happen when packaging is treated as a finish layer instead of a system.
How Custom Foam Lined Rigid Boxes Work
The structure is straightforward, but every layer has a job. A typical custom foam lined rigid box uses a 2 mm to 3 mm chipboard base, a wrapped exterior paper or printed stock, and a foam insert inside the tray or lid base. The outer shell keeps the box square and crush-resistant. The insert keeps the item from migrating. The wrap gives the packaging its visual language, whether that means matte art paper, soft-touch lamination, textured paper, or custom printed boxes with full-coverage branding.
Protection in this format usually comes from three mechanisms. First is compression resistance: the rigid walls help the box maintain shape under stacking or handling pressure. Second is shock absorption: the foam absorbs impact from drops, vibration, and rough transport. Third is product immobilization: the insert prevents side-to-side movement, which is often the part that creates abrasion or edge damage. Custom foam lined rigid boxes work because all three mechanisms reinforce each other instead of fighting each other.
The foam choice matters a great deal. Buyers often focus on color or surface appearance, but density and resilience drive performance.
- EVA foam is denser, cleaner in appearance, and often used for presentation-focused inserts with precise cut edges.
- EPE foam is lighter and usually more economical, with good cushioning for many consumer goods.
- PU foam can feel softer and is often used for lower-cost cushioning, though it may not hold a crisp shape as well.
- Cross-linked foam offers a refined cut surface and can suit premium custom foam lined rigid boxes where the insert itself is visible during unboxing.
Density is not just a technical detail. It changes how the product sits. A lightweight item in dense foam can feel secure but annoying to remove. A heavier item in foam that is too soft can sink too far or drift after repeated handling. In real production, the best insert is rarely the thickest one. It is the one that balances support, access, and surface protection.
Design also affects the customer experience. A lift-out tab can make a tightly fitted product easier to remove without pulling at the edges. A layered cavity can keep accessories in order so the main item is revealed first. A finger notch can prevent consumers from digging into the foam and damaging a finish. These details seem small during quoting, yet they shape the entire impression of custom foam lined rigid boxes once the package lands on a desk or retail shelf.
Imagine three failure modes. If the cavity is too loose, the product rattles, and the box sounds cheap. If the cavity is too tight, the finish can scuff during removal, especially on painted metals or polished plastics. If support is uneven, the item can lean under its own weight and arrive with pressure marks. That is why strong packaging design treats the insert as a performance component, not a decorative one.
For brands that ship across multiple channels, custom foam lined rigid boxes can also reduce presentation drift. A retail sample, a direct-to-consumer kit, and a sales demo box can all use the same structural logic while varying the exterior print or accessory layout. That makes the format useful for branding packaging programs that need consistency across sales teams, pop-up events, and premium gifts.
It also helps to separate "protective" from "protective enough." Some packages pass a casual drop test and still fail under vibration, compression, or repeated handling. If a product is being shipped through a distribution chain with multiple handoffs, that matters. For transit validation, the ISTA test procedures are a practical reference point, especially when you want to compare a box that merely looks sturdy with one that is actually engineered for distribution stress.
One practical detail that gets overlooked is temperature. Foam can feel different in a warm warehouse than it does in a cool showroom, and some surface finishes respond badly to heat or long storage. That does not mean the format is fragile. It just means the job is more precise than a casual sample photo makes it look.
Custom Foam Lined Rigid Boxes: Cost and Pricing Factors
Price is usually driven less by the outer box alone and more by the insert, the finishing choices, and the number of setup steps. A simple custom foam lined rigid box with one cutout and standard wrap can stay reasonably controlled. Add magnets, ribbon pulls, multiple compartments, printed foam, or a premium surface finish, and the unit cost rises quickly. The insert is often where budgets move the most because precision cutting and material density both matter.
For small to mid-size runs, the numbers can be surprisingly uneven. A prototype or sample build may cost $75 to $300 depending on complexity and whether new tooling is needed. A short run of 300 to 500 units might land in a range of roughly $2.80 to $6.50 per set for simpler custom foam lined rigid boxes. At 1,000 units, that same structure might fall to roughly $1.90 to $4.80 per set. At 5,000 units, you may see something closer to $1.10 to $3.10 per set, depending on print coverage, foam grade, and assembly labor. Those are practical ranges, not guarantees. Size, freight, and the number of finishing passes can push them higher or lower.
The main cost levers are easy to identify once you know where to look:
- Box size: larger boards require more material and more wrapping labor.
- Foam material: EVA and cross-linked foam usually cost more than basic EPE.
- Cut method: die-cut, routed, or laser-cut inserts each create different setup and finish profiles.
- Surface finish: soft-touch lamination, foil, spot UV, embossing, and specialty papers all add cost.
- Hardware: magnets, ribbons, custom trays, and nested parts add both material and assembly time.
- Order quantity: tooling and setup get spread over more units as volume increases.
| Order Size | Typical Unit Range | Cost Pressure | What Usually Moves the Number |
|---|---|---|---|
| 300-500 units | $2.80-$6.50 | High | Prototype setup, insert tooling, hand assembly, and small-run waste |
| 1,000 units | $1.90-$4.80 | Moderate | Material choice, finish complexity, and foam cut precision |
| 5,000 units | $1.10-$3.10 | Lower | Material standardization, automated or semi-automated cutting, and better labor spread |
| 10,000+ units | Project-specific | Variable | Volume discounts, but also stricter QC, freight, and warehousing requirements |
The useful lesson here is simple: custom foam lined rigid boxes should be treated as engineered packaging, not a commodity carton. The box is not merely holding the product; it is controlling risk. That means cost comparisons should include expected damage rate, returns, unpacking quality, and assembly time. A lower unit price can be a false economy if the insert creates higher returns or extra labor on the packing line.
If you need to protect budget without harming performance, start with the least visible savings first. Standardize box dimensions. Reduce the number of cavities. Use one foam type throughout the line instead of mixing densities. Simplify exterior finishes. Keep magnets only where they genuinely improve the closure. Those changes usually do more than trimming the outer decoration on custom foam lined rigid boxes, because the insert and structure are what the customer actually touches.
There is another financial angle that gets missed: branding value. A box that supports a premium reveal can reduce the need for extra inserts, instruction sheets, or presentation sleeves. It can also lift perceived product value in subscription, gifting, and launch scenarios. That does not mean the box pays for itself automatically. It means the packaging should be judged as part of the total commercial experience, not as an isolated line item.
For paper sourcing on premium wraps, the FSC system is a common benchmark when buyers want documented forest stewardship. The exact certification route depends on the supplier chain, but it is a practical conversation to have early if sustainability claims matter to your product packaging strategy.
Step-by-Step Guide to Designing the Right Insert
The best custom foam lined rigid boxes start with measurement discipline. Before anyone draws the insert, gather the product's exact dimensions, weight, finish sensitivity, accessory count, and orientation preference. Is the item displayed flat, upright, or diagonally? Does it have glossy paint, plated metal, exposed glass, or a soft coating that marks easily? Does the product include cables, adapters, cards, or seals that need their own compartment? A vague brief almost always becomes a vague fit.
A clean spec sheet should cover more than the main object. Include the shipping configuration, the retail configuration, and the presentation configuration if they are different. A headset that ships in one orientation may look better in another. A bottle that travels safely on its side may present better upright. A small tool kit may need a top cavity for the main device and lower recesses for accessories. That is why custom foam lined rigid boxes often depend on the full set, not just the lead product.
Then comes the sequence of design work. In a typical project, the team moves from concept sketch or CAD to a dieline, then to a prototype, then to revisions, and finally to production approval. The prototype stage matters more than many teams expect. On paper, a 1 mm clearance can look fine. In hand, 1 mm can be the difference between a polished fit and a frustrating extraction. Foam compresses differently under load, so sample testing is not optional if the item is fragile or finished to a high standard.
A practical design checklist looks like this:
- Measure product length, width, height, and weight.
- Mark fragile edges, buttons, lenses, ports, or polished faces.
- List all accessories and decide what needs a separate cavity.
- Set the target orientation for unboxing.
- Choose a foam density based on weight and abrasion risk.
- Define tolerance so the product fits securely without pinching.
- Request a prototype and test removal with real samples.
Fit tolerance is the part that tends to get hand-waved, and it should not be. If the cavity is too snug, coatings can abrade and corners can chip. If the cavity is too open, the product can shift in transit and miss the whole point of custom foam lined rigid boxes. A good rule is to design with enough room for handling and production variation, then test with an actual sample batch rather than trusting a spec sheet alone.
Branding decisions belong in the insert discussion too. Some teams want the foam hidden so the reveal feels clean and minimal. Others want part of the insert exposed because the contrast between paper wrap and colored foam creates a stronger visual rhythm. In some cases, a partially revealed insert can serve as a design feature, especially in branded packaging for premium kits. The point is not to chase novelty. It is to decide whether the insert should disappear, support, or visually lead the story.
For companies that are still mapping their broader packaging program, it can help to review custom foam and rigid packaging selections alongside other structural formats. Seeing the options side by side makes it easier to judge whether the job needs a presentation box, a shipping-safe kit, or a hybrid solution that does both.
Process and Timeline: From Sample to Shipment
The production workflow for custom foam lined rigid boxes is usually more predictable than people expect, but only if the brief is complete. It begins with briefing, moves into structural design and quoting, then prototype development, revisions, approval, manufacturing, quality control, and packing. If the project includes print finishes or special wrapping paper, artwork approval becomes its own checkpoint. If the insert is highly custom, the foam tooling can become the pacing item.
Simple projects with an existing structure may move faster than a fully custom build, but "fast" still depends on how clean the inputs are. A basic set using standard board sizes and a simple foam cavity might be sampled in 5 to 10 business days, with production taking another 10 to 20 business days after approval. More complex custom foam lined rigid boxes with new tooling, multiple compartments, or premium finishing often need 15 to 25 business days for sampling and another 15 to 30 business days for production. Freight is separate, and international shipping can add its own layer of uncertainty.
The biggest timeline delays are usually not mysterious:
- Incomplete measurements that force a redesign after the first prototype.
- Artwork changes after structural approval.
- Insert revisions caused by accessory fit or product finish issues.
- Late decisions on magnets, ribbons, or internal printing.
- Approval delays from multiple stakeholders reviewing the same sample.
Quality control is where strong suppliers earn their keep. Fit testing should verify that the product sits level, lifts cleanly, and does not bind on the foam edge. Adhesion checks matter because wrap separation on a rigid box is often a sign of rushed glue application or poor board prep. Visual inspection should catch wrinkles, corner crush, and print alignment issues. For higher-risk shipments, many teams also want a basic transit simulation, even if it is not a formal certification run. That step is especially relevant if the project is meant to survive multi-touch distribution rather than a direct handoff.
If you want a formal framework for testing, ISTA methods such as the 3-series procedures are a useful reference. Not every custom foam lined rigid box project needs the same level of validation, but the standards give the conversation structure. They help separate marketing language from actual transit performance. That is useful whether the package will be sold in retail packaging, shipped direct to consumer, or handed over as a premium sample kit.
One subtle timing issue deserves mention: the product itself can change after the box design starts. That happens often with launches. A last-minute wall thickness change, a connector move, or a cap redesign can invalidate the insert fit. A smart production plan protects time for one revision cycle, because custom foam lined rigid boxes are only as good as the final product dimensions they were built around.
From a planning standpoint, the safest approach is to build backward from the launch date. Add buffer for approval, proofing, and shipping. If the box is part of a sales sample or launch kit, do not assume the schedule can absorb multiple rounds of artwork edits. It usually cannot. Teams that get the best outcome tend to lock the design earlier than they think they need to, which can feel a little strict in the moment but saves a lot of grief later.
Common Mistakes That Increase Damage or Waste Budget
The most expensive mistake is designing the foam around a prototype before the product is final. It sounds efficient. It is not. A product that gains 2 mm in height or changes the location of one port can turn a well-fitted cavity into scrap. With custom foam lined rigid boxes, even minor product revisions matter because the insert is built to a specific geometry, not a broad approximation.
Over-tight inserts are another classic problem. They can look secure in a sample photo and still cause damage during use. A painted finish may scuff. A polished edge may pick up pressure marks. A glass component may bind during removal and chip at the rim. On the other side, too much clearance creates rattle, and rattle is often the first thing a customer notices when they open a premium package. Neither outcome fits a strong package branding strategy.
There is also a tendency to choose foam by appearance instead of performance. A dense, crisp-cut insert may look more premium than a softer one, but that does not mean it suits the product. Weight, temperature exposure, and chemical sensitivity all matter. Some foams are fine for presentation but poor for long-term compression. Others cushion well but do not hold fine edges cleanly. That is why custom foam lined rigid boxes should be evaluated by use case, not by surface polish alone.
Common oversights include:
- Forgetting cables, chargers, cards, or literature in the layout plan.
- Ignoring the order in which the customer removes components.
- Underestimating labor if the insert has many small pieces.
- Choosing a finish that looks good but adds unnecessary cost or rejection risk.
- Skipping distribution testing because the box "looks strong enough."
Shipping tests matter even for luxury packaging. Distribution is rougher than shelf display. Boxes get stacked, tipped, compressed, and handled by different people with different priorities. A package that survives a clean tabletop demo may still fail after a cross-country trip. That is why custom foam lined rigid boxes should be checked against real route conditions, not just studio photography.
Another mistake is treating assembly as an afterthought. If the box has multiple nested parts, ribbons, printed sleeves, or accessory trays, labor can rise fast. A design that looks elegant on screen may be awkward on the packing line. The result is slower throughput, inconsistent fit, and higher waste. In Premium Product Packaging, speed and consistency are part of the cost structure whether anyone writes them down or not.
Finally, do not ignore end-of-life handling if sustainability is a priority. Foam, wrap paper, and adhesives do not all behave the same in recycling streams. Local rules differ. If the project needs a lower environmental profile, ask early about foam alternatives, recycled board, and paper sourcing. Not every sustainability claim is equal, and not every recycle symbol tells the whole story. That is where custom foam lined rigid boxes benefit from a supplier who can explain the tradeoffs plainly instead of hiding them behind marketing language.
Expert Tips and Next Steps for Custom Foam Lined Rigid Boxes
Start with the job the box must do. That sounds basic, but it cuts through a lot of confusion. Is the goal protection, presentation, subscription reveal, retail display, or premium gifting? A box that needs to survive parcel shipping is not the same box that sits in a retail environment for customer interaction. Custom foam lined rigid boxes can cover several of those goals, but the design should prioritize the one that matters most.
Build a spec sheet before requesting quotes. Include the product dimensions, weight, finish sensitivity, drop risk, accessory list, target budget, and launch date. Add a note about whether the item is a one-piece product or a kit with multiple parts. This helps suppliers recommend the right foam density, board thickness, and closure style. It also helps you compare apples to apples instead of comparing a basic rigid shell with fully engineered custom foam lined rigid boxes.
Ask for samples, not just promises. Request material options, sample photos, and prototype timelines up front. If a supplier cannot explain the foam grade or the estimated fit tolerance, that is a signal to pause. A good partner should be able to explain why one insert works better than another, especially if the project has a fragile finish or a tight unboxing sequence. That is true for both high-volume launches and smaller branded packaging runs.
For higher-value products, a pilot run is usually worth the time. Even 100 to 200 units can reveal whether the cavity is too tight, whether the foam compresses too much, or whether the lid closes cleanly after repeated use. Pilot runs also expose assembly bottlenecks. If the line struggles with insert placement or accessory loading, you will Know Before You commit to scale. That kind of feedback is far cheaper than discovering the issue after a full production order.
Here is a practical next-step path if you are planning custom foam lined rigid boxes now:
- Measure the final product set, including accessories and protective caps.
- Decide whether the priority is transit protection or presentation first.
- Choose a foam style based on weight, finish, and removal behavior.
- Request a prototype with the actual product, not a stand-in.
- Review fit, speed of removal, and visual alignment.
- Scale only after the sample passes a real handling test.
There is a strong business case for that discipline. Better fit usually means fewer returns, better unboxing, and more consistent package branding. It also reduces waste, because a precise insert avoids unnecessary overbuilding. That is the part many teams miss: custom foam lined rigid boxes are not expensive just because they are premium. They cost more because they solve several problems at once, and they do it with a level of control that generic packaging rarely matches.
If you are comparing structures, materials, and finishes, start with Custom Packaging Products and narrow from there. The right path is usually not the flashiest one. It is the one that protects the item, supports the reveal, and stays inside the budget you can defend. In practical terms, that means choosing the insert around the final product, not the prototype, and being honest about how much risk the package actually has to absorb.
What products are best for custom foam lined rigid boxes?
High-value, fragile, or presentation-sensitive products are the best fit, especially electronics, cosmetics, glass, jewelry, and medical kits. Items with accessories also benefit because the foam can organize every component in one secure layout. Custom foam lined rigid boxes are especially useful when unboxing matters as much as protection.
How thick should the foam be in custom foam lined rigid boxes?
Foam thickness depends on product weight, drop risk, and the amount of space needed to absorb shock. Heavier or more fragile items usually need denser foam and deeper cavity support. The safest way to choose thickness is to sample the exact product inside the insert before final production, since the right depth for one item may be wrong for another.
Are custom foam lined rigid boxes expensive?
They usually cost more than standard folding cartons because they use rigid board, specialty wrapping, and precision foam inserts. Unit price drops as quantity increases, but setup, tooling, and insert complexity still shape the final budget. Costs can be controlled by simplifying finishes, standardizing sizes, and reducing unnecessary internal features.
How long does it take to produce custom foam lined rigid boxes?
Simple projects with existing structures move faster than fully custom builds with new foam tooling. Prototype approval, artwork changes, and insert revisions are the most common timeline delays. Plan extra time for testing if the product is fragile, tightly fitted, or launching alongside a new package design.
Can foam inserts be replaced or recycled later?
Yes, many designs allow the foam insert to be replaced without rebuilding the outer rigid box. Recyclability depends on the foam type, paper wrap, and local recycling rules. If sustainability matters, ask for material options up front so the packaging can balance protection and end-of-life handling.
The practical takeaway is simple: design custom foam lined rigid boxes around the final product, not the sample, and test the insert with the actual item before you commit to scale. That one habit catches most of the expensive mistakes early, keeps the unboxing clean, and gives the box the one thing premium packaging really needs — a fit that feels deliberate, not lucky.

