Custom Frosted Zipper Bags for jewelry packing teams solve a very specific production problem: they keep tiny, easy-to-mix components organized while making the packed order look controlled before it ever reaches the next station. On a busy bench, that matters. Rings, chains, cards, tags, pouches, and anti-tarnish inserts tend to move through the same hands in a narrow window of time, and a bag that is easy to read, easy to close, and easy to stack can prevent avoidable mistakes.
The appeal is not only visual. A frosted bag hides fingerprints, scuffs, and the messy look of mixed parts better than a fully clear pouch, which gives the packing table a calmer appearance and makes finished sets feel more deliberate. That can help with both internal handling and customer-facing presentation. It also gives brand teams a cleaner surface for a logo or short message without pushing the package into expensive retail-box territory.
For jewelry programs, the bag is usually part of a wider system rather than a stand-alone item. The best results come when the bag size, insert card, barcode area, and outer carton all follow the same logic. If the bag sits beside custom printed boxes or other branded components, the finish should feel like one family, not a last-minute add-on.
Custom Frosted Zipper Bags for Jewelry Packing Teams: What They Solve
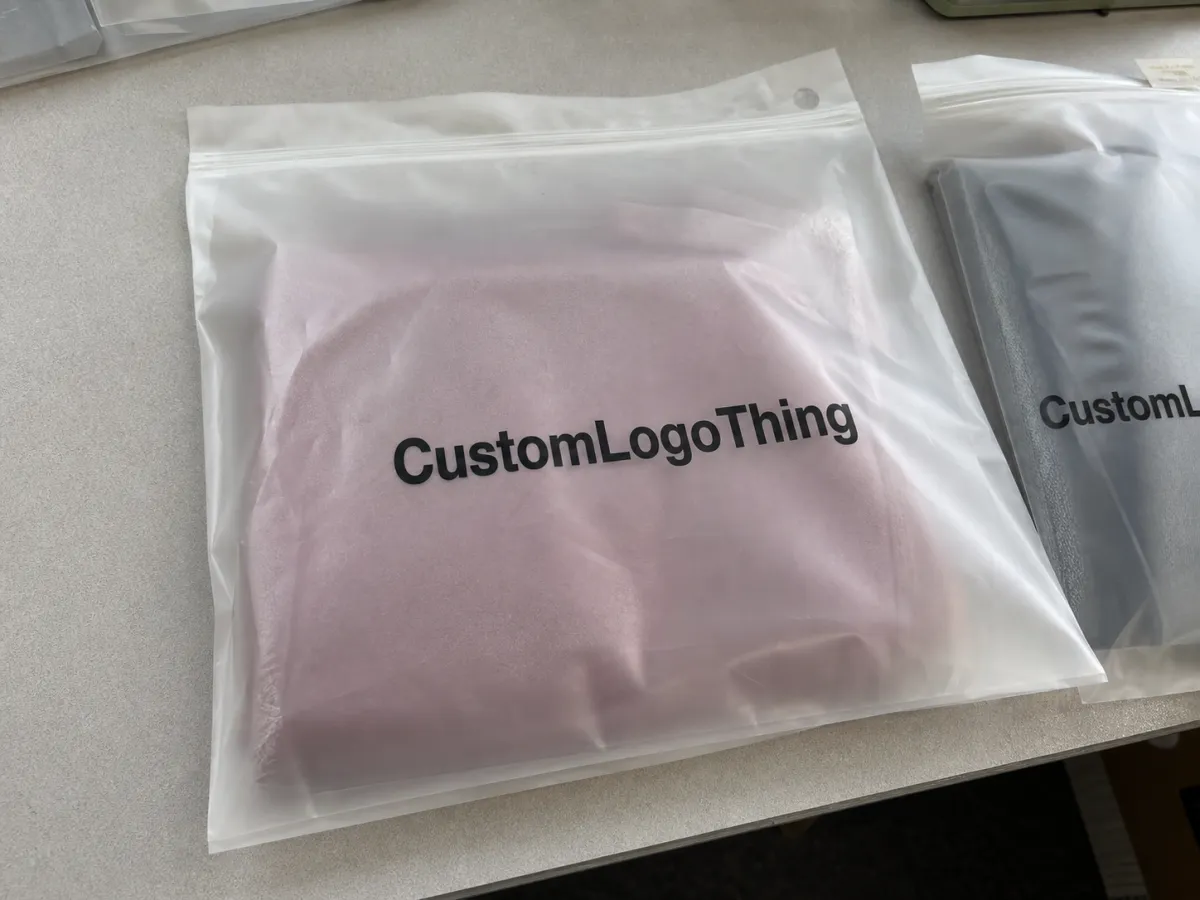
Most Frosted Zipper Bags are made from PE film, often LDPE or a comparable blend, with a matte or semi-matte finish that scatters light instead of passing it through cleanly. That softens the look of the contents and gives the bag a more uniform appearance. In a jewelry packing environment, that matters because a necklace chain, a ring card, and a care slip can sit together without creating visual clutter.
The zipper closure is the other practical advantage. A reliable seal makes it easier for operators to inspect a piece, reopen it, and reseal it without slowing the line. A weak or sticky zipper seems minor during sampling, but on a full production run it turns into wasted motion, frustrated staff, and extra rework. Even a few seconds added to each unit becomes expensive once the order volume climbs.
These bags are useful because they fit several stages of work. They can be used for kitting, inspection, short-term storage, final packing, or gift-ready presentation. That flexibility helps teams standardize fewer packaging types across more SKUs. Standardization is often undervalued, but on the floor it reduces confusion, speeds training, and lowers the chance of the wrong bag being pulled from inventory.
Still, a frosted finish is not protection by itself. It is a surface treatment, not armor. Delicate jewelry still needs the right internal safeguards, whether that means a soft pouch, a divider card, an anti-tarnish strip, or a protective sleeve around polished surfaces. The bag should support the packaging plan, not replace it.
A useful frosted zipper bag should make the packing bench easier to run, not only nicer to photograph. If it improves fill speed, reseal speed, and visual consistency, the spec is paying for itself.
That is why many teams ordering custom frosted zipper Bags for Jewelry packing teams also review the rest of their pack-out system at the same time. If the insert card, outer carton, and seal area all follow the same visual rules, the package feels intentional even when the line is moving fast.
If your program includes a broader mix of components, it helps to keep the bag aligned with your other Custom Packaging Products so the branding and the handling requirements stay consistent from one layer to the next.
How the Frosted Finish and Zipper Seal Work
The frosted finish works by diffusing light. That means the contents remain visible, but less sharply defined. For jewelry, that softer view can make mixed components look cleaner and easier to sort. It also helps hide small marks that would stand out immediately on a clear bag. The effect is subtle, but on a packing table it changes the whole visual rhythm of the workstation.
Thickness is part of the story too. Most custom bags in this category fall somewhere in the 60 to 100 micron range, depending on the desired feel and the way the bag will be handled. Lighter film can be fine for secondary packaging or short handling cycles. Thicker film usually feels better for repeated use, more substantial kits, or bags that are opened and closed several times before final shipment. There is no universal best choice; the right gauge depends on how the bag is actually used.
The zipper profile should close cleanly without requiring much force. That sounds obvious, but it is one of the first places a custom run can fail in practice. If the zipper is too tight, operators start pinching harder, and that slows the line. If it is too loose, the bag may open during handling or storage. For jewelry teams, the closure has to feel predictable every time, because the same bag may be used for inspection, resealing, and final presentation.
Print placement deserves more attention than many buyers expect. A logo printed too close to the top edge can disappear under the filled area. A barcode placed where fingers naturally press on the seal may become harder to scan after repeated handling. A good layout gives the artwork room to breathe and preserves the working area near the zipper. The bag is part of the product packaging system, not just a surface for decoration.
Clear panels or window sections can be useful in some workflows, but they are not always the better choice. A fully frosted bag usually gives a cleaner presentation for mixed jewelry sets, while a partial-clear design may be better for internal sorting or quick identification. The right answer depends on whether the bag is being used for presentation, inspection, storage, or all three.
That same logic applies if the bag will sit beside custom printed boxes or other retail packaging. The finish does not need to be loud to feel premium; it needs to feel controlled and consistent.
Cost, MOQ, and Quote Drivers for Custom Runs
Price is driven by a small group of variables: bag size, film thickness, zipper style, print colors, print coverage, and any extras such as hang holes, special tinting, or custom inserts. For custom Frosted Zipper Bags for jewelry packing teams, the fastest way to get a realistic quote is to lock those details before asking for pricing. A supplier can only be precise when the spec is precise.
MOQ matters because setup cost has to be spread across the order. The smaller the run, the more artwork prep, proofing, machine setup, and waste allowance affect the unit price. In practical terms, a simple one-color run at 5,000 pieces might land around $0.18 to $0.28 per unit. A more involved two-color job with custom sizing often moves into the $0.24 to $0.38 range. Larger runs, full-coverage branding, or special zipper colors can reach $0.32 to $0.55 or more. Those numbers are planning ranges, not promises, but they are useful for early budgeting.
Quote comparisons only work if the specs match. A 60-micron bag is not the same product as an 80-micron bag, even if the dimensions look identical on paper. The same goes for print method, zipper quality, carton pack count, and whether samples are included. Ask every supplier to quote from the same spec sheet so the pricing can actually be compared.
| Option | Typical MOQ | Typical Unit Cost | Best Use |
|---|---|---|---|
| Standard frosted bag with one-color logo | 5,000-10,000 | $0.18-$0.28 | Basic branded packaging and internal kitting |
| Custom size with two-color print | 5,000-10,000 | $0.24-$0.38 | Retail packaging that needs a stronger visual identity |
| Full-coverage branding or special zipper color | 10,000+ | $0.32-$0.55 | Higher-touch presentation, coordinated with premium packaging |
Do not stop at unit cost. Freight, samples, artwork revisions, and rush charges can change the landed price more than buyers expect. Build in shrinkage too. A packing team may need extra units for startup loss, QC samples, or line overage, and those pieces should be part of the order from the start rather than treated as an afterthought. The lowest number on a quote sheet is not always the lowest delivered cost.
If sustainability is part of the buying discussion, look at the whole system rather than only the film bag. Paper inserts or outer cartons may be specified in FSC-certified stock, and shipping performance can be checked against common transit-testing methods. For paper-based components, FSC is a practical sourcing reference, and ISTA test methods are useful for distribution planning.
Process and Lead Time: From Artwork to First Shipment
The process is usually straightforward: quote request, spec confirmation, artwork submission, proof approval, sample or preproduction check if needed, then mass production. The delay usually comes from incomplete information, not from the sequence itself. If the supplier has to chase a missing dieline or wait for final logo placement, the schedule stretches quickly.
Jewelry packaging projects often slow down because the team knows what the bag should do, but not every detail has been written down. Maybe the card is final, but the folded height is not. Maybe the logo is approved, but the Pantone target is still floating. Maybe the bag is supposed to hold a bracelet set, but nobody has tested the actual stack of items inside it. Those gaps force extra proof rounds, and each round adds time.
A realistic timing picture often looks like this:
- Quote and spec review: 1-2 business days
- Artwork or dieline proof: 2-4 business days
- Sample or preproduction approval, if needed: 5-8 business days
- Mass production: often 10-15 business days after approval for simpler runs
- Freight and receiving: depends on route, carton count, and destination
That range changes with quantity and print complexity. A one-color logo on a standard frosted bag moves differently from a run with multiple ink colors, a special zipper tone, or custom carton labeling. Still, breaking the schedule into stages gives the buying team something usable. It is easier to plan a launch around proof, production, quality check, and shipping than around a single promised delivery date.
Fast approvals help, but only if the right people are reviewing the right things. If the packing floor, artwork team, and purchasing team all sign off on different parts of the spec, the order can drift. The most reliable projects lock the dimensions early, send print-ready files the first time, and sample the bag against the actual product before the main run begins.
Step-by-Step Spec Checklist Before You Order
Start with what goes inside the bag. A single earring card, a necklace with a care slip, and a bracelet set all behave differently in the pack. Measure the finished stack, not only the jewelry itself. That small difference is where many sizing problems begin. Once the contents are clear, the bag dimensions are much easier to define.
Then confirm the structure. Check width, height, thickness, zipper profile, and whether you want a full frosted surface or a design with clear panels. For jewelry packing teams, that choice affects both visibility and presentation. A uniform frost usually looks cleaner for mixed components. A partial-clear format may work better if the team needs faster internal identification.
After that, lock the branding details. Decide whether the logo sits on one side or both, whether the ink should be one color or two, and whether there needs to be a clean area for a barcode, SKU, or batch code. If the bag will sit beside custom printed boxes, keep the typography and visual tone aligned so the package set does not feel pieced together from different programs.
- Product mix: item type, finished dimensions, and whether the bag holds one piece or a set
- Bag structure: exact size, film thickness, zipper profile, frost level, and panel style
- Branding: logo placement, print colors, barcode space, and any front/back differences
- Operations: carton count, pallet preference, label format, and receiving requirements
- Validation: sample the bag on the actual packing bench before full production
That last point saves the most trouble. Put the sample into the real workflow. Ask an operator to fill it, seal it, reopen it, and stack it with the rest of the order. A spec that looks fine on paper can still be too tight, too slippery, or too awkward once it reaches production speed. Static, dust, glove friction, and table surface can all affect how the bag behaves.
It also helps to keep the order family manageable. Fewer bag sizes mean fewer training errors and less inventory confusion. A small set of standardized sizes is usually better than a new custom dimension for every SKU, especially in a busy jewelry program where multiple lines are packed in the same shift.
Common Mistakes Jewelry Packing Teams Should Avoid
The first mistake is undersizing the bag. Buyers often measure only the item and forget the card, pouch, tissue, or label that travels with it. Once those extras are added, the zipper sits under pressure, the contents bow awkwardly, and the package looks stuffed instead of finished. That problem shows up fast with polished metals and delicate chains, where compression can leave a poor first impression.
The second mistake is overdesigning the print. A frosted surface already creates visual softness, so too much ink can fight the effect. Heavy coverage costs more, reduces readability, and turns a clean bag into clutter. For most jewelry packing workflows, a simple logo, a short brand line, or a small icon is enough. The bag should support the product, not compete with it.
The third mistake is treating every zipper bag as interchangeable. One closure may feel acceptable in a sample and still wear down after repeated opening and resealing on a busy line. If the bag is used for inspection, then resealing, then final packing, zipper quality matters more than it first appears. A weak profile adds small failures that are easy to ignore until they become expensive.
The fourth mistake is skipping validation with actual operators. A bag that looks right on a screen can behave differently once it meets gloved hands, static, dust, and real packing speed. Even the way a frosted film slides across a table can affect the feel of the workstation. Testing the sample in the real environment gives a much clearer answer than approving it from a proof alone.
Another common issue is assuming the bag will solve every presentation problem by itself. It will not. If the insert card is flimsy, the logo is off-center, or the outer carton looks unrelated, the whole package still feels uncoordinated. Good packaging design is cumulative. Each layer has to do its job.
Expert Tips and Next Steps for a Smooth Launch
Standardize what you can. A few well-chosen bag sizes are easier to manage than a different custom spec for every SKU. That keeps purchasing simpler, reduces storage mistakes, and makes training easier for new packing staff. On a production floor, those small efficiencies add up quickly.
Ask for three items from the supplier: a dieline, a clear spec sheet, and a physical sample. The dieline keeps artwork placement honest. The spec sheet keeps purchasing and quality on the same page. The sample shows whether the zipper feel, film thickness, and finish actually fit the work. If one of those is missing, the project is harder to control.
Build a short packing-floor checklist that covers fill count, seal integrity, barcode placement, and final appearance. It does not need to be long. Five lines is often enough if the checklist reflects the real task. The point is to catch small issues before bags are boxed and shipped.
For teams that manage a larger branded packaging system, keep the bag tied to the rest of the line. The same logo treatment, same type weight, and same visual rules should show up across inserts, cartons, and labels. That is where Custom Packaging Products become more useful than one-off purchases, because the whole system can be planned together instead of patched later.
For a first order, the most reliable path is simple: collect exact sizes, confirm the product mix, gather artwork, estimate true quantity, and ask for a sample that can be tested on the packing bench. For custom frosted zipper bags for jewelry packing teams, that step usually reveals whether the spec is ready or still needs one more round of adjustment.
What size custom frosted zipper bags work best for jewelry packing teams?
Base the size on the finished product plus any card, insert, pouch, or care slip that will ride inside the bag. Leave enough headroom so the zipper closes cleanly without compressing delicate pieces or bending display cards. Most teams do better with a few standardized sizes instead of many one-off dimensions.
Are frosted zipper bags better than clear poly bags for jewelry packing?
Frosted bags usually create a cleaner, more uniform look and hide minor scuffs or fingerprints better than clear film. Clear bags can be better when visibility is the top priority, such as fast internal sorting or barcode-heavy workflows. Many teams use frosted bags for presentation and clear bags for internal handling.
What affects MOQ and unit cost for custom frosted zipper bags?
Size, thickness, print colors, and special features like hang holes or custom inserts all move the unit cost. MOQ matters because setup, tooling, and proofing are spread across the whole order. Larger runs often lower the per-bag price, but freight, samples, and artwork revisions still need to be counted.
How long does the process usually take after artwork approval?
Timing depends on quantity, print complexity, and whether a sample or preproduction approval is required first. Simple runs move faster than orders with multiple colors, special finishes, or repeated proof changes. The safest planning method is to confirm lead time in stages: proof, production, quality check, and shipping.
What should a team send before requesting a quote for custom frosted zipper bags?
Send exact bag dimensions, target quantity, material thickness goals, and any must-have features like a zipper style or hang hole. Include artwork files, logo placement notes, and brand color targets so the supplier can quote accurately. Add the product use case too, because jewelry packing teams often need different specs than display or storage buyers.

