Buyer Fit Snapshot
| Best fit | Custom Logo Box Inserts projects where brand print, material claims, artwork control, MOQ, and repeat-order consistency need to be specified before quoting. |
|---|---|
| Quote inputs | Share finished size, material target, print colors, finish, packing count, annual reorder estimate, ship-to region, and any compliance wording. |
| Proofing check | Approve dieline scale, logo placement, barcode or warning zones, color tolerance, closure strength, and carton packing before bulk production. |
| Main risk | Vague material claims, crowded artwork, missing packing details, or unclear freight terms can make a low unit price expensive after revisions. |
Fast answer: Custom Logo Box Inserts: Board, Finish, Dieline, and Unit Cost should be specified like a repeatable production item. The safest quote records material, print method, finish, artwork proof, packing count, and reorder notes in one written spec.
Production checks before approval
Compare the actual filled-product size with the drawing, then confirm tolerance on folds, seals, hang holes, label areas, and retail display edges. Reserve space for logos, QR codes, warning copy, and material claims before decorative graphics fill the panel.
Quote comparison points
Review material grade, print process, finish, sampling route, tooling charges, carton quantity, and freight assumptions side by side. A quote is only useful when the supplier can repeat the same color, closure quality, and packing count on the next order.
Most premium unboxing failures start with Custom Logo Box inserts that were treated like filler instead of function. The outer box can look sharp, the print can be perfect, and the marketing team can be thrilled, then the product slides a half inch during transit and arrives with a scuff on the corner. That is the part customers remember. Custom logo box inserts fix that by holding the product in place, shaping the reveal, and making the pack feel deliberate instead of thrown together.
From a packaging buyer’s point of view, a good insert does three jobs at once: it protects, it organizes, and it supports package branding. That is why custom logo box inserts show up in cosmetics, electronics, gift sets, subscription kits, and retail packaging where the first impression matters as much as the shipment itself. The trick is not to overdesign them. A clean insert with the right fit usually beats a dramatic one with the wrong fit. Packaging has a way of punishing vanity. Reality is rude like that.
If you are comparing options for custom logo box inserts, the smartest starting point is not artwork. It is the product. Measure the item, list every component, think about packing labor, and decide whether the job needs shipping protection, presentation, or both. That choice affects material, tooling, print method, and cost far more than most people expect. I have seen teams spend two weeks debating Logo Placement on the insert and then discover the bottle does not actually fit the cavity. That kind of mistake gets expensive fast.
What Are Custom Logo Box Inserts?
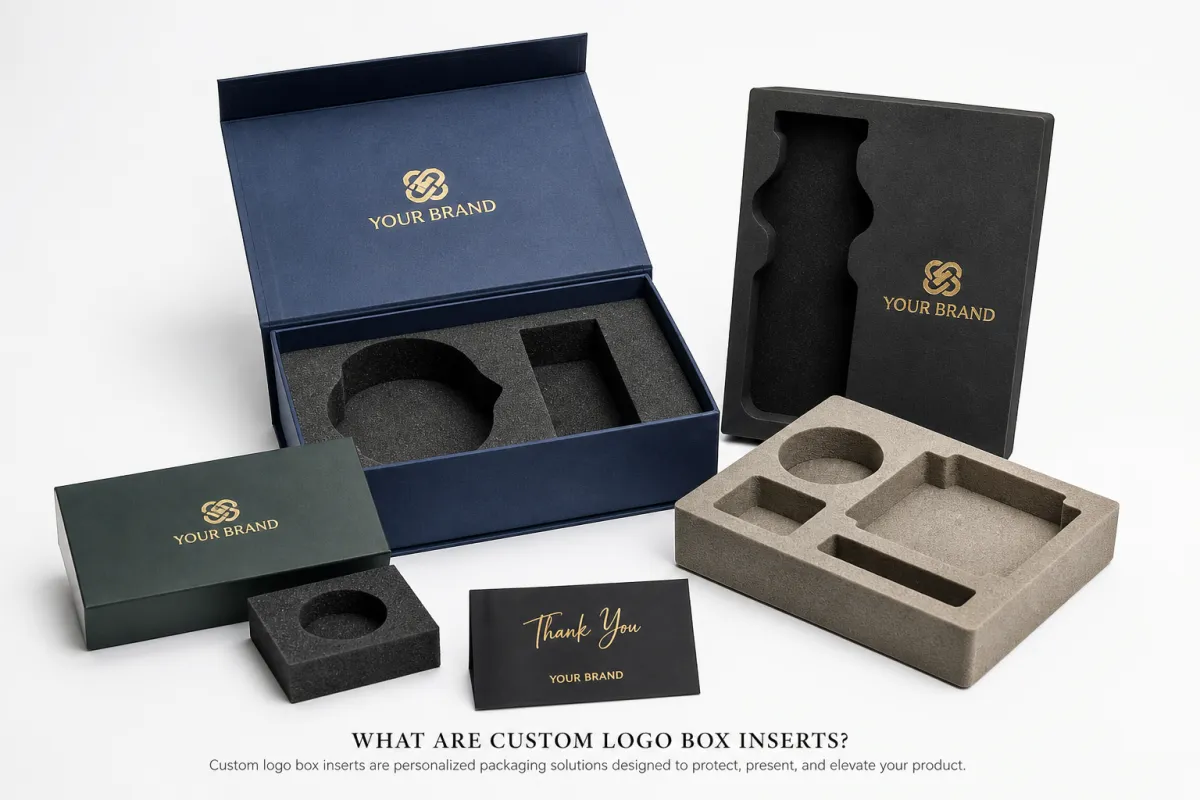
Custom logo box inserts are the interior pieces that hold products in place inside a box. They are cut, molded, folded, or formed to fit a specific item so the product does not rattle around during handling and transit. In practice, they separate a polished reveal from a box full of loose parts. A premium outer carton without a proper insert is just a pretty shell with bad posture.
The basic job is simple: stop movement. The better version does more. Custom logo box inserts can support the product’s weight, separate accessories, protect weak points like corners or caps, and create a reveal that feels organized. That is why buyers use them for everything from perfume bottles to wireless earbuds to curated gift sets. You are not just filling empty space. You are controlling how the product behaves inside the pack.
There are a few common formats. Corrugated board inserts are popular for shipping because they are economical and hold shape well. Cardboard or printed paperboard inserts work nicely for lighter retail packaging and presentation-driven kits. Molded pulp is a strong Fit for Brands that want a more natural look and better shock absorption than plain folded board. Foam inserts are usually reserved for fragile, high-value items where cushioning matters more than recyclability. None of these are magic. Each one is just a better answer for a different product problem.
Custom logo box inserts also carry a branding role. A logo can be printed on the top panel, tucked into a reveal area, or repeated subtly across the insert so the brand shows up during the opening sequence. That is useful in branded packaging because the inside of the box becomes part of the customer experience instead of dead space. The best inserts do not shout. They reinforce the product and the brand without turning the inside of the carton into a billboard.
Here is the blunt version: custom logo box inserts are usually cheaper than paying for damage, returns, and repacking labor. People love to chase a lower unit price on the insert itself, then spend more later because the product moved around and got beat up. That is not savings. That is just expense with extra steps. I know that sounds harsh, but I have watched packaging programs eat their own budget because someone wanted to save two cents on the interior piece.
"A good insert should feel boring during transit and elegant during opening."
If you are building custom logo box inserts for Custom Packaging Products, start by asking what the insert must prevent. Movement? Breakage? Tangling? Sloppy presentation? Usually all four, at least in part. Once that is clear, the material and structure decision gets a lot easier.
How Custom Logo Box Inserts Work
The mechanics are straightforward. Custom logo box inserts are measured to the product, then cut or formed so the item sits securely inside the outer box. The cavity needs enough clearance for easy loading, but not so much room that the product shifts in transit. That balance is the whole game. Too tight and packing becomes miserable. Too loose and the insert misses the one job it has.
For single products, the insert usually uses one main cavity. For multi-piece kits, custom logo box inserts may include accessory pockets, cable channels, compartment walls, or tabs that hold each component in place. This shows up a lot in electronics, skincare sets, and retail packaging where the customer expects each part to look assigned rather than dumped in. A tidy layout feels more premium because the eye reads order as value.
Branding can be subtle or obvious. Some custom logo box inserts use a printed logo on a visible panel. Others hide a message under the top layer so the customer sees it only after removing the product. I generally prefer the quieter route unless the brand has a strong reason to make the inside loud. Full-coverage graphics on an insert can look busy, and busy usually reads as cheaper than it cost.
There is also a functional design layer most people miss. A good insert should make removal obvious. Finger notches, pull tabs, and open-sided cavities matter because customers should not need a minor engineering degree to get a bottle out of a box. If you need to pry the product out with a thumbnail, the structure is working against you. Custom logo box inserts are supposed to guide the experience, not fight it.
For brands shipping fragile items, custom logo box inserts should be designed around the product’s weak points. Glass shoulders, sharp corners, lids, pumps, and cords all need different support. That is why a generic tray often fails. It may look fine in a flat sample photo, but product packaging is not a photo shoot. It has to survive handling, vibration, and the occasional rough toss from a conveyor belt. If the design only works on a clean desk, it is not really a packaging solution.
Custom Logo Box Inserts: Materials, Cost, and Pricing
Material choice drives cost more than almost anything else in custom logo box inserts. Corrugated board is usually the budget-friendly starting point because it is widely available, easy to die-cut, and strong enough for a lot of shipping applications. Molded pulp sits in the middle for many projects, especially if the buyer wants a more natural look and better cushioning. Foam and specialty rigid constructions tend to cost more because they often involve more shaping, tighter tolerances, or higher material expense.
Order quantity matters too. Small runs carry more setup burden per unit because tooling, proofing, and sample work get spread over fewer pieces. Larger orders usually lower the per-unit cost, especially when the design is standardized and the print coverage stays manageable. That is why custom logo box inserts for 500 units can feel annoyingly expensive while 5,000 units suddenly make a lot more sense. The math is not glamorous, but it is honest.
Below is a practical comparison of common insert options. These are general ranges, not a promise from the packaging gods. Exact pricing depends on size, artwork, tooling, and how picky the tolerances need to be. If a quote sounds wildly cheap, ask what it leaves out. That question saves headaches.
| Material | Best For | Typical Cost Impact |
|---|---|---|
| Corrugated board | Shipping protection, moderate budgets, e-commerce packs | Usually the lowest setup burden; often best for simple custom logo box inserts |
| Printed paperboard | Lightweight retail kits, cosmetics, subscription boxes | Moderate cost; print quality can be strong without heavy structure |
| Molded pulp | Eco-focused brands, molded support, breakable products | Mid-range; tooling and geometry can affect pricing |
| Foam | Fragile or high-value items, controlled cushioning | Usually higher; good protection, but not always the friendliest sustainability choice |
| Rigid board construction | Premium gift sets, high-end retail packaging | Higher cost; strong visual effect but more material and assembly work |
There are also hidden costs. Sample rounds add time and money. Multi-SKU programs can require more than one cavity layout. Tight tolerances can slow production because the insert has to fit like a glove, and gloves do not come cheap in packaging. Freight matters too, especially for bulky materials that take up space. If a supplier quotes a cheap insert price but ignores shipping, assembly time, or rework, the quote is not actually cheap. It is just optimistic.
For custom logo box inserts, the real question is landed cost versus damage reduction. A lower-priced insert that increases breakage can destroy the margin on the entire program. A slightly better insert can reduce returns, protect print quality on the product itself, and speed up packing on the line. That matters in retail packaging where labor can quietly become the most expensive line item in the room.
Typical pricing logic looks something like this: simple corrugated custom logo box inserts on a decent run may be economical, while multi-piece rigid or foam systems climb fast once die-cut complexity and print coverage increase. If you need a ballpark for planning, think in terms of material efficiency, cavity count, and assembly steps before you think about fancy finishes. A beautiful spec sheet is still a spec sheet. The carton on the line is what gets paid for.
Also, ask whether the insert needs certification or test data. For shipping-heavy programs, suppliers often reference ISTA procedures and distribution testing; see the ISTA standards site for the kind of testing framework that helps verify performance. For sustainability claims, buyers may also check material sourcing or recycled-content language through resources like the EPA sustainable materials page. That does not make the insert magical. It just makes the claim less flimsy.
Custom logo box inserts should be priced as part of the whole packaging system, not as an isolated accessory. Outer carton, insert, artwork, shipping volume, assembly labor, and damage rates all belong in the same spreadsheet. That is the grown-up version, though I understand spreadsheets are not exactly romantic. Still, they beat guessing.
Custom Logo Box Inserts: Step-by-Step Process and Timeline
The best projects start with clean input. Before anyone talks about art files, gather product dimensions, weight, fragility level, component count, and the outer box size. For custom logo box inserts, that information matters more than a mood board. A supplier cannot design around “premium” and “elevated.” Those are feelings. They need measurements.
The next step is layout and structural design. The supplier creates a dieline or a 3D concept showing where each product sits inside the box. Here, custom logo box inserts either become practical or become a headache. If the product has an odd shape, the cavity may need extra clearance, relief cuts, or a different folding sequence. If there are accessories, the layout needs to decide what goes where and in what order the customer sees it.
Sampling is not optional if the job matters. Request a prototype, place the actual product in it, close the box, open the box, remove the product, and do it again. Then test it with the real contents, not the stand-in version that was nearby. Custom logo box inserts often look fine in flat form and fail in the hand because the fit is off by a few millimeters. That small gap is enough to create movement, and movement is usually the enemy.
For shipping programs, ask for a basic drop or transit test. You do not need to pretend every brand is sending items through a torture chamber, but you do need to know whether the pack survives realistic handling. A design that looks good on a desk and fails after a short drop is not a packaging solution. It is expensive optimism. I have seen this go wrong on a small run of glass bottles, and the repair bill was not cute.
Timeline depends on complexity. A simple custom logo box inserts job with clear measurements and ready artwork can move relatively quickly. Add a new structure, multiple cavities, special print, or tooling revisions, and the schedule stretches. Production does not start until approval lands, and delayed feedback is the easiest way to blow up a tidy schedule. It is almost a hobby in packaging: one late approval, and suddenly everybody is “working hard” to catch up.
Typical workflow for custom logo box inserts looks like this:
- Collect product specs, quantity, and packaging goals.
- Choose the material and determine the cavity structure.
- Review a dieline or 3D mockup.
- Approve a prototype and test fit with real products.
- Confirm print, finish, and production details.
- Start production after final approval.
For straightforward orders, the process may take a couple of weeks from approved proof to production-ready output, depending on sampling and workload. More complex custom logo box inserts with new tooling, rigid components, or multiple revision rounds take longer. I would rather tell a buyer that upfront than watch them discover it after a launch date is already on the calendar. Packaging schedules have a nasty habit of becoming everybody else’s emergency. If you want a smooth launch, give the insert enough runway instead of asking for miracles on Friday.
Common Mistakes With Custom Logo Box Inserts
Measurement mistakes are still the most common problem. A few millimeters off in product diameter, lid depth, or cavity spacing can make custom logo box inserts fail immediately. Sometimes the box closes, but the insert crushes the product. Other times the product fits until an accessory is added, and then the whole layout breaks. The measurement sheet has to reflect the real packed version, not the empty hero sample on your desk.
Another common error is designing for the mockup instead of the actual product. If the real kit includes cords, caps, tamper seals, display cards, or fillers, those pieces change the dimensions. Custom logo box inserts need to be built around the complete set, not the nicest-looking item by itself. I have seen a lot of “perfect” inserts collapse the moment the last component gets added. Packaging reality is annoying that way.
Overbranding is a quieter mistake, but it shows up fast. Too many colors, too much ink coverage, or a cluttered graphic layout can make custom logo box inserts look busy instead of premium. The inside of a box should feel considered. It does not need to scream for attention. A simple logo, a clean message, and good white space often work better than a full-color explosion of enthusiasm.
Material mismatch causes trouble too. Heavy products need more support than light ones, and not every material behaves well under load. A flimsy board on a heavy item is asking for collapse. Foam can solve protection problems, but it may conflict with a sustainability story. Molded pulp can feel right for eco-minded brands, but only if the geometry actually supports the item. Custom logo box inserts are not one-size-fits-all, despite what some people wish the quote sheet would say.
Then there is the pack-line problem. If the insert takes too long to assemble, staff will cut corners. That usually means bent tabs, missed folds, or inconsistent packing. A beautiful insert that slows production is a self-inflicted wound. The best custom logo box inserts are easy to load, easy to check, and easy to repeat across a shift without making the crew hate the project.
Here is a practical rule: if your team cannot pack ten units in a row without confusion, the design probably needs simplification. Not every issue is solved by adding more structure. Sometimes the solution is removing one layer and making the cavity a little more forgiving. That is not a compromise. It is just good packaging sense.
Expert Tips for Better Custom Logo Box Inserts
Design for the packer first. That sounds boring, and it is, but boring usually ships better. Custom logo box inserts should have clear orientation, simple folds, and obvious entry points. If the packer can load it quickly without second-guessing the direction of a flap or the order of a component, you are already ahead of most projects.
Use contrast to your advantage. A logo does not need full-coverage print to read well. In many custom logo box inserts, a dark mark on a light surface, or a simple foil hit on a single panel, is enough to make the brand feel present. The goal is recognition, not visual noise. People do not remember “more ink.” They remember a crisp, tidy reveal.
Build around the product’s weak points. If the item has a glass edge, a charging port, a pump, a lid, or a fragile accessory, protect that first. Custom logo box inserts should support the exact place the product is most likely to fail. This sounds obvious until you see a tray designed to hold the middle of a bottle while leaving the neck exposed. Yes, that happened. Yes, it was as dumb as it sounds.
Use testing like a packaging professional, not a hopeful artist. A basic drop test, a vibration check, or a simple shipping simulation can tell you more than ten renderings. If the insert is for a retail or e-commerce shipment, it should survive actual handling. That is especially true for branded packaging where a damaged product undermines the whole premium message. A pretty sample that breaks in transit is just expensive decoration.
Consistency is underrated. A repeatable insert that behaves the same across runs often feels more premium than a complicated one with decorative extras. Custom logo box inserts should be easy to reproduce, easy to inspect, and easy to pack. That kind of reliability is what makes a packaging program look expensive in the right way. Not flashy. Just controlled.
A few practical specs to think about:
- Board thickness: often 1.5 mm to 3 mm for paperboard and corrugated insert structures, depending on load.
- Clearance: aim for just enough room to insert the product without wobble, usually a few millimeters rather than a loose fit.
- Print coverage: keep it focused unless the insert is meant to be a visual feature.
- Assembly steps: fewer folds and fewer separate parts usually mean lower labor cost.
For sustainable programs, ask whether the board is FSC-certified or whether the supplier can source materials with a clear chain of custody. The FSC site is a useful reference if your brand needs a stronger paper sourcing story. Just remember that certification helps the story; it does not replace good structural design. Custom logo box inserts still need to protect the product first.
One more thing: if you are comparing custom logo box inserts across multiple suppliers, keep the spec consistent. Same product dimensions, same outer box size, same material, same print notes, same quantity. Otherwise the quotes are garbage in, garbage out, and you will spend half a day comparing apples to oranges to a mystery fruit nobody can identify. I have seen that meeting. Nobody enjoyed it.
Custom Logo Box Inserts: Next Steps and Final Takeaways
If you are moving forward with custom logo box inserts, start with the basics: measure the product, list every component, confirm the outer box size, and decide whether protection or presentation matters more. That order matters because the design has to support the real use case, not just the mockup in someone’s head. Once those inputs are locked, the project becomes a lot easier to quote and produce.
Request at least one prototype and compare it against the product in real shipping conditions. Desk checks are fine for spotting obvious issues, but they do not tell you how the insert handles movement, vibration, or repeated opening. Custom logo box inserts should earn trust before they go into production, not after customers have already handled the first bad batch.
Get two or three quotes using the same specs so you can compare material, print, timeline, and tooling on equal terms. The cheapest quote is not always the best deal. Sometimes it is the quote that quietly assumes lower tolerances, fewer revisions, or more labor on your side. With custom logo box inserts, the real comparison is landed cost, packing speed, and damage risk.
Review the insert as part of the whole packaging system. A slightly better insert can reduce returns, protect the product, and improve the opening experience enough to justify the added spend. A badly chosen one does the opposite. That is why custom logo box inserts deserve the same level of attention as the outer box, the print finish, and the product itself.
So the practical takeaway is simple: build the insert around the product first, then shape the branding around the structure That Actually Works. If the fit is right, the materials match the job, and the pack-line can run it without drama, the insert will do its job quietly and well. That is the win. Not flashy. Just right.
FAQ
What do custom logo box inserts actually do?
They keep products from shifting during shipping and handling, which reduces scuffs, dents, and breakage. They also create a cleaner opening sequence by holding each item in place instead of letting it bounce around. On top of that, custom logo box inserts give you space for branding, labels, or a short message without relying on the outer box alone.
How much do custom logo box inserts cost?
Pricing depends mainly on material, cavity complexity, print coverage, and order quantity. Simple corrugated custom logo box inserts usually cost less than molded pulp or foam, while complex multi-piece designs cost more. Small runs carry more setup burden per unit, so the price drops as the order gets larger and the design becomes simpler.
What material is best for custom logo box inserts?
Corrugated board is a solid default for shipping protection and moderate budgets. Molded pulp is a smart pick when sustainability matters and the product needs molded support. Foam works for fragile or high-value items, but it is harder to justify if your brand wants a recyclable or lower-waste option. The best choice for custom logo box inserts depends on the product, the shipping risk, and the customer experience you want.
How long does it take to make custom logo box inserts?
A straightforward insert can move quickly if the dimensions are clear and the artwork is ready. New tooling, prototype revisions, and complex shapes add time before production starts. The fastest custom logo box inserts projects usually have one decision-maker, one product sample, and no mystery accessories hiding in someone’s drawer.
Can custom logo box inserts work for small businesses or small batches?
Yes, but the design should stay simple so setup costs do not eat the budget. Digital printing and standard dielines can help smaller runs stay practical. For small batches, custom logo box inserts usually work best when you focus on fit and protection first, then add branding where it actually improves the unboxing experience.

