A customer leaves after an oil service, and the smallest printed piece in the transaction may be the one they see for the next 3,000, 5,000, or 7,500 miles. That is why custom Oil Change Stickers with logo deserve more attention than many shops give them. They are service reminder, brand marker, and retention tool, all pressed into a few square inches of windshield space.
Receipts get folded into glove boxes. Emails sink below promotions and password resets. A windshield reminder stays in the driver’s peripheral vision for months, doing one plain job: showing who serviced the vehicle, when to return, and how to book the next visit.
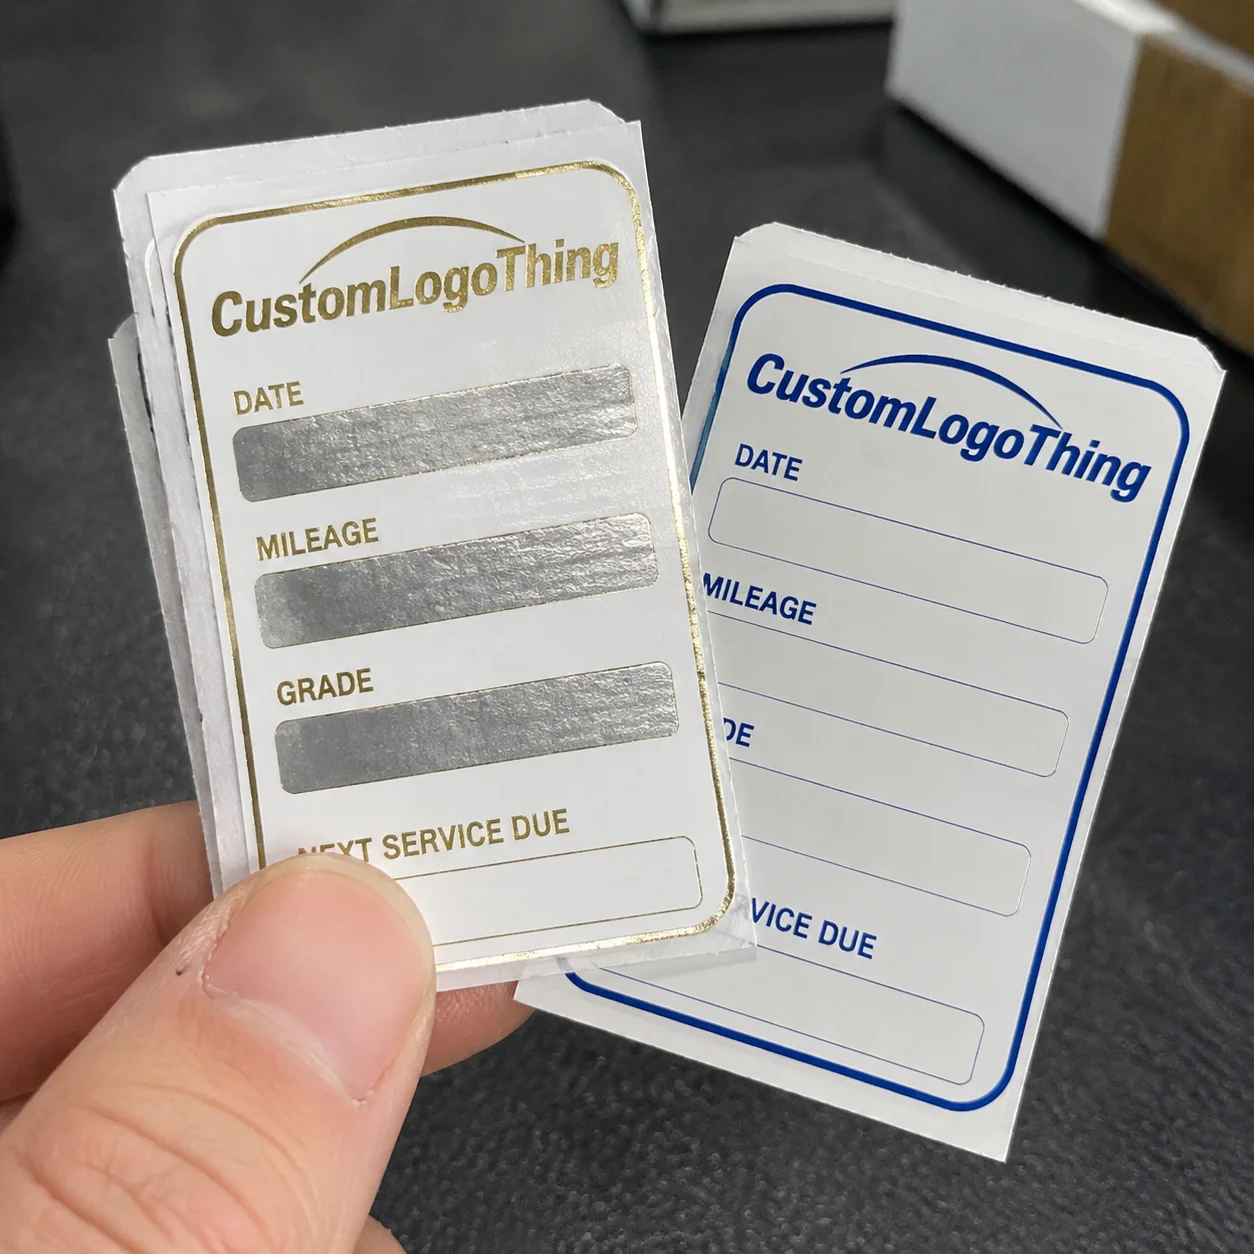
The product looks simple. Oil Change Reminder Stickers are removable or semi-removable windshield decals printed with a shop logo, date and mileage fields, oil grade notes, technician initials, phone number, booking URL, QR code, or short appointment prompt. Independent repair shops, quick lube centers, dealerships, fleet maintenance teams, mobile mechanics, and tire shops all use them.
Simple does not mean low-spec. Material, adhesive, coating, print method, layout, storage, and writing surface all affect how the sticker behaves once it meets glass, sunlight, defroster heat, interior cleaning spray, and a technician’s pen. From a print buyer’s point of view, these are small-format labels with the same decisions behind Custom Labels & Tags: surface, ink, finish, workflow, and repeatability.
Why Custom Oil Change Stickers With Logo Matter More Than They Look
Oil Change Stickers sit in a valuable location. The driver sees the lower windshield area repeatedly, often more often than any postcard, invoice, coupon, or service email. That visibility gives a branded reminder a practical marketing role without making it feel like an ad.
A good service sticker answers three questions quickly: when should I come back, how many miles should I drive before returning, and who do I contact? If the answer is clear, the sticker has done its job. If the print is tiny, the logo is muddy, or the handwritten mileage smears after a week, it becomes clutter.
The common mistake is treating the decal as a disposable scrap rather than customer-facing print. The cost per piece is low, but the use period is long. A sticker that costs only a few cents may stay in front of a customer longer than a service card, mailer, retail package, or custom printed box.
There is a trust signal here too. A clean, readable reminder suggests an organized shop. A crooked layout, fuzzy logo, or confusing service field sends a different message, even if the oil service itself was handled well. Small print details do shape how customers judge the work around them.
Shop-floor rule: if a technician cannot write the mileage cleanly in five seconds and the customer cannot read it from the driver’s seat, the design needs work.
For most buyers, the smartest approach is to define the sticker like any other printed component: size, face material, attachment method, ink system, writable coating, finishing format, and reorder plan. That discipline keeps cost under control and prevents surprises after the rolls arrive.
How Oil Change Reminder Stickers Work on the Windshield
The functional job is plain: the sticker must stay readable, hold neatly to glass, and remove cleanly at the next service interval. It should not slide down the windshield in July heat, curl at the corners in winter, or leave a gummy square behind.
Most shops choose between two attachment styles. Static cling grips glass without adhesive, using film contact and surface energy. Low-tack removable adhesive uses a light glue system, giving stronger placement while still aiming for clean removal.
Static cling is popular because it feels clean. It is easy to place, easy to remove, and forgiving if a technician needs to reposition it. The tradeoff is grip. In high heat, heavy condensation, dusty glass, or vehicles cleaned frequently from the inside, cling film may not hold as consistently as removable adhesive.
Low-tack adhesive gives more bite. It is useful for shops in hot climates, fleet vehicles with frequent interior cleaning, and service bays where technicians want the sticker to stay put the first time. The adhesive should still be designed for temporary windshield use. Permanent label adhesive is the wrong tool here.
Write-on performance matters as much as adhesion. Ballpoint pens, fine-tip permanent markers, grease pencils, and thermal transfer printers all interact differently with the surface. A matte write-on varnish may accept ink cleanly, while a glossy untreated film can cause smearing or poor contrast. If technicians use a specific pen every day, test that pen before approving a large run.
Common layouts are simple for a reason: logo at the top, service date and mileage in the center, oil grade and technician notes below, then phone number, URL, or QR code at the bottom. The sticker should be visible without blocking the driver’s sight line. Many shops stay near 1.5 by 2.5 inches or 2 by 3 inches, though exact sizing depends on windshield placement and local preference.
Materials, Adhesives, and Print Specs That Affect Durability
Material choice sets the foundation. Vinyl is flexible and familiar, with good conformability and a soft hand-feel. Polypropylene is often economical, slightly stiffer, and clean-looking on glass. Polyester is more dimensionally stable, which can help with heat resistance and crisp printing. Static cling film is usually PVC-based or a similar flexible film engineered to cling without glue.
Thickness changes the feel. Thin films around 2 to 4 mil can look cleaner and less bulky on the windshield. Thicker films may feel more substantial, but they can curl if the adhesive, liner, die-cutting, or storage conditions are not matched well. Curl seems minor until technicians are trying to apply hundreds of reminders during a busy service day.
Adhesive selection should match the customer experience. A removable adhesive should release cleanly after months on glass. An ultra-removable adhesive may reduce residue risk, though it can sacrifice some hold. Static cling avoids glue entirely, but it still needs clean glass contact to perform well.
Ink and coating choices affect durability and legibility. UV inks cure quickly and can produce sharp color. Solvent or eco-solvent inks can work well on many films, depending on the supplier’s print platform. Thermal printable coatings are used when shops want variable information printed instead of handwritten. Matte write-on varnishes remain common because they give pens and markers a surface to grip.
Branding needs restraint. A vector logo file, such as AI, EPS, or editable PDF, gives the cleanest output. Pantone color matching can help protect brand consistency, but CMYK is often adequate for economical runs. Pale colors may disappear against bright outdoor light, and tiny phone numbers on clear film can be surprisingly hard to read. High contrast wins more often than elaborate artwork.
The vehicle interior is not gentle. Sunlight, dashboard heat, winter condensation, defroster airflow, and ammonia-based glass cleaners can all challenge the sticker. The same rule applies here as it does with packaging design: the material has to survive the real use case, not just look good on a proof.
Cost, Pricing, MOQ, and Quote Factors for Service Stickers
Pricing for custom oil change stickers with logo usually depends on quantity, size, material, adhesive type, number of ink colors, coating, finishing, and whether the stickers are supplied on rolls or sheets. Artwork cleanup, rush scheduling, freight, and split shipments can also change the invoice.
Higher quantities reduce unit cost because setup work gets spread across more pieces. Even a simple service sticker can involve artwork review, proofing, press setup, material allocation, coating, die-cutting, winding or sheet packing, and quality checks. Short runs still consume production time, which is why manufacturers set minimum order quantities rather than pricing every tiny batch like office copies.
Exact pricing depends on supplier, specification, and order volume, but practical ranges help frame the decision. Basic one-color service stickers on standard removable material are usually far cheaper than full-color, coated, QR-enabled stickers on specialty film. Rolls tend to be efficient for high-volume service bays. Sheets can suit small teams, mobile mechanics, or locations without a dispenser setup.
| Specification | Typical Use | Cost Impact | Buyer Notes |
|---|---|---|---|
| One-color static cling | Standard oil reminder programs | Lower | Clean removal, simple branding, best with high-contrast writing fields |
| Full-color removable adhesive | Branded shops and dealerships | Medium | Stronger hold and better logo presentation, depending on coating |
| Thermal printable film | Shops printing variable data | Medium to higher | Requires compatible printer ribbon, coating, and workflow testing |
| QR code and specialty coating | Online booking or review prompts | Higher | Needs real-size scan testing and careful contrast control |
As a planning example, a 5,000-piece roll order may price very differently from a 50,000-piece recurring program because setup, finishing, and freight are spread out differently. Simple runs may land in a low per-piece range, while specialty constructions can be several times higher. Treat any estimate as conditional until the supplier sees the size, material, ink coverage, finishing format, and delivery requirements.
For cleaner quotes, provide exact specs from the start: size, quantity, material preference, adhesive style, print colors, roll or sheet format, intended writing method, shipping destination, and requested delivery date. If your shop also orders other Custom Packaging Products, keep brand assets consistent so service stickers, labels, and customer-facing print look connected.
Process and Timeline: From Artwork Proof to Finished Rolls
A clean order starts with use case, not artwork. Decide where the sticker will sit, how technicians will fill it out, how long it should remain on glass, and whether the shop prefers rolls, sheets, or boxed sets for multiple locations. Once that is clear, the print decisions get easier.
The usual sequence looks like this: define size and use case, submit logo files, choose material, review proof, approve production, print, coat if needed, die-cut or slit, inspect, pack, and ship. A simple repeat order can move quickly after proof approval. A new design with color matching, specialty film, custom die shapes, or location-specific roll finishing needs more schedule room.
Vector logo files are preferred because they scale cleanly. High-resolution PNG or PDF files may work if the logo is sharp and large enough. Low-resolution screenshots usually create fuzzy edges. If a QR code is included, test it at final size, on the actual background color, from a normal phone distance.
The proofing stage is where buyers should slow down. Check logo placement, spelling, phone number, URL, QR code scanability, service fields, oil type labels, safe margins, and the final trim line. One wrong digit can repeat across thousands of stickers, an expensive mistake for such a small item.
Production timelines vary. Many straightforward custom printed service stickers take around 7 to 15 business days after proof approval, though material availability, order size, color matching, custom die shapes, roll finishing, and shipping distance can shift that window. Rush work may be possible, but it often adds cost and leaves less room for testing.
Quality checks should include print clarity, registration, coating consistency, cut depth, roll direction, unwind direction, and adhesion behavior. For packaging-related print, standards bodies such as ISTA are often referenced for distribution testing principles, while paper and fiber-based branded packaging may involve programs such as FSC. Oil change stickers are not shipping cartons, but the thinking is similar: define the performance requirement, then verify the piece against that requirement.
Step-by-Step Guide to Ordering the Right Reminder Sticker
Ordering the right sticker is mostly about removing guesswork. A clear spec prevents long email chains, weak proofs, and production delays. It also helps the supplier recommend the correct construction instead of guessing from a logo file alone.
- Choose the windshield position and size. Place a paper mockup on the glass before approving the design. A 2 by 3 inch layout may look comfortable on screen but feel too large near the driver’s sight line, while a 1.5 by 2 inch layout may crowd the service fields.
- Select static cling or removable adhesive. Static cling is clean and easy to reposition. Removable adhesive gives stronger hold in hot climates, cold weather, or vehicles where the windshield area gets touched or cleaned often.
- Confirm the information fields. Most shops need mileage, date, oil type, and service advisor or technician initials. Some add a QR code, phone number, booking URL, loyalty prompt, fleet unit number, or review request.
- Prepare brand files. Use vector art when possible. Check that logo colors, fonts, and contrast remain legible at final size. A layout can look polished at 300 percent zoom and still fail at actual windshield size.
- Choose the format for daily workflow. Rolls are efficient at a counter or service bay dispenser. Sheets are convenient for smaller teams. Boxed sets may help multi-location shops control inventory.
- Review the proof carefully. Treat it with the same discipline used for labels, cartons, or retail packaging. Phone numbers, URLs, QR codes, and service intervals should be checked by more than one person.
- Test before scaling. Put a sample or first shipment into real shop conditions. Try the actual pen, marker, or printer. Apply it to clean glass, expose it to heat and cold, then remove it after a practical test period.
For recurring orders, document the approved specification. Keep the final art file, material name, adhesive type, roll direction, core size, and reorder quantity in one place. That small bit of discipline can prevent version drift six months later.
Common Mistakes That Make Oil Service Decals Fail Early
The first failure point is usually the wrong attachment method. A weak cling may be fine for a mild climate and clean windshield, but it may struggle with high heat, frequent cleaning, or repeated repositioning. A stronger adhesive may hold better, but if it leaves residue, the customer remembers that too.
Overcrowding is another common issue. A shop wants the logo, mileage, date, oil grade, QR code, phone number, web address, slogan, and maybe a coupon message on a very small surface. The result is a sticker nobody can read quickly. Prioritize the service reminder first, then the brand message.
Skipping write-on testing creates avoidable frustration. Some marker inks bead up on glossy surfaces. Some ballpoint pens dig into soft film. Some thermal transfer ribbons need a specific receptive coating. If the writing method fails, technicians compensate by pressing harder, writing larger, or ignoring fields.
Artwork approval at the wrong scale causes surprises. Fine lines vanish. Pale gray text becomes invisible against daylight. A QR code that scanned on a monitor may fail after printing at less than one inch wide. Print a real-size proof on paper and tape it to glass before approving.
Removal experience also matters. Oil service decals should behave like temporary reminders, not permanent safety labels. If the customer has to scrape adhesive from the windshield, the sticker has damaged the service experience.
Inventory planning can fail quietly. Ordering only for the next few weeks may seem cautious, but it can create reorder rushes, inconsistent designs, and freight costs that erase the savings. A shop with five technicians completing 25 oil services per day can burn through more than 3,000 stickers in a quarter, even before seasonal promotions or fleet work.
Next Steps Before You Place an Order
Before contacting a supplier, create a one-page specification sheet. Include size, quantity, material preference, adhesive type, logo file, brand colors, writing method, roll or sheet format, delivery deadline, and shipping address. A clear spec saves time on both sides.
Ask the people who will use the stickers. Service writers know which details customers ask about. Technicians know how quickly the reminder must be filled out during a busy bay schedule. If the design slows them down, it will not be used consistently.
Compare one or two layouts at actual size on a windshield. Computer screens make everything look larger, brighter, and cleaner than it will appear in a vehicle. Put the mockup where the final sticker will sit, then check it from the driver’s seat in daylight.
Prepare the logo file, verify contact details, test any QR code, and decide what the sticker should encourage. Some shops want appointment booking. Others want return mileage only. Fleet service teams may need unit number or oil type clarity more than marketing copy.
Ask the manufacturer about samples, proofing, production lead time, reorder consistency, and whether the same design can be repeated across future runs. If the shop is building a broader branded packaging system with labels, service cards, mailers, or counter displays, share those assets so the sticker does not feel disconnected.
Custom oil change stickers with logo work best when the material, adhesive, artwork, and ordering process match the way a shop actually services vehicles. Keep the design readable, test the writing surface, Choose the Right attachment method, and order with enough lead time to avoid rushed decisions.
FAQ
What are custom oil service stickers with a logo used for?
They remind drivers when to return for the next oil change by showing the service date, mileage, oil type, and shop contact details. They also keep the shop’s brand visible inside the vehicle between visits, which can support repeat service and easier rebooking.
Are static cling or adhesive oil change stickers better?
Static cling is easier to remove and reposition, making it a clean option for many standard windshield reminder applications. Removable adhesive can provide stronger hold in hot climates, cold weather, or vehicles where the sticker may be touched or cleaned more often.
How much do logo oil change reminder stickers cost?
Cost depends on quantity, size, material, adhesive, print colors, coating, finishing format, and whether artwork cleanup or rush production is needed. Larger runs usually reduce unit cost because setup and production preparation are spread across more stickers.
What file type should I send for custom windshield service stickers?
A vector file such as AI, EPS, or editable PDF is usually best for a clean logo and sharp print. A high-resolution PNG or PDF may work if the logo is crisp, correctly colored, and large enough for the final sticker size.
How long does it take to produce custom oil change stickers with shop branding?
Many standard orders take about 7 to 15 business days after proof approval, but timing depends on material availability, order size, color requirements, finishing format, and shipping distance. Complete specs and quick proof review help avoid delays.


