Why the Cheapest Poly Mailer Often Fails in Transit
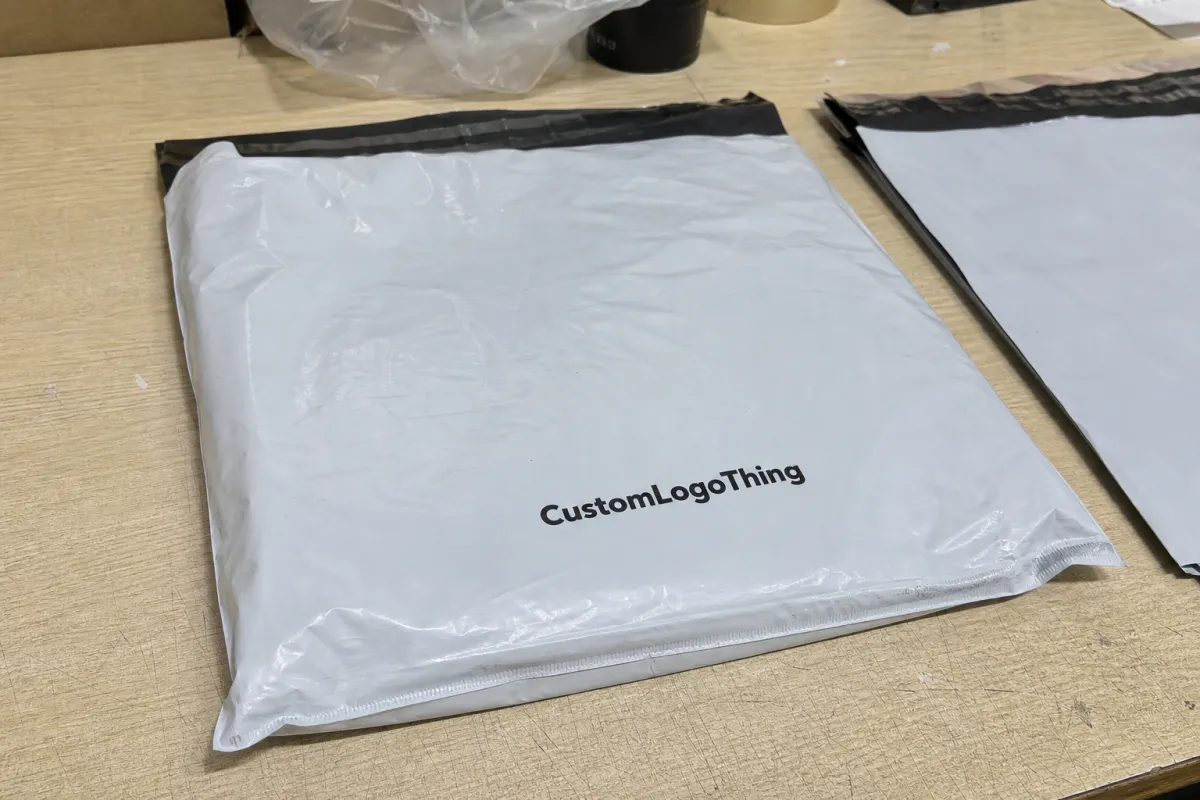
The ecommerce brand Custom Poly Mailer Bags production quality checklist starts with a simple point: most problems show up in the seal, the film, or the adhesive strip, not in the artwork. A bag can look right in a mockup and still split at the fold, leak at the seam, or peel open after temperature swings. Those failures turn into refunds, re-ships, and customer complaints fast.
That pattern shows up often with subscription brands and DTC labels shipping soft goods. The mailer survives the sample stage, then tears on the conveyor or arrives with a weak self-seal because the adhesive was chosen for price instead of climate range. That is not a branding issue. It is a production issue.
For buyers, the real job is not to approve the prettiest sample. It is to choose a bag that protects the product, stays within shipping dimensions, and arrives without defects that make the brand look careless. If the bag fails in transit, the print quality stops mattering.
A good poly mailer is the one that keeps its seal, holds its size, and performs the same on unit 1 and unit 50,000.
That is why spec review matters before anyone signs off on a run. Film strength, seal integrity, print consistency, and packing accuracy all need to work together. If one of them is off, the whole order can feel cheap even when the design looks premium.
Production Steps and Timeline from Artwork to Shipment
Good production follows a sequence. Skip a step and the schedule gets messy. For a typical order, the flow is artwork review, material approval, print proof, sample confirmation, printing, slitting, bag making, inspection, packing, and shipment. Each stage has its own risk.
The biggest delay is usually approval time, not machine time. Missing dielines, unclear bleed, color changes after proofing, or a late request to move the logo can add days. If artwork is not locked before plate-making or printing starts, expect rework. That is a process problem, not a factory surprise.
Here is a practical timing range:
- Sample lead time: often 3-7 business days for straightforward custom samples, longer for unusual film or finish requests.
- Mass production: often 10-18 business days after approval, depending on quantity, print colors, and factory load.
- Freight time: can be 3-7 days domestically or much longer for international shipments, so transit planning matters.
Light customization usually stays near the shorter end of those ranges. Complex branding, heavy color coverage, specialty adhesive, or custom film pushes the schedule longer. Rush orders are possible, but they usually trade one problem for another: higher freight cost, less inspection time, or a tighter approval window.
Before production moves forward, ask for a clear proof, a material spec sheet, and a pre-production sample when the order size justifies it. If the supplier cannot explain what is being approved at each step, that is a warning sign. A clean process is part of good packaging, not an extra.
For buyers comparing workflows across formats, the same discipline applies to Custom Packaging Products and not just mailers. The less ambiguity you allow early, the fewer expensive surprises you get later.
Film, Seal, and Print Specs That Define Quality
Quality lives in the spec sheet, not in a showroom sample under flattering light. A serious buyer should start with material specs: film thickness, opacity, tensile strength, seal width, and adhesive performance. If those details are vague, the buyer is guessing.
Thicker is not always better. A heavy-looking bag can still fail if the film blend is brittle or the seal area is weak. In practice, a well-built 60-80 micron mailer often performs better than a poorly made thicker bag because the film, seal, and stretch behavior are balanced. Buyers should ask what the film is designed to do, not just how thick it sounds.
Print quality needs the same attention. Check registration, ink adhesion, color consistency, and scuff resistance after the bag is folded. A logo that looks fine on a flat proof can shift or crack once the mailer is bent, stacked, or tossed into a carton. Opaque films can also make colors read differently than expected, especially under warehouse lighting.
Usable inner space matters too. A bag may measure correctly on paper but lose practical capacity because of the gusset shape or seal placement. Dimensional accuracy matters more than people think. If the product barely fits on the sample, it will usually fit badly in production.
For buyers who want external reference points, the broader packaging industry is useful. The ISTA test framework helps evaluate transit behavior, and sourcing standards tied to the FSC can matter for brands that track fiber responsibility in adjacent packaging programs. Not every mailer needs the same compliance level, but the supplier should be able to explain what each spec means.
The short version: measure the bag against the spec sheet, not the lighting. If the sample passes visually but fails dimensionally, it does not pass.
Cost, Pricing, MOQ, and Unit Cost Drivers
Pricing for poly mailers is usually driven by six levers: size, film thickness, print color count, finish, adhesive style, and order quantity. If a quote is much lower than the others, one of those levers is probably being weakened. Sometimes it is the film. Sometimes it is the seal. Sometimes the factory is trimming inspection or packing. Cheap is rarely free; it usually invoices you later.
MOQ changes the math more than new buyers expect. A low MOQ usually carries a higher unit cost because setup, plates, and machine time are spread over fewer pieces. On a 5,000-piece order, Custom Poly Mailer pricing might land around $0.18-$0.35 per unit depending on print coverage and film spec. On a 20,000-piece run, that can drop if the design is stable and the vendor does not need to restart the line for every variation.
Hidden costs show up where buyers forget to ask. Plate fees, setup charges, proof revisions, sampling, and upgraded outer packaging can make a quote look clean on the first page and messy on the invoice. If the seller charges for every small artwork edit, a simple branded packaging project becomes a long list of add-ons.
| Option | Typical Unit Cost Range | Best For | Watch-Out |
|---|---|---|---|
| Basic stock mailer with one-color print | $0.12-$0.22 | Lean brands testing demand | Limited brand identity and fewer size options |
| Custom poly mailer with full-color branding | $0.18-$0.35 | Most ecommerce shipments | Color proofing and artwork placement need careful review |
| Premium custom mailer with thicker film and specialty finish | $0.30-$0.60+ | Luxury or gift-focused retail packaging | Higher MOQ and more setup risk |
The cheapest quote can become the most expensive order if bags fail in transit or trigger a reprint. Saving a few cents per unit does not matter if a percentage of the shipment needs replacement. From a purchasing point of view, consistency is usually the better buy.
Ecommerce Brand Custom Poly Mailer Bags Production Quality Checklist
Use this checklist before production starts. Keep it written, keep it specific, and get the supplier to confirm each item in plain language. That is how the checklist becomes a control tool instead of a hopeful email thread.
- Dimensions: confirm flat width, length, gusset if applicable, and finished tolerance.
- Material: confirm film type, thickness, opacity, and any recycled-content claim.
- Print file: confirm dieline, bleed, safe area, color mode, and linked fonts.
- Adhesive: confirm strip type, peel strength, and whether it performs in cold storage or hot transit.
- Pack count: confirm units per carton and cartons per pallet.
- Sample match: confirm the sample is approved against the spec sheet, not just against memory.
- Inspection: confirm how many bags are checked and what defects are rejected.
On the sample itself, test three things first: seal strength, tear resistance, and print placement. Then test the adhesive strip across multiple units. One perfect bag means almost nothing. Ten random bags tell you much more about variation.
Packaging and labeling matter too. Verify carton counts, outer labeling, pallet protection, and any moisture barrier or stretch wrap used for shipment. A clean bag that gets crushed in transit still arrives as damaged inventory. Outer carton protection is part of the packaging system, not an afterthought.
Before final release, compare the pre-production sample, the approved tech pack, and the carton label. If all three disagree, stop and fix it before the run ships.
For reference materials and internal process templates, many brands also keep examples in Case Studies so the team can compare older runs against the current one. That habit makes it easier to tell whether a defect is new or simply repeated.
Common Artwork, Sizing, and Packing Mistakes
The same mistakes show up again and again: wrong gusset size, artwork too close to the edge, tiny legal text that becomes unreadable after print shrink, no bleed, and no clear safe zone. Someone approved a proof on a laptop and called it done. Then the bags arrive and everyone acts surprised.
Color drift is another common issue, especially on opaque or recycled materials. Screen mockups often look brighter than printed film, and inks can read differently depending on finish. Matte stock, glossy stock, and recycled blends all change the final look. A supplier who says every substrate prints exactly the same is overselling confidence.
Packing errors are less visible but just as costly. Loose cartons, mixed SKUs, incorrect counts, and weak outer protection can damage bags before they are used. That means the brand pays freight on bad inventory and then pays again to sort or replace it.
One bad approval can lock a mistake into the whole order. If the logo sits 8 mm too low, every bag carries that error. If the pack count is wrong, the inbound receiving process gets messy. That is why the checklist has to cover the sample, the tech pack, and the final carton label every time.
Brands That Sell across multiple channels should also keep the mailer spec aligned with other packaging assets. If the brand looks clean online but sloppy on the shipper, the customer notices.
Expert Tips for Better Approvals and Cleaner Runs
Build a golden sample and keep it in a dry, labeled place for reorders. Not a photo. Not a memory. The actual bag. Once you have one approved standard, future orders get easier because everyone can compare against the same physical reference.
Ask for a short pre-production photo set or video showing the print, seal, and stack before the full run ships. That does not replace inspection, but it catches obvious mistakes early. A wrong logo placement or bad stack pattern is much easier to fix before packing than after freight leaves the building.
Use two checklists, not one. One goes to the factory. One stays with receiving. The factory checklist should cover artwork, materials, pack count, and finish. The receiving checklist should cover carton condition, sample comparison, and counts on arrival. It is boring, which is why it works.
Keep a simple approval log with date, version number, change summary, and sign-off. That log is useful when a reorder arrives with a subtle shift and nobody can remember whether the artwork, adhesive, or film spec changed last time. A clean record makes the conversation faster.
Lock artwork, dimensions, and pack counts before asking for a quote. If the spec is still moving, every number will be fuzzy. The factory is not guessing for fun. It is guessing because the brief told it to.
For brands comparing mailers with rigid formats, the same discipline applies to Custom Poly Mailers and other packaging formats across the product packaging lineup. The structure changes, but the approval logic stays the same.
What to Do Before You Reorder the Next Batch
Before you reorder, review the last shipment and compare it to the approved sample. Look for seal issues, print drift, count errors, and any change in adhesive behavior. If the last batch had a weakness, write it into the next spec sheet. Memory is a bad production document.
Update the spec if your product size changed, your shipping method changed, or your branding evolved. A bag that worked for folded tees may not work for thicker apparel or boxed kits. Reorders are where brands assume nothing changed; in practice, something usually did.
Set reorder triggers based on inventory, lead time, and seasonal demand. If you wait until you are nearly out, you lose room to approve samples properly, and the factory gets pressure instead of information. That is how rushed decisions sneak into otherwise solid packaging plans.
Use the same checklist on the next sample, the next quote, and the next inbound inspection. That is the point. A good process is repeatable, not one-time rescue.
If you treat the ecommerce brand Custom Poly Mailer Bags production quality checklist like an operating document, you get fewer surprises, cleaner approvals, and a better fit between cost and performance.
How do I check custom poly mailer bags before mass production?
Approve a physical sample against the written spec sheet, not just the digital mockup. Test seal strength, sizing, print placement, and adhesive performance on multiple units. Confirm carton count, label accuracy, and outer packing before the full run is released.
What affects the unit cost of custom poly mailer bags most?
Bag size, film thickness, print color count, and order quantity usually move the price the most. MOQ, setup fees, plate charges, and sampling can raise the effective unit cost on small runs. Better planning on artwork and specs usually lowers rework and keeps pricing cleaner.
How long does production and delivery usually take for poly mailers?
Artwork approval and sample sign-off are often the first bottlenecks, not the factory run itself. Standard production is usually faster than custom print jobs that need extra approval steps. Freight time can be as important as factory time, so ask for both lead time and transit time.
What should I test in a poly mailer quality check?
Test seals, tear resistance, print durability, adhesive strip hold, and dimensional accuracy. Check whether the bag still performs when folded, stacked, and packed at normal shipping weight. Inspect multiple samples so you catch variation instead of trusting one perfect-looking bag.
Can I fix artwork or size issues after approval?
Sometimes, but changes after approval often mean new setup costs, schedule delays, or a fresh sample round. Size changes can affect print placement, bag fit, and packing counts, so they are rarely minor edits. Lock the spec early if you want fewer surprises and less expensive rework.

