Buyer Fit Snapshot
| Best fit | Custom Tray and Sleeve Boxes projects where brand print, material claims, artwork control, MOQ, and repeat-order consistency need to be specified before quoting. |
|---|---|
| Quote inputs | Share finished size, material target, print colors, finish, packing count, annual reorder estimate, ship-to region, and any compliance wording. |
| Proofing check | Approve dieline scale, logo placement, barcode or warning zones, color tolerance, closure strength, and carton packing before bulk production. |
| Main risk | Vague material claims, crowded artwork, missing packing details, or unclear freight terms can make a low unit price expensive after revisions. |
Fast answer: Custom Tray and Sleeve Boxes: Board, Finish, Dieline, and Unit Cost should be specified like a repeatable production item. The safest quote records material, print method, finish, artwork proof, packing count, and reorder notes in one written spec.
Production checks before approval
Compare the actual filled-product size with the drawing, then confirm tolerance on folds, seals, hang holes, label areas, and retail display edges. Reserve space for logos, QR codes, warning copy, and material claims before decorative graphics fill the panel.
Quote comparison points
Review material grade, print process, finish, sampling route, tooling charges, carton quantity, and freight assumptions side by side. A quote is only useful when the supplier can repeat the same color, closure quality, and packing count on the next order.
Custom Tray and Sleeve Boxes: Fit, Cost, and Setup Guide
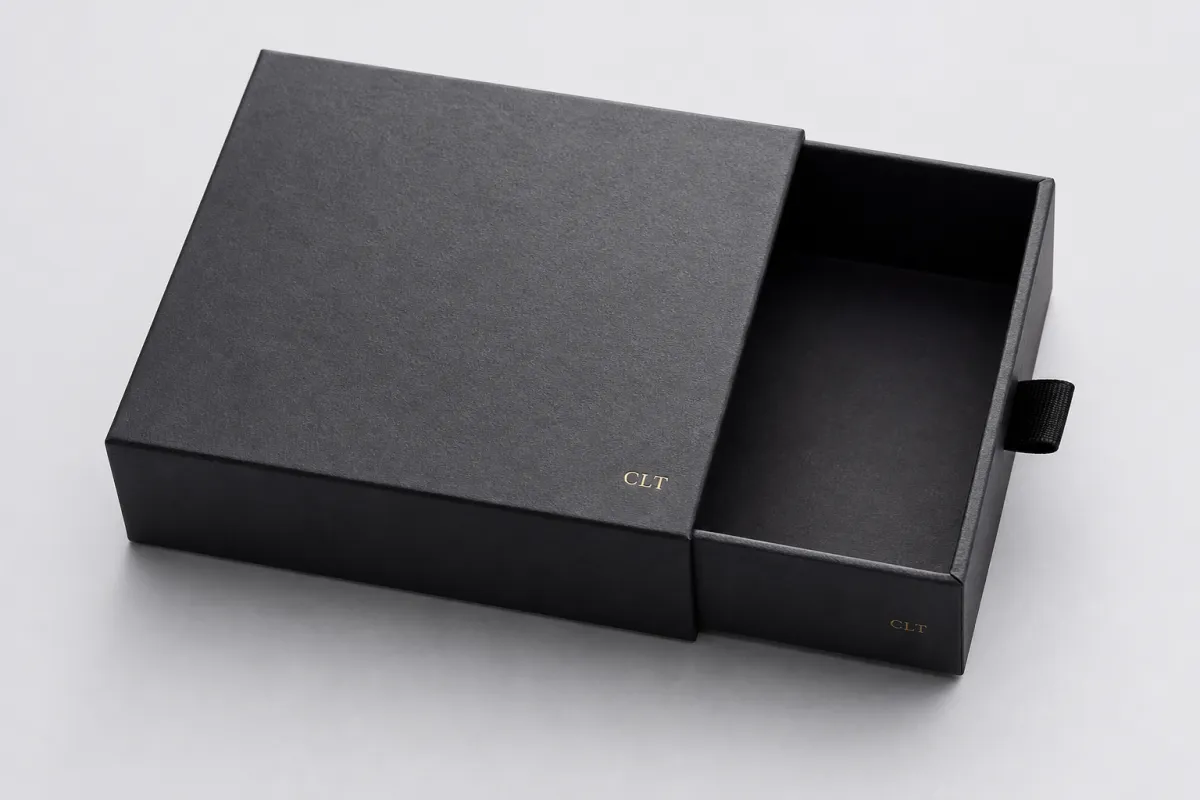
Custom Tray and Sleeve boxes do a lot of work for a format that can look plain at first glance. The premium feel usually comes from the reveal, not from board thickness alone: the sleeve frames the moment, while the tray protects the product and gives the whole pack some structure. That is why custom tray and sleeve boxes can make a product feel more intentional on shelf, in mailers, and during unboxing without forcing a full rigid setup.
From a packaging buyer’s point of view, this format earns attention because it gives you two branding surfaces, a controlled opening experience, and enough structure for product packaging that needs to look polished without becoming overbuilt. It fits launch kits, cosmetics, tech accessories, gift sets, and limited-edition bundles especially well. The catch is that custom tray and sleeve boxes are not just sliding cartons. Fit, friction, print placement, and insert planning decide whether the result feels elegant or awkward.
Custom tray and sleeve boxes: why they punch above their weight
The part many teams miss is simple: custom tray and sleeve boxes often feel more premium than their material cost suggests because they manage anticipation so well. A sleeve hides the contents until the final pull, and that brief resistance gives the product a sense of intention. Even a modest board spec can feel elevated if the draw force is right and the print design stays disciplined.
That is one reason custom tray and sleeve boxes show up so often in branded packaging for launches and gift programs. The sleeve becomes the billboard. The tray becomes the frame. In retail packaging, that split matters because customers read the outside quickly, then experience the inside more slowly. When those two moments are designed separately, the pack can do more than a standard folding carton usually can.
Custom tray and sleeve boxes also help with package branding in a practical way. You get one panel for bold messaging, another for ingredient or spec information, and a third area for logos, icons, or a quieter finish treatment. That split can reduce clutter. It can also improve shelf legibility, especially for products competing in crowded categories where every square inch of print space has to justify itself.
The sleeve controls the first impression. The tray controls whether that impression feels finished or fussy.
What most people get wrong is treating this format like a generic sliding carton. It is not that simple. If the sleeve is too loose, the box feels cheap. If it is too tight, the opening gets kinda annoying. If the insert is not planned, the product shifts during transit and the whole presentation loses its value. In practice, custom tray and sleeve boxes reward careful fit more than decorative excess.
For that reason, these packs are often a smart middle ground between basic custom printed boxes and heavier rigid packaging. You still get a premium look. You still get structure. But you can keep the construction lighter, easier to ship, and easier to store than a fully rigid setup in many cases.
How custom tray and sleeve boxes work: structure, materials, and fit
The format is straightforward, but the details are where the work happens. The inner tray holds the product, and the outer sleeve controls presentation, branding, and the first point of contact. Custom tray and sleeve boxes perform best when those two parts are engineered together instead of being treated as separate pieces assembled at the end. A good sample usually makes that obvious within seconds: if the tray pulls cleanly, the geometry is probably close; if it snags or rattles, you are gonna feel that problem every time the box is opened.
Choosing the right substrate
Most custom tray and sleeve boxes are built from paperboard rather than thick rigid chipboard. For lighter products, SBS or C1S board in the 18-24 pt range is often enough, especially when the item has its own primary container. CCNB can be a practical choice for higher recycled content goals, while kraft board gives a more natural retail packaging look that fits wellness, food-adjacent, and eco-positioned brands.
Rigid board does have a place, especially when the product is heavier, the box must survive more handling, or the brand wants a more substantial feel. But rigid construction changes the economics quickly. If the goal is polished product packaging rather than a premium gift box at any cost, custom tray and sleeve boxes on paperboard may be the smarter fit.
If sustainability matters, ask whether the board is FSC-certified and whether the finishing choices still allow recycling in your target market. The FSC chain-of-custody framework is worth reviewing if your buyers ask for documentation: FSC standards and certification details. The point is not to chase a label for its own sake. It is to choose materials that support your actual sales story, not just the render on a sales deck.
Fit mechanics matter more than people expect
With custom tray and sleeve boxes, the most important dimension is often not the product length or width by itself. It is the packed system dimension: product, insert, accessory bundle, clearance, and the amount of friction needed to make the sleeve feel intentional. A half-millimeter can matter. So can the board thickness, glue wrap, and how the tray walls are folded.
Common fit features include finger notches, thumb cuts, pull tabs, and partial openings that make removal easier. Those details sound minor, but they change the user experience dramatically. A box that needs two hands and a tug feels very different from one that slides with controlled resistance. In custom tray and sleeve boxes, that resistance is part of the brand.
Transit testing should not be ignored either. Many packaging teams borrow from ISTA-style drop and vibration thinking because the box has to survive actual handling, not just a tabletop reveal. If you want a starting point for performance methods, the testing framework at ISTA is a useful reference. It will not design your pack for you, but it helps you ask better questions about protection and distribution risk.
How artwork is usually split
One practical advantage of custom tray and sleeve boxes is that print can be split between the two parts. The sleeve often carries the strongest branding, while the tray can carry a message, a pattern, or a quieter internal reveal. That split helps budget control. Full coverage on both components can push print cost up fast, especially if you add specialty coating, foil, or spot UV.
Good packaging design uses that split to control hierarchy. Put the logo where it is seen first. Put product detail where it supports buying confidence. Keep the tray clean if the sleeve already carries enough visual weight. The result is often better than crowding every surface with ink.
Practical rule: if the tray will be partially hidden in normal use, spend more on the sleeve and less on the concealed surfaces. That is one of the easiest ways to keep custom tray and sleeve boxes polished without paying for decoration no one sees.
Custom tray and sleeve boxes process and timeline: from dieline to delivery
The workflow is fairly predictable, but delays usually come from incomplete inputs. Custom tray and sleeve boxes begin with product measurements, then move into structural direction, dieline creation, proofing, sampling, production, and packing. If any one of those stages is rushed, the whole schedule can slip.
What the process usually looks like
- Discovery and measurement. The packaging team confirms product dimensions, accessory count, tolerance, and whether an insert is needed.
- Structural setup. A dieline is built for the tray, sleeve, and any internal spacer or insert.
- Artwork placement. Print is mapped to the structure so logos, legal copy, and design elements land in the right position.
- Proofing. A digital proof or structural sample is reviewed for panel placement, bleed, and fit.
- Sampling. For new launches, a physical sample often saves money by exposing problems before production.
- Production. Printing, cutting, laminating, gluing, and packing move into the main run.
- Final inspection and shipment. Units are checked for alignment, color consistency, and sleeve friction before dispatch.
Lead time depends on how clean the inputs are. For a simple run of custom tray and sleeve boxes with straightforward artwork and no unusual insert, production often lands around 10-15 business days after proof approval. Add a custom insert, foil stamping, or multiple SKUs, and the schedule can stretch to 18-25 business days or more. Sampling can add another few days, depending on the complexity of the cut.
Where do delays usually happen? The answer is boring, but accurate: late artwork approval, product measurements that ignore tolerances, and the need to rework an insert after the first sample. A box that looks fine on screen can still fail in hand if a charger cord, dropper bottle, or accessory set shifts in the tray.
One useful habit is to treat the structure as a system, not just a container. A box for a cosmetic serum, a charging accessory, and a holiday gift set all need different internal logic. The more moving parts you have, the more valuable it is to build in time for revisions. That is especially true for custom tray and sleeve boxes that need to balance shelf appeal with shipping resilience.
If you are working with a supplier, ask for a schedule that separates structural sampling from graphic approval. That makes it easier to see where time is actually being spent. It also helps if the same pack needs to be adapted into multiple sizes later. A good dieline file can save future rounds of custom tray and sleeve boxes work from starting over.
Custom tray and sleeve boxes cost and pricing: what moves unit cost
Pricing for custom tray and sleeve boxes is not mysterious, but it is often presented too vaguely. The biggest drivers are board grade, finished size, print coverage, specialty finishes, and whether the design needs inserts or extra assembly. Quantity matters too, because fixed setup costs spread out more efficiently over larger runs.
For a rough sense of scale, a small run of 1,000 units might land around $0.90-$1.80 per unit for a simple printed tray-and-sleeve setup, depending on size and finish. At 5,000 units, that range may come down to roughly $0.28-$0.65 per unit. Larger runs can drop lower still, sometimes into the $0.18-$0.45 range, but only if the design stays restrained. Add foil, embossing, special coatings, or a more complex insert and the curve changes fast. These figures are directional, not universal, because shipping lane, material market swings, and converting method can move a quote more than people expect.
| Option | Typical use | Relative cost | What it changes |
|---|---|---|---|
| Simple paperboard tray and sleeve | Cosmetics, accessories, launch kits | Lower | Good for clean branding and moderate protection |
| Paperboard with full print coverage | Retail packaging with strong shelf visibility | Medium | Raises ink and finishing spend, but improves brand impact |
| Special finish package | Gift sets, premium promos, limited editions | Higher | Foil, embossing, soft-touch, or spot UV add setup and handling |
| Added custom insert | Multi-item kits, fragile items, electronics | Higher | Improves fit and protection, but increases design and assembly work |
| Rigid board construction | Heavier premium packs | Highest | Stronger perceived value, more material intensity, higher freight impact |
There is also a difference between one-time setup charges and recurring per-box cost. Dieline development, tooling, and plate charges may show up early, then disappear from the unit price once the run gets larger. Offset printing often carries plate costs per color, while digital runs may avoid that but cost more per unit. That tradeoff is why low minimums are not always cheaper in the long run.
MOQ matters because short runs absorb more labor and setup overhead. If you need only a few hundred custom tray and sleeve boxes, the supplier still has to cut the form, align the print, test the fit, and finish the edges. The material itself is not the whole story. Assembly time and scrap rate can influence the quote just as much.
Here is the cleanest way to judge value: compare the box against the job it has to do. If the product is a low-margin refill, simplify the finish and keep the structure lean. If the pack sits in a display program or gift box program where perceived value drives conversion, a slightly higher unit cost can be justified. For most teams, the best savings come from Choosing the Right level of finish, not from trimming the board spec beyond what the product can safely tolerate.
To compare substrates, insert styles, and finish options before you request quotes, review the available Custom Packaging Products and build the spec around the actual product rather than the render.
Step-by-step guide to ordering custom tray and sleeve boxes
The best way to order custom tray and sleeve boxes is to start with the packed system, not the carton. That means measuring the product, accessories, and insert components together. A box designed around a single item can fail the moment a charger, card, tissue, or leaflet is added. That mistake is common, and it is expensive.
- Measure the product accurately. Include the widest point, tallest point, and any protrusions such as caps, cables, or closures.
- Define the packaging goal. Decide whether the pack needs display impact, shipping protection, premium unboxing, stacking strength, or a mix of all four.
- Set the material direction. Choose paperboard, kraft, or rigid board based on weight, appearance, and budget.
- Build a spec sheet. Include dimensions, quantity, finish, print coverage, insert requirements, and target lead time.
- Request a dieline or sample. A digital proof is useful, but a physical sample is better for pull-out feel and fit testing.
- Check the brand hierarchy. Confirm where the logo, claims, and support information should sit on the sleeve and tray.
- Approve with real product. Never approve custom tray and sleeve boxes using placeholders if the final product weight or shape is different.
A good spec sheet is not complicated, but it should be precise. Include tolerances if the product is molded, filled, or assembled with variation. Note whether the sleeve needs a more generous opening because of laminate drag. List whether the insert should hold one item, two items, or a full kit. Those details prevent a quote from missing the real cost of the job.
Testing should be done with the actual product, not a dummy block unless the dummy block matches the weight and surface texture closely. A smooth plastic bottle behaves differently from a textured carton. A soft-touch sleeve behaves differently from a gloss sleeve. These differences affect how custom tray and sleeve boxes slide, grip, and survive transport.
One useful way to review packaging design internally is to ask three questions: does it protect the product, does it communicate the brand, and does it slow the line down? If the answer to any of those is no, the box needs another round of work. Good custom printed boxes are not just attractive; they are efficient to pack and predictable to use.
Quick buyer check: if the supplier cannot tell you how the sleeve fit will be verified, ask for the sample method before approving the run. That simple question can save an entire production cycle.
Common mistakes when ordering custom tray and sleeve boxes
The first mistake is measuring too tightly. Teams often size custom tray and sleeve boxes to the naked product and forget the tolerances created by inserts, label thickness, coating, or bundled accessories. A pack that looks perfect in CAD can feel cramped once the real item arrives.
The second mistake is over-finishing the box. A render with foil, embossing, soft-touch lamination, and a heavy insert may look impressive, but it can slow production, increase spoilage risk, and complicate hand packing. Not every launch needs that level of treatment. Sometimes a clean printed sleeve and a well-fitted tray will outperform a more elaborate idea.
The third mistake is ignoring sleeve friction. A sleeve that slides too freely can make custom tray and sleeve boxes feel ordinary, almost accidental. One that is too tight frustrates the user and risks scuffing the print. The sweet spot is controlled resistance, usually verified with a sample rather than guessed from a drawing.
The fourth mistake is forgetting warehouse and freight math. Larger outer dimensions can change carton count, pallet efficiency, and dimensional shipping cost. That can turn a good-looking pack into a hidden logistics problem. The outer footprint of custom tray and sleeve boxes matters just as much as the visual footprint.
There is also a common assumption that sustainability means using the thinnest board possible. Not always true. Right-sizing the structure often matters more than shaving a fraction of a millimeter from the substrate. If the package needs a failed reprint because it was too flimsy, the environmental gain disappears fast.
Expert tips and next steps for custom tray and sleeve boxes
If you are comparing custom tray and sleeve boxes across several suppliers, build a simple matrix with five columns: fit, branding impact, unit Cost, Lead Time, and sustainability. That forces the conversation away from vague preferences and toward measurable tradeoffs. It also makes internal approval easier because everyone can see why one option wins.
Ask for multiple quote paths. A supplier might show you a standard paperboard option, a version with reduced print coverage, and a more premium version with a special finish. That comparison is useful because it reveals where the money actually goes. Sometimes the best move is to keep the structure and remove a finish. Sometimes it is the opposite. The numbers should decide.
Another smart move is to request real samples before committing to the full order. A sample lets you test draw force, tray stability, and how the product feels during the first and final inch of the pull. Those moments are small, but they define the experience. For custom tray and sleeve boxes, small moments carry a lot of weight.
On the sustainability side, keep the design as simple as the brand allows. Recyclable board, minimal lamination, and reduced plastic content all help. So does avoiding oversized dimensions that waste freight space. If your packaging brief includes recycled content or chain-of-custody expectations, ask for documentation early rather than at the end.
And if you need to make the business case internally, frame the decision in plain terms: custom tray and sleeve boxes can raise perceived value, support retail packaging goals, and still keep material intensity lower than some rigid alternatives. That balance is why the format keeps showing up in product packaging programs that care about both image and economics.
Next steps: gather exact dimensions, quantity, insert needs, finish preferences, and timeline, then compare the best custom tray and sleeve boxes options against those inputs before you approve artwork or tooling. If the sample feels wrong, stop there and adjust the dieline before you lock in production. That is the simplest way to avoid surprises later.
Frequently asked questions
What products are best suited for custom tray and sleeve boxes?
They work best for products that benefit from a premium reveal, including cosmetics, gifts, electronics, subscription kits, and limited-edition launches. They are especially useful when the outer presentation matters as much as the product protection. They are less ideal for ultra-low-cost shipping-only packaging where speed and minimal material use matter more than presentation.
How do custom tray and sleeve boxes compare with rigid boxes?
Tray and sleeve boxes usually offer a strong premium feel with a more flexible structure and often lower material intensity than a full rigid setup. Rigid boxes can feel heavier and more luxurious, but custom tray and sleeve boxes can deliver a similar reveal at a different cost point. The best choice depends on product weight, retail positioning, and how important the opening experience is.
What details are needed for an accurate custom tray and sleeve boxes quote?
Provide exact product dimensions, quantity, insert requirements, print coverage, finish preferences, and your target timeline. Include whether the pack needs retail display strength, shipping protection, or a gift-ready finish. If possible, send reference images or a sample unit so the supplier can spot fit issues before quoting.
What affects the turnaround time for custom tray and sleeve boxes?
Artwork approval, dieline revisions, sampling rounds, finish complexity, and order size all affect turnaround time. Custom inserts and unusual sizing usually add extra review steps. Seasonal production demand and shipping method can also change the final schedule, especially if the order needs export packing or staged delivery.
Can custom tray and sleeve boxes be made with more sustainable materials?
Yes, they can be produced with recyclable board, minimal lamination, and lower-plastic finishing choices. Sustainability improves when the design is right-sized and avoids unnecessary inserts or oversized outer dimensions. Eco-friendly inks and simpler construction can also reduce environmental impact without sacrificing presentation.
Done well, custom tray and sleeve boxes give you the part most brands are chasing: a controlled reveal that looks intentional, protects the product, and stays financially defensible. If you treat structure, fit, and finish as separate decisions instead of one glossy idea, custom tray and sleeve boxes become one of the most practical premium formats in packaging. The clearest takeaway is to approve the sample only after the real product has been tested inside it; that one step catches the problems that artwork alone will never show.

