Campus bookstores can approve artwork that looks fine on screen and still end up with a bag that fails on the line. That is why a Garment Poly Bags for campus bookstores artwork proof checklist matters before anyone signs off. The bag has seams, fold lines, header space, barcode quiet zones, and a real folded garment inside it. A useful proof has to reflect the finished package, not just a neat digital mockup.
Why Campus Store Bags Fail Proof First
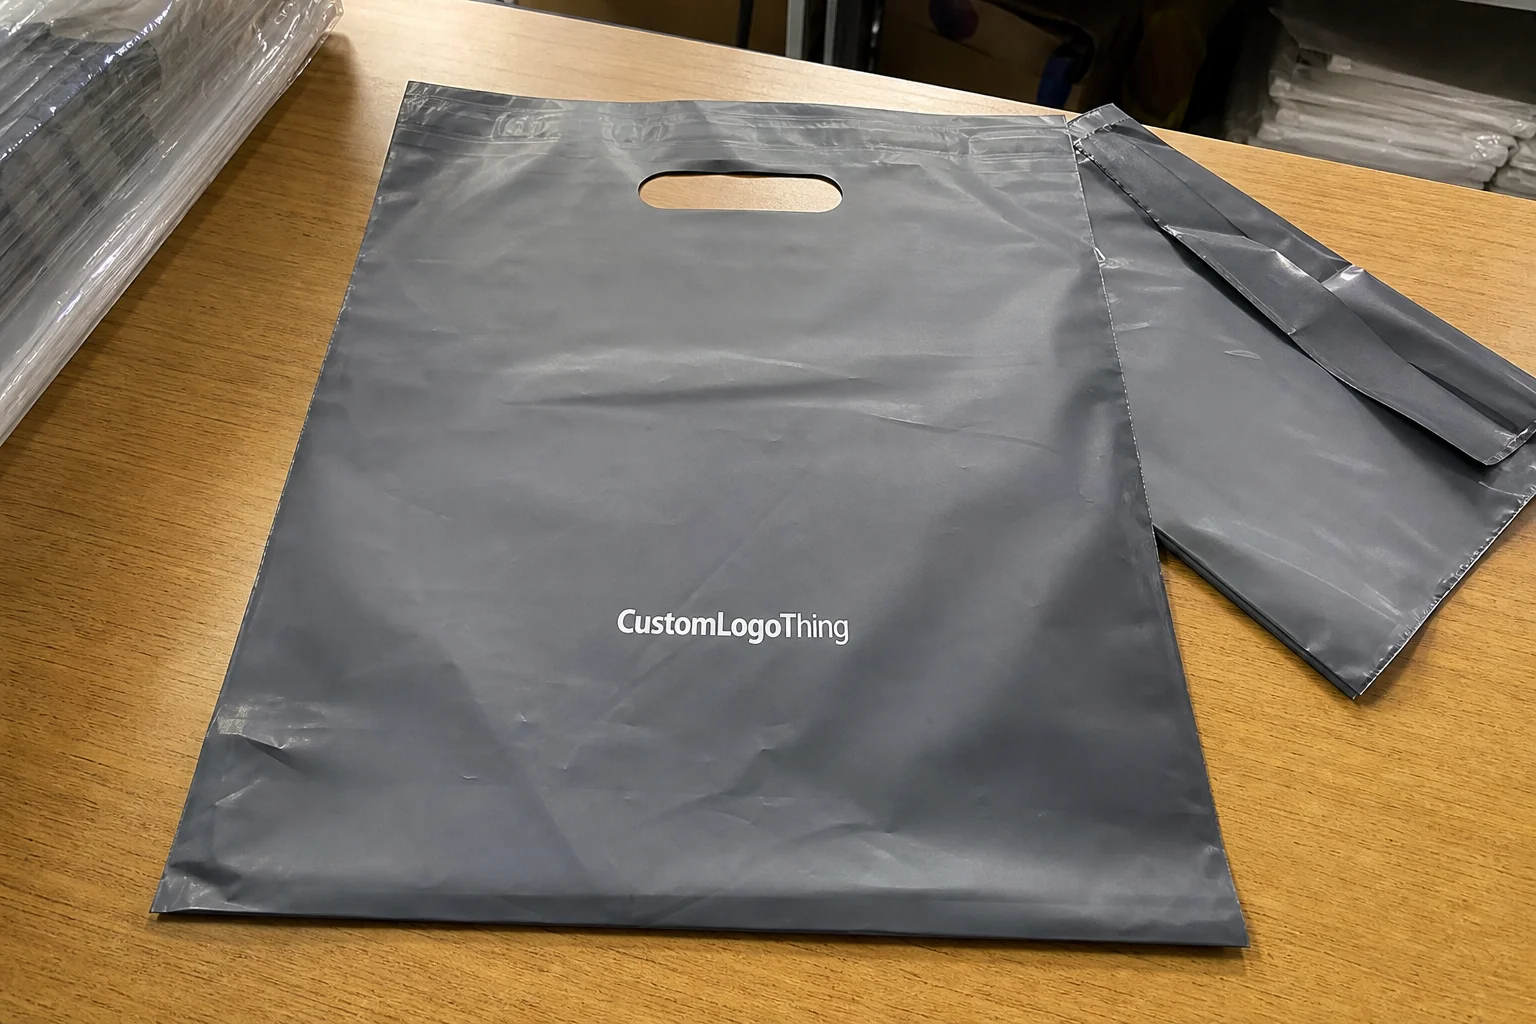
The first surprise for many buyers is that the bag size can be right while the artwork still fails. A folded crewneck for a campus bookstore display does not take the same shape as a flat tee. Once the garment goes into film, the logo, size callout, and care copy all compete for a very narrow print area. That is where the garment poly bags for campus bookstores artwork proof checklist earns its place.
Most proof problems start with a packaging assumption. Teams review a PDF as if it were a poster. A poly bag is a functional retail container, which means the top seal may steal space, the side gusset may shift copy, and the film finish can change how much contrast a buyer actually sees under fluorescent bookstore lighting. Clear film also behaves differently from cloudy or heavier gauge film, so a proof that ignores material feel is only half useful.
For campus retail, the package has to do more than protect the garment. It needs to show size clearly, carry barcode or SKU information, support fast checkout, and hold up during back-room handling, merchandising, and repeat reorders. That is a different job than a one-off marketing piece. Ask what is being packed, how it is folded, whether it will hang or stack, and how the store receives it. Those details shape the proof more than the artwork software does.
Another common mistake is assuming all clear bags print the same way. Gauge, seal style, gloss level, and print method all change the result. A 1-color flexographic print on 1.25 mil LDPE film behaves differently from a digital short run or a heavier mailer-style bag. If the proof does not reflect those physical differences, it is not a real approval tool.
A proof is not a decoration review. It is the last practical check that the press, the seal, and the scanner will all agree with the artwork.
That is the heart of the Garment Poly Bags for campus bookstores artwork proof checklist: prevent a bag that looks fine in a browser window but fails once it is folded, filled, scanned, and displayed on the sales floor.
How Artwork Proofs Move Through Production
Good proofing follows a sequence. The design file comes first, then the bag spec or dieline, then the digital proof or press proof, and finally the production release. Each step answers a different question. The design file checks brand compliance, the spec checks physical fit, the proof checks placement and readability, and the release authorizes the run.
That order matters because a proof can look polished and still miss something basic. If the supplier is running flexographic print, gravure, or digital, handling of fine type, solids, halftones, and spot color will differ. Thin rules that look elegant on a monitor can disappear in print. Dense dark backgrounds can build ink differently on film than they do on paper. And yes, the file that “looked great in Illustrator” can still fail once it hits press. Software is not a substitute for film behavior.
Before approving, ask for front, back, and seam behavior. Campus stores often want one side facing the buyer and one side facing the back-room stack or hanger. If the proof only shows a single flat view, it may hide the real orientation once the bag is loaded. In packaging work, orientation is not a small detail. It decides whether the package looks clean on the shelf or upside down in the stack.
For any Garment Poly Bags for campus bookstores artwork proof checklist, the file should also show:
- Bleed where ink reaches the edge intentionally.
- Safe area so important copy stays away from seals and trim.
- Registration marks if the printer uses them for alignment.
- Overprint behavior when one color sits on top of another.
- Special features such as hang holes, vent holes, or tear notches.
If the supplier offers a prepress review, use it. That pass often catches low-resolution art, missing fonts, barcode placement issues, and copy too close to the top opening. It is routine work, but it prevents the kind of reproof that pushes a campus launch off schedule. A missed font warning is cheaper to fix before plates or digital setup than after the first sample.
For buyers who want a broader packaging reference, the basics at Packaging.org are useful, and ISTA publishes distribution testing guidance that helps frame how a package should hold up in transit and handling.
Artwork Specs and Copy Checks That Matter Most
The most common specification mistake is measuring the garment alone instead of the garment inside the bag. A folded hoodie, crewneck, or tee creates a different package footprint, and that footprint determines whether the artwork can sit centered, whether the size callout stays visible, and how much room remains for barcode and legal copy.
Logo reproduction needs the same discipline. Campus marks often include detailed seals, mascots, arch text, or stacked wordmarks. Those features can soften if the film is thin or the print dots are too small. A proof should show the logo at actual size whenever possible, not just as a scaled-down thumbnail that makes everything look sharper than it will be on press.
Then there is the copy. Size callouts, SKU, UPC, fiber content, care language, store identifier, and any legal or merchandising text need a line-by-line check. In retail packaging, missing one line can create a relabeling task or trigger a rejected shipment. That is not theoretical. It happens whenever the proof review stops at appearance and never checks the full text block.
Color deserves a practical note. If the brand uses a campus red, navy, black, or green, the proof should say whether the match is visual only or tied to a Pantone target. Clear film, gloss, and white ink all change the visual read. A black logo on a glossy clear bag can look heavier than expected, while a reversed white logo may need more stroke weight than the screen rendering suggests.
Barcode placement needs special attention. The code should have enough quiet space around it, and it should not sit too close to a seam, fold, or busy background. If the barcode is going on a clear bag with printed art nearby, ask for a scanability check before approval. A code that scans in the art room but fails at checkout is a real problem, not a cosmetic one.
For text, keep one rule in mind: legibility beats decoration. Hairline fonts, tiny reversed type, and dense blocks of legal copy look neat in a PDF but are risky on film. Campus bookstore packaging is handled fast, often under mediocre lighting, so the type has to survive real use, not just a zoomed-in proof.
One more practical detail: if the bookstore uses the same bag for several apparel lines, the proof should make the variable fields obvious. Otherwise the next reorder turns into a scavenger hunt for the right size code, and nobody needs that.
Simple copy checks that save reproofs
If the team wants a fast pass, these are the checks I would never skip:
- Confirm the bag dimensions against the folded garment.
- Verify the exact wording of size, content, and retail copy.
- Place the barcode where a scanner can read it cleanly.
- Keep logos and legal copy inside the approved safe area.
- Match the proof to the approved print method and film gauge.
If the project also includes secondary packaging or shipping materials, it can help to review Custom Packaging Products alongside the bag spec, or compare handling with Custom Poly Mailers if the bookstore is moving stock between locations or fulfillment points.
Process and Timeline for Proof Approval
Work backward from the delivery date, not forward from the artwork deadline. That sounds obvious, but a surprising number of projects get squeezed because nobody left time for revision rounds. The Garment Poly Bags for campus bookstores artwork proof checklist should sit inside a schedule that includes file review, proof issuance, internal review, comments, revision, and final signoff.
A normal path often takes more than one round, especially when multiple people review the same package. A merch buyer may care about the look, the campus brand team may care about the seal, and the bookstore operator may care about barcode placement or opening direction. If those comments arrive separately, the proof cycle slows down. One decision-maker who consolidates feedback is usually worth more than another round of design opinions. That person does not need to know everything. They do need to stop the email pile from becoming a project plan.
Ask the supplier how revisions are handled. Some vendors turn changes quickly once the file stabilizes. Others reset the proof clock if artwork, UPC data, or dimensions change. That detail matters because a proof that is technically acceptable but not formally released can still hold up production if the signoff process is unclear. A missing approval timestamp can be enough to push a job into the next press window.
The safest approval path is a hard checklist. Keep the fields simple and specific:
- Bag dimensions verified against the folded garment.
- Artwork placement confirmed on all visible panels.
- Barcode tested or reviewed for scanability.
- Copy approved by the correct campus contact.
- Color expectations acknowledged in writing.
- Quantity and delivery window confirmed.
If the order is tied to a semester launch, a bookstore reset, or a seasonal merchandise drop, do not wait for the last proof to begin internal approvals. Campus buying windows move fast, and production rarely recovers lost days without compromising something else. Late approvals usually create two bad choices: rush the job or cut corners on the review. Neither is smart.
Cost, Pricing, and Unit Cost Drivers
Pricing for garment poly bags is usually driven by bag size, film gauge, print coverage, number of colors, and total quantity. For a campus bookstore run, even a small increase in dimensions or print complexity can move the unit cost more than a buyer expects. That is why an accurate spec sheet matters as much as the artwork itself.
Here is a practical way to think about it: simple one-color logos on clear film tend to sit at the lower end of the range, while full-coverage print, multiple PMS colors, and heavy back printing push the quote upward. If the design needs specialty ink, extra white underprint, or dense legal copy, the setup gets more complex and the proof review usually gets slower too. None of that is mysterious. More ink, more stations, and more alignment checks cost more.
MOQ also shapes the price. Setup cost has to be spread across the run, so 2,500 pieces and 10,000 pieces will rarely price the same on a per-unit basis. If the bookstore needs several sizes, it is worth asking whether one larger combined order lowers the break point or whether each SKU has its own minimum.
| Option | Typical Use | Approx. Unit Cost at 5,000 | What Drives the Price |
|---|---|---|---|
| Clear LDPE, 1-color print | Tees, lightweight apparel, simple branding | $0.09-$0.16 | Low ink coverage, standard gauge, fewer prepress steps |
| Clear bag, 2-color print with barcode | Campus basics with size and retail data | $0.12-$0.20 | Extra print station, barcode placement, tighter registration |
| Heavier film with full graphic coverage | Premium apparel or higher-end presentation | $0.18-$0.28 | More ink, more coverage, more setup scrutiny, often higher spoilage risk |
| Short-run digital version | Small launches, seasonal updates, pilot programs | $0.22-$0.38 | Less tooling, but higher per-unit pricing and tighter file requirements |
Those ranges are only a starting point. Film gauge, print method, freight, revision fees, and compliance copy can change the final number. A cleaner quote breaks out the bag cost, setup, plate or prepress charge, shipping, and any charge for changes after proof approval. That separation matters because it lets the buyer compare suppliers honestly instead of guessing where the money went.
If the campus team is balancing margin and presentation, the smartest place to spend is usually the part the customer sees and handles: crisp print, reliable thickness, and clean size messaging. The cheapest quote is not always the lowest total cost if it produces spoilage, rework, or a line that scans poorly at checkout.
For sustainability-minded programs, ask whether any paper inserts, hang tags, or cartons tied to the order can be sourced with FSC-certified content. Film itself is a different conversation, and if recycled content or disposal language is part of the request, it is better to align that copy with current EPA guidance than to improvise it on the proof.
Common Proof Mistakes Campus Stores Make
One of the easiest mistakes is approving artwork on a bright white screen and forgetting that the finished bag is clear, glossy, or slightly cloudy. That changes contrast immediately. What looked crisp on screen may become too faint in real light, especially if the art uses soft grays, thin lines, or small text.
Another common miss is centering the logo without respecting the seal or fold. The artwork may look balanced in a flat mockup, but once the bag is sealed or folded into stack form, the logo shifts upward or downward. If the proof does not show that physical movement, the final package can look sloppy even though the file was technically correct.
Barcode trouble is also common. A code too close to the seam, too close to the opening, or printed over a busy background may look acceptable in a mockup and fail at the register. That is a real operational problem, not a cosmetic one. The shopper does not care why the scanner failed; they only care that checkout slowed down.
Campus crests and mascots can cause another kind of trouble. Fine outlines, tiny lettering, and highly detailed seals often lose clarity on thin film. The proof may appear elegant in the PDF viewer, but the actual print can muddy the smallest shapes. In those cases, simplifying the art slightly usually improves the real-world result more than any amount of prepress polishing.
There is also the administrative mistake: approving copy without confirming that it matches the latest campus brand rules or the store’s internal SKU structure. That leads to reprints, relabeling, or a delayed release while everyone checks who approved what. A clean proof review is part design, part document control.
Expert Tips for Faster Approval and Cleaner Reorders
The easiest way to speed up future orders is to create a master spec sheet for each bag size. Keep the dimensions, film gauge, print colors, barcode location, and approved copy in one place. If a new buyer takes over or a seasonal assistant handles the reorder, that sheet becomes the source of truth instead of a pile of emails.
Use file naming that makes revision history obvious. Something as simple as version dates, proof numbers, and SKU references prevents the usual confusion when three people are comparing different PDFs. In a busy campus retail workflow, clarity here saves more time than any fancy design move.
Keep a small photo archive of approved finished bags. Visual references help new staff understand what good looks like, especially if the original project team is no longer in the room. A real finished bag, held in the hand, solves more confusion than a dozen comments in the margin.
If the artwork repeats every semester, design for repeatability. Leave room for seasonal text, variable size callouts, or short promotional copy without rebuilding the whole layout. That makes future proofs faster and reduces the chance that a minor update breaks the entire package.
A few vendor questions are worth asking directly:
- Which proof issues create the most delay?
- How are barcode changes handled?
- What print method is being used on this run?
- What is the realistic turnaround after final approval?
- Which copy fields must be frozen before release?
One final habit helps more than people expect: treat every reorder like a quick compliance audit. Even if the artwork is familiar, recheck dimensions, UPC data, branding, and any copy tied to campus policy. A small change can slip through easily if nobody is looking for it.
Next Steps Before You Request a Quote
Before you ask for pricing, gather the bag dimensions, garment type, print method preference, quantity, and target delivery date. A supplier can only quote accurately if the spec is concrete. That one step prevents vague numbers and saves the back-and-forth that usually slows campus packaging projects down.
Then assemble one clean proof packet. Include the artwork files, copy requirements, barcode art, and any brand rules the campus wants followed. If the team has a logo standard or a merchandising guide, attach that too. The cleaner the packet, the less room there is for conflicting comments.
Decide who has final approval authority before the proof arrives. If the bookstore, brand office, and merchandising buyer all need to weigh in, define the order of review in advance. Otherwise, the proof sits in limbo while everyone assumes someone else is handling it.
If you are comparing bag styles, ask for a spec comparison rather than a broad recommendation. Thickness, clarity, closure style, and print area are the features that matter most. Those details will tell you far more than a generic “best option” answer.
When the proof lands, verify the checklist one more time before signing. Size, copy, color, barcode, safe area, and timeline all need a deliberate pass. For garment poly bags for campus bookstores artwork proof checklist work, that final review is what keeps the order clean from art approval through delivery.
What should be on a garment poly bag proof checklist for campus bookstores?
Bag size, artwork placement, barcode placement, required copy, color expectations, and safe area should all be checked before approval. If the package includes special features such as vent holes, hang holes, or warning text, those should be reviewed too.
How do I check whether the proof will fit the folded garment correctly?
Compare the bag dimensions to the actual folded item, not just the garment size on paper. Then confirm seal lines, top opening space, and usable print zones against the spec sheet so the final package does not crowd the artwork.
Why does the timeline matter so much before approval?
Proof revisions, internal campus review, and production release all take time, and each round can add days. Building the schedule backward from the needed delivery date gives enough room for changes without forcing a rushed signoff.
What affects unit cost for garment poly bags the most?
Quantity, bag size, film gauge, number of print colors, and setup complexity are the main cost drivers. Full coverage graphics, white ink, and barcode placement usually cost more than a simple one-color logo on clear film.
What is the fastest way to avoid artwork mistakes on reorder bags?
Use a master spec sheet, keep approved files organized, and recheck dimensions, barcode data, and campus branding before every reorder. That simple discipline prevents most of the problems that show up late in proofing.


