Garment Poly Bags for Nonprofit Retail Launch Orders
Packaging can make a nonprofit apparel launch look organized or make it look like somebody lost a fight with a storage closet. The bag is not the star of the show, but it does the unglamorous work: it protects folded garments, keeps sizes separated, speeds up packing, and helps the launch look retail-ready instead of improvised.
That matters more than teams usually admit. Nonprofit campaigns tend to mix volunteers, staff, donor inventory, event sales, and pickup orders. One bag often has to handle several jobs at once. If it tears, clouds up, or barely fits the product, everyone pays for it later in rework, delays, and a table full of wrinkled inventory.
For buyers, the right bag is part of the operating plan. It should stack cleanly, hold up in transit, and still look presentable under store lighting or event tents. A good Custom Packaging Products order supports the campaign. A bad one creates extra labor, which is a very expensive way to learn a very ordinary lesson.
Garment poly bags for nonprofit campaigns retail launch checklist: what they solve first
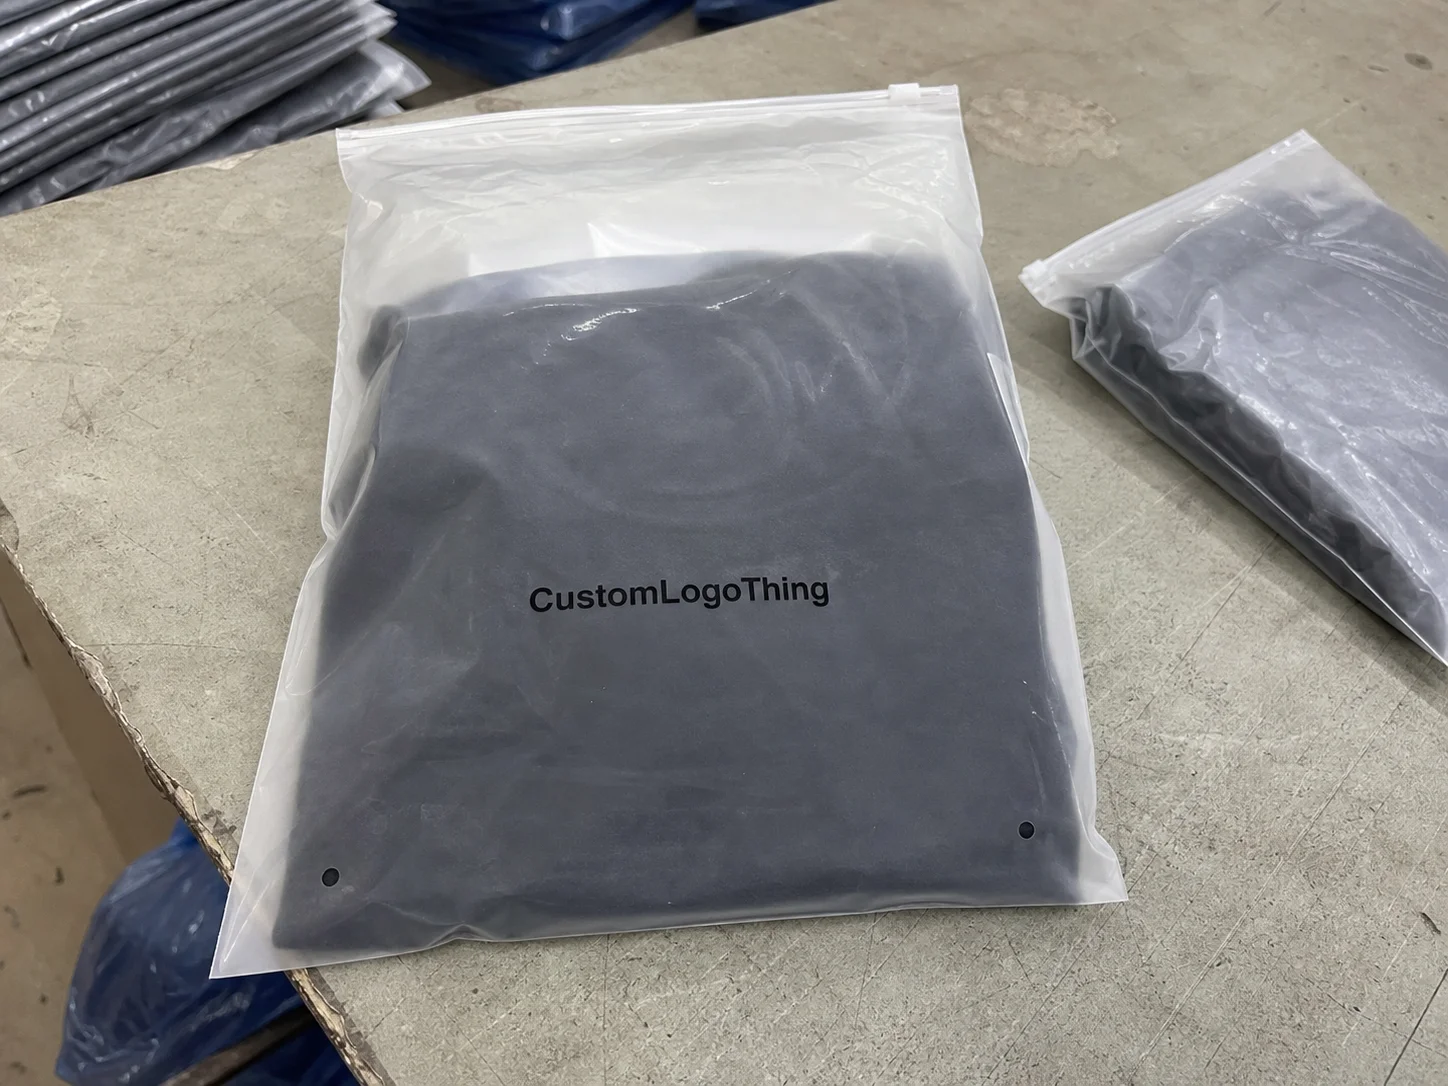
The first mistake is treating apparel bags as decoration. They are not. In a nonprofit launch, the bag has to separate size runs, preserve presentation, protect inventory during transport, and keep the packing table moving. That is why Garment Poly Bags for Nonprofit campaigns retail launch checklist planning should start with operations, not artwork.
Clear bags are often the simplest starting point. Staff can identify sizes quickly, buyers can see the garment, and pack-out moves faster because nobody needs to open every unit for a check. Printed bags still have a place, but clarity usually matters first.
There is also a perception issue. A clean, correctly sized bag makes a folded tee or hoodie look intentional. A cloudy, undersized bag makes the same product look rushed. People notice that. Maybe not consciously, but they notice it anyway. If the package looks sloppy, the launch does too.
For teams shipping apparel to stores, warehouses, or event sites, sample testing is worth the time. A simple transit shake test tells you more than a glossy spec sheet with no context. If the bags are part of a longer parcel chain, compare handling assumptions the same way you would for other packaging in ISTA-style testing logic. The goal is not overengineering. The goal is avoiding preventable damage.
"The bag should speed up the launch, not become another thing the table has to manage."
Fit, film, and closure choices that keep apparel sale-ready
Size starts with the folded garment, not the flat garment. That sounds obvious until someone measures a shirt laid open, orders to that number, and ends up with a pack that barely closes. Measure the folded width and height, then leave room for one clean fold and a little slip space. Too tight and the garment wrinkles. Too loose and the stack slides around like it has nowhere to be.
For most apparel runs, clear poly bags in the 1.5 mil to 2.0 mil range are a practical baseline. Thinner film lowers cost, but it also shows punctures more easily and can get sloppy when volunteers are packing quickly. Thicker film resists tearing, handles corners better, and stands up better when cartons are stacked during transport. The film gauge should match the actual handling, not the optimistic version of it.
Closure choice depends on how the bag will be used:
- Open-top: best for back-of-house sorting and fast pack-out.
- Self-seal: best for customer-facing displays, pickup bags, or shipping-ready packs.
- Adhesive flap: useful when you want reseal behavior but need a cleaner front panel.
- Warning printed bags: useful when channel rules or retailer requirements call for suffocation risk labeling.
For mixed campaigns, a standard size for core garments plus one oversize option for hoodies or heavyweight sweatshirts usually keeps the line simpler. That is better than ordering three nearly identical sizes and then asking volunteers to guess which one fits. Guessing is not a packing strategy.
If you are comparing film strength, request samples and inspect seal quality, clarity, and tear behavior. ASTM methods exist for film testing, but most teams do not need a lab report before they need a usable bag. They need something that survives handling and still looks clean at retail distance.
Print choices that affect branding, sorting, and reuse
Print is not just decoration. On a launch table, it can identify sizes, show the organization name, mark a campaign, or separate event inventory from general stock. The best printed bags do two jobs: they brand the pack and they help staff move faster.
Nonprofit teams often overcomplicate this part. A large logo may look nice in a proof, then turn into clutter once the bag is stacked or the garment sits in front of it. Smaller, cleaner layouts usually work better. Strong type, a clear logo, and a simple size mark beat a busy design nobody can read from three feet away.
One-color print is often enough. Multi-color coverage raises cost, adds proof risk, and can extend lead time. On clear film, restrained artwork usually gives the cleanest retail look. If the campaign wants stronger brand presence, placement and contrast usually solve more problems than adding another ink color.
Print can also reduce sorting errors. Clear size labels, campaign names, SKU numbers, or internal codes help when volunteers are moving fast and checking inventory by eye. If the launch uses other pack materials, pair the garment bags with matching labels or companion packaging from Custom Poly Mailers so the back-of-house flow stays consistent.
Some teams want sustainability language in the launch materials. Fine. Just keep it accurate. FSC applies to paper-based components such as inserts, cartons, and hang tags. For plastic bags, be specific about resin type, reuse expectations, and local recycling reality. Vague green claims are usually worse than no claim at all.
Print placement also matters for storage. A design that only reads when the bag is perfectly flat can disappear once the carton is opened and the bags are handled. Keep the most important information where hands are least likely to cover it. Packaging design should survive contact with a busy table.
Ordering process and lead times from quote to dock
The smoothest ordering process is boring, which is a compliment. First, confirm dimensions, film thickness, closure style, and print count. Then review a proof. Then approve a sample if the order is custom enough to justify it. Skipping steps does not make the order faster. It usually creates rework, and rework loves to eat launch timelines.
For Garment Poly Bags for nonprofit campaigns retail launch checklist projects, delays usually come from bad inputs rather than the production line. Missing folded-size data. Unclear quantity by size. Artwork sent as a low-resolution JPG. One department approves one version, another changes the pack-out, and operations discovers the conflict after the quote is already in motion. That is how a simple order turns into a mess with a purchase order attached.
Typical lead time depends on print complexity, bag size, resin availability, and whether the order needs custom tooling or a special seal style. Straightforward runs can move in about 12 to 15 business days after proof approval. More complex jobs often land in the 15 to 25 business day range. Freight adds its own clock, so “ready in two weeks” is not the same as “arrives in two weeks.”
Before approving, ask for the details that actually matter:
- Finished bag dimensions and usable interior space
- Gauge or mil thickness
- Closure type and seal position
- Print method and ink count
- Overrun or underrun tolerance
- Carton pack count and master carton size
That list looks tedious because it is. It also saves launches. A careful spec sheet beats a heroic scramble.
One more practical point: if the order needs to land before a public event, build a cushion for proof revisions and freight variability. A factory can finish on time and still lose the schedule if nobody leaves room for transit. Production and delivery are not the same thing, even though people keep pretending they are.
Cost, MOQ, and unit pricing tradeoffs for nonprofit runs
Price is rarely one number. It is a stack of decisions: bag size, film thickness, print colors, closure style, total quantity, and pack-out. The cheapest quote on paper can become the most expensive choice if the bag does not fit the product or if the team has to rework it by hand.
MOQ matters because setup costs have to be spread across the run. Smaller nonprofit campaigns usually pay more per unit, while larger launches generally unlock better pricing. That is not a trick. It is just how tooling and press setup work. If a line is built to run 10,000 units efficiently, it will not behave like a boutique order of 2,000.
Here is a practical comparison. These are directional ranges, not live quotes, and freight is extra unless stated otherwise.
| Option | Best For | Typical Spec | Rough Unit Cost |
|---|---|---|---|
| Clear open-top bag | Back-of-house sorting and size identification | 1.5 mil, no print, standard fold fit | $0.05-$0.09 at 5,000 units |
| Self-seal printed bag | Retail presentation and pickup packs | 1.5 mil, one-color print, adhesive flap | $0.08-$0.14 at 5,000 units |
| Heavier printed bag | Transit-heavy or volunteer-packed launches | 2.0 mil, one-color print, larger format | $0.11-$0.18 at 5,000 units |
| Oversize specialty bag | Hoodies, sweatshirts, mixed apparel kits | 2.0 mil+, custom size, custom print | $0.14-$0.24 at 5,000 units |
Compare landed unit cost, not just the quote line. Add freight, proofing fees, carton charges, and any special labeling. Sometimes a slightly higher unit price wins because the pack count is cleaner and the freight is lower. That is the part spreadsheets miss if nobody enters the full landed cost.
For larger launches, the gap between clear and printed bags can narrow if the run is efficient. For smaller campaigns, print setup can dominate the total. That is why a simple one-color mark often delivers the best value: enough branding to feel intentional, without pushing the budget into vanity territory.
There is also a hidden cost in bad fit. A bag that saves half a cent but slows packing or creates wrinkles is not a bargain. It is just an invoice with extra steps.
Common mistakes that blow up budgets and delays
The classic error is measuring the garment flat and forgetting the fold. The shirt may fit on paper and still be too tight in real life because the pack needs depth, not just width and height. Hoodies are worse. They trap air, stack unevenly, and punish anyone who guessed instead of measuring.
Artwork mistakes are next. Low-resolution logos, wrong dielines, and last-minute copy changes can push a launch off schedule quickly. If design is improvising while procurement is trying to place an order, something will break. A clean proof cycle is better than a “fast” order that needs to be corrected twice.
Another common miss is choosing the thinnest film because the per-unit price looks better. Thin film can split during transport, scuff under retail lighting, or make the garment look more wrinkled because the bag collapses around it. Saving one cent and losing the presentation is not a good trade.
The less obvious mistake is ignoring how the bags are handled internally. Volunteers move fast. They stack, shuffle, and restock. A bag that only works if handled carefully is a bad fit for a nonprofit launch. If durability matters, ask for a sample run and test it under real table conditions. Not perfect conditions. Real ones.
Carton pack count can also create avoidable delays. If the internal pack size does not match how the team stores or distributes inventory, staff waste time opening cartons, re-bundling units, and rebuilding stacks. Small packaging mismatches have a habit of multiplying once the order reaches the floor.
Next steps before you request quotes and sign off
Lock three things before sending anything out: finished garment dimensions, quantity by size, and the exact use case for each bag. That lets vendors quote something real instead of guessing. It also keeps internal teams from drifting into scope creep after the first proof comes back.
Then build one approval sheet with the variables that actually matter: artwork, closure style, thickness, pack count, and target delivery window. One page beats a long email chain every time. If a line item affects launch success, it belongs on the sheet. If it does not, leave it out.
For teams still choosing between bags and other packaging formats, compare the pack flow against shipping requirements, storage space, and the retail display plan. Some campaigns need a simple clear bag. Some need printed bags with a resealable flap. Some should split the difference and use one format for back-of-house and another for the customer-facing handoff.
Use this Garment Poly Bags for nonprofit campaigns retail launch checklist to confirm fit, compare landed cost, and approve only the version that supports the campaign. Not the one that merely looks cheap. Cheap and wrong is still wrong, and it usually gets expensive later.
FAQ
How do I choose the right size for garment poly bags for nonprofit campaign launches?
Measure the garment after folding, not just laid flat, because the finished pack needs room for thickness and clean handling. Leave a little clearance so staff can insert the apparel without stretching the film or crushing the stack. If you are between sizes, choose the one that fits the thicker item in the launch lineup and confirm with a pre-production sample.
What thickness works best for nonprofit retail launch packaging?
Use thinner film only when the bags stay in a controlled setting and will not be tossed around in transit. Choose thicker film for pop-ups, volunteer packing, or shipping mixed apparel bundles because it resists tears and punctures better. Ask for samples if the product includes sharp tags, buttons, or folded corners that can stress the bag.
How long does the garment poly bags for nonprofit campaigns retail launch checklist process usually take?
Simple orders move fastest when artwork is ready, specs are locked, and no custom tooling is needed. Print complexity, proof revisions, and freight timing usually matter more than the bag itself. Build in review time for fundraising, merch, and operations so approval does not become the bottleneck.
What drives unit cost the most on a nonprofit order?
Quantity matters first because setup costs spread out as the run gets larger. After that, size, film thickness, print colors, and closure style usually move the price more than anything else. Freight and pack-out requirements can shift the landed cost enough to change the winner between two similar quotes.
Should we choose printed or clear garment poly bags for a nonprofit retail launch?
Choose clear bags if the main goal is fast sorting, easy size identification, and lower cost. Choose printed bags if the launch needs stronger branding, donor presentation, or size and SKU information built into the pack. Many teams use a hybrid approach: clear bags for back-of-house and simple printed bags for display or pickup.


