Buyer Fit Snapshot
| Best fit | choose right box size for packaging buyers comparing material specs, print proof, MOQ, unit cost, freight, and repeat-order risk where brand print, material, artwork control, and repeat-order consistency matter. |
|---|---|
| Quote inputs | Share finished size, material target, print colors, finish, packing count, annual reorder estimate, and delivery region. |
| Proofing check | Approve dieline scale, logo placement, barcode or warning zones, color tolerance, and any recyclable or compostable wording before bulk production. |
| Main risk | Vague material claims, crowded artwork, or missing packing details can create delays even when the unit price looks attractive. |
Fast answer: Choose Right Box Size: Dieline, Finish, Proof, and Buyer Review should be specified like a repeatable production item. The safest quote includes material, print method, finish, artwork proof, carton packing, and reorder notes in one written spec.
What to confirm before approving the packaging proof
Check dimensions, folds, seals, label areas, and retail display edges against the actual filled product before bulk approval.
How to compare quotes without losing quality
Compare board or film grade, print process, finish, sampling route, tooling charges, carton quantity, and freight assumptions side by side.
How to Choose the Right Box Size Guide
Shipping the wrong box size is one of the most expensive mistakes new businesses make—and it's entirely preventable. This box size guide walks you through everything You Need to Know about packaging dimensions, from measuring your product correctly to understanding the difference between internal and external dimensions. Whether you're shipping your first hundred orders or optimizing your thousandth shipment, here's How to Choose the Right Box Size every time.
Why Box Size Matters More Than You Think
I learned this lesson the hard way back in 2016. I was shipping our skincare line in boxes that were way too big for the products. The bottles rattled around like dice in a cup, so I'd stuff them with newspaper, bubble wrap, and whatever else I could find. My packaging costs were bleeding me dry, and I couldn't figure out why my profit margins kept shrinking.
Then I did the math after a particularly brutal quarter where shipping costs ate into my margins by 23%. I downsized our most popular product from a 12x10x8 box to an 8x6x4 box. That single change saved us $0.85 per shipment. Over 14,000 annual orders, that's $11,900 back in my pocket. The lesson? Box size isn't an afterthought—it's a profit lever.
Here's something most first-time packaging buyers miss: every dimension decision compounds across thousands of shipments. A 10-15% savings on shipping costs by Choosing the Right box size adds up fast when you're moving volume. The math is brutal in the best way possible.
Beyond money, there's the damage prevention equation. Products rattling inside oversized boxes is a recipe for heartbreak and Amazonian chargebacks. I've seen clients lose $40,000 in a single year to damage claims because they refused to properly size their packaging. The irony? Sizing down would have cost them maybe $8,000 in additional box material. That's a net savings of $32,000, and that's before you factor in customer lifetime value loss from damaged shipments.
Storage efficiency sounds boring until you're paying $2.50 per square foot monthly for warehouse space. Oversized boxes are space hogs. They require more pallet room, more shelving, and more labor to handle. I toured a facility in Dongguan a few years ago where the company had consolidated from 47 different box sizes down to 12. Their warehouse productivity improved by 18% because workers stopped hunting for the right box and started working faster.
And let's not forget the unboxing experience—because it matters more than most founders realize. When I receive a tiny product in a massive box, I feel cheated. That's your customer's first tangible interaction with your brand. A well-fitted box signals professionalism, attention to detail, and respect for the customer's experience. You can have the best product in the world, but if your packaging looks like you grabbed whatever was lying around, that perception bleeds into how people view your entire operation.
Understanding Box Dimensions: Length x Width x Height
Box dimensions follow a universal convention: Length x Width x Height. But here's where people get tripped up—this isn't alphabetical ordering, it's an orientation system. The key is understanding which dimension is which.
Industry standard defines these as:
- Length: The longest side of the opening (the horizontal dimension when you're looking at the box from above)
- Width: The shorter side of the opening (the other horizontal dimension)
- Height: The vertical dimension (how tall the box is when closed)
Orientation matters. When a supplier lists dimensions as 12x10x8, they're telling you length first, width second, height third. But if you're trying to fit a product that's 11 inches long, You Need to Know which dimension that 11 inches corresponds to. Is your product longer than the length? Longer than the width? This confusion has led to some seriously expensive reorders.
When I'm working with new suppliers, I always ask them to confirm which dimension is length versus width on their spec sheets. You'd be amazed how often this simple clarification prevents a $3,000 mistake on your first production run.
Regional variations trip up plenty of buyers too. US manufacturers typically follow the LxWxH format I've described. European suppliers often list dimensions as Height x Width x Length, which is completely backwards from what you're used to if you grew up stateside. Asian manufacturers might use any format, which is why I always ask for dimension confirmation in writing before tooling is cut.
A spec sheet might show external dimensions, internal dimensions, flute type and thickness, joint location and style, and compression strength ratings. Most buyers focus only on the dimensions and ignore the rest. Big mistake. The flute type affects not just strength but actual usable internal space. A B-flute box versus a C-flute box with the same external dimensions can give you 3-5mm less usable space on each wall. For precision fits, that matters enormously.
Internal vs External Dimensions: The Critical Difference
This is where I see clients consistently shoot themselves in the foot. And I get it—it's counterintuitive. When you buy a product, you care about its external dimensions because that's what determines how much space it takes up on a shelf. But when you're packaging a product, you need to care about internal dimensions because that's what determines whether your product actually fits inside.
Here's a real-world example. A typical 12x12x12 inch shipping box might have external dimensions of exactly 12 inches on each side. But the internal dimensions—the actual usable space—are smaller. Depending on the flute thickness and board grade, you're looking at maybe 11.6x11.6x11.6 inches of usable space. That half-inch difference on each side might not sound like much, but it's the difference between your product fitting snugly or not fitting at all.
Corrugated board thickness directly impacts your internal space. Here's the rundown:
- A-flute: Approximately 5mm thickness—rarely used in standard boxes, mostly for fragile high-end items
- B-flute: Approximately 1.5-2mm—good for flat, heavy products
- C-flute: Approximately 3-4mm—the most common flute type, good all-around
- E-flute: Approximately 1-1.5mm—used for smaller, lighter products or retail packaging
- BC flute (double wall): Approximately 6-8mm combined—used for heavy or fragile items
When you calculate internal dimensions, you need to subtract twice the combined flute thickness from each wall. So if your board is C-flute (about 3.5mm per wall), you're losing roughly 7mm from each dimension. For a box listed as 300x300x300mm external, your actual internal might be 293x293x293mm.
Common mistake: Always specify internal dimension requirements to your supplier. Don't assume they'll interpret "12x12x12" the way you need them to. Get it in writing. I've had suppliers deliver boxes that were technically correct per their spec sheet but useless for my application because we were speaking different dimension languages.
The practical implication is this: if you have a product that's 11.8 inches in its longest dimension, and you're ordering a box listed as 12x12x12 external, you might think you're fine. But if that box is B-flute (about 1.5mm per wall), your internal space is 11.85x11.85x11.85 inches. Your 11.8-inch product fits, but with zero clearance. No room for cushioning, no room for error, and a product that's going to rattle around during shipping and arrive damaged.
How to Measure Your Product for the Perfect Box Fit
Grab a measuring tape. I'm serious—stop guessing and actually measure your product. This sounds obvious, but I've watched clients estimate measurements for years before finally measuring and realizing they were off by half an inch. That half-inch difference could be the difference between a box that works and a box that doesn't.
Here's my step-by-step process:
- Measure the longest dimension—this is your length
- Measure the second-longest dimension—this is your width
- Measure the shortest dimension—this is your height
- For irregular shapes, measure at the widest points in each dimension
- Account for any protrusions—buttons, handles, caps, anything that extends beyond the main body
- Record all three measurements with at least one decimal place precision
A quick story here. We had a client making artisanal candles who kept ordering boxes that were "close but not quite right." After watching me measure their 4-inch diameter, 6-inch tall candles with a tape measure, they realized they'd been ordering based on the wax portion dimensions, not including the protruding wick holder and the additional height needed for lid clearance. Once they measured correctly and added proper clearance, their damage rate dropped from 8% to under 1%.
Now, about that clearance I keep mentioning. The industry standard recommendation is 1-2 inches of total clearance—meaning 0.5-1 inch on each side, or thereabouts. But this isn't a rigid rule. Adjust based on what you're shipping:
- Heavy items (>5 lbs): Add extra bottom cushioning. Clearance should be heavier at the base.
- Fragile items (glass, ceramics): Minimum 2 inches all around, with corner reinforcement
- Multi-pack products: Measure each unit, then account for dividers and additional clearance
- Products with odd shapes: Use the widest points in each dimension, not averages
Here's the thing—the difference between dimension-specific clearance and uniform clearance matters for efficiency. If your product is tall but narrow, you don't need uniform clearance on all sides. You might need 2 inches of height clearance (for cushioning above and below) but only 0.5 inches on the width sides. This kind of precision sizing can save significant material costs, especially at high volumes.
Void Fill, Cushioning & Internal Protection Space
Your product fits in the box. Great. Now what happens when it ships? That's where void fill and cushioning come in, and this is where a lot of first-timers get surprised by the costs.
The math is simple: box volume minus product volume minus cushioning requirements equals wasted space. That wasted space isn't just inefficiency—it's money leaving your business. Every cubic inch of unnecessary box volume costs you in material, shipping, and storage. But too little cushioning costs you more in damage claims.
Typical void fill requirements vary by product category:
- Electronics and fragile items: 15-25% of box volume in protective material
- General goods: 10-15% of box volume
- Clothing and soft goods: 5-10% (mostly for shape, not protection)
- Heavy items: Bottom-heavy cushioning, typically 20% of box height in material at base
I've worked with clients who were spending $0.45 per shipment on bubble wrap for a product that fit so tightly they didn't need more than a few paper puffs. We right-sized the box, used a single sheet of tissue paper to prevent scratches, and brought their per-unit packaging cost down to $0.08. That's $0.37 savings per shipment, multiplied by their annual volume of 22,000 units, equals $8,140 annually in savings that fell straight to their bottom line.
Sustainable Void Fill alternatives have come a long way. Kraft paper is my go-to for most applications—it's recyclable, compostable, and effective. Mushroom-based packaging (from companies like Ecovative) is getting cheaper and works beautifully for items under 10 pounds. Inflatable air pillows are efficient but controversial from a sustainability standpoint, though many are now made from recycled materials and are recyclable.
For fragile items, I always recommend minimum 2-3 inches of cushioning at corners and impact points. The math here is about physics: corrugated cardboard can absorb so much shock before failure, and corner impacts are the most common cause of damage. If your product is glass, ceramics, or anything that cracks under pressure, don't cheap out on corner protection. I've seen companies try to save $0.03 per unit on cushioning and lose $50 in damage claims per incident.
Quick calculation: Box internal volume minus product volume minus cushioning volume should equal your void fill volume. Target a cushioning ratio of 12-18% for general goods, higher for fragile items. If you're using more than 25% cushioning relative to box volume, consider whether a smaller box might work better.
Box Size & Cost: What You're Actually Paying For
Let's pull back the curtain on box pricing. When you order packaging, you're paying for material costs, tooling costs (if custom), and logistics costs. Understanding how box size affects each component helps you make smarter decisions.
Material costs in the corrugated industry are quoted by the square foot of board. Current market rates range from $0.08-$0.35 per square foot depending on board grade, flute type, paper weight, print requirements, and any special treatments like water resistance or flame retardant.
For a simple single-wall RSC (regular slotted carton) box, you're probably looking at $0.12-$0.18 per square foot in material costs. A 12x12x12 box has approximately 8.7 square feet of surface area. Do the math: that's roughly $1.04-$1.57 in material alone before any markup, tooling, or shipping.
Now let's talk about the real cost killer: dimensional weight pricing. Most carriers—UPS, FedEx, USPS—all use dimensional weight calculations for packages that exceed certain size-to-weight ratios. The formula is (Length x Width x Height) / 139 for domestic US shipments. If your package's dimensional weight exceeds its actual weight, you pay based on dimensional weight.
Here's why this matters in practice. A 12x12x12 box shipped to Zone 5 via UPS might bill at 18 pounds dimensional weight, even if your product only weighs 2 pounds. That's a $28 shipping charge. If you'd sized down to an 8x8x8 box, your dimensional weight drops to about 7 pounds, bringing your shipping cost to roughly $14. That's a 50% reduction in shipping costs from sizing alone.
Most suppliers price with volume tiers:
- 50-100 units: highest per-unit price
- 100-500 units: moderate pricing
- 500-2000 units: significant discount
- 2000+ units: best pricing, but requires capital commitment
Let me share a real case study from a client in the supplement space. They were shipping protein powder canisters in 14x14x14 boxes. Each canister was about 10 inches tall and 6 inches in diameter. We moved them to an 8x8x12 box with a single paper wrap for protection. Results:
- Material cost reduction: $0.18 per box
- Shipping cost reduction: $1.42 per shipment (dimensional weight dropped from 15 lbs to 9 lbs)
- Annual savings: approximately $12,000 on their volume of about 7,500 shipments
The smaller box also allowed them to fit more units per pallet, reducing their freight costs for warehouse replenishment by another $3,200 annually. Total impact: over $15,000 in savings, and their damage rate dropped from 4.2% to 0.8% because the product wasn't rattling around anymore.
Standard Box Sizes & When Custom Makes Sense
Standard box sizes exist for a reason—they're optimized for common use cases and manufactured at high volumes, which keeps costs down. Understanding when standards work versus when you need custom can save you significant money.
The most common industry standard sizes and their typical applications:
- 6x6x2 inches (Mailer): Jewelry, small accessories, USB drives, compact discs
- 8x6x2 inches (Mailer): Phone cases, small cosmetics sets, bookmarks, small art prints
- 10x8x4 inches (Shipping/Mailer): Books, medium cosmetics, small electronics, clothing accessories
- 12x10x8 inches (Shipping): Multiple small items, medium apparel, kitchen goods
- 14x12x10 inches (Shipping): Larger apparel bundles, shoes, medium household items
The advantage of standard sizes is lower MOQs (often 50-100 units versus 500+ for custom), faster lead times (typically 7-10 days versus 4-6 weeks), and competitive pricing because suppliers have these tools and workflows optimized. If you're starting out or testing a product, standards are almost always the right call.
Custom makes sense when your product dimensions don't map cleanly to standard sizes, when you're at sufficient volume to justify the tooling costs, or when your product has unusual requirements. Here's my break-even framework:
- Below 500 units annually: Standard sizes almost always win on total cost
- 500-1000 units: Calculate carefully—custom tooling costs must be amortized over volume
- 1000+ units: Custom often makes sense, especially for products with tight margins where packaging efficiency matters
Custom box tooling (the cutting dies needed to form your specific dimensions) typically costs $300-$800 per design. If that tooling cost can be amortized over enough units to save $0.05 or more per box versus a standard alternative, you're ahead. At 2,000 units, that's $100 in savings per thousand units—tooling pays for itself in one or two orders.
Bottom line: If your product's dimensions plus clearance requirements don't fit any standard size without significant wasted space, or if you're shipping over 500 units annually of a single product, get custom quotes. The math usually works in your favor, and the efficiency gains compound over time.
The Custom Box Ordering Process & Timeline
I've been through this process dozens of times with different suppliers, and the timeline is remarkably consistent across reputable manufacturers. Here's what you're actually signing up for when you Order Custom Packaging.
Week 1-2: Dimensions, Artwork, and Supplier Selection
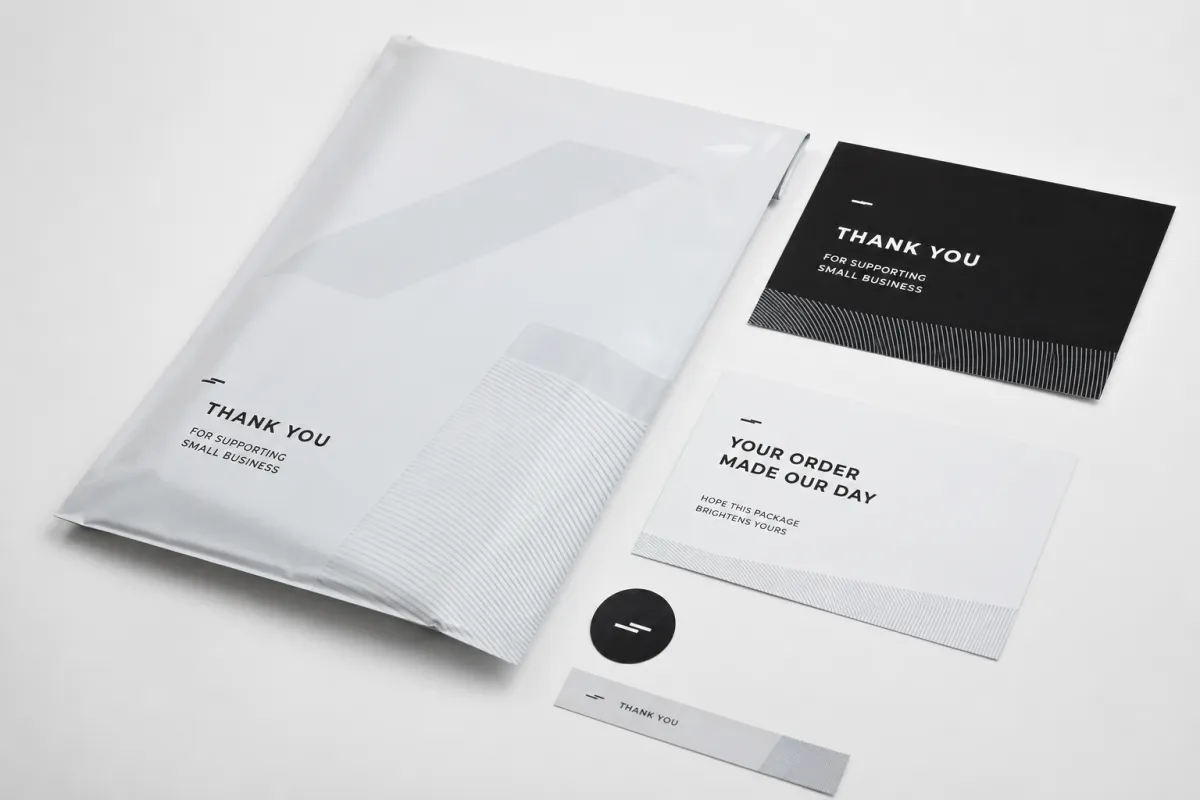
This phase involves finalizing your specs. You'll work with suppliers to confirm internal dimensions, flute type, board grade, and print requirements. If you're getting printed boxes (custom branding), you'll also finalize artwork during this phase. I always recommend getting a dieline from your supplier—this is the template showing exactly how your artwork needs to be set up for printing. Using an incorrect dieline is the #1 cause of art file problems and delays.
Supplier selection includes requesting samples of similar work they've produced, confirming their quality control processes, and locking in Pricing and MOQs. Don't skip the sample review. I've seen beautiful spec sheets produce mediocre boxes because a supplier's quality control wasn't up to snuff.
Week 2-3: Sample Production and Approval
Before production, most suppliers will produce a sample run of your actual box. This is non-negotiable in my book. A sample run lets you physically verify dimensions are correct, your product fits as expected, print quality meets your standards, and structural integrity is sufficient for your application.
For fragile items or products where fit is critical, I recommend requesting 3-5 sample boxes and actually shipping them to test the packaging under real conditions. This adds 5-7 days to your timeline but can prevent costly production mistakes.
Week 3-5: Production Run and Quality Control
Once samples are approved, production begins. Your supplier will typically provide a production timeline based on their current workload and the complexity of your order. Simple brown kraft boxes with no printing can sometimes be produced faster than full-color printed boxes.
Quality control is your responsibility during this phase. I always recommend requesting pre-shipment inspection either by the supplier or through a third-party inspection service. The cost (typically $0.02-$0.05 per unit for random inspection) is trivial compared to the cost of receiving a bad batch.
Week 5-6: Shipping and Delivery to Your Warehouse
Production complete means shipping begins. Factor in freight time from your supplier's location (domestic suppliers typically 3-5 days, Asian suppliers 3-5 weeks for ocean freight) plus customs clearance if applicable. Always build in buffer time because delays happen—port congestion, weather, carrier issues. I've never had a Custom Packaging Order arrive exactly on the originally quoted date.
Total realistic timeline: 5-7 weeks from approval to warehouse delivery. Rush orders can sometimes compress to 2-3 weeks but expect a 25-40% premium on pricing. Artwork complexity can add 1-2 weeks to the process if your design needs significant revision or if there are print file issues.
My recommendation? Start the custom packaging conversation 2-3 months before you actually need the boxes. This gives you breathing room for sample approval, potential reorders, and unexpected delays. Nothing is more stressful than having inventory ready and packaging stuck in production.
Frequently Asked Questions
How do I measure a box for my product correctly?
Start by measuring your product at its longest, widest, and tallest points—these become your length, width, and height respectively. Add 1-2 inches of clearance on each dimension to account for cushioning materials. For irregularly shaped products, always measure at the widest points in each dimension rather than using averages. Most importantly, confirm with your supplier whether they quote internal or external dimensions—assuming they match what you need is how expensive mistakes happen.
What's the difference between custom and standard box sizes?
Standard boxes come in fixed dimensions that are manufactured in high volumes, resulting in lower MOQs (typically 50-100 units) and faster lead times (7-10 days). Custom boxes are made to your exact specifications with dimensions you define, requiring tooling setup but offering precise Fit for Your Products. Standard sizes often have better per-unit pricing at low volumes, while custom becomes cost-effective above 500-1000 unit orders depending on box size and complexity.
How much should I add for cushioning and void fill?
The general rule is 1-2 inches of clearance around all product surfaces for adequate cushioning. Fragile items like glass or ceramics need 2-3 inches minimum, especially at corners. Heavy items require reinforced bottom cushioning to absorb impact. A practical calculation: your void fill volume should equal box volume minus product volume minus 15-20% for proper protection. Using too little cushioning is almost always more expensive than using too much due to damage claims.
Will a smaller box always save me money on shipping?
Not always. Dimensional weight pricing means oversized boxes cost more if the dimensional weight exceeds actual weight, but if your product is already heavy relative to its size, reducing box dimensions may not significantly impact shipping costs. However, smaller boxes always reduce material costs and typically lower damage rates. A proper fit balances material cost, shipping cost, and damage prevention—which usually means choosing the smallest box that safely accommodates your product plus required cushioning.
How long does it take to get custom boxes made?
Typical timeline is 4-6 weeks from final approval to warehouse delivery. This includes 1-2 weeks for dimension/artwork finalization, 1-2 weeks for sample production and approval, and 2-3 weeks for production and quality control. Rush orders can sometimes compress to 2-3 weeks but expect a 25-40% premium on pricing. Artwork complexity can add 1-2 weeks if design revisions are needed. Always build buffer time into your planning—delays happen and inventory sitting waiting for packaging is expensive.
For more information on sustainable packaging practices and industry standards, visit the Sustainable Packaging Coalition and review EPA guidelines on packaging material management.


