Buyer Fit Snapshot
| Best fit | Create Premium Unboxing Experience projects where brand print, material claims, artwork control, MOQ, and repeat-order consistency need to be specified before quoting. |
|---|---|
| Quote inputs | Share finished size, material target, print colors, finish, packing count, annual reorder estimate, ship-to region, and any compliance wording. |
| Proofing check | Approve dieline scale, logo placement, barcode or warning zones, color tolerance, closure strength, and carton packing before bulk production. |
| Main risk | Vague material claims, crowded artwork, missing packing details, or unclear freight terms can make a low unit price expensive after revisions. |
Fast answer: Create Premium Unboxing Experience: Board, Finish, Dieline, and Unit Cost should be specified like a repeatable production item. The safest quote records material, print method, finish, artwork proof, packing count, and reorder notes in one written spec.
Production checks before approval
Compare the actual filled-product size with the drawing, then confirm tolerance on folds, seals, hang holes, label areas, and retail display edges. Reserve space for logos, QR codes, warning copy, and material claims before decorative graphics fill the panel.
Quote comparison points
Review material grade, print process, finish, sampling route, tooling charges, carton quantity, and freight assumptions side by side. A quote is only useful when the supplier can repeat the same color, closure quality, and packing count on the next order.
Some customers decide whether a brand feels expensive before they ever touch the product. I’ve watched that happen on factory floors in Shenzhen, in retailer walkthroughs in New York, and in client meetings in Los Angeles where a sample box changed the entire mood of the room in under 15 seconds. I remember one buyer literally going quiet after opening a 2-piece rigid box with a 2 mm greyboard core and a matte black wrap because the lid felt “right.” That’s the kind of dramatic pause people like to pretend doesn’t matter. It does. If you want to know how to create premium unboxing experience, start there: packaging is often the first proof of value, and sometimes the only proof a shopper notices before they post a photo.
That’s why how to create premium unboxing experience is not really about “a fancy box.” It’s about a sequence. A deliberate one. The outer mailer, the first reveal, the inner structure, the insert card, the tissue, the sound of the lid, the way the product sits in place—each layer either reinforces care or quietly undermines it. I’ve seen brands spend $2.40 on a rigid box and save $0.06 on a flimsy insert, then wonder why the whole package felt cheap. The customer noticed. They always do. Humans are annoyingly good at spotting cheap shortcuts, especially when the box arrives from a fulfillment center in Dallas or a contract packer outside Ho Chi Minh City.
Honestly, I think a lot of people get premium packaging wrong because they confuse decoration with design. Premium does not automatically mean expensive. It means intentional, coherent, and matched to the product and audience. A $0.18 mailer can feel refined with the right print restraint and closure. A $7 box can feel ordinary if the details are noisy, loose, or inconsistent. That contrast is where the real lesson in how to create premium unboxing experience begins. And yes, I’ve had to explain that to more than one founder who wanted “luxury vibes” but also wanted to cram in six finishes and a neon logo. Wild combo.
How to Create Premium Unboxing Experience: What It Really Means
Premium unboxing is a designed emotional arc. The customer starts with anticipation, then encounters friction or ease, then gets a reveal, then ends with a memory. That memory becomes part of customer perception, and customer perception is stubborn; it can stick longer than product specs, especially for categories like cosmetics, accessories, specialty food, and subscription gifts. When people ask me how to create premium unboxing experience, I tell them to think less like a printer and more like a director. The box is the set. The opening is the scene. The customer is the only critic who matters, whether they’re opening the parcel in Miami or Manchester.
At a trade show in Chicago, a skincare founder showed me two samples side by side. One was a plain kraft mailer with a folded leaflet. The other was a rigid box with a magnetic closure, 2 mm board, soft-touch lamination, and a black insert that held three jars with almost surgical precision. Same formula. Same fill weight. Different reactions entirely. The second sample felt calmer, and calm is a premium signal. It suggested control, which suggested quality. That’s one of the hidden truths behind how to create premium unboxing experience. People don’t just buy products. They buy the feeling that the brand knows what it’s doing.
The mechanics are simple, even if the execution is not. People respond to anticipation, reduced friction, surprise, and perceived luxury. A well-planned unboxing journey delivers all four. The outer package creates curiosity. The first opening lowers resistance. The inner presentation rewards attention. The final card, thank-you note, or care instruction creates closure. Each moment can be measured in seconds, but the impression can last for weeks. I’ve seen customers keep the outer box because the opening felt too good to toss. That’s not an accident. That’s design working as intended, usually after 2 or 3 sample rounds and at least one very opinionated buyer review.
Premium unboxing differs from ordinary packaging in one key way: ordinary packaging mainly protects, while premium packaging also communicates. A standard poly mailer tells the customer, “Your item arrived.” A structured box with a branded seal, tissue wrap, and custom insert says, “This was prepared for you.” That sentence matters more than many teams realize. It changes the brand identity signal before the product even appears, whether the box was assembled in Suzhou or Monterrey.
Here’s the most useful distinction I’ve learned in years of packaging work: premium is not excess, it is alignment. If you’re selling a $28 candle, a $14.50 rigid box may be too much. If you’re selling a $180 grooming kit, a plain corrugated mailer may be too little. How to create premium unboxing experience depends on matching structure and finish to the item’s price point, audience, and brand promise. Not always the same answer. That’s the honest part. Packaging is not a costume party, and the box does not get to lie for the product.
“The box should not shout. It should reassure.” A luxury home fragrance client told me that during a pack-out review in Seoul, and I’ve repeated it ever since.
How to Create Premium Unboxing Experience Through Packaging Design
Packaging design is where how to create premium unboxing experience becomes concrete. The structure, material, and finish are the first tactile cues your customer gets, and tactile cues are powerful. Soft-touch lamination feels warmer than gloss. Rigid board feels more substantial than a 350gsm C1S artboard folding carton. Embossing can give a logo a quiet lift, while foil can add contrast if used sparingly. The trick is knowing when each detail earns its keep. Because yes, there is such a thing as too much shine, and it usually looks like someone got carried away in a sample room in Dongguan.
I visited our Shenzhen facility last year and watched a team test four box prototypes for a premium tea client. One version had heavy foil on every panel. Another had only a single foil logo, a 1-color print, and an uncoated interior. The latter looked more expensive because it had restraint. That surprised the client, but not the pack engineers. Excess rarely reads as premium for long. Precision does. I still remember the client saying, “Wait, the simpler one?” like the box had personally betrayed them. It hadn’t. It was just doing the right thing.
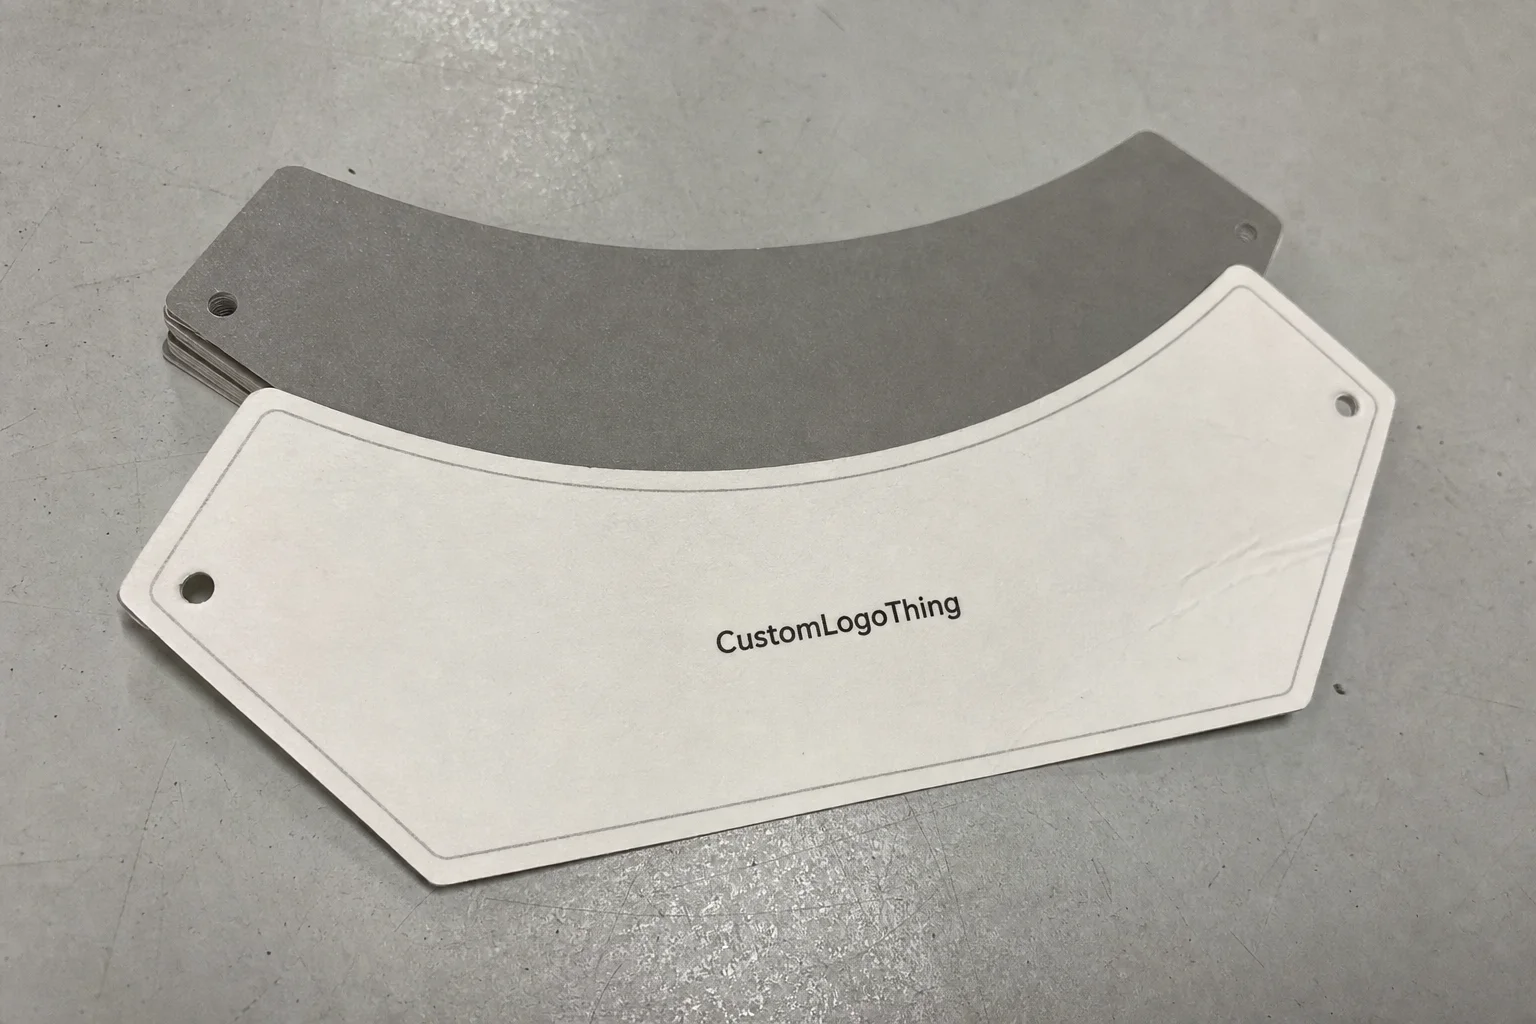
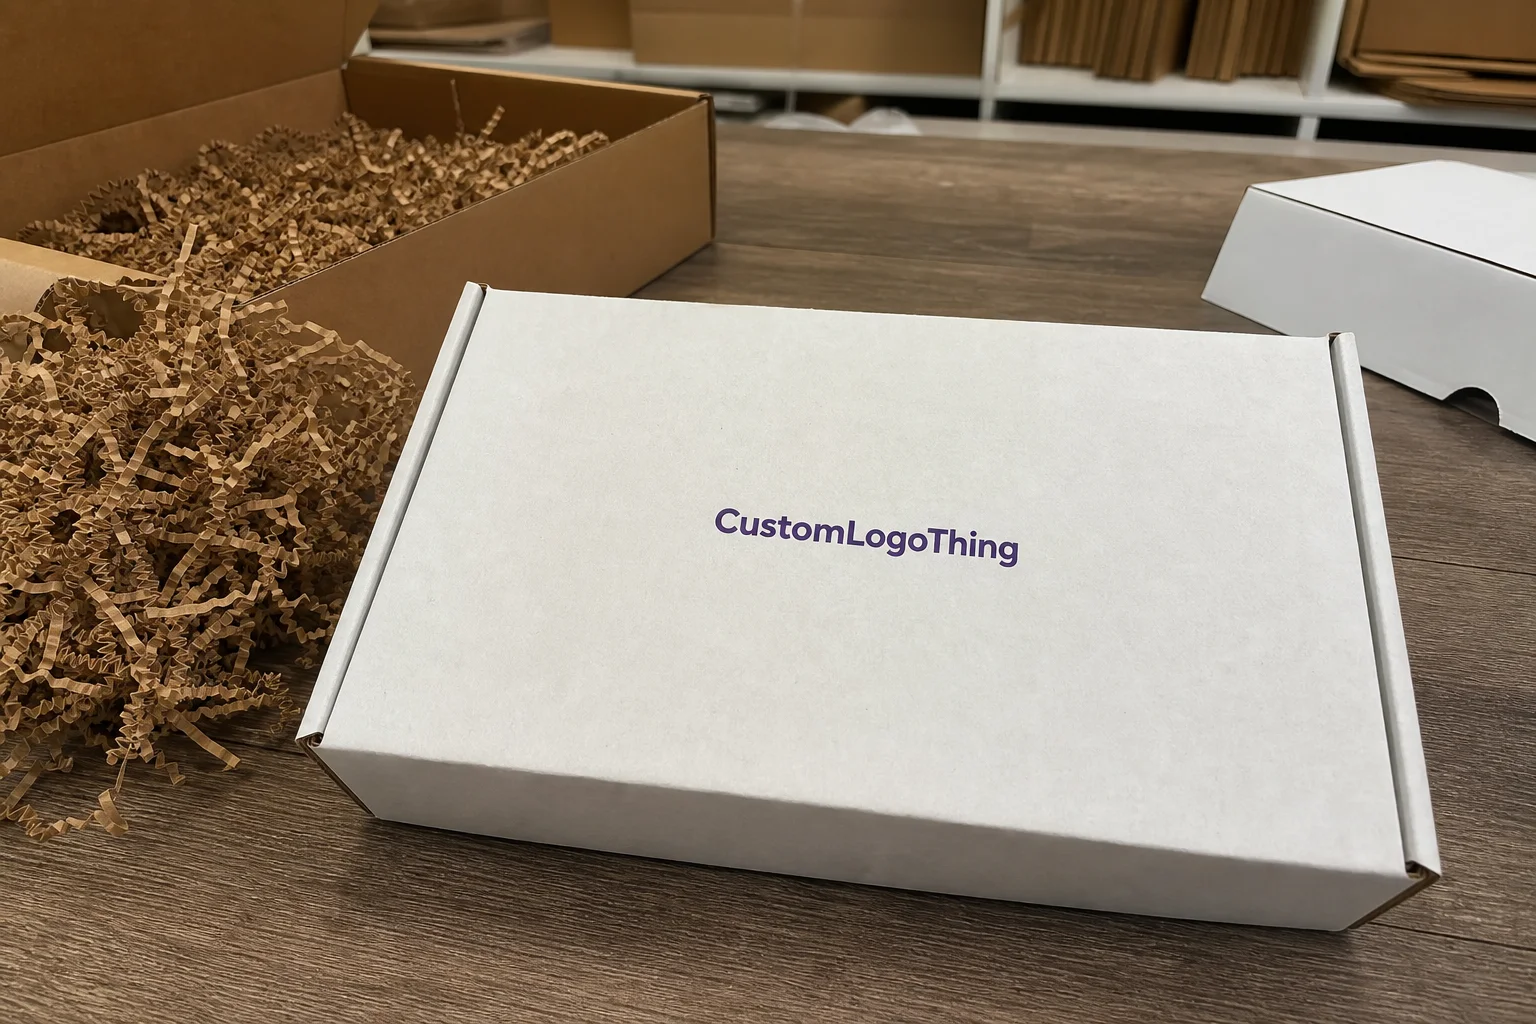
Structure matters first. A rigid setup box with a 1200gsm board wrap feels different in the hand than a 350gsm folding carton. A magnet closure creates a defined opening moment. A drawer-style box builds anticipation through motion. A two-piece lid-and-base box offers a clean reveal, especially if the fit tolerance is tight enough that the lid lifts with a controlled release rather than a sloppy pop. If the lid flies off like it’s angry at you, that is not premium. That is a packaging problem wearing a fake mustache.
Materials matter second. For many brands, 157gsm art paper over a rigid board is a common premium combination. Add a soft-touch film and you get a smoother, more muted feel. Use FSC-certified paperboard where possible, especially if sustainability messaging is part of the brand story. If you want to review standards and sourcing guidance, the FSC site is a useful reference point. Premium buyers increasingly notice material choices, and they notice waste too. They also notice when packaging feels weirdly plastic-heavy for no reason. Nobody wants to pay more for extra landfill energy.
Finish matters third. Spot UV can create a subtle contrast on matte stock. Foil stamping can make a logo feel more deliberate. Blind embossing adds dimensionality without adding noise. I’m partial to details that reward close inspection. That’s because many customers now view the outer package from 2 feet away, photograph it from 18 inches away, and touch it within 5 seconds. Your finish has to work at all three distances. If it only looks good under studio lights, that’s not useful. That’s a mood board.
Design cues that usually signal premium
- Soft-touch or matte lamination instead of high-gloss everywhere
- One dominant color and 1 accent, not 5 competing shades
- Clear typography hierarchy with at most 2 font families
- Custom inserts that hold product components with 2-3 mm accuracy
- Branding repeated at the right layers, not stamped on every surface
Negative space is one of the most underused tools in visual branding. A box with empty margins and a centered mark can feel far more expensive than a crowded design. It signals confidence. It also supports brand recognition because customers can identify the logo faster when the layout is clean. I’ve seen this in meetings with beauty startups in Orange County that wanted “more luxury” but actually needed “less noise.” Honestly, it’s usually less noise. That fix saves everyone a headache and a few bad sample rounds.
There’s also a sustainability tradeoff that buyers can feel. Excess foam, oversized shippers, and unnecessary wraps can make a premium package seem wasteful. A cleaner structure, recyclable paper-based insert, and right-sized shipper can improve both customer perception and operational efficiency. For broader material and waste context, the EPA’s packaging and materials resources at epa.gov are worth a look, especially if your team is balancing premium presentation with recyclability. I’ve had sourcing conversations in Guangdong where this tradeoff showed up in the first 10 minutes, usually right after the sample cost was quoted at $0.15 per unit for 5,000 pieces of a simple paper insert.
Brand hierarchy inside the package matters just as much as outside. The outer shipper should protect. The inner box should present. Tissue paper or a wrap sheet should create anticipation. The insert card should communicate the message. The protective layer should disappear visually while doing its job mechanically. If every layer tries to be the hero, the whole system gets noisy. Premium unboxing is a choreography problem, not a decoration problem. And if the warehouse team hates it, your “premium” idea is probably just making everyone miserable.
How Premium Unboxing Experience Works: Customer Psychology and Flow
If you want to understand how to create premium unboxing experience, watch what happens in the first 30 seconds after a delivery lands on a doorstep in Toronto or Tampa. That’s where the psychology starts. The buyer is not only opening a box; they’re confirming whether they made a smart purchase. Good packaging reduces anxiety. It says the order is complete, protected, and worth what they paid. Bad packaging makes people suspicious before they even see the product. I’ve watched that shift happen in real time. It’s brutal.
The sequence usually moves through four moments. First, the customer sees the external package. Second, they open the shipper or mailer. Third, they reveal the product presentation. Fourth, they reach the note, insert, or final accessory. Each stage builds trust if the fit is precise, the contents are arranged cleanly, and the branding is consistent. Miss one stage, and the emotional curve drops. The box can be beautiful, but if the product rattles around inside like spare change in a glove compartment, the illusion is gone.
Sound matters more than most people expect. I’ve been in fulfillment rooms in Klang and Long Beach where a lid makes a soft, controlled release and instantly the package feels better. I’ve also heard low-grade corrugated squeak, inserts rattle, and adhesive pull away from coatings. Those sounds are not minor. They change how premium the experience feels. Weight does the same. A 2-piece rigid box with a snug insert feels substantial in the hand; a thin folding carton can feel like a shortcut, even if the product inside is excellent. Customers may not know why they reacted badly, but trust me, they know.
There’s a reason some packages get photographed within minutes of arrival. Shareability is part of premium unboxing. Customers post what makes them feel special. A neat ribbon tie, a message printed inside the lid, or a product cradle cut to match the item can all trigger that urge. That’s free marketing, but it’s not accidental. It comes from planning the reveal so the package looks good from the top-down view, the side angle, and the open-box shot. I’ve seen teams obsess over the front of the box and forget the interior completely. Then they wonder why the social posts look flat. Because people open boxes, not just stare at them.
One client in the personal care category told me their returns dropped after they improved packaging consistency across three SKUs. The products themselves didn’t change. The pack format did. Inserts were adjusted, the color system was tightened, and the unboxing journey became more predictable. The customer-facing result was fewer “I thought something was missing” emails. That’s an underrated benefit of how to create premium unboxing experience: it can reduce post-purchase doubt, especially when fulfillment happens from a warehouse with 8 packing stations and 2 shifts.
To put it plainly, people trust order. They trust symmetry. They trust when the product appears exactly where it should be, with no loose paper, no crushed corners, and no obvious pack line shortcuts. The psychology is almost primitive. Tidy equals cared for. Cared for equals valuable. And yes, that works even when the customer insists they “don’t care about packaging.” Sure. Then why are they opening it carefully like it’s holding state secrets?
Key Factors That Shape Premium Unboxing Costs and Timeline
People often ask me for a single price on how to create premium unboxing experience, and the truthful answer is that it depends on at least six variables. Material selection, print complexity, finishing methods, customization level, order quantity, and assembly time all move the needle. A simple custom mailer in 4-color print might run $0.48 to $0.85 per unit at 10,000 pieces, while a rigid box with foil, embossing, and custom insert can climb from $1.90 to $5.50 per unit depending on size and volume. For a 5,000-piece run out of Ningbo, a paperboard insert alone may land around $0.15 per unit if the geometry is straightforward.
That spread is not random. It reflects setup, tooling, and labor. Smaller orders usually cost more per unit because die-cutting, plates, and packing labor are spread over fewer boxes. A 500-piece run might price at $4.20 each for a structure that drops to $2.10 at 5,000 pieces. I’ve seen buyers balk at that math, then choose a larger run to bring the per-unit cost into a more reasonable range. That’s normal. It’s also why how to create premium unboxing experience is often a volume conversation as much as a design conversation. Packaging people love romance right up until the spreadsheet shows up.
Hidden costs show up fast if you’re not watching them. Structural prototyping can add $150 to $600. Custom insert development may add another $120 to $400, especially if the insert needs foam, molded pulp, or layered paperboard. Special finishes like hot foil, spot UV, and blind embossing add both setup and production time. Shipping weight matters too; a heavier box can raise outbound freight costs by $0.20 to $1.10 per order depending on carrier and zone. Then there’s assembly labor. If the pack takes 45 seconds instead of 18 seconds, your warehouse feels it immediately, whether you’re packing in Phoenix or Porto.
Here’s a practical comparison I’ve used with clients who needed to choose a direction quickly:
| Packaging Option | Typical Per-Unit Cost | Best For | Premium Signal |
|---|---|---|---|
| Custom mailer, printed exterior | $0.48–$0.85 | Lightweight DTC products, subscription kits | Moderate, if design is disciplined |
| Rigid box, simple print | $1.90–$3.10 | Beauty, gifting, accessories | Strong tactile and visual impact |
| Rigid box with foil and insert | $2.80–$5.50 | Premium retail, tech accessories, luxury goods | High, especially with tight fit |
| Multi-part presentation set | $4.50–$9.00 | Influencer kits, launch sets, high-end gifting | Very high, but labor-heavy |
Timeline is the other half of the equation. Concept development may take 3 to 7 business days. Dieline approval often takes another 2 to 5 business days, depending on revision cycles. Sampling can take 7 to 14 business days. Production for a complex rigid box usually runs 12 to 20 business days after proof approval, and specialty finishing can extend that. If you add custom inserts or multi-part assemblies, expect extra time for pack-out testing. This is not delay for delay’s sake; it’s the price of avoiding expensive mistakes later. A realistic project in Guangzhou or Ho Chi Minh City often lands at 12-15 business days from proof approval for a standard rigid set, assuming materials are already in hand and there are no last-minute copy changes.
For teams that need shipment testing or distribution validation, the ISTA standards are useful because they help you think beyond visual appeal. A package that looks beautiful but fails drop testing is not premium. It’s fragile. And fragility creates returns, which destroys the very perception you’re trying to build.
Step-by-Step: How to Create Premium Unboxing Experience for Your Brand
Here’s the part most teams want: a process they can actually use. How to create premium unboxing experience becomes much easier once you stop treating packaging as a last-minute add-on and start treating it as part of the product strategy. I’ve seen brands improve outcomes in one quarter simply by revising the pack journey before the next purchase cycle. Nothing magical. Just less chaos, and fewer “can we fix this by Friday?” emails.
Step 1: Audit the product, audience, and brand promise
Start with the product itself. Is it fragile, heavy, high-margin, giftable, or frequently shared on social media? Then look at your audience. A customer buying a $24 wellness item has different expectations than someone buying a $240 accessory. Finally, define your promise. If the brand claims calm, your packaging should feel calm. If it claims bold confidence, your packaging can tolerate sharper contrast and stronger structure. This is where brand consistency either starts or falls apart. I’ve seen beautiful boxes that had the wrong emotional tone, and that mismatch is weirdly obvious once you spot it, especially after reviewing 3 or 4 sample rounds from a supplier in Yiwu.
Step 2: Map the unboxing journey
Draw the path from shipper to reveal. I mean literally sketch it on paper. What does the customer see first? What do they touch second? Where does the product sit? How many layers are there, and how long does each reveal take? One of my favorite client exercises is to time the experience with a phone timer. A premium unboxing can happen in 20 to 40 seconds, but that timing depends on the category. A gift set may take longer. A subscription refill may need to be fast. The point is not to make it slow. The point is to make it feel considered.
Step 3: Choose structure, materials, and finishes
Select the box based on function first, then finish it based on brand. A rigid box with 2 mm board works well for gifts and premium kits. A folding carton with a well-designed insert can work for lighter products. Choose finishes that enhance the brand rather than compete with it. For example, a matte black box with one foil mark can feel more elevated than a fully printed box with four competing effects. That’s a common mistake in how to create premium unboxing experience: trying to show every technique at once. You are not collecting packaging Pokémon.
Step 4: Build inserts, messaging, and protection
The insert should do three jobs: hold, protect, and present. If it only cushions the product, it’s underperforming. If it only looks nice, it may fail in transit. When I was reviewing a cosmetics pack-out line with a startup team in Dongguan, we found that the product was moving 6 mm during shipping because the insert cavity was too loose. Fixing that single detail improved both presentation and transit performance. Small correction, big customer impact. The kind of boring fix that saves a launch and keeps the returns inbox quiet.
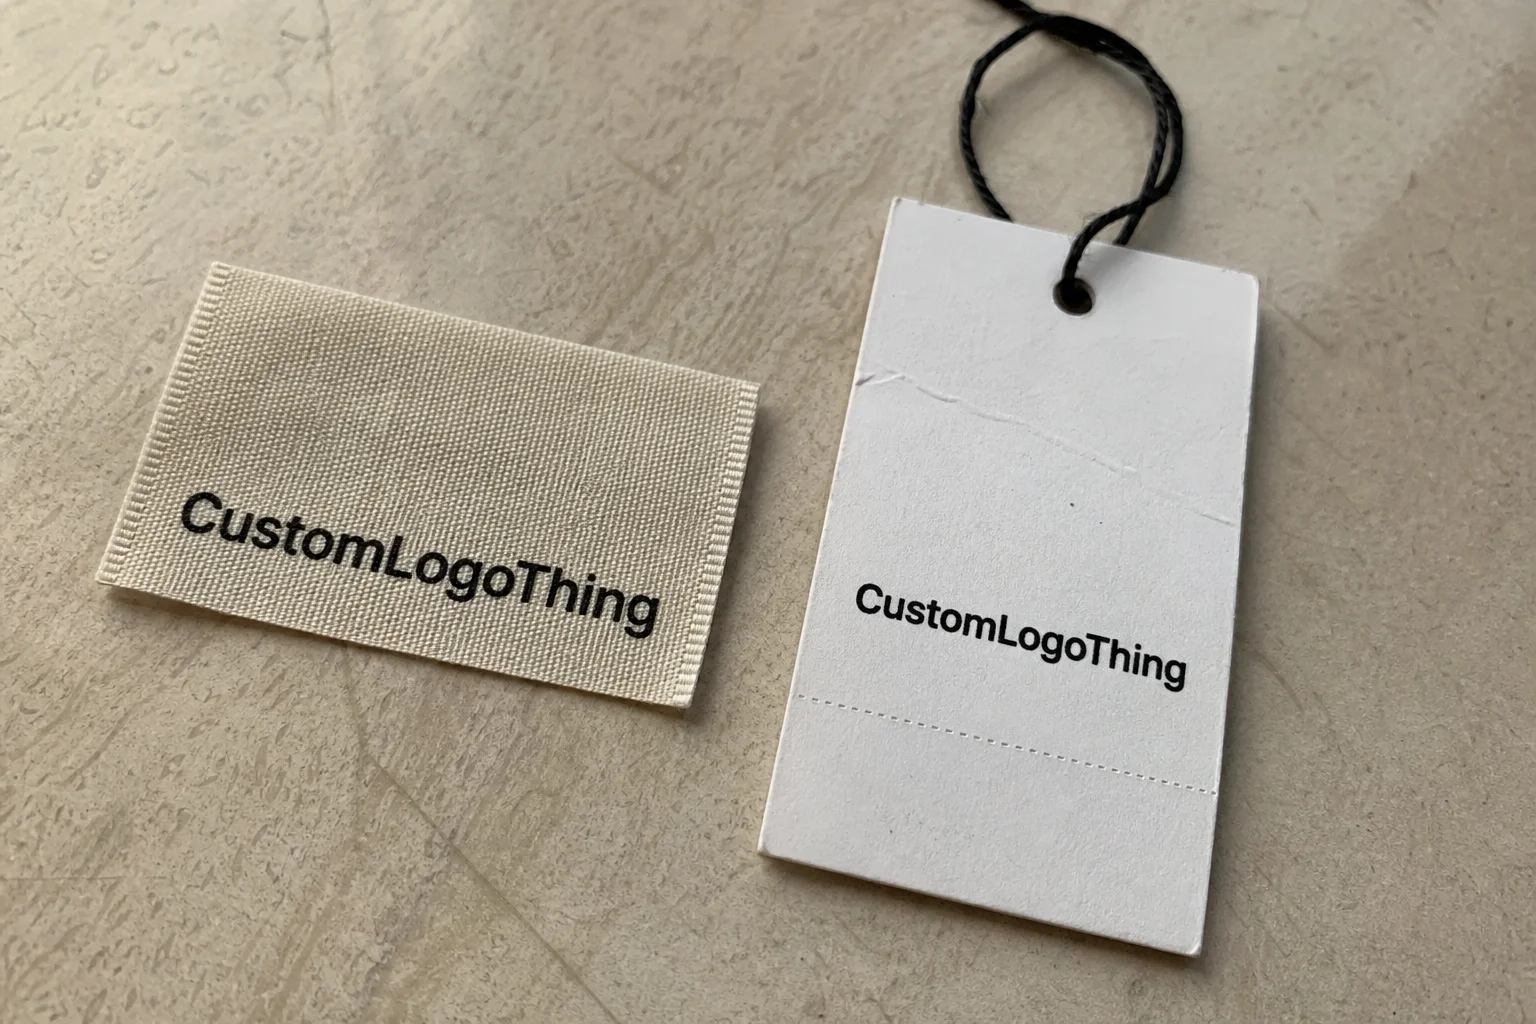
Messaging matters too. A printed note inside the lid, a brand story card, or a simple care instruction can anchor the experience. Keep it short. Four to eight lines is often enough. If the copy is too long, it turns into clutter. Premium readers don’t want a speech. They want a thoughtful signal. Honestly, I’d rather see one good line than a paragraph that sounds like it was written by committee and approved in a conference room with too much coffee.
Step 5: Prototype, test, refine, and compare against budget
Always prototype before full production. I’ve seen a sample that looked immaculate on a table and failed inside a corrugated shipper because the corners crushed during transit. Test it under real handling conditions. Check pack-out time. Check fit. Check whether the finish scratches under warehouse conditions. Compare the cost to the customer value you expect to create. If a $1.75 upgrade can increase repeat purchase rate or social sharing, that’s worth investigating. If it only adds gloss, walk away.
One more thing: keep an eye on operational friction. Premium packaging should not slow the line so much that labor costs eat the margin. A package that takes 90 seconds to assemble may be justified for a launch kit, but not for a standard replenishment order. I’ve seen beautiful packaging designs rejected because the warehouse team simply could not pack them efficiently at scale. That’s not a creative failure. It’s a systems failure. And yes, I’ve been in that meeting. It’s as fun as it sounds.
Common Mistakes When Trying to Create Premium Unboxing Experience
The most common mistake is overdesign. Too many finishes, too many colors, too many paper types, too many visual ideas fighting for space. The result can feel expensive in budget terms but cheap in execution. Premium buyers often prefer clarity over clutter. If your box needs three sentences to explain itself, it’s probably working too hard. If it needs five, somebody got excited at the wrong time, probably around a sample table in Shanghai.
Another error is choosing style over function. I remember a client who loved a beautiful lid style with a deep embossed logo, but the material choice added cracking around the edges during transit on a 1,200-mile route. We fixed the issue with a slightly thicker wrap and a tighter score line, but the original idea would have generated damaged goods. A premium package that damages the product is not premium. It’s costly failure dressed up as design. That’s one of my least favorite categories, right next to “surprise freight surcharge.”
Inconsistent branding causes trouble too. If the outer shipper looks one way, the inner box another, and the insert card feels like it belongs to a different company, the experience fractures. Visual branding should feel like one voice, not three committees. The fonts should agree. The colors should agree. The tone should agree. Even a strong logo loses force when the system around it is incoherent. I’ve seen brands spend money polishing one touchpoint while the rest of the package looked like it came from three unrelated vendors in three different regions.
Then there’s logistics. A beautiful package that takes too long to assemble or ships poorly will strain operations fast. If pack-out time rises from 22 seconds to 58 seconds per order, labor cost balloons. If the box adds 11 ounces to the parcel, freight moves up too. If the insert requires hand-folding at the warehouse, mistakes multiply. Premium packaging only works when the back end can support it. Otherwise the “premium” feeling gets eaten alive by operational pain, usually right around the time the third pallet hits the dock.
Finally, there’s the mismatch between packaging cost and product value. A $12 body lotion in a $4.80 presentation box can feel artificial unless it is part of a gift program or a subscription experience. On the other hand, a $220 product in a $0.32 flimsy mailer can feel stingy. The sweet spot is where the packaging reinforces the product’s actual worth without pretending to be something else. That balance is central to how to create premium unboxing experience, and it’s one of the first things I check during supplier negotiations in Vietnam or coastal China.
“The premium feeling vanished the moment the insert bent in transit.” I heard that from a client after a launch setback in Austin, and it still sums up the stakes better than most brand decks.
Expert Tips to Improve Premium Unboxing Experience Without Overspending
If budget is tight, pick one hero upgrade and do it well. A rigid mailer, a custom insert, or branded tissue can make a visible difference without forcing a full system rebuild. In my experience, the single biggest mistake is trying to upgrade every component equally. That usually spreads the budget too thin and leaves no detail strong enough to carry the experience. One sharp detail beats five half-baked ones every time, especially when the order quantity is 2,000 units and every cent matters.
Use restraint in print. One or two strategic accents often outperform a fully decorated surface. For example, a matte black carton with a single copper foil logo can feel more refined than a full-coverage design with gradients and multiple finishes. That’s because premium is often defined by what you leave out. This is one of the simplest ways to improve how to create premium unboxing experience without inflating unit cost, and it’s a lot easier to explain to finance than “we needed three more inks.”
Test with small sample runs before scaling. I recommend 100 to 300 pilot units if the budget allows. That gives you enough data to assess customer reaction, pack-out speed, and transit performance. It also gives you room to fix a problem before a 5,000-unit order locks it in. Some brands skip this and regret it. Sampling is cheaper than correction. A lot cheaper. And far less embarrassing than discovering a structural flaw after pallets have already left a factory in Ningbo.
Personalization can help too, but it doesn’t need to be complex. A printed thank-you card with variable messaging, a seasonal wrap, or a customer name on the insert can create a premium feel at relatively low cost. The key is that it feels intentional. Random personalization feels gimmicky. Thoughtful personalization supports brand recognition because it makes the experience memorable without shouting, and it can be done with variable data printing for roughly $0.03 to $0.12 per unit depending on the line.
Here are a few practical cost-control moves I’ve recommended in supplier negotiations:
- Upgrade only the visible surface, not the hidden layers, unless transit performance demands more.
- Use one specialty finish instead of two or three competing effects.
- Design inserts with paperboard first before jumping to molded or foam solutions.
- Standardize box sizes across SKUs to reduce tooling and storage complexity.
- Keep messaging cards in a fixed format and vary only the copy block or QR code.
One client in specialty coffee reduced packaging cost by 14% while improving customer feedback because they simplified the inner structure and spent the savings on a better exterior print finish. Another reduced damages by switching from loose tissue to a die-cut insert that stabilized the product at two contact points. Neither brand spent wildly. Both improved the experience. That’s usually the smarter path when learning how to create premium unboxing experience, especially if the production line is in South China and the freight budget is already tense.
If you’re planning a refresh right now, here’s the fastest next move: review your current packaging, list the three weakest touchpoints, set a budget ceiling, and prototype one improved version immediately. Don’t wait for perfection. A good test beats a perfect idea sitting in a spreadsheet. Spreadsheets are great. They are also where good ideas go to nap, usually somewhere between column H and row 48.
Frequently Asked Questions
How do I create premium unboxing experience on a small budget?
Focus on one hero upgrade, such as a rigid mailer, custom insert, or branded tissue, instead of changing everything at once. Use clean design, tight fit, and consistent branding so the package feels intentional. Spend first on the parts customers touch and see most, because those details usually drive the highest perceived value. A thoughtful package does more than a flashy one that falls apart in transit, especially if you’re producing 1,000 to 3,000 units from a supplier in Guangdong.
What packaging elements matter most in a premium unboxing experience?
Structure, material quality, and presentation order usually matter more than decorative extras. Customers notice fit, texture, print finish, and how clearly the product is secured and revealed. A simple package can still feel premium if the sequence is well planned and the branding is consistent from outer shipper to inner reveal. If those basics are off, no amount of foil is going to save it, even if the foil cost you $0.22 per unit.
How long does it take to build a custom premium unboxing experience?
Simple custom packaging can move quickly, but premium projects often require sampling, revisions, and finish approvals. Timeline depends on structure complexity, material sourcing, and whether inserts or specialty finishes are involved. Plan extra time for prototyping and testing so the final result works in both design and fulfillment. Rushing packaging usually means paying for the mistake later, which is a terrible bargain; a realistic schedule is typically 12-15 business days from proof approval for a standard rigid setup, longer if the insert or closure is custom.
How much does premium unboxing packaging cost?
Cost depends on order quantity, box style, print coverage, and finishing methods like foil, embossing, or soft-touch coating. Smaller orders usually cost more per unit because setup and tooling are spread across fewer boxes. The best approach is to budget by customer impact, not by decoration alone, and compare unit cost against perceived value. If the packaging supports repeat purchase and social sharing, that spend can make sense. For reference, a 5,000-piece rigid box run might land around $2.10 to $3.10 per unit depending on finish and insert complexity.
Can sustainable packaging still feel premium?
Yes. Recyclable materials, minimal waste, and smart structural design can feel elevated when executed well. Premium does not require excess; it requires precision, quality control, and a cohesive brand story. Many customers now associate thoughtful sustainability with higher-end brands rather than lower-value packaging. A clean, recyclable package with a strong structure can feel more premium than a wasteful one with a bunch of gimmicks glued on, especially if the board is FSC-certified and the insert is paper-based rather than foam.
If you’re serious about how to create premium unboxing experience, don’t start by asking which finish is trendiest. Start by asking what your customer should feel in the first 10 seconds, what they should remember after 10 minutes, and what they should tell someone else the next day. That’s the real test. Get the sequence right, keep the materials aligned with the product, and build the package as part of the brand—not just as a container. That is how to create premium unboxing experience in a way that actually lasts. And if a sample looks amazing but packs like a nightmare, throw it back. Or at least make someone else explain it to fulfillment.
Related packaging resources
Use these related guides to compare specs, costs, quality checks, and buyer decisions before making the final call.