Jewelry Embroidered Beanies Proof Checklist to Approve
A logo can look sharp on a screen and still lose its footing once it meets ribbed knit. That gap between mockup and finished hat is exactly why the jewelry embroidered beanies Digital Proof Checklist matters. It catches scale problems, placement drift, and thread choices before the order moves into digitizing and machine time.
Beanies are less forgiving than flat garments. Rib structure stretches, cuffs fold, seams pull attention, and the crown curves in a way a spreadsheet never captures. A placement error of 2 mm may sound negligible. On a cuffed beanie, it can make the mark feel off-center enough that a buyer notices it from several feet away.
From the buyer side, a proof is not decoration. It is the last inexpensive checkpoint before setup fees, revisions, and shipping deadlines become hard commitments. That is why a useful proof has to show how the embroidery will really live on the hat, not just how the art looks in isolation.
Why the proof matters on ribbed knit beanies
Ribbed knit changes the visual read of every logo. A design that looks balanced on a smooth garment can tighten on a dense cuffed beanie, spread a little on a looser slouch style, or get visually pinched if the fabric rolls more than expected. The exact same artwork may need a different placement strategy depending on the hat body.
The real issue is context. The art may be correct, but the setting is unforgiving. A center-chest logo on a sweatshirt can survive a small offset. A beanie places the seam, fold line, and head curve in the same field of view. The eye finds mismatches faster.
"A proof that feels slightly small on screen usually reads even smaller once the knit stretches. A logo that sits a touch high on the mockup often ends up looking higher on the wearer."
That is why the jewelry embroidered Beanies Digital Proof Checklist should start with measurements. Not vibes, not a general front view, and not a promise that "it will look fine." Buyers should see the logo width and height, the distance from the cuff edge, and the reference point used for placement. If the supplier measures from the center seam, that needs to be stated. If the placement is based on the lowest visible fold, that needs to be stated too.
The proof also protects the schedule. Once digitizing begins, changes stop being trivial. A revision before approval usually means a few minutes of artwork cleanup. A revision after the files hit production can trigger a rerun of digitizing, a machine reset, or a missed ship date. That is where a low-cost decision turns into a much more expensive one.
There is a subtle point many teams miss: the proof is often the first place where decoration constraints become visible. A tiny script that looked elegant in Adobe Illustrator may need thicker letters to survive embroidery. Thin outlines may collapse. Small counters in letters can fill in. That is not a flaw in the factory. It is a physical limit of thread on knit.
What the jewelry embroidered beanies digital proof checklist should show
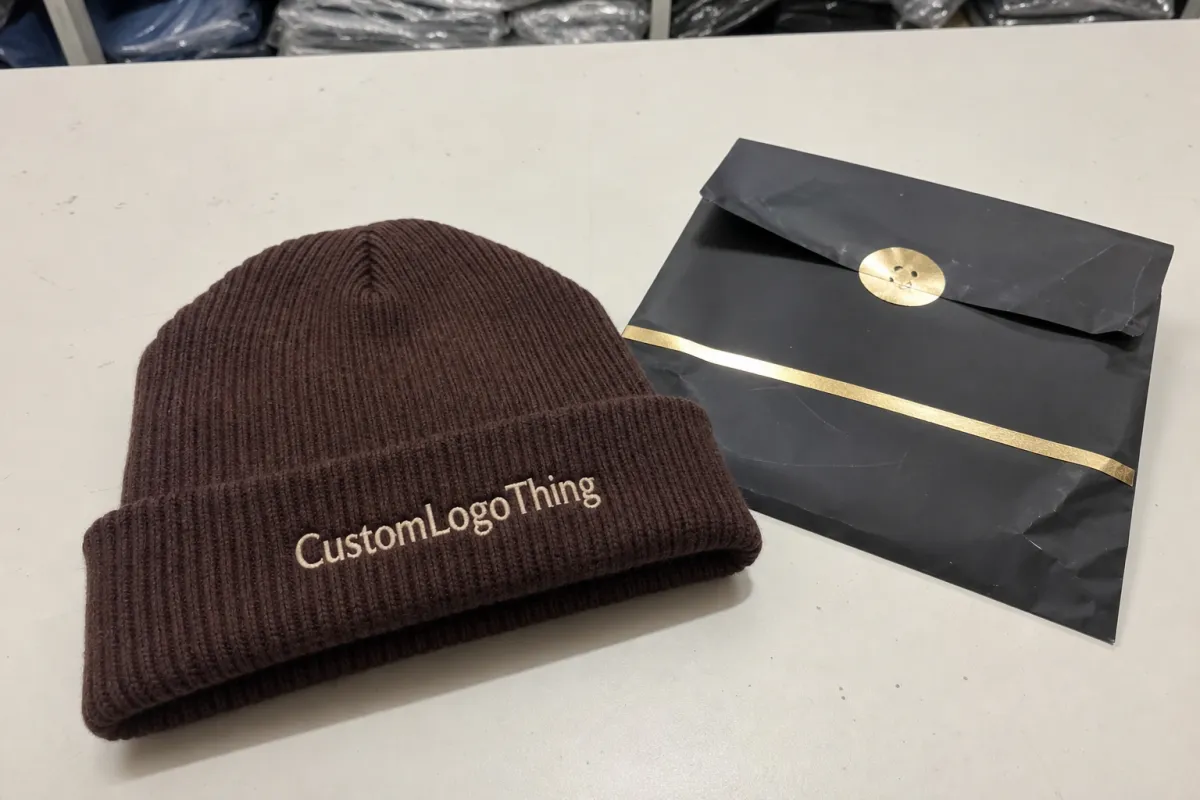
A useful proof is more than a mockup. It should show the artwork size, stitch area, placement from the cuff, thread colors, beanie color, and any backing or patch detail if the decoration is not direct embroidery. If the order is using a woven patch, felt applique, or badge-style build, the proof should make that obvious. Ambiguity at this stage creates disputes later.
Ask for the view you actually need to approve. A front-facing image is a starting point, but it does not tell the full story for every style. Cuffed beanies benefit from a side view because it shows whether the logo sits too high. Slouch styles often need a back angle because the fabric drape changes the logo’s position. For dense embroidery or fine lettering, a close-up detail shot is worth the extra turnaround.
The difference between a flat image and a production-ready proof is stitch behavior. A true production proof reflects knit thickness, thread fill, and the realities of digitizing. Small scripts, delicate outlines, and close letter spacing often need widening or simplification so the needle can reproduce them cleanly. That is not cosmetic editing. It is manufacturing logic.
Flat image versus production proof
Buyers sometimes approve a polished render that never had a chance on the line. A better proof shows how the logo will be built: estimated stitch count, thread direction, density, and placement tolerance. If those details are missing, the document is probably a visual aid, not a real signoff sheet.
Beanie style changes the proof logic too. A cuffed beanie gives you a concentrated decoration zone. A slouch beanie gives more fabric but less structure. A pom beanie can crowd the crown area and make a logo feel compressed. The same design often needs different sizing across those formats.
If the supplier can provide front, side, and detail views in one packet, that is usually enough for a clean decision. If the proof only shows a generic front shot with no dimensions, ask for more before approval. One extra round of clarification is cheaper than a second production run.
Practical buyers also look for the small notes that prevent confusion later: whether the logo is centered on the cuff or on the full hat body, whether the stitch count is approximate or locked, and whether the thread colors are matched to a standard chart or only visually close. Those details are easy to skim past. They are also where most surprises start.
Cost, pricing, and MOQ: what changes the quote
Pricing on embroidered beanies usually comes down to five variables: stitch count, thread colors, number of placements, beanie style, and whether the design needs digitizing from scratch. A simple one-color logo on the cuff is materially easier than a multicolor design with fine detail stitched in two locations.
For planning purposes, many buyers see decorated beanies in the $3.25-$7.50 range at moderate volume, with digitizing often adding $25-$75 one time depending on the complexity of the art. Small orders can push the unit price up quickly because setup, proofing, and machine preparation get spread across fewer pieces. That is where minimum order quantity, or MOQ, changes the economics more than anything else.
MOQ for beanies often lands around 48, 72, or 100 pieces, but the actual number varies by decoration method and production capacity. A lower MOQ can be useful for a retail test, a seasonal launch, or a corporate gift program with a tight headcount. The tradeoff is familiar: the smaller the run, the less room there is for low per-piece cost.
| Proof or order path | What it shows | Typical cost impact | Best use |
|---|---|---|---|
| Flat digital mockup | Visual only, no stitch behavior | Usually included | Early internal review |
| Production digital proof | Size, placement, colors, and build notes | Often included after quoting | Final approval before digitizing |
| Physical sew-out sample | Real thread, knit interaction, and texture | Can add $35-$100 plus shipping | Complex logos, premium retail runs |
Hidden costs matter as much as the headline number. Rush edits after approval, extra proof rounds, specialty thread, and late logo changes can all move the quote. If the order includes hang tags or carton inserts, ask what stock is being used and whether any packaging spec needs to be documented alongside the hat approval. For projects that travel through a more formal supply chain, transit expectations should be clear too. That is not overkill. It is how small errors stay small.
When comparing suppliers, ask for a line-by-line quote: digitizing, blank beanie cost, embroidery, packaging, and freight. A good quote tells you where the money is going. A vague one usually hides the part that changes later. If you need to compare decoration approaches across styles, the Manufacturing Capabilities page is a useful place to separate direct embroidery from patch-based builds.
One practical observation: the cheapest quote is often the one with the least friction at the proof stage. A slightly higher quote that includes clearer proofing, one revision round, and explicit placement notes can cost less overall than a low bid that turns into four rounds of corrections.
Process and timeline: from first upload to production
The cleanest timeline usually follows the same sequence: artwork upload, file review, digitizing, first proof, revision if needed, final approval, then production scheduling. Clean vector art can move through the first review in 24 to 48 hours. Messy files slow everything down because someone has to redraw shapes, separate colors, or reconstruct missing details.
Proof turnaround is not the same as production lead time. Proof turnaround measures how quickly the artwork can be reviewed and returned. Production lead time depends on factory capacity, thread availability, and shipping method. A buyer can approve in a day and still wait two weeks if the line is full.
To save time, send more than the logo. Include the exact beanie style, preferred thread colors, placement direction, and the intended use case. Retail gift order? Team merch? Promotional giveaway? Those details influence how precise the proof needs to be and how much the design can be simplified without losing its identity.
If the order sits inside a broader decoration program, keep the art package consistent across product types. The same logo may need a version for embroidery, another for print, and another for woven labels. Having those variants ready before approval often trims days off the back-and-forth.
Revision policy matters too. One revision round is common for a simple logo. Multi-color artwork, tiny lettering, or a nonstandard placement may need a second pass. If the supplier is upfront about that from the start, the buyer can schedule internal review properly instead of scrambling to fit comments into a shrinking production window.
In buyer work, the fastest timelines are usually won before the proof arrives. Vector files, Pantone references, one measured placement request, and a single decision-maker on the buyer side remove a lot of noise. That sounds administrative. It is. It also saves real time.
There is a production reality worth mentioning: a beanie order with embroidery does not only occupy the embroidery machine. It can also involve digitizing, thread matching, sample check, trimming, pressing, folding, and packing. Each step adds a chance for delay if the proof was unclear. Good approvals reduce those friction points before they spread.
Common mistakes that lead to embroidery rework
The most common error is approving size based on a screen instead of the actual beanie. A logo that feels balanced in a digital mockup can read too small on a chunky rib knit, especially once the cuff stretches. Buyers should compare the proof against a physical size target, not against memory.
Thread substitution is another quiet problem. Not every brand color has a perfect thread match, and that matters more on bold logos than on small marks. If the proof shows a close match rather than an exact one, ask for the thread chart code or a written color note. Screens drift. Thread charts do not.
Placement is where many first-time approvals go wrong. A centered logo on a flat image can still sit a little off once the beanie is folded and worn. Ask where the measurement is taken from: cuff edge, center seam, or crown point. Without that reference, "centered" can mean three different things.
Last-minute edits are the expensive mistake. Change the logo after approval and the supplier may need to digitize again, reset machine files, and move the job to a later production slot. Even a small tweak can add a day or two. A large change can push the order back a full cycle.
From a buyer’s perspective, the safest proof is the one that makes hard decisions visible early. If the line is too thin, the size is too small, or the placement is vague, it should be fixed before anyone opens the machine schedule.
There is also a repeat-order problem that gets missed. No one documents the approved version, then a reorder comes in months later and the team works from memory. That is how drift happens. One run lands a little lower, another uses a slightly different thread shade, and the product line slowly loses consistency.
Another rework trigger is overcomplicated art. Fine gradients, tiny taglines, and intricate borders can look persuasive in a mockup but weak in embroidery. A disciplined proof will often simplify the art. That is not a compromise. It is a translation into a medium with physical limits.
Expert tips for cleaner approvals and fewer revisions
The easiest way to reduce revisions is to pair the proof with a short spec sheet. Keep it tight: logo size, color count, placement, beanie style, backing type, and intended use. A checklist like that makes it easier to see whether the visual proof and the quote are telling the same story.
Ask for revision notes in writing, not as scattered comments across email or chat. Side-by-side notes are better than vague language like "make it pop" or "move it a little." The more specific the instruction, the less room there is for interpretation. That matters when the decoration zone is only a few inches wide.
One habit that pays off: save the approved proof as the reorder master. That file should include thread colors, placement measurements, and any special notes about backing or patch construction. For repeat runs, it prevents a lot of avoidable drift.
It also helps to confirm the quote, proof, and timeline in writing before approval. Then there is one source of truth. If the supplier says the revision limit is one round and the buyer expects two, that disagreement should surface before the files are released to production, not after.
If the logo is sensitive to scale, ask for the proof at actual size before approval. That may sound old-school, but on a small hat mark it is one of the fastest ways to catch proportion problems. A logo that looks balanced at 100 percent on screen may not hold up on a cuffed beanie in real life.
For high-value orders or dense artwork, a sew-out sample can be worth the added cost. It may add $35-$100 plus freight, and nobody enjoys waiting for it, but it reveals how the thread behaves on the knit. That kind of feedback is hard to get from a screen and cheap to get from a sample compared with a remake.
One more point that matters in production: ask whether thread sheen, not just color, affects the final look. Two threads can match on paper and still read differently under light. That is especially visible on darker beanies and high-contrast logos.
Next steps before you approve the final proof
Before you sign off, print the proof and measure it. Compare the dimensions to the beanie spec, confirm the thread colors, and check every placement note line by line. If the proof mentions a cuff measurement, make sure the number is taken from the same reference point the factory will use.
Then check the fine print. Does the proof name the exact beanie style? Does it say direct embroidery or patch? Does it list how many revision rounds are included? Those details sound minor until someone needs to explain why the final product does not match the approved version.
If anything is missing, ask for it now. Request thread color references, backing type, and whether the logo is centered from the cuff or from the crown. Ask for the current lead time, the final quote, and the revision limit in writing. That is the fastest way to avoid a surprise invoice or a delayed ship date later on.
For teams running multiple decorated products, the same discipline applies across the board. Keep the approval file, keep the pricing record, and keep the spec sheet. That is how reorders stay consistent instead of becoming fresh guesswork every time.
Run the jewelry embroidered Beanies Digital Proof Checklist one last time, then approve only when art, price, and timing all match. That final minute of discipline usually saves days of rework.
Frequently asked questions
What should a jewelry embroidered beanies digital proof checklist include?
At minimum, it should include artwork size, exact placement, thread colors, and the beanie style being used. It should also show a production view that reflects the real knit texture, not just a generic mockup. If the order uses a patch or applique, that build should be stated clearly.
How many proof revisions are normal before approval?
One initial proof plus one revision round is common for simple logos. More complex artwork, multiple colors, or special placement can require a second revision, especially if the design is small or the knit is thick. The key is to confirm the revision limit before the order enters production.
What affects embroidery pricing on custom beanies the most?
Stitch count, color changes, placement count, and whether the logo needs digitizing from scratch are usually the biggest drivers. Lower order quantities often raise the unit cost because setup fees are spread across fewer pieces. Packaging and freight can also move the total more than buyers expect.
How long does proof approval and production usually take?
Clean artwork can often get a first proof in 24 to 48 hours. Final production lead time depends on order size, revisions, current factory queue, and whether the order includes extra packaging or labeling work. A simple approval process is faster than a complicated one, but it still depends on plant capacity.
Can I approve a proof if the colors look different on my screen?
Only if the supplier confirms the closest thread match or sends a physical color reference. Screens shift color, so thread charts and written notes matter more than monitor appearance. If color is critical, ask for a standard thread code or a sew-out sample before approval.


