The same logo can look crisp on a flat twill patch and muddy on a ribbed cuff, which is why a Logo Patch Beanies print method comparison matters before anyone approves a mockup. The key is matching the decoration to the patch material, logo size, and the way the beanie will actually be worn and handled.
Buyers often focus on ink color first, but edge sharpness, texture, and finishing usually decide whether the piece looks premium. Winter headwear is seen at arm's length and in motion, so a method that looks great on a screen can still fail on a fuzzy knit beanie if the surface is uneven or the type is too small.
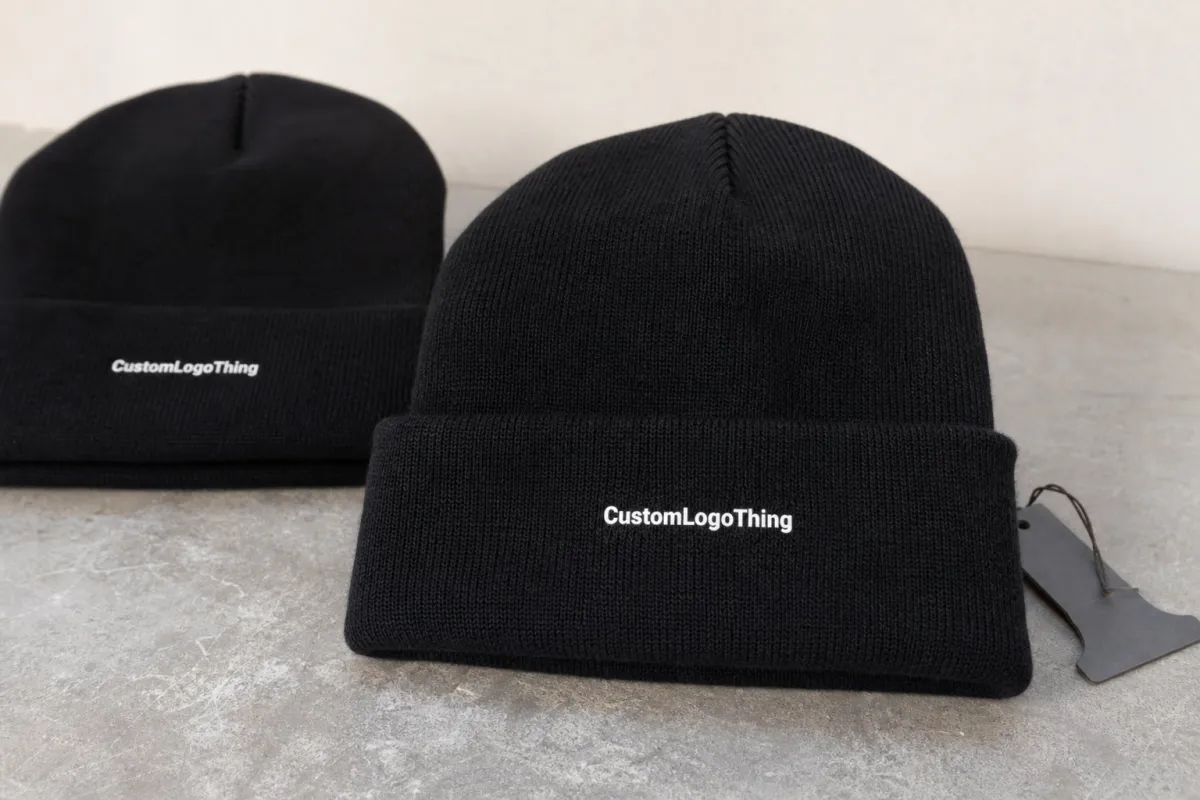
Logo Patch Beanies Print Method Comparison: Why Results Vary
The patch material changes the rules. A beanie stretches, curves, and compresses, while a patch may be smooth, textured, coated, or raised. That is why a Logo Patch Beanies print method comparison has to start with the substrate, not just the artwork.
Patch decoration is also judged differently from packaging print. A beanie patch needs to read fast, survive wear, and still look intentional after folding, shipping, and repeated handling. The method, border style, and contrast often matter more than visual tricks.
A patch does not need to impress up close. It needs to read fast, survive wear, and still look intentional when the hat is folded into a drawer.
The buying use case matters too. Retail beanies need shelf appeal, team beanies need instant identity, and giveaways need low friction and clean unit economics. Better briefs make better method choices because the supplier can weigh spot color printing, CMYK detail, stitched texture, and the limits of the patch surface itself.
One more nuance: the patch can hide or amplify the decoration. A matte woven patch softens contrast, while a glossy faux leather patch can make small text shimmer or blur. A textured embroidered patch can add perceived value, but it can also swallow thin lines. The method only makes sense when it is evaluated with the patch material.
How Screen Print, Transfer, and Embroidery Behave on Patches
Screen print is usually the cleanest choice for bold, simple artwork. It lays down opaque color well, and on a relatively flat patch the result can be sharp and confident. Solid fills, one- to three-color logos, and strong spot color matches are where screen print performs best. The downside is that small type, tiny knockout spaces, and gradients can get messy quickly.
Transfer methods, including digital printing and DTF-style application, work better when the artwork has gradients, fine type, or several colors that would be expensive to separate. If a logo depends on CMYK art or photographic detail, transfer keeps more of that information intact. The tradeoff is tactile: film thickness, adhesive behavior, and patch texture affect how premium the decoration feels.
Embroidery is the most dimensional of the common options. It reads as premium because thread has weight, shadow, and a tactile edge that print cannot mimic. Fine details can close up fast, though, so simplify first. If the artwork relies on tiny secondary text, embroidery usually becomes a compromise instead of an upgrade.
Sublimation can work well on compatible light-colored substrates because it keeps the surface soft and can reproduce rich color variation. But it is not universal. The patch material has to support it, and dark beanies can limit usefulness if the base is not right. The "best" method is therefore a materials question, not a style question.
Short version: screen print tends to win on bold simplicity, transfer wins on detail, embroidery wins on texture, and sublimation wins only when the substrate supports it. The right answer depends on logo size, patch finish, order count, and how much visual noise the knit adds once the beanie is stretched on a head.
Cost, MOQ, and Unit Pricing: Where Each Method Wins
The cheapest method on paper is not always the cheapest landed order. Setup fees, digitizing, patch construction, application labor, and freight can shift the final number more than buyers expect. A fair Logo Patch Beanies print method comparison should use the same patch size, the same logo scale, and the same order quantity for every quote.
These are common decoration-only ranges at modest volume, not blank beanie cost:
| Method | Typical MOQ | Typical Unit Range | Best For | Main Tradeoff |
|---|---|---|---|---|
| Screen print on patch | 50-100 | $1.10-$2.25 | Bold spot color logos, clean fills | Less forgiving on fine detail |
| Transfer / DTF | 25-50 | $1.25-$2.60 | Small type, multi-color art, CMYK detail | Can feel more layered on textured patches |
| Embroidery | 100+ | $1.60-$3.20 | Premium texture, simple logos | Fine details can close up |
| Sublimation | 50+ | $1.20-$2.40 | Compatible light substrates, vivid art | Depends heavily on patch material |
The spreads widen with quantity. At 25 units, setup and labor are felt hard. At 250 units, the per-piece impact drops and the more efficient methods usually pull ahead. Asking for breakpoints at 25, 50, 100, and 250 units makes the economics easier to compare.
Also ask whether the supplier is quoting the patch only or the finished beanie. Some quotes hide application labor, thread changes, or packaging, while others include them. If the order is meant for retail, packaging and transit standards matter too. For shipper validation, ISTA is a useful reference; for paper hangtags or inserts, FSC certification can support a cleaner sourcing story.
Lower MOQ often favors transfer methods because setup is lighter. Larger runs can make embroidery or screen print more efficient, especially if the logo is simple and the patch size stays consistent. The economics follow the art, which is why the cheapest option is not always the best one.
Process and Timeline: From Artwork to Production Steps
Most delays happen before production starts. Artwork cleanup, proof approval, color matching, and patch method selection usually consume more calendar time than the actual decoration run. A clean vector file can save days, while a low-resolution logo with tiny type can add several revision rounds.
The workflow is usually simple on paper: file review, mockup, sample or strike-off, production, quality check, packing. In reality, those steps may be sequential or partially parallel. If the patch has to be custom made, material sourcing comes first. If the decoration method needs testing on the final patch stock, that test has to happen before the full run. For a normal order, 12-15 business days from proof approval to completion is a reasonable expectation; custom patch construction can push it longer.
If timing is tight, ask which steps can run at the same time and which cannot. That answer shows where the schedule can compress and whether the supplier has worked with the patch material before. A vendor who knows the substrate can usually move faster because they are not re-learning how the finish reacts.
Proof quality matters more than many buyers realize. A mockup that shows a logo centered on a bright white beanie may look perfect, yet the final piece can read differently once the fabric stretches and the patch bends with the crown. Ask for the proof on the actual beanie color, not just on a neutral background. If the decoration uses spot color matching, make sure the reference is tied to the same patch stock and the same print finishing.
Common Mistakes That Make a Good Beanie Look Cheap
The fastest way to cheapen a beanie is to ask too much of a tiny patch. Detailed logos, thin strokes, and micro text all look more fragile once they are scaled down to winter merch size. A 40 mm patch can carry a strong icon, but it usually cannot carry a full corporate lockup with several lines of copy and still feel premium.
Contrast fails more often than color choice does. Dark gray text on navy may look polished in a mockup, but on the finished beanie it can disappear. Low-contrast combinations are especially risky on ribbed knits and fuzzy yarns, where the background already adds visual noise. If the logo has to be read from three meters away, simplify the palette and lean on one dominant shape.
Skipping a real sample is another classic mistake. A digital proof cannot show how the patch behaves under tension, how the border sits against the knit, or how the decoration looks after the beanie is folded. If the run is large or the launch is retail-facing, the sample is cheap insurance.
Method mismatch is the last trap. A buyer may choose embroidery because it feels premium, then discover the logo is too intricate. Or they choose transfer for detail, then realize the patch material adds too much sheen. The trendiest choice is not always the better choice. In a good Logo Patch Beanies print method comparison, the method follows the design and the use case, not the other way around.
Expert Tips for Sharper Color, Cleaner Edges, and Better Wear
Start by designing for winter viewing distance. That usually means one strong icon, fewer words, and more breathing room than a summer promo item would need. A compact logo can outperform a crowded lockup because the human eye catches shape faster than it catches detail.
Build contrast on purpose. Test the logo against the actual beanie color, not a generic swatch. If the beanie is black, deep charcoal, or forest green, the patch background should be chosen with that in mind. This is especially true for CMYK-style artwork, where small separations can disappear on textured surfaces.
Choose the method based on patch texture. On a smooth patch, digital printing or screen print can look crisp and modern. On a faux leather or heavily textured patch, bold edges matter more than subtle shading. If the patch already has a lot of surface character, let the decoration stay simple.
For resale and corporate gifting, consistency matters more than maximum decoration complexity. Ten beanies that all look identical will outperform ten beanies with slightly different ink density or thread tension. Same patch placement, same border style, same thread or ink density, same carton pack. Repeatability is what keeps the whole order looking intentional.
If the beanie program includes hangtags, care cards, or retail cartons, align those materials with the same visual language. The decoration on the hat and the print on the packaging should feel like one system, even if they do not match exactly.
Next Steps: Build a Better Quote Brief Before You Order
The best way to compare options is to make the quotes identical except for the print method. Use the same artwork size, the same patch dimensions, the same beanie color, and the same quantity. Then ask each supplier to show setup cost, unit cost, sample Cost, and Shipping separately.
Send a vector logo, note the preferred hand feel, and state whether the order is for retail, staff, or giveaway use. Those details tell the vendor whether to steer toward screen print, transfer, embroidery, or sublimation. If you want a low-risk result, ask for a digital proof and, if the schedule allows, a physical sample.
Choose the method that balances appearance, durability, and delivery date, not the one with the lowest sticker price. A beanie is small real estate, so every decision is visible. The best method is the one that keeps the logo clear, the finish consistent, and the order on schedule.
What is the best print method for logo patch beanies?
It depends on patch material, logo detail, and order size; no single method wins every time. Screen print is strong for bold, simple artwork, while transfer methods handle more color variation and embroidery adds texture. Ask for a sample on the actual beanie color because contrast changes the result more than most buyers expect.
Are printed logo patch beanies cheaper than embroidered ones?
Often the setup cost is lower for printed patches, but the total unit cost can change once proofs, application, and quantity are included. Embroidery may become more efficient as volume rises, especially for simple one- or two-color logos. Compare quotes using the same patch size and the same order count so you are not comparing apples to oranges.
How long does the production process take for custom logo patch beanies?
Timing usually depends on artwork approval, sample approval, and whether the patch is stock or custom made. Rush orders can still be slowed by proofing, so the fastest path is to submit clean vector artwork early. Ask your supplier for the full timeline from mockup to packed cartons, not just the production days.
Can logo patch beanies use full-color artwork?
Yes, but only if the print method and patch substrate support gradients, small type, and color transitions. Methods like DTF or sublimation can handle more detail, while embroidery usually needs simplified art. For dark beanies, high contrast matters more than extra colors because low contrast details disappear quickly.
How do I compare quotes for logo patch beanies fairly?
Make sure each quote uses the same artwork size, patch size, quantity, and packaging spec. Check whether setup, digitizing, sample fees, and shipping are included in the unit price. Choose based on landed cost and turnaround together, since the lowest sticker price can still be the worst deal.


