A stationery embroidered Beanies Material Sample guide starts with a blunt factory-side reality: a logo that looks flawless in a vector file can still fail once it meets knit structure, thread tension, and real light. On a screen, the shape is fixed. On a beanie, the fabric moves, the cuff bends, and the embroidery sits on top of a surface that is rarely perfectly flat.
That gap between digital proof and physical result is where most approvals succeed or go wrong. A sample is not just a color check. It reveals whether the yarn choice, stitch density, backing, and placement work together, and whether the piece reads as premium in the hand or merely passable in a photo.
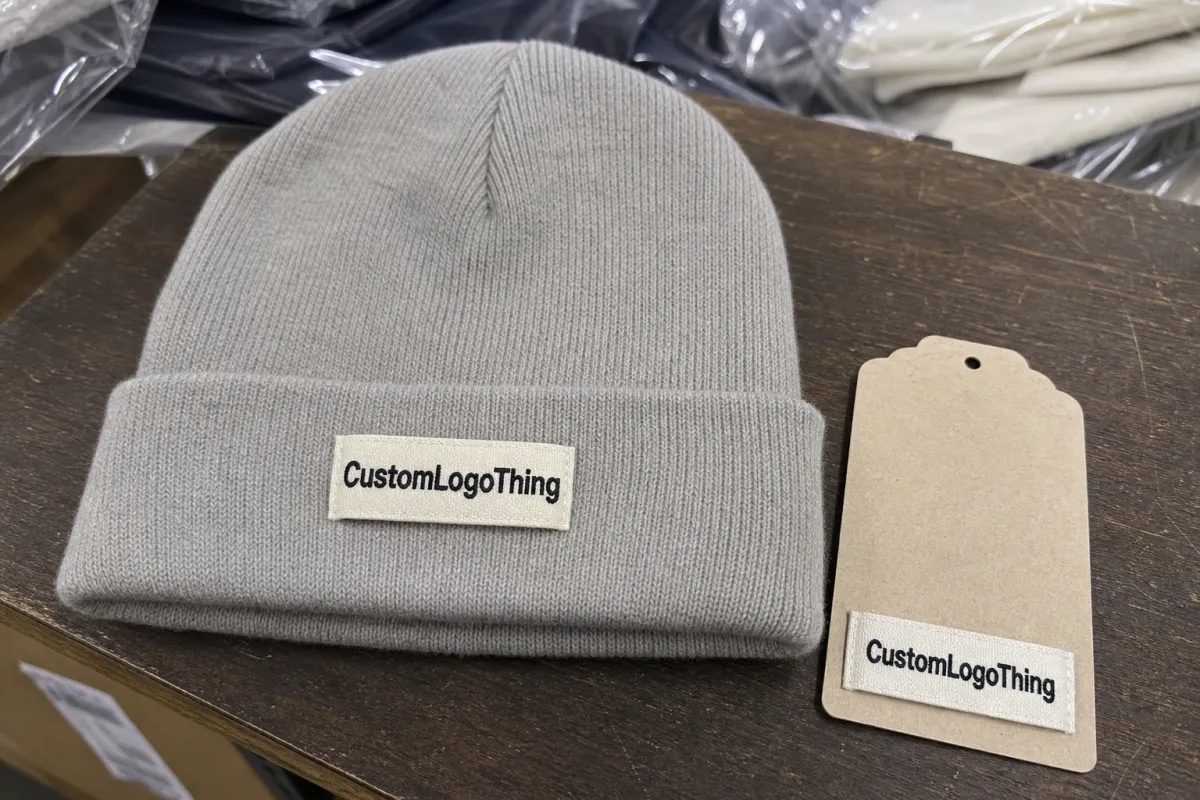
Why a beanie sample can change the whole read
Beanies look simple from a distance. Up close, they are a stack of decisions. Rib knit, jersey knit, cuff height, crown shaping, yarn thickness, embroidery scale, and seam style all change the way a mark reads. A logo that feels centered on a mockup can look oversized once it lands on a narrow cuff, while a smaller version may disappear into a textured melange yarn.
The real value of sampling is not limited to visual alignment. It shows how the item feels, stretches, and recovers. A soft acrylic knit with clean satin stitch can look retail-ready. A loose construction with too much tension can pucker around the design and make the whole piece feel cheaper than it should, even if the artwork itself is accurate.
A good beanie sample is a stress test. It tells you whether the knit, the thread, and the logo placement can survive real handling before production locks in the spec.
There is also a usage issue that gets overlooked. Beanies are worn low on the forehead, pulled over hair, folded under cuffs, stuffed into bags, and stretched back into shape over and over. A sample should be checked in motion, not just laid flat on a table. If the branding still looks clean after the knit is stretched and released, the construction is usually in the right zone.
That matters for promotional programs, school stores, retail lines, and executive gifts alike. The difference between a giveaway and a piece people keep is often smaller than buyers expect. On accessories, perceived value depends on details that are easy to miss in a digital proof: hand feel, logo crispness, and whether the fabric rebounds after use.
Stationery embroidered beanies material sample guide: how it works
A practical stationery embroidered beanies material sample guide follows a fairly fixed order. First comes artwork review. The supplier checks line weight, lettering size, color count, and where the logo will sit on the cuff or body. If the artwork is too intricate for the knit field, that is the stage where it should be simplified, not after the sample is already made.
Then comes the build decision. For a fully custom knit, the factory confirms gauge, yarn blend, cuff depth, and crown structure before anything is produced. For an embroidered blank, the team digitizes the logo, chooses stitch direction, and adds stabilizer behind the embroidery zone so the knit does not shift or collapse.
After stitching, the piece is inspected for thread pull, edge cleanup, density, and balance. In a serious sample package, the buyer should also receive notes on substitutions. A deep navy yarn may be the closest stocked option during sampling. A denser backing may be needed to keep tiny lettering from sinking into the knit. Those details matter because they explain which parts of the sample are final and which still need confirmation.
- Visual proof: useful for confirming placement, wording, and basic layout.
- Physical sample: confirms texture, stretch, thread sheen, and fit.
- Revised sample: needed if the first version shows puckering, spacing issues, or a color shift.
That distinction between a proof and a sample is easy to miss. A proof tells you where the logo will sit. Only the sample tells you whether the knit will hold that placement cleanly. For fine text, tight spacing, or logos that rely on small negative space, ask for both. The cost of that extra step is usually modest compared with the cost of approving a flawed setup for production.
Once the sample is approved, production can freeze the construction choices with less guesswork. The value is not abstract. Small corrections happen before material, labor, and shipping are committed at scale, which is far cheaper than correcting a bulk run after the fact.
The material and construction factors that change the result
Fiber content is the first spec worth checking. Acrylic is common because it is stable, predictable, and usually friendly to budget targets. Recycled blends can strengthen the sustainability story and are now common in higher-volume programs, but the hand feel can be slightly different, and embroidery often sits on them with a different firmness. Wool blends bring warmth and a richer surface, while cotton-rich knits are softer but can behave differently under tension and may not recover shape as well after repeated wear.
Gauge and weight are just as important. A looser knit shows more texture, which can help some designs and hurt others. Dense knit usually gives the embroidery a flatter base, so the logo reads cleaner. On a thick cold-weather retail beanie, larger embroidery often holds better than on a thin promotional knit, simply because the fabric can support it. The question is not which construction is best in the abstract. The real question is whether the structure supports the art you want visible.
Embroidery method changes the outcome more than many buyers expect. A standard 40-weight polyester thread is common because it balances sheen and durability, but the right choice depends on the logo and the background yarn. Matte thread tends to calm down bright highlights on dark knit. Shinier thread can help a low-contrast logo pop. For micro text, a shorter stitch path and cleaner digitizing usually improve legibility more than adding more thread coverage.
Backing and stabilizer are where many samples either succeed or fail. Too little support and the stitches pucker. Too much and the knit loses its natural stretch. On beanies, low-profile cut-away or a knit-friendly stabilizer often performs better than a heavy backing that would be fine on a flat woven cap. If the logo area is narrow, the stabilizer choice can matter as much as the thread color.
Construction details outside the logo should not be treated as filler. Cuff depth changes how visible the mark is when worn. Seam style affects comfort against the scalp. Label placement changes whether the piece feels polished or scratchy. Even a near-perfect logo can be undermined by a seam that twists or a tag that sits exactly where the wearer notices it most.
Color matching deserves its own check because screens are unreliable. A thread that looks rich and neutral on a backlit display can read warmer or cooler in daylight. Dye lots also shift. The most reliable approval process compares the sample against a physical reference under more than one light source, ideally daylight and indoor office lighting. If a buyer only checks color on a phone, the odds of disappointment go up fast.
Packaging can be part of the evaluation too, especially for retail or gift programs. Ask for the sample to arrive in corrugated cardboard with simple kraft protection rather than loose fill that obscures the presentation. If the order is intended to have a lower-waste profile, FSC certified paper components, recycled inserts, or biodegradable packaging may be relevant. Those details do not change the beanie itself, but they do affect the full impression the buyer receives.
Cost, pricing, MOQ, and quote inputs to watch
Any stationery embroidered Beanies Material Sample guide worth reading should speak plainly about money. Sample cost is usually driven by digitizing, setup labor, yarn or thread selection, and whether the sample needs special construction to match the target product. A simple embroidered blank may be inexpensive. A fully custom knit with private label work, multiple revisions, or specialty yarns will climb quickly.
MOQ changes the economics in a predictable way. A factory spreading setup across 300 pieces can usually offer a lower unit cost than one producing 50, even when the logo is identical. That is why a small test order often looks expensive on a per-piece basis. The setup cost has not changed; it is just being carried by fewer units. When buyers compare quotes, they should compare them against the intended production volume, not against a random low minimum from a different spec.
| Sample option | Typical sample fee | Best use case | Turnaround | What changes cost most |
|---|---|---|---|---|
| Basic embroidered blank | $25-$55 | Simple logos, fast approval | 3-7 business days | Extra thread colors, digitizing edits |
| Production-style beanie sample | $45-$90 | Retail, uniform, or gift programs | 5-10 business days | Custom color matching, stabilizer changes |
| Fully custom knit sample | $80-$180+ | Private label or premium merch | 10-20 business days | Knitting setup, complex trim, label work |
Those numbers move with fiber choice, stitch coverage, country of origin, and finishing complexity. A recycled yarn beanie with minimal embroidery may still cost more than a basic acrylic style if the supply chain is tighter or the color has to be matched closely. On the production side, a simple embroidered beanie may land in the low single digits per piece at higher volume, while a custom knit with premium yarn and private labeling can move well above that. Small orders always carry a heavier setup burden, and that is normal.
Shipping can be a quiet cost driver. International transit, duties, rush freight, and sample redelivery after a revision can change the final number more than buyers expect. It is sensible to ask whether the sample fee is credited back against production, whether revision rounds are included, and whether the quote assumes one shipping lane or multiple.
Comparing like with like prevents bad decisions. A lower quote might use a lighter yarn, fewer stitch passes, a cheaper label, or a less exact embroidery method. That makes the number look attractive for the wrong reason. Real comparison starts with identical specs, then looks at cost.
Process, timeline, and turnaround from file to ship
The timeline is usually a chain of small steps rather than one long production block. File check comes first. Then the team confirms yarn or blank availability, plans the sample, makes the beanie or prepares the blank, applies embroidery, inspects the finish, and packs the piece for shipment. If the artwork is clear and the material is in stock, this can move quickly. If the logo file is fuzzy, the dimensions are missing, or the color reference is vague, every step slows down.
Delays tend to show up in the same places. Incomplete artwork is one. Another is color confusion, especially when the buyer sends a screen capture instead of a physical reference or fabric swatch. Late approval on a revised stitch file can also push the schedule. A rushed sample can still be useful, but rush work leaves less room for correction if the first pass exposes a problem.
For decorated samples, a realistic turnaround often lands around 5-10 business days after proof approval. Fully custom knit samples can stretch into the 10-20 business day range because more steps are involved. Add revision time if the first version needs placement changes, thread changes, or a different backing. That extra round is usually worth it. A sample that is one day slower and correct is better than one that arrives quickly and creates uncertainty.
Transit deserves the same attention as production. A sample that leaves on time but arrives after the buyer meeting is not really on time. The shipping method should match the review calendar. Clean labeling helps, and so does a package that protects the piece from crushing. If the shipment also uses recycled or FSC certified paper components, that can support a cleaner sourcing story without changing the product itself.
For teams managing larger approvals, it helps to treat the sample like a short project plan: file check, build, correction window, and transit all need room. Skip one of those and the process gets noisy fast. Leave a little buffer for weather, customs, or a revision round. That buffer is usually cheaper than expediting a second shipment.
Common mistakes that create disappointing samples
The easiest mistake is approving from photos alone. A picture can hide texture, stretch, and thread sheen, all of which matter on a knit beanie. Something that looks balanced on a phone may feel crowded in hand, especially if the embroidery catches light differently from the yarn around it.
Sampling the wrong material is another common problem. If the approved piece uses a different fiber blend, different gauge, or different cuff depth than the final run, the approval loses much of its value. Buyers sometimes do this to save a little time, then discover the bulk run behaves differently because the knit field changed. That is a costly shortcut, and it is avoidable.
Fit testing gets ignored more often than it should. A beanie can look fine on one person and feel too shallow or too tight on another. If the piece will be worn by a team, a store audience, or a mixed-size group, put it on a few heads before signing off. Stretch it. Fold it. Check whether the embroidery remains readable after a few minutes of handling. That is closer to real use than any tabletop inspection.
Wear and wash checks are useful too. Some finishes look sharp on day one and then relax too much after use. Stitch edges can soften, and a cuff can lose snap. That does not automatically mean the sample failed. It means you found the edge of acceptable performance before production multiplied the issue. In quality terms, that is valuable information.
Another mistake is approving a sample without writing down what changed. If the buyer asks for the logo to sit 6 mm higher, or wants the thread to be less glossy, those notes should be attached to the approved photo and the spec sheet. Written approval prevents drift. Once a supplier has a clean note trail and an approved reference, bulk production stays much closer to the target.
Expert checks and next steps after the sample arrives
When the sample arrives, review it like a buyer who plans to place a real order. Start with stitch clarity. Then measure the beanie body, cuff depth, and logo placement against the spec sheet. Check color under daylight and indoor light. After that, stretch the knit lightly and see whether the hand feel changes too much or holds steady.
It also helps to check the construction against the intended use case. A school store piece, an office holiday item, and a cold-weather retail beanie do not need the exact same balance of softness, structure, and logo emphasis. The same sample can be perfectly acceptable for one channel and slightly off for another. That is why one approval note can never cover every situation.
If possible, test the sample on the people who will actually wear it. A beanie meant for a team or event staff should feel acceptable on more than one head size. Note comfort, warmth, and whether the logo still reads clearly when the cuff is folded or the hat is pulled down. Those observations are not cosmetic; they affect sell-through and repeat wear.
- Inspect: stitch density, thread tails, seam feel, and edge cleanup.
- Measure: height, width, cuff depth, and logo placement.
- Test: fit, stretch recovery, and visibility after wear.
- Record: approved photos, written notes, and final specs in one file.
Move one correction at a time. If the logo sits too low, fix placement first. If the color is off, solve that before debating thread sheen. Clear, measurable feedback tends to get faster responses and less back-and-forth. That matters on rush jobs, where confusion eats the schedule.
Once the sample is approved, lock the spec sheet, save the approved reference, and send production only what should be repeated. That is the point of a careful stationery embroidered Beanies Material Sample guide: it turns subjective approval into a repeatable standard, so the bulk run matches the piece that was actually signed off.
Frequently asked questions
What should I check in a stationery embroidered beanie material sample?
Check knit weight, stretch recovery, embroidery clarity, and how the logo sits on the cuff or body. Review color under daylight and indoor light so you catch shade shifts before production. Comfort, seam feel, and shape retention after handling should also be part of the review.
How many samples should I request before approving production?
Request at least one true production-style sample and a second version if the first one needs color, stitch, or fit changes. Keep one approved sample as the production reference. If the artwork is detailed, a revised physical sample is safer than approving from an image.
Do material samples match the final embroidered beanies exactly?
They should be very close, but small differences can happen in dye lot, thread sheen, and stitch tension. The goal is to verify construction, fit, and logo visibility before the full run starts. Ask which elements are final-spec and which are still being tested.
What affects sample cost and unit cost the most?
Setup work, digitizing, stitch coverage, and premium yarns usually move cost the fastest. Higher MOQ often lowers unit cost because setup is spread across more pieces. Shipping, revisions, and private labeling can add separate charges if they are not built into the quote.
How long does the sample process usually take?
Timing depends on artwork readiness, material availability, and whether the first version is approved or revised. Plan for extra time if you need a color correction, fit change, or a second review cycle. Transit time should also be included so the sample arrives early enough for hands-on approval.

