Buyer Fit Snapshot
| Best fit | Printed Belly Bands for Boxes projects where brand print, material claims, artwork control, MOQ, and repeat-order consistency need to be specified before quoting. |
|---|---|
| Quote inputs | Share finished size, material target, print colors, finish, packing count, annual reorder estimate, ship-to region, and any compliance wording. |
| Proofing check | Approve dieline scale, logo placement, barcode or warning zones, color tolerance, closure strength, and carton packing before bulk production. |
| Main risk | Vague material claims, crowded artwork, missing packing details, or unclear freight terms can make a low unit price expensive after revisions. |
Fast answer: Printed Belly Bands for Boxes: Branding, Cost, and Fit should be specified like a repeatable production item. The safest quote records material, print method, finish, artwork proof, packing count, and reorder notes in one written spec.
Production checks before approval
Compare the actual filled-product size with the drawing, then confirm tolerance on folds, seals, hang holes, label areas, and retail display edges. Reserve space for logos, QR codes, warning copy, and material claims before decorative graphics fill the panel.
Quote comparison points
Review material grade, print process, finish, sampling route, tooling charges, carton quantity, and freight assumptions side by side. A quote is only useful when the supplier can repeat the same color, closure quality, and packing count on the next order.
Printed Belly Bands for Boxes: Branding, Cost, and Fit
Printed Belly Bands for boxes do a lot of work for a very small piece of paper. They tidy up a plain carton, add a brand marker, and make a package feel intentional instead of borrowed from a warehouse shelf. That matters when a team wants packaging that looks custom without committing to a fully printed carton program.
The appeal is practical. A belly band can carry a logo, a seasonal line, a SKU name, a barcode, a promo message, or a legal line. It changes faster than a carton and usually costs less to revise. The trap is fit. A band that misses by a few millimeters can buckle, drift, or look cheap the second it lands on a real box. Packaging has a habit of exposing sloppy math.
A good belly band has one job in front of the customer and another behind the scenes: look polished and stay out of the pack line's way.
Printed Belly Bands for Boxes: A Small Wrap With Outsized Impact
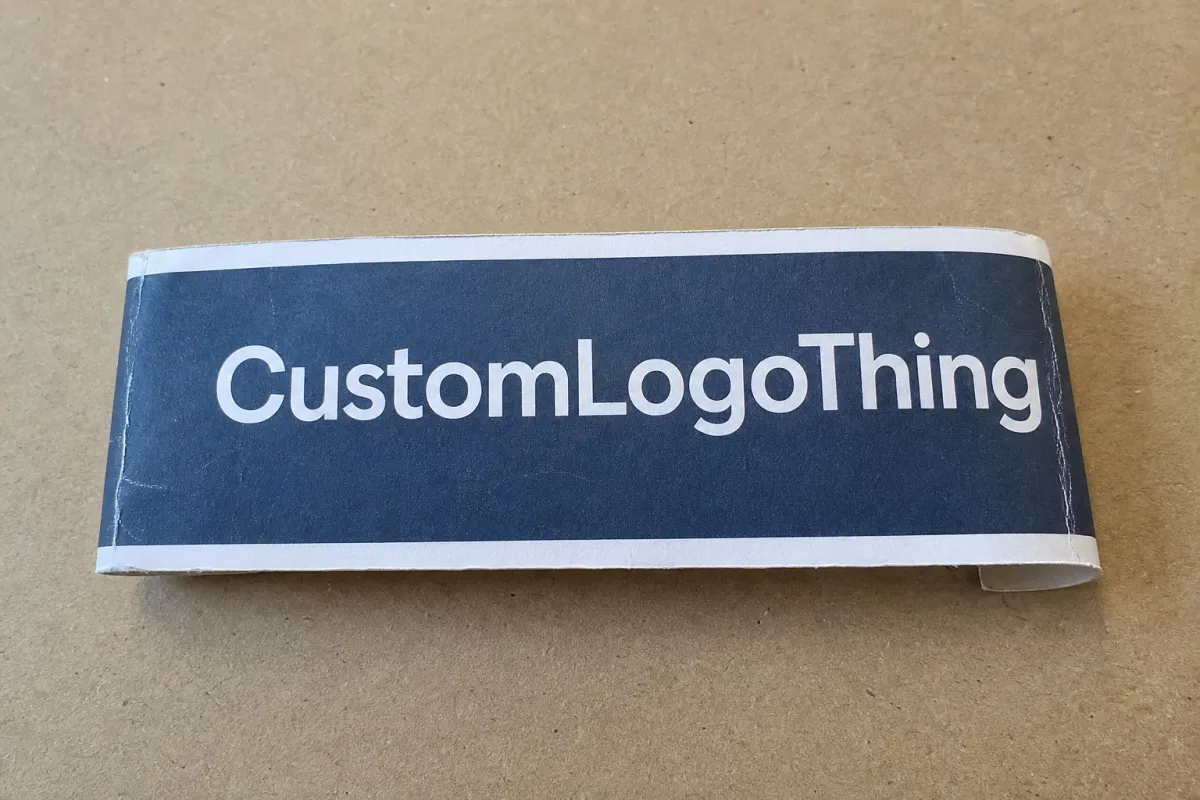
A belly band is a printed strip of paper, paperboard, or lightweight cardstock that wraps around a box and closes with a tuck, adhesive point, sticker seal, or friction fit. It sounds modest. It is not. The band gives the eye a clean place to land and turns a plain carton into something with shape, direction, and intent. One narrow wrap can do more for first impression than a much larger blank surface ever will.
That matters in a warehouse, on a retail shelf, and at a front door. A corrugated shipper can look exactly the same across multiple SKUs. Add printed belly bands for boxes and those same cartons become easier to sort, easier to identify, and easier to connect to a campaign or product family. For limited runs, gift sets, subscription boxes, and seasonal promotions, that flexibility is worth real money.
The logistics angle is hard to ignore. Fully printed cartons work well when volume is steady and the artwork never changes. Most brands do not live in that fantasy. They launch, refresh, test, and pivot. A belly band gives them a middle path. The box stays stable. The message changes. Holiday sets, influencer mailers, launch kits, and channel-specific versions can all share the same carton spec.
That is why the format keeps showing up in packaging conversations. It helps differentiate similar products, speeds up sorting, and reduces the need to stock multiple carton versions. It also improves the customer-facing side of the package without forcing a structural redesign. Small format. Big effect. Packaging loves those.
Budget matters too. Belly bands use less material than a full sleeve or printed carton, and they often make more sense for shorter runs. The unit price is not always the lowest line item on paper, but the total package often pencils out better when artwork changes often or inventory needs to move fast. If the design changes every quarter, the lower setup burden is usually where the real savings show up.
If you are comparing packaging options, think system first. A box, a label, a sleeve, and a belly band each solve a different problem. Printed belly bands for boxes usually make the most sense when the goal is a premium outer presentation without committing to a custom carton. If you are building a packaging mix, our Custom Packaging Products page is a useful place to compare formats before you request quotes.
How Printed Belly Bands Work in Real Packaging Lines
The mechanics are simple. The execution is not always kind. The band has to wrap cleanly, land in the right spot, and stay put while the package gets handled, stacked, and shipped. Printed dimensions are only part of the story. Carton thickness, closure style, insert height, and product bulk all affect the true wrap path.
Most bands include a seam or closure zone that should land where it causes the least trouble. On a well-planned layout, that seam disappears into a quiet panel. On a lazy one, it cuts straight through the hero artwork. That is the kind of mistake people notice immediately, usually after the print run is already underway. Good pack-line design avoids extra thinking. Workers should not have to stop and inspect the direction of every wrap.
Common closure methods include a tuck-in fit, a glue dot, a sticker seal, or a friction fit. Each behaves differently. A tuck-in closure is fast when the sizing is tight. A glue dot adds a small application step. A sticker seal is easy to inspect but can pull the piece toward a label look. Friction fit only works when carton and band tolerances are controlled. If the box varies too much, the band slides, twists, or lands crooked.
Printed belly bands for boxes fit best on pre-packed goods, kitted sets, subscription boxes, and seasonal promotions. Those are the jobs where the outer message changes more often than the structural box. A subscription pack can keep the same carton all year and swap band artwork each month. A gift set can use the same insert and base box while changing the band for Valentine’s Day, the holidays, or a retail event. Less churn. More control.
Compared with labels, belly bands give more surface area and a stronger retail feel. Compared with full sleeves, they use less material and usually move faster through production. Compared with printed cartons, they are easier to update and less expensive to keep in stock. None of these options wins every time. The right one depends on message frequency, print area, labor tolerance, and how much the team wants to commit up front.
There is a quality-control benefit too. Because the band is applied late in the process, it can absorb last-minute changes better than a carton spec. If a product gets relabeled, a bundle changes, or a distributor wants its own version, the band can often be revised without touching the box order. That is useful in operations where speed matters more than perfect theory.
For transit performance, test the thing. Standards groups such as ISTA publish transport test methods that are useful when the package needs to survive vibration, compression, and drops. A band that looks clean in a mockup can still fail if it sits too loose or catches a carton edge. That is not rare. It is packaging being packaging.
Materials, Sizing, and Design Choices That Affect Fit
Material choice changes the whole feel. Uncoated text stock gives a natural, tactile look and works well for simple graphics or text-heavy layouts. Coated stock sharpens color and edge detail, which helps when the artwork depends on bold brand colors or small type. Kraft paper gives a grounded, earthy look that fits many sustainability stories. Recycled board feels sturdier and more substantial. Specialty papers add texture, sheen, or a finish that makes the band feel more deliberate.
The nicest sample on a table is not always the right production choice. Heavy board can feel premium and still be the wrong move if it cracks at the fold or slows application. Lighter stock may be easier to handle and still wrinkle if the carton surface is rough or the box is thicker than expected. The right material depends on line speed, handling environment, and how much tolerance you have for labor.
Sizing deserves more attention than it gets. A band that looks close enough in a spreadsheet can be wrong in the warehouse. The wrap path is not just the math on the carton spec. Tape, inserts, tuck flaps, product height, and machine variation all change the final perimeter. Measure the finished box. Not the idea of the box. The real one. If the program covers multiple carton sizes, test the smallest and largest before approving the dieline. That step saves a lot of pain.
Design choices affect fit too. Bleed, panel placement, seam location, barcode visibility, and copy length all change how the band works in production. A clean front panel almost always beats a crowded one. When the design tries to say everything, the band loses the sharp, premium look that made it useful in the first place. A logo, a product name, and one clear message usually do the job better than a pile of claims.
Sustainability is another part of the conversation, but the details matter. Heavier stock adds paper weight, freight weight, and cost. Lighter stock can support shipping goals and recycling goals, depending on coatings and adhesives. If sustainability claims matter, ask how the stock, ink, and closure method fit with local recycling streams. FSC-certified paper can support responsible sourcing claims, and FSC explains how that certification works. The fine print matters as much as the front panel.
Here is a practical comparison that packaging teams often use:
| Material Option | Typical Look | Best Use Case | Approximate Cost Impact | Tradeoff |
|---|---|---|---|---|
| Uncoated text stock | Natural, matte, easy to read | Simple branding, craft positioning, low-gloss packaging | Lowest to moderate | Less color pop than coated stock |
| Coated cover stock | Sharper print, richer color | Retail-ready packaging, strong brand colors | Moderate | Can feel less tactile, may show scuffs |
| Kraft paper | Warm, earthy, recycled look | Eco-focused brands, artisan goods | Low to moderate | Color accuracy can be more limited |
| Recycled board | Sturdy, substantial, structured | Premium sets, heavier boxes, stronger presence | Moderate to higher | More expensive, can be less forgiving to fold |
| Specialty paper | Textured, unique, high-end | Gift packaging, limited editions, luxury presentation | Higher | Longer lead time, higher minimums possible |
Do not treat the seam like a defect. Sometimes it hides on a back panel and disappears. Sometimes it becomes part of the layout. The right answer depends on the artwork. A band should be planned as a three-dimensional object, not a flat graphic in denial. A mockup can hide the corners, folds, and awkward transitions that show up the second the wrap touches a real box.
Process, Timeline, and Lead Time for Production
Most belly band projects follow a familiar sequence: brief, dieline setup, artwork approval, proofing, printing, finishing, cutting, and shipment. The order feels linear. The delays usually live between the steps. A missing dieline stalls artwork. A low-resolution logo stalls proofing. A late copy change can force a new color check or a fresh proof cycle if the layout shifts in a sensitive area.
Fast projects are usually repeat orders with an approved dieline, known stock, and unchanged artwork. Those jobs move because the production team is not rebuilding the structure. First-time orders need more time. A sample may be needed to verify size. The customer may want to test the feel on the assembled box. Color-sensitive brands often ask for a press proof or production proof before the full run. Sensible move. Cheaper than guessing.
Lead time depends on quantity, stock availability, print method, finishing, and whether Custom Die Cutting is involved. A simple run on a common stock might land in roughly 7 to 12 business days after proof approval. A more involved order with specialty paper or custom finishing can stretch to 12 to 20 business days or longer. If the launch date is fixed, build the schedule backward from ship date, not forward from order date. Teams still mess this up, usually because marketing, procurement, and fulfillment are looking at different calendars.
Late approvals cause more damage than buyers expect. A color change, seam adjustment, or copy edit can reset the clock. A clean creative brief helps prevent that. When the file already contains the correct logo usage, product copy, barcode placement, and legal line, proofing becomes confirmation instead of discovery. That is faster and less expensive.
It helps to separate pilot orders from full production. The pilot can be small enough to validate fit, appearance, and application speed. Once the pilot works, the larger run can follow with fewer surprises. That is especially useful for brands using multiple box formats. It is a lot cheaper to catch a sizing problem in a test run than after 10,000 units are printed.
Storage and rollout timing matter too. If the band is seasonal, where does the inventory sit until the campaign starts? If the design includes variable messaging, how will the team keep versions separate? If the program rolls through distributors, does every location need the same release date? Those are operational questions, not creative ones, and they can make or break the project.
For teams building a wider packaging plan, our Custom Packaging Products catalog can help compare what should be printed, what should be labeled, and what should stay on the carton. That distinction usually saves more money than shaving a few cents off the band itself.
Cost, Pricing, MOQ, and Quote Factors to Compare
Pricing for printed belly bands for boxes usually follows the same levers: size, stock, print coverage, quantity, finishing, and whether the design is one color or full bleed. The unit price can swing a lot because a small black-on-kraft band is a different job from a full-color wrap on coated stock with Custom Die Cutting and a special finish. Buyers want a simple number. The press wants details.
For rough planning, smaller runs often land somewhere around $0.18 to $0.45 per band at lower quantities, with better economics at scale. In the 5,000 to 10,000 piece range, straightforward designs may come in lower depending on stock and coverage, while premium materials, heavier board, or finishing can push the price up. Those numbers are directional only. A narrow one-color band on common stock will not price the same as a full-coverage wrap with foil, spot coating, or specialty paper.
MOQ, or minimum order quantity, changes the economics fast. Lower minimums help when testing a new product, launching a short campaign, or supporting a niche SKU. Higher quantities lower the unit cost, but only if the design will still matter when the inventory is used. Overordering is the expensive mistake. Old packaging in storage is not savings. It is a pile of money with dust on it.
When comparing quotes, ask what is included. Does the price cover prepress, proofing, plates or setup charges, cutting, bundling, and freight? A quote that looks cheaper at first can become the expensive one after those line items appear. It also helps to ask whether the printer is quoting the finished size or only the flat sheet size. A small mismatch there can create headaches later, especially when the pack line depends on a precise wrap.
Labor is the hidden cost people like to ignore. A cheaper band that is fussy to apply can erase the print savings fast. If the band is hard to align, hard to close, or prone to rework, the labor line takes the hit. On a busy pack line, an extra second per unit matters. Across thousands of boxes, that adds up fast.
Use this comparison before approving a job:
- Material cost: compare pricing at the target quantity and the next volume tier.
- Setup cost: confirm whether prepress, die cutting, and proofing are included.
- Labor impact: estimate how long it takes to apply one band to one assembled box.
- Waste rate: account for rejects from fit issues, print variance, or damaged stock.
- Inventory risk: consider whether artwork changes often enough to make large runs risky.
One more comparison helps. Printed cartons usually need a bigger upfront commitment because they lock in the outer look of the package. Belly bands are more flexible and often cheaper to update, but they can add a little labor. Labels are cheaper still, yet they cover less area and feel less complete. The best choice depends on the role of the package. If the carton is mostly functional and the goal is a retail or gift-ready look, the belly band often lands in the sweet spot.
For brands that track sustainability reporting, recycled content, or fiber sourcing, ask for documentation early. The packaging world already has enough vague claims. If a vendor can explain stock composition, printing method, and certification claims clearly, that is a good sign. If the answers are fuzzy, treat that as both a cost risk and a compliance risk.
Step-by-Step Guide to Ordering Printed Belly Bands for Boxes
Start with measurements. Gather the finished box dimensions, not just the flat carton spec. Include closure style, insert height, and any bulk added by the product or protective material. If one band will serve multiple SKUs, measure the smallest and largest version. That gives the supplier a real range and lowers the odds of a fit issue after production starts.
Build a tight creative brief next. A good brief should include the logo file, brand colors, required text, barcode needs, legal copy, and whether the same design must work across several products. If the band has to support a standard SKU and a seasonal variant, say so early. It is much easier to design flexibility into the layout than to force it in later.
Ask for a dieline before artwork gets approved. That is the geometry checkpoint. The dieline shows seam placement, folds, bleed area, and safe zones. It also shows whether the most important copy will be interrupted by a seam or corner. Designing without the dieline is how people end up doing revisions after the fact. Slow. Expensive. Avoidable.
When the proof arrives, review it with a checklist, not casual comments. Confirm color accuracy, type size, orientation, seam alignment, barcode placement, and final dimensions. If the band needs to sit on a specific face of the box, check that the face is identified correctly. If the design uses a fine line or a delicate border, inspect how it behaves near the seam. Small errors are cheapest before ink hits stock.
Approve a sample if the job is color-sensitive or structurally delicate. A production proof is especially helpful when the band has to line up with a fold, when the stock is textured, or when the brand wants a close match to existing packaging. Digital proofs help, but they do not always show how ink will behave on the chosen paper. That is a limitation of the medium, not a failure of the printer.
Then plan the rollout like an operations project. Decide who will apply the bands, where they will be stored, and when they enter the pack flow. If the band is applied by hand, the team needs a clear orienting rule. If it is applied by a fulfillment partner, that partner should receive the spec and a sample. If extra inventory is held for reorders, label the approved version clearly so an old design does not sneak back in.
A few ordering habits make repeat jobs much easier:
- Keep the approved dieline on file with a clear version name.
- Save the exact stock name, finish, and quantity from the last good run.
- Record the actual application speed and reject rate during the pilot.
- Note the freight destination and any receiving constraints.
- Store a finished sample for future reference.
That discipline pays off on the second order. Reorders should feel routine, not like a scavenger hunt through old emails and half-labeled folders.
Common Mistakes to Avoid With Belly Bands
The first mistake is guessing the size. A band that is too loose can slide, rotate, or arrive crooked. A band that is too tight can bow outward, tear at the seam, or make the carton harder to close. Either way, the package looks less polished. A small measurement miss creates a big visual problem. Packaging is rude like that.
The second mistake is stuffing too much into the design. Printed belly bands for boxes are small, so restraint helps. When the layout tries to cram in too many claims, icons, certifications, taglines, and legal notes, the band loses its clarity. The customer sees a list, not a brand. A narrow wrap should act like a strong storefront sign: one clear message beats five competing ones.
The third mistake is ignoring carton variation. A nominal box size on paper does not always match the packed box on the line. Inserts, tape, machine tolerances, and material thickness all affect the wrap path. That is why a band should be tested on actual samples, not just a spec sheet. Even a stable carton line can drift a little over time.
The fourth mistake is treating screen output like print output. A deep blue that looks elegant in a PDF may read differently on kraft stock. A light gray may vanish on a textured surface. A barcode that looks fine on-screen may need more contrast in production. Color testing matters, especially on paper stocks that absorb ink differently from one another. Physical proofing exists for a reason.
The fifth mistake is buying only on unit price. The cheapest quote is not always the least expensive result. If the band is hard to apply, causes rework, or slows the pack line, the total landed cost climbs quickly. A slightly more expensive stock or a better-fitting dieline can be cheaper once labor and waste are included. Visible price is only part of the price.
Change control is another issue people underestimate. If the band supports multiple promotions or SKUs, version files need to be managed carefully. An old seasonal message can slip back into production when file naming is sloppy. The fix is simple: maintain a controlled artwork folder and a reorder checklist. That habit prevents embarrassment and scrap.
Finally, do not assume a thick-feeling paper will survive rough handling. Package performance depends on the whole system: board, closure, transit lane, stacking height, humidity, and handling. If the package travels through rough distribution channels, it may need transport testing or a stronger closure method. The extra step costs less than replacing damaged product.
Expert Tips and Next Steps for Better Results
The best belly band programs run on repeatable systems. Use one base dieline across several cartons if you can, then swap copy or campaign messaging as needed. That lowers the number of setups and makes inventory easier to manage. It also helps a brand move faster when a promotion changes or a SKU expands into a new channel.
Keep the most important information on the visible panel. A logo, product name, and one clear message should carry the design. If there is room for a secondary detail, use it carefully. The band is not a brochure. It needs to communicate quickly and make the box feel complete. Overfilling the surface kills that effect.
Ask for a production proof when the work is color-sensitive, highly detailed, or dependent on seam alignment. That is especially true for fine type, line art, or packaging that needs a close match to an existing brand system. A proof costs less than a reprint. Reprints are rarely charming.
Build a short internal reorder checklist. Include the approved dieline, stock choice, finish, quantity, target ship date, and delivery location. Add notes on the application method and any pack-line quirks. If the band has already been tested on specific cartons, keep those details where the next buyer or coordinator can find them. Packaging projects often disappear into memory gaps, not complexity.
Ask a strategic question before you order: should the outer package change every time, or should the band carry the change while the box stays stable? In many operations, the answer is obvious once costs are laid out. Keeping the carton stable and using printed belly bands for boxes for message changes can save money, cut clutter, and simplify procurement. It also makes fulfillment planning less chaotic.
If you are still deciding how much of the package should be custom, compare the options side by side. A full printed carton gives the strongest permanence. A sleeve adds more coverage. A belly band gives a lighter route to branded presentation. None of them is always right. The best choice is the one that fits the box geometry, the production schedule, and the budget without creating waste you did not ask for.
For teams ready to move from concept to quote, the practical next step is simple: measure three sample boxes, request two pricing tiers, compare lead time against the launch date, and ask for a prepress proof before committing to production. That keeps the project anchored in real numbers and real fit, which is where printed belly bands for boxes either work beautifully or fall apart. Get those details right, and printed belly bands for boxes become one of the most efficient branding tools in the packaging mix.
FAQ
How do I measure printed belly bands for boxes correctly?
Measure the finished box, not only the flat carton specification, because inserts, closures, tape, and product bulk can change the wrap path. Confirm the panel width, wrap length, and seam location so the band sits flat without buckling or sliding. If you have multiple box sizes, test the smallest and largest versions before you lock the dieline.
Are printed belly bands for boxes cheaper than printed cartons?
Usually yes, because they use less material and can often be printed in shorter runs than a fully printed carton. Total cost still depends on labor, quantity, finishing, and whether the band can be applied quickly on your packing line. They are often best when you want a premium look without committing to custom-printed corrugated inventory.
What material works best for printed belly bands on shipping boxes?
Kraft or uncoated paper works well for a natural, recyclable look, while coated stock gives sharper color and stronger branding impact. Heavier board feels more premium but can add cost and make folding less forgiving. Choose the stock based on handling, brand style, and whether the band needs to survive humid or rough transit conditions.
What is a normal lead time for printed belly bands for boxes?
Lead time varies by quantity, stock, finishing, and whether artwork and dielines are already approved. Simple repeat orders usually move faster than first-time projects that need sampling and proofing. Build in extra time if the band supports a launch date, seasonal shipment, or coordinated marketing campaign.
What should I include in a quote request for belly bands?
Send box dimensions, estimated quantity, preferred material, print colors, finishing details, and any barcode or legal copy requirements. Include your desired ship date and destination so freight and production timing are accurate. If possible, attach the current carton dieline and a reference image of how you want the finished band to look.


