Buyer Fit Snapshot
| Best fit | Printed Box Inserts with Logo projects where brand print, material claims, artwork control, MOQ, and repeat-order consistency need to be specified before quoting. |
|---|---|
| Quote inputs | Share finished size, material target, print colors, finish, packing count, annual reorder estimate, ship-to region, and any compliance wording. |
| Proofing check | Approve dieline scale, logo placement, barcode or warning zones, color tolerance, closure strength, and carton packing before bulk production. |
| Main risk | Vague material claims, crowded artwork, missing packing details, or unclear freight terms can make a low unit price expensive after revisions. |
Fast answer: Printed Box Inserts with Logo: Board, Finish, Dieline, and Unit Cost should be specified like a repeatable production item. The safest quote records material, print method, finish, artwork proof, packing count, and reorder notes in one written spec.
Production checks before approval
Compare the actual filled-product size with the drawing, then confirm tolerance on folds, seals, hang holes, label areas, and retail display edges. Reserve space for logos, QR codes, warning copy, and material claims before decorative graphics fill the panel.
Quote comparison points
Review material grade, print process, finish, sampling route, tooling charges, carton quantity, and freight assumptions side by side. A quote is only useful when the supplier can repeat the same color, closure quality, and packing count on the next order.
Printed Box Inserts with logo do more than sit inside a package and look tidy. They stop products from wandering around in transit, make the unboxing feel deliberate, and put branding right where the customer actually touches it. The outer box gets the first glance. The insert gets the first touch. That difference matters more than most teams think.
Too many brands treat inserts like filler with a logo slapped on top. Bad move. Printed Box Inserts with logo can stabilize a product, organize accessories, and cut down on damage claims without turning the pack-out into a headache. Cosmetics, supplements, apparel, specialty food, electronics, and subscription kits all use them for the same reason: they solve a real problem and make the box feel planned instead of improvised.
At Custom Logo Things, I keep hearing the same question from buyers: how do you make packaging feel branded without making it fragile, expensive, or annoying to assemble? Printed box inserts with logo are often the answer. The catch is simple. The structure, material, and print plan have to match the product and the shipping conditions. If one of those is off, the whole thing gets kinda ugly fast. The sections below break down how they work, what drives cost, where teams trip up, and how to plan a run That Holds Up in actual production.
What Are Printed Box Inserts With Logo?
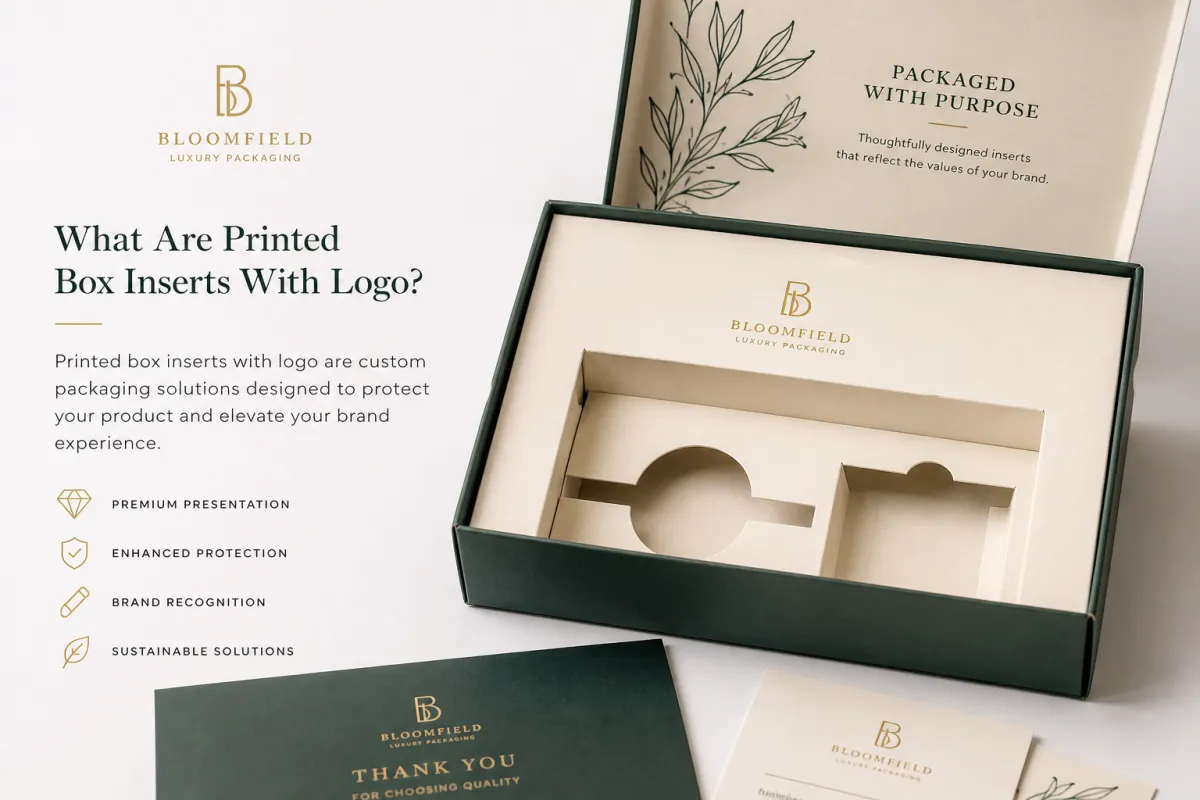
Printed box inserts with logo are custom pieces placed inside a mailer, folding carton, or shipping box to keep the product positioned correctly while adding branding inside the package. They can be die-cut paperboard, folded board cradles, corrugated dividers, or molded-style paper structures. The right choice depends on product weight, protection needs, and the look the brand wants to create.
The part people miss is that the insert often becomes the first printed surface the customer handles up close. A logo on the outer carton can be seen from across the room. The insert gets opened, touched, and handled in the middle of the reveal. That makes it a quiet but effective branding tool. Quiet usually ages better than loud anyway.
There is also a real difference between inserts that exist for show and inserts that do actual work. Decorative inserts focus on color, messaging, and presentation. Functional inserts focus on holding the product in place. The best printed box inserts with logo do both without wasting material or crowding the inside of the box with noise. If it looks good but fails the first drop, nobody gets credit for the pretty part.
These inserts show up anywhere presentation and protection need to coexist. Cosmetics use them for bottles, jars, and kits. Supplement brands use them for sample packs and rigid containers. Apparel brands use them to separate pieces and accessories. Specialty food brands use them for jars and tins. Electronics companies use them for cables, chargers, and small accessories that should not rattle around like loose change.
Think of printed box inserts with logo as part of the package structure, not decoration added at the last second. Designed around product dimensions, box size, and pack-out sequence, they can reduce filler, improve consistency, and make the whole shipment feel considered. Designed after everything else is fixed, they usually become the awkward part nobody wants to fold. That is not a fun surprise during launch week.
"A strong insert should answer three questions at once: does it hold the product, does it survive shipping, and does it look intentional when the box opens?"
That is the real test. Printed box inserts with logo need to earn their spot inside the package.
How Printed Box Inserts With Logo Work in Shipping
Printed box inserts with logo work by creating controlled contact points inside the box. A die-cut slot, folded tab, pocket, or wraparound cradle keeps the product from sliding around during handling and transit. Sized correctly, the insert keeps the item centered, preserves the presentation, and lowers the chance of a box opening to a scuffed or rattling product. Nobody enjoys that reveal, especially the customer.
The mechanics matter as much as the graphics. A decent insert starts with the product's actual height, width, depth, and weight, then accounts for sleeves, caps, accessories, labels, and manufacturing tolerances. That last part is where teams get burned. The sample on the table may fit perfectly, then the production run shows up with enough variation to create friction, looseness, or pressure points. I have seen a "perfect" prototype fall apart the minute a real run hit the line. Printed box inserts with logo need to be designed around real tolerances, not wishful thinking.
Print placement changes the experience too. Some brands put a full-panel logo on the top face and leave the underside blank. Others print a one-color mark on the flaps and add a short message inside the lid. A few use repeat marks or a subtle pattern so the insert feels branded without shouting over the product. Restraint usually looks more premium than trying to cover every visible panel with ink.
From a shipping standpoint, the insert has to work with the outer box, not against it. If the carton is too loose, the insert may shift. If the carton is too tight, the insert may buckle or crease during pack-out. Fragile products may need a secondary cushion layer, such as tissue, corrugate pads, or paper pulp support. Printed box inserts with logo should survive vibration, compression, and the normal abuse a parcel takes on the way to a customer.
Common production methods include offset printing for longer runs, digital printing for shorter and more variable jobs, and flexographic printing for certain high-volume paperboard or corrugated applications. Finishing can include aqueous coating, varnish, lamination, or a scuff-resistant clear layer if the insert gets handled a lot before the product goes in. Not every insert needs a finish, but if the printed surface is likely to rub against bottles, metal components, or other carton contents, a little protection goes a long way.
Brands that test transit performance seriously should pay attention to shipping standards. The International Safe Transit Association, or ISTA, publishes test procedures that help packaging teams check whether a package can survive drops, vibration, and compression. Printed box inserts with logo are not certified by default, but the test logic is useful. If the insert cannot hold the product through handling simulation, it will not hold up reliably in the real world.
A practical workflow usually looks like this:
- Measure the product and the box interior with real tolerances.
- Choose the insert style based on weight, fragility, and pack-out speed.
- Place branding where it will be seen and touched, not hidden.
- Test the insert with actual products, not empty samples.
- Check whether the insert stays flat, locks cleanly, and opens in a controlled way.
That last step gets skipped more often than it should. Printed box inserts with logo should open cleanly because the opening moment is part of the brand experience, but they should not be so delicate that a warehouse associate has to handle them like museum paper. Shipping teams want repeatability, not origami.
Key Factors That Affect Design, Materials, and Performance
Several design choices shape how well printed box inserts with logo perform. Material selection comes first because the substrate determines stiffness, print feel, and how much abuse the insert can take during folding and loading. Paperboard, SBS, CCNB, kraft board, and corrugated board each behave differently. A 16 pt SBS insert can feel crisp and premium in a cosmetic kit, while a corrugated insert may be the better fit for a heavier subscription shipment that needs more structural support.
Structure comes right after that. Tabs, folds, slots, glue points, and product nests all change how the insert behaves. A simple friction-fit insert can be fast to assemble and economical to ship flat. A nested design can hold multiple items neatly but may need tighter die-line control and clearer pack-out instructions. The right structure often eliminates extra void fill, which saves both material and packing time.
Branding choices affect the feel of the finished piece. Large solid color areas cost more to print and show scuffing more easily. Small logos, restrained typography, and a clean internal message often look more premium than a crowded layout. That is one of packaging's less glamorous truths: an insert does not need to say much to feel polished. Printed box inserts with logo usually look better when the message is focused and intentional.
Artwork prep matters more than many non-packaging teams expect. Dielines have to be accurate. Bleeds need to be set correctly. Safe zones matter because fold lines, glue flaps, and insert cutouts can hide or distort text. Color profiles should match the print method, because a bright blue on screen can drift once it lands on paperboard under production conditions. Small artwork mistakes get expensive after tooling, proofing, and print setup are already in motion.
Product sensitivity changes the brief too. Food packaging may need ink choices and board grades that suit indirect contact expectations. Health and supplement packaging may need room for regulatory copy, lot codes, or handling information. Fragile products may need inserts that spread pressure across a wider area instead of pinning the item at one point. Printed box inserts with logo should support those requirements, not fight them.
If sustainability is part of the plan, material selection needs to be honest. Recyclable paper-based inserts can work well when the product does not need plastic cushioning. Forest stewardship claims should be backed by documentation, and brands that need chain-of-custody support should look at FSC certification pathways instead of assuming every sheet of paper tells the same story. The environmental claim has to be real, not decorative.
For teams deciding what matters most, these four questions usually clear the fog:
- Does the insert protect the product through handling and transit?
- Does the logo placement improve the opening moment without cluttering the structure?
- Can the fulfillment team pack it quickly and consistently?
- Does the material choice match the product value and shipping conditions?
That is the practical lens. Printed box inserts with logo do their best work when they solve a physical problem and carry a brand message at the same time. Leave out either piece and the result usually feels underbuilt or overdesigned.
Cost and Pricing for Printed Box Inserts With Logo
Printed box inserts with logo are priced the same way most custom packaging is priced: more complexity means more setup, and larger order quantities usually bring the unit cost down. Material grade, insert size, print coverage, finishing, cut complexity, and assembly requirements all affect the final number. A simple one-color paperboard insert is one thing. A multi-panel folded insert with a scuff coat and tight die-cut tolerances is another beast entirely.
For many buyers, the first surprise is that setup costs can matter more than print cost on short runs. A custom dieline, proofing, plate or file prep, and special cutting instructions all need to happen before the first unit ships. That means a 500-piece order can feel wildly more expensive per unit than a 5,000-piece order, even when the artwork is identical. Printed box inserts with logo reward planning volume more than almost anything else.
Here is a simple way to think about common cost tiers for custom runs. These are directional figures, not universal quotes, because every plant, print method, and material stack is different. Still, they help frame the conversation.
| Insert Type | Typical Material | Common Use | Indicative Unit Cost | Notes |
|---|---|---|---|---|
| Basic branded insert | 14 pt to 18 pt paperboard | Light products, simple mailers, sample kits | $0.18-$0.35 at 5,000 units | Usually one-color or simple two-color print with minimal finishing |
| Mid-tier functional insert | SBS, CCNB, or light corrugate | Cosmetics, supplements, multi-item kits | $0.30-$0.65 at 5,000 units | More die-cutting, tighter fit, and possible coating or spot varnish |
| Premium branded insert | Thicker board, specialty stock, or corrugate | High-value products, electronics accessories, gift sets | $0.60-$1.40 at 5,000 units | More print coverage, more complex structure, sometimes hand-assembly |
Those numbers move fast when the order is small. A short-run order of printed box inserts with logo can land much higher per unit because the setup cost gets spread across fewer pieces. That is not a flaw in the printer. It is just how custom packaging economics work. Pilot runs still matter because they expose fit problems and assembly issues before a larger order bakes in the wrong assumptions.
It also helps to compare inserts against the whole packaging workflow, not just the line item on the quote. Shipping damage, repacking labor, fulfillment speed, and returns all cost money. If a better insert reduces breakage by even a small amount, the savings can offset part of the print expense. Printed box inserts with logo should be judged on total package performance, not the lowest quote in the stack.
There are a few hidden budget items worth watching:
- Shipping of the finished inserts to the fulfillment site or co-packer.
- Storage if the inserts arrive flat in large case packs.
- Assembly labor if the insert needs folding, locking, or gluing before use.
- Pack-line time if the insert slows the team down by even a few seconds per unit.
- Sampling if more than one structure or finish needs to be reviewed.
In a lot of projects, the smartest savings come from simplification instead of cutting quality. A cleaner structure can reduce die complexity. A smaller print area can cut ink coverage. A flatter pack-out can save on storage and freight. The goal is not to make printed box inserts with logo cheap in isolation. The goal is to make them efficient in context.
One more note for buyers comparing printed box inserts with logo to other internal packaging pieces: tissue, stickers, and filler can support the presentation, but they rarely solve the same problem. A sticker adds identity. Tissue adds theater. The insert adds structure. If the item needs to stay fixed, the insert is the part doing the actual work.
Process and Timeline for Printed Box Inserts With Logo
The production flow for printed box inserts with logo usually starts with the product brief, and that brief needs more than a rough sketch. The team should define the item dimensions, the box interior dimensions, the shipping method, the finish level, and any accessories that ship with the main product. From there, the dieline is created or confirmed, artwork is mapped to the structure, and a proof is reviewed before the job moves into production.
The dieline is the foundation. If the structure is wrong, everything else shifts around it. That is why timeline planning has to start with the insert shape, not the graphics. A logo can be revised quickly. A cut pattern cannot. Printed box inserts with logo that use custom pockets, side flaps, or nested compartments need especially careful measurement because even a small change can affect how the finished piece folds and locks.
Proofing usually happens in more than one layer. A digital mockup helps catch text placement and logo scale. A structural sample shows whether the fold sequence makes sense. A physical prototype gives the team a real feel for stiffness, fit, and assembly speed. If color matters, a press proof or controlled color reference is worth the extra time. Rushing this stage usually costs more later because changes after approval can trigger rework, replates, or another round of cutting.
Lead times vary by print method and complexity, but a realistic planning window is usually measured in business days rather than vague promises. A straightforward job may run in roughly 10-15 business days after proof approval. A more complex structure with special coatings, custom cutting, or seasonal demand can push farther out. Printed box inserts with logo that need multiple approvals or late artwork changes should be planned with extra buffer time, especially if they support a launch date or promotional window.
For teams that want a cleaner process, the workflow can be broken into a simple sequence:
- Confirm product dimensions and package goals.
- Approve the insert structure and material.
- Build or review the dieline.
- Place branding and copy on the panel map.
- Check the proof for fit, color, and legibility.
- Run a sample pack-out with real products.
- Approve production and final shipment.
That sample pack-out step saves a lot of pain later. A folded insert can behave differently under real weight than it does in a flat mockup. Printed box inserts with logo should be tested with actual products, actual cartons, and the same team that will handle the live order. If a packer needs two extra motions to place the product, the design probably needs another pass.
There is another reason to test before launch: shipping is not gentle. Vibrations, corner drops, temperature swings, warehouse stacking, and carrier handling all interact with the insert structure. A beautifully printed piece can still fail if the structure does not hold under those conditions. If the product is valuable, fragility testing guided by common package test methods, including vibration and drop checks, is time well spent.
Printed box inserts with logo are usually best when production planning is boring in the best possible way. No surprises. No last-minute resizing. No unclear fold maps. Just a clean path from brief to proof to pack-out. Fulfillment managers tend to love that sort of predictability for good reason.
Common Mistakes to Avoid With Printed Box Inserts With Logo
The biggest mistake is designing for the photo and forgetting the shipment. Printed box inserts with logo can look great in a render or a marketing mockup, but if the product rattles, tilts, or crushes the insert during transit, the packaging has failed its core job. A pretty insert that generates damage claims is not a good insert. Pretty does not pay for replacements.
Sizing errors are another common problem. Teams often measure the product itself and ignore the sleeve, cap, accessory, or protective wrap that actually travels with it. The result is a fit that looks right on paper but is too tight in real pack-out. Printed box inserts with logo should always be measured against the final packed configuration, not the bare product alone.
Overprinting can also hurt the result. When every panel is packed with copy, icons, disclaimers, and decorative elements, the insert starts to feel crowded. The logo loses contrast, typography gets smaller, and production costs rise because of ink coverage and file complexity. A cleaner layout usually prints better, reads better, and feels more expensive in hand. Buyers often learn that after one overdesigned run they would rather forget.
File prep mistakes create avoidable delays. Missing bleeds, low-resolution logo files, unverified dielines, and the wrong color profile can all create back-and-forth right when the job should be moving. If the insert folds or glues in a specific sequence, the artwork needs panel labels and clear orientation marks. Printed box inserts with logo should never rely on guesswork during prepress.
Operational mistakes can be just as costly as design mistakes. Some teams skip the sample stage and approve production from a PDF alone. Others forget to check how the inserts stack in cartons or how quickly the fulfillment team can fold them. A structure that saves five cents in material but adds ten seconds of labor per unit is not saving money. In a real warehouse, labor usually matters more than people want to admit.
A few things are especially worth double-checking:
- Does the insert hold the item securely with normal carton movement?
- Does it still fit when the product includes labels, sleeves, or accessories?
- Does the logo remain visible after folding and loading?
- Does the finish resist scuffing during assembly?
- Can the fulfillment team pack it without slowing the line?
There is also a sustainability trap worth avoiding. A brand may want recycled content or recyclable packaging, which is a good goal, but the material choice still has to match the product. If the insert is too weak, the team may compensate with extra filler, bigger cartons, or higher damage rates. That can wreck the environmental plan fast. Printed box inserts with logo should reduce waste, not move it from one place to another.
One practical way to avoid all of these mistakes is to treat the insert as a working tool. Ask whether it improves product retention, protects the customer experience, and supports warehouse speed. If the answer is yes, the branding is probably in the right place. If the answer is no, the logo may be doing too much of the heavy lifting.
Expert Tips and Next Steps for Printed Box Inserts With Logo
If you are planning printed box inserts with logo for the first time, start with one hero SKU instead of rebuilding every package at once. A focused pilot gives you cleaner data on fit, customer reaction, assembly speed, and shipping performance. It also keeps the risk manageable. Once the structure is proven, expanding to adjacent product lines becomes much easier.
The best inserts usually solve a real problem first. Maybe the product moves too much in transit. Maybe the accessories end up scattered inside the box. Maybe the team wants a cleaner opening sequence without adding another layer of packaging. If the insert is built to fix one of those issues, the branding feels more credible because it is tied to utility. Printed box inserts with logo land better when they earn the message through performance.
Request a sample or short-run prototype and test it under real conditions. Pack actual products into real cartons, close the box the same way your fulfillment team will, and run a handling check. Vibration, light drops, carton stacking, and warehouse storage are all fair tests. You do not need a lab to catch most of the common failures. You need a disciplined trial with the right product and the right people paying attention.
For decision-making, I like a simple four-part matrix:
- Protection - Does the insert keep the product stable?
- Appearance - Does the logo and layout support the brand feel?
- Cost - Does the unit price fit the margin and volume?
- Fulfillment speed - Can the team pack it without friction?
Printed box inserts with logo usually work best when all four stay balanced instead of chasing only one. A premium look with poor protection is a problem. A strong insert with no brand presence leaves money on the table. A cheap insert that slows the line can cost more than a better-built version. The right answer sits in the middle, where the packaging works and the branding feels intentional.
One more useful habit: compare the branded version with the unbranded version before committing to a full run. Audit a single shipment, note the labor time, the damage rate, the product presentation, and customer feedback, then decide whether printed box inserts with logo deserve a wider rollout. That kind of controlled test is more useful than guessing from a sample sheet alone.
If the result is positive, the next step is usually straightforward: tighten the dieline, confirm the board grade, finalize the artwork, and move into production with clear expectations. If the result is mixed, adjust the structure before you spend on a larger order. Printed box inserts with logo are a packaging tool, and like any tool, They Work Best when they are chosen for the job rather than for appearances alone.
Practical takeaway: lock the product dimensions, run a packed sample through transit testing, and only then approve the artwork for production. That sequence protects the product, keeps the pack-out sane, and makes the logo feel like part of the design instead of a last-minute add-on.
What are printed box inserts with logo used for in shipping?
They hold products in place, reduce movement, and improve the first impression when the box is opened. Printed box inserts with logo can also organize accessories, instructions, or sample items so the shipment feels more deliberate and easier to unpack. The logo adds brand recognition without needing extra stickers or labels on the outside of the package.
How much do printed box inserts with logo usually cost?
Cost depends on material, insert size, print coverage, finishing, and order quantity. Simple short runs often cost more per unit because setup work is spread across fewer pieces. To estimate accurately, compare the insert cost with packing labor, shipping efficiency, and damage reduction, because printed box inserts with logo should be judged on total package value, not print price alone.
What file format should I send for printed box inserts with logo?
Vector files such as AI, EPS, or PDF are usually best for logos and clean line work. Artwork should be built on the approved dieline with bleeds, safe areas, and correct color settings. If the insert has folding panels, label each panel clearly so placement errors are less likely during prepress and production.
How long does production take for printed box inserts with logo?
Lead time depends on sample approval, artwork readiness, printing method, and whether the design needs custom cutting or finishing. A simple insert can move faster than a complex structural piece with multiple folds or special coatings. Planning early is the best way to avoid delays during seasonal spikes or product launches, especially when printed box inserts with logo are part of a larger fulfillment schedule.
Are printed box inserts with logo better than stickers or tissue paper?
If the goal is product retention and a polished unboxing, inserts usually perform better because they add structure as well as branding. Stickers and tissue can support the presentation, but they do not usually hold the product in place by themselves. The best choice depends on the item, shipping method, and how much protection the package needs.


