Buyer Fit Snapshot
| Best fit | Printed Cartons with Embossing projects where brand print, material claims, artwork control, MOQ, and repeat-order consistency need to be specified before quoting. |
|---|---|
| Quote inputs | Share finished size, material target, print colors, finish, packing count, annual reorder estimate, ship-to region, and any compliance wording. |
| Proofing check | Approve dieline scale, logo placement, barcode or warning zones, color tolerance, closure strength, and carton packing before bulk production. |
| Main risk | Vague material claims, crowded artwork, missing packing details, or unclear freight terms can make a low unit price expensive after revisions. |
Fast answer: Printed Cartons with Embossing: Board, Finish, Dieline, and Unit Cost should be specified like a repeatable production item. The safest quote records material, print method, finish, artwork proof, packing count, and reorder notes in one written spec.
Production checks before approval
Compare the actual filled-product size with the drawing, then confirm tolerance on folds, seals, hang holes, label areas, and retail display edges. Reserve space for logos, QR codes, warning copy, and material claims before decorative graphics fill the panel.
Quote comparison points
Review material grade, print process, finish, sampling route, tooling charges, carton quantity, and freight assumptions side by side. A quote is only useful when the supplier can repeat the same color, closure quality, and packing count on the next order.
Printed cartons with embossing change how a customer reads a package before the message has fully registered. The hand feels the raised detail, the eye follows the shadow it casts, and the brand gets an extra beat of attention that plain print rarely earns on its own. In categories like skincare, supplements, candles, fragrance, tea, and small gift products, that extra beat can matter more than a louder color palette. A raised logo often communicates premium value with less effort than a crowded design trying too hard.
The appeal is not only visual. Printed cartons with embossing make a folding carton feel intentional, which is exactly what many products need on shelves where decisions happen quickly and comparison is unforgiving. I have sat through enough press checks to see the same pattern repeat: a carton looks fine on screen, then suddenly feels convincing once the logo rises above the surface. The catch is that embossing is not a decorative filter you add at the end. It depends on board choice, die quality, artwork structure, finishing order, and quantity. Miss one of those, and the premium effect starts to erode into waste.
That is why the real comparison is rarely embossing versus no embossing. More often, it is printed cartons with embossing against a flatter carton with cleaner typography, a better coating, or a carefully used spot UV panel. Some brands need tactile depth. Others need sharper files and a tighter spec. Both answers can be correct. The job is figuring out which one supports the product without pushing the budget into awkward territory.
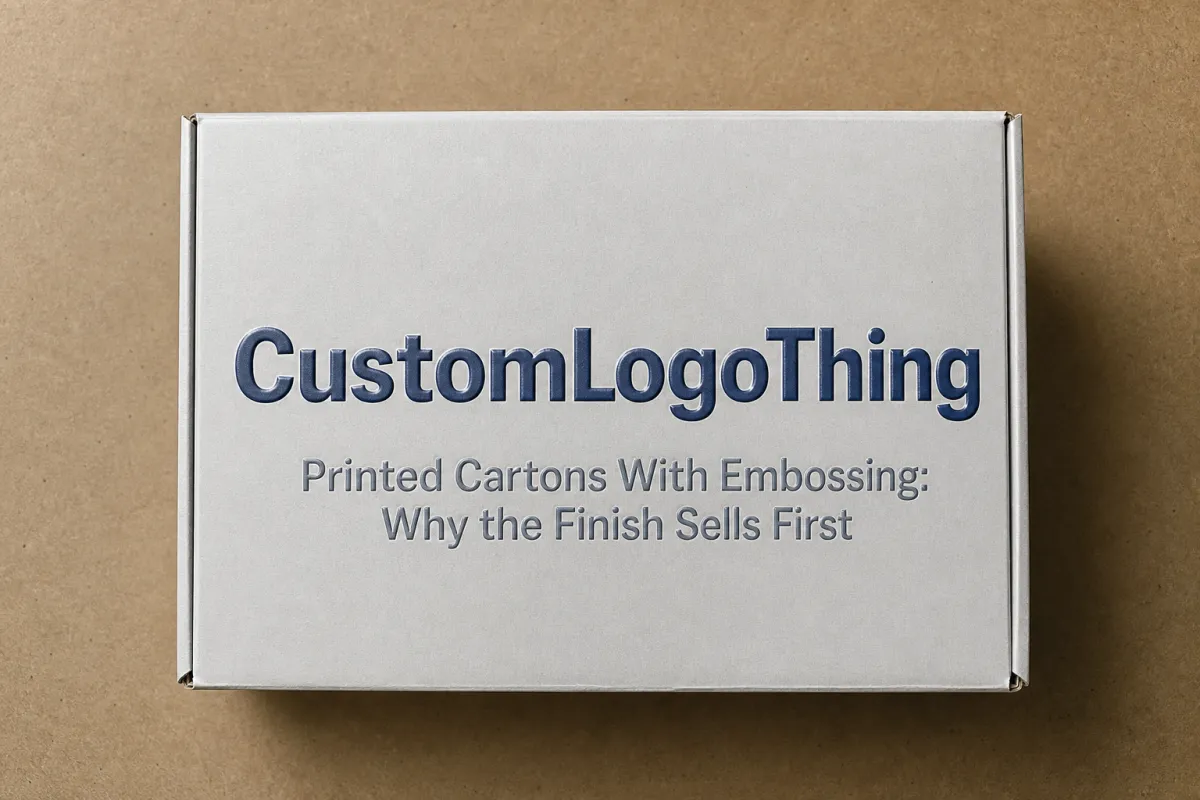
Printed Cartons With Embossing: Why the Finish Sells First
Printed cartons with embossing work because people feel them before they interpret them. A raised logo on a compact carton can do more than a full-panel illustration that looks polished but never invites touch. Fingers catch the relief, the eye catches up, and the carton starts behaving like part of the product rather than a disposable shell. Packaging does not always need more color. Sometimes it only needs enough texture to slow the hand for a second or two.
That effect shows up most clearly in categories where the box carries part of the brand promise. Premium skincare, small-batch candles, nutritional supplements, perfumes, specialty tea, and gift sets all depend on perception as much as utility. A restrained monogram or logo on printed cartons with embossing can make a package feel tailored instead of generic, even when the artwork is minimal and the palette is quiet. The restraint is often the point. Loud packaging can feel insecure. Quiet packaging, if it is built well, tends to feel expensive.
The shelf effect is physical as much as visual. Embossing creates light and shadow, and that contrast can make a carton look more deliberate than a busier layout with no depth at all. A 25 mm logo panel, a border on the top flap, or a compact emblem near the product name is often enough. That is one reason printed cartons with embossing appear so often in cosmetics and gift packaging: they add perceived value without cluttering the surface. I once reviewed a pair of sample cartons for a skincare launch, both printed on the same stock. The one with the raised mark felt almost twice as resolved, even though the artwork changed by only a few millimeters.
Cost also shapes the decision. Compared with wrapping a carton in full-coverage foil, embossing can feel more controlled and more defensible. That matters to brands that want elegance rather than noise. A matte laminate, a soft-touch surface, or a small spot UV accent can still sit on the box, but the emboss gives the package a tactile anchor. Customers rarely describe the effect in technical terms. They still notice it.
The finish has limits, and those limits are often where the budget gets saved. Push the emboss too far and the board begins to complain. Thin stock can crack, soft fibers can flatten, and dense artwork can swallow detail that looked clear in the render. The better question is not whether embossing makes a carton nicer. It usually does. The better question is whether printed cartons with embossing fit the product, the quantity, and the launch timing without creating expensive friction elsewhere in production.
"A good emboss should feel obvious in hand and quiet in design. If the layout has to point at itself, the layout is already doing too much."
What Printed Cartons With Embossing Actually Are
A printed carton is the outer folding box that carries artwork, legal copy, brand marks, and product information. Embossing is the process that raises selected areas of the board so they sit above the surrounding surface. Put them together and you get printed cartons with embossing: cartons printed first, then pressed with a shaped die to create depth and texture. In many plants, that die is part of a matched set, or paired with a counter-die, so the pressure can be controlled and the relief stays crisp instead of vague.
That raised effect is different from debossing, which pushes material inward instead of lifting it. Buyers confuse the two constantly, and printers hear the same correction all week. Embossing is the bump. Debossing is the dent. Both can look refined, but they do different things on shelf. Embossing usually reads louder and more luxurious. Debossing often feels quieter and more architectural. Blind embossing, where no foil or ink highlights the relief, can be especially elegant if the board holds detail well.
The build of printed cartons with embossing is more layered than it looks. First comes the artwork and dieline. Then the board choice. Then the embossing die, which has to land in the right place on the panel. Then the sequence: print, drying, possible lamination or UV coating, embossing, die cutting, folding, and gluing. If any step drifts, the carton starts to feel off even if every individual stage looked acceptable in isolation. That is the part outsiders miss. Packaging is not a single effect; it is a chain of decisions, and each one changes what the next can do.
Most emboss targets are simple because simple survives pressure. Logos, monograms, product names, borders, icons, and clean pattern work are the safest candidates. Tiny type is risky. Fine lines are risky. Dense illustration is risky. I have seen brands ask for a floral pattern in raised detail on a small panel, then act surprised when the result looked soft around the edges. The board does not care about mood boards. It cares about pressure, grain direction, and geometry.
If the goal is a clean result, the raised area should be intentional and readable. The strongest printed cartons with embossing usually have one focal point, not four finishes competing for attention. A raised logo on a matte carton, or a raised emblem paired with a disciplined spot UV title, often beats a crowded design that tries to use every effect available. Premium packaging is not a buffet table.
The structure matters as much as the art. Folds, glue zones, tuck flaps, and seams can all interfere with the finish. A sharp emboss in the center panel can fail near a fold line because the board is already under stress there. Any supplier worth trusting should check the dieline before quoting, not after production has begun and everyone is pretending the problem is minor.
Printed Cartons With Embossing Cost and Pricing Factors
The price of printed cartons with embossing is driven by a short list of variables, none of them mysterious. Die creation, press setup, carton size, board thickness, print coverage, and any extra finishing like foil stamping, spot UV, or soft-touch lamination all move the number. The more moving parts you add, the more setup time and waste you invite. That is true whether the order is 1,000 cartons or 50,000.
Tooling is the first bucket. A simple embossing die is usually a one-time charge, and depending on size and supplier it may land around $80 to $250 for a small logo die, with larger or more detailed work costing more. Multi-level embossing and oversized panels raise the bill because the die has to be engineered, tested, and sometimes revised with more care. It is not a stamp in the casual sense. It is a precision tool with opinions, and it rewards clarity more than ambition.
Then comes the unit cost. At lower quantities, setup gets spread across fewer cartons, so the price per unit rises. At higher runs, the tooling cost is easier to absorb. That is why printed cartons with embossing at 1,000 pieces can feel expensive while the same design at 5,000 or 10,000 pieces starts to look far more reasonable. It is arithmetic, not a supplier trick.
For rough planning, a simple logo emboss on a standard folding carton might add about $0.03 to $0.10 per unit at mid-sized runs. More complex embossing, or combinations with other finishes, can add $0.12 to $0.35 or more per unit depending on coverage, board, and setup complexity. Those figures are directional, not a promise. They are useful because they keep the first quote from becoming a shock.
Here is a quick comparison of common options for printed cartons with embossing:
| Finish option | Typical use | Tooling/setup burden | Approx. unit impact at 5,000 pcs | Practical note |
|---|---|---|---|---|
| Simple logo emboss | Small premium marks, monograms, icons | Low to moderate | $0.03-$0.10 | Best cost-to-impact ratio for first orders |
| Emboss + foil stamping | Luxe logos, gift sets, beauty cartons | Moderate to high | $0.08-$0.22 | Strong shine, but tighter registration and more setup |
| Emboss + spot UV | Modern premium cartons with contrast | Moderate | $0.07-$0.18 | Good for matte cartons that need a visual lift |
| Deep or multi-level emboss | Signature packaging, special releases | High | $0.12-$0.35+ | Looks impressive, but needs stronger board and careful testing |
What people often miss is the hidden cost. If the files are messy, if the dieline changes three times, if the emboss area has to move after proofing, the bill climbs quickly. Rework touches several steps at once: file prep, plate or die updates, setup, and sometimes fresh sampling. The cleanest way to protect the budget on printed cartons with embossing is to lock the structure before requesting the final quote.
If you are comparing suppliers, ask for the quote in layers. Request the carton price, the emboss tooling fee, print plate fees, and any extra finish charges separately. That makes comparison much easier. One supplier may look cheaper because the tooling is buried inside the unit price. Another may look higher but includes the die, sample, and a stronger board spec. The numbers only mean something when they are broken apart.
Printed Cartons With Embossing Process and Timeline
The production flow for printed cartons with embossing usually starts with artwork approval and a confirmed dieline. That dieline is not decoration. It is the map. It shows folds, cuts, glue tabs, and the emboss area on the finished carton. If the artwork sits on the wrong template, the rest of the job turns into damage control before anyone has even touched the press.
After the dieline is confirmed, the supplier moves into die making. That step matters more than many buyers realize. The embossing die has to match the approved art and the carton panel exactly. Once die production begins, changing the design becomes slower and more expensive. Experienced buyers do not treat the first proof as a rubber stamp. They inspect it carefully, because the proof is usually the last inexpensive chance to catch a mistake.
Then comes print setup. Depending on the artwork, the carton may be printed with offset, digital, or another production method, followed by drying and any coating or lamination the job needs. A matte laminate can reduce glare and help the emboss read more clearly. A UV coating adds protection, but it also changes how the surface reacts under pressure. Spot UV can create contrast, though it should be used with restraint on printed cartons with embossing so the carton does not start feeling overworked.
Once printing is ready, the embossing setup starts. The press has to be aligned carefully so the raised area lands exactly where the design calls for it. That alignment is where poor planning becomes visible. After embossing, the carton usually goes through die cutting, folding, and gluing. The sequence can vary by structure, but the principle stays the same: the carton is engineered, not merely printed.
For lead time, a straightforward job can move in about 12 to 15 business days after proof approval if the tooling path is clear and the quantity is manageable. More complex printed cartons with embossing take longer, especially if foil stamping, multiple revisions, or a specialty board are involved. If the launch date is fixed, build buffer into the schedule. A week is decent. Two is better. Guessing is not a planning method.
There are a few ways to keep the timeline from slipping:
- Approve the dieline before polishing the artwork.
- Mark the emboss area clearly in a separate vector layer.
- Ask for a physical sample if the carton is tied to a premium launch.
- Keep revision rounds tight. Three rounds is already enough for a carton job.
- Confirm packing format, carton quantity per case, and shipping method before production starts.
For reference on pack performance and transport testing, the International Safe Transit Association has useful guidance on distribution testing, and the Packaging School / packaging resources are a solid place to review broader packaging basics. If your cartons need sustainability claims, ask for chain-of-custody documents from recognized programs such as FSC, PEFC, or SFI rather than relying on marketing language. That is how you keep the spec clean and the buyer confident.
Key Design and Material Factors That Change the Result
The board you choose may be the biggest factor in how printed cartons with embossing look and feel. Thin stock will not hold a crisp raised detail very well. Heavier board can support more depth and a cleaner edge. For many folding cartons, something in the 300gsm to 500gsm range is common, but the right spec depends on box size, shape, and how much stress the panel takes during folding, shipping, and filling. Recycled content can still perform well, though the surface formation and fiber mix may change how sharp the relief looks.
In practical terms, emboss depth should match the board. A subtle 0.3 mm to 0.6 mm lift often works well for smaller logos and clean geometric marks. Bigger or deeper relief can work too, but the risk of cracking or flattening rises as the area grows. That is why oversized embosses need test runs. A design that looks strong in a render can fall apart once the press starts applying pressure. Renderings are optimistic. Fibers are honest.
The surface finish matters as well. Matte stocks often give printed cartons with embossing a crisp, upscale look because the contrast between raised and flat areas is easier to see. Soft-touch lamination gives a velvety feel, but it can also make the raised area seem slightly muted if the die is too shallow. Gloss coating and UV coating reflect light differently, so the embossed shape may read more by shadow than by touch. None of these finishes is wrong. They just behave in different ways.
Registration is another detail that separates clean cartons from mediocre ones. If the embossed logo does not align with the printed logo, the box looks off even if the emboss itself is technically fine. That becomes obvious fast when embossing is paired with foil stamping or spot UV. The eye catches misalignment immediately. A 1 mm shift can be enough to make a premium carton feel rushed.
Structure matters too. The safest places for printed cartons with embossing are usually flat panels with good board support and enough space away from folds, flaps, and glue zones. Panels near score lines can distort when folded. Corners can crack. Glue areas can flatten the relief. If the carton has to survive both shelf display and assembly, the structure needs to be solved before the finish gets approved.
Here is a simple way to judge whether your design is friendly to embossing:
- Large flat panel? Good candidate.
- Fine serif type under 6 pt? Risky.
- Dense illustration with hairline strokes? Usually too much detail.
- Logo with bold edges and clear negative space? Strong candidate.
- Emboss crossing a fold line? Usually a bad idea unless the supplier confirms it.
The strongest results tend to come from restraint. A small, well-placed mark can do more than a giant decorative panel. That is the odd truth of premium packaging: the simpler solution often costs less and looks better. Fancy is easy to request. Controlled is harder.
Common Mistakes When Ordering Printed Cartons With Embossing
The first mistake is asking for too much detail. Printed cartons with embossing are not a rescue tool for overloaded artwork. If the logo is packed with tiny lines, dots, and nested shapes, the die may compress the detail into a vague bump. That is not premium. That is an expensive blur. Simplify the emboss area and let print handle the rest.
The second mistake is ignoring carton structure. A design can look excellent on a flat mockup and still fail near a fold, tuck flap, or seam. When the board is scored and folded, the fiber direction changes how pressure behaves. If the emboss sits too close to a stress point, the carton may crack or lose definition. Packaging engineering and artwork should be in the same room, not exchanging notes like distant relatives.
The third mistake is skipping samples. A digital proof tells you color placement and layout. It does not tell you how printed cartons with embossing will feel in the hand, how crisp the edge will look, or how the board responds under pressure. If the carton is going into a premium retail setting, you need at least one hard proof or sample. Otherwise you are approving a theory, not a box.
The fourth mistake is underestimating lead time. Tooling takes time. Proofing takes time. Press setup takes time. If the carton also includes die cutting, foil stamping, lamination, or spot UV, each added step creates another chance for delay. Buyers often plan only for print time, then wonder why the carton misses the launch window. That surprise can be avoided with a better schedule.
The fifth mistake is giving the supplier a vague brief and hoping for mind reading. "Make it premium" is not a specification. Neither is "raise the logo a bit." You need to state the carton size, board spec, emboss placement, emboss depth preference, finish pairing, and quantity. The clearer the brief, the cleaner the quote. Printed cartons with embossing are precise work. Precision starts in the email, not in the press room.
One more problem shows up often: adding too many finishes because each one sounds attractive on its own. Embossing plus foil stamping plus spot UV plus a heavy gloss can look rich, but it can also start looking busy for the wrong reasons. A carton does not earn points for collecting finishes. It earns points for making the product look stronger than it would have looked otherwise.
"Most bad carton jobs are not material failures. They are communication failures dressed up as design problems."
Expert Tips and Next Steps for Printed Cartons With Embossing
If you want printed cartons with embossing to do real work for the brand, start with the outcome. Ask what the finish should accomplish. Is the goal luxury perception? Tactile recognition? A clearer logo on a crowded shelf? A better fit with the rest of the product line? Once the target is clear, the design and budget choices become easier to judge.
My practical advice is to keep the first order simple. One logo. One panel. One finish goal. That usually gives the best cost-to-impact ratio. A small embossed mark on a matte carton, or a raised emblem paired with a restrained foil accent, is often enough to move perception. You do not need to turn the whole carton into a special-effects exhibit just to prove it is premium.
If the brand is new to printed cartons with embossing, ask for a sample or hard proof whenever possible. Check the depth in natural light. Run your finger across the surface. Look at the carton folded, not just flat. A finish can look perfect on a press sheet and still feel wrong on the assembled box. The hand is part of the product experience, and buyers notice that faster than they admit.
When you request quotes, use a checklist. Keep it boring and complete:
- Carton size and style
- Quantity
- Board spec and thickness
- Print colors and coverage
- Emboss location and approximate size
- Any extra finishes such as foil stamping, spot UV, or lamination
- Packing method and delivery window
That checklist saves time and makes the quotes comparable. It also helps you avoid surprise charges later, which are never as surprising as the supplier hopes. For a serious purchasing decision, compare at least two or three vendors on tooling clarity, sample quality, and turnaround. The cheapest quote is not always the smartest one. Sometimes it is just the one with the most missing lines.
Here is the simplest way to think about the purchase: choose the carton spec that gives you the right tactile signal, not the loudest possible finish. Good printed cartons with embossing feel intentional. They make the product look like somebody cared. That is the point, and it is measurable in how the box lands in hand as much as how it photographs.
FAQ
What is the minimum order for printed cartons with embossing?
MOQ depends on the supplier, carton size, and whether a custom die is needed. Lower quantities are possible, but setup costs usually make them expensive per unit. Ask for tiered quotes at multiple quantities so you can see where the unit price improves and where the tooling stops dominating the cost.
How much do printed cartons with embossing usually cost?
Pricing depends on board, size, print complexity, emboss size, finish pairing, and total quantity. Simple logo embossing is typically less expensive than large-area or multi-level embossing. Always separate tooling from unit cost so you can compare quotes fairly. That split is the only way to spot the real difference between a competitive bid and a padded one.
How long do printed cartons with embossing take to produce?
Lead time includes design approval, die making, printing, emboss setup, and finishing. Straightforward jobs can move quickly, while complex cartons need more proofing and setup time. Build in extra buffer if your launch date is fixed. A delay at the die stage can ripple through the rest of the schedule faster than most buyers expect.
Can embossing work on coated or soft-touch printed cartons?
Yes, but the board and coating must be tested because the finish can affect crispness and depth. Some coated stocks hold detail better than others, so sample approval matters. Ask the supplier which stock gives the cleanest result for your design. A finish that looks luxurious in theory can flatten the relief in practice.
What files do I need for printed cartons with embossing?
You usually need the dieline, editable artwork, and a clear mark showing the emboss area. Provide vector files when possible so the supplier can separate print and tooling layers cleanly. Confirm final panel placement before production so the emboss lands exactly where you want it. A file that is tidy at the start saves money at every later step.
If you keep the board spec tight, the tooling clear, and the artwork disciplined, printed cartons with embossing can give you a premium look without wasting money on unnecessary extras. Approve the dieline early, request a hard proof before the final run, and ask for a quote that separates tooling from unit cost. That sequence is usually enough to turn a polished idea into a carton that feels right in hand and survives production without surprises.
Related packaging resources
Use these related guides to compare specs, costs, quality checks, and buyer decisions before making the final call.


