The sample looked sharp on the conference table. Then someone packed it with 12 ounces of product, shot it under a ring light, and the matte finish suddenly looked darker, flatter, and scuffed across the logo. That is why a get Printed Matte Zipper bags sample approval checklist belongs in the process before anyone signs off on bulk production.
Matte Zipper Bags feel more premium than standard glossy pouches. They photograph with less glare. They can make coffee, supplements, snacks, pet treats, apparel accessories, and cosmetics look more intentional. They are also less forgiving. A small color shift, weak zipper, tight tear notch, or barcode placed too close to a gusset can turn into thousands of annoying bags. Not defective enough to throw away cleanly. Just bad enough to bother everyone.
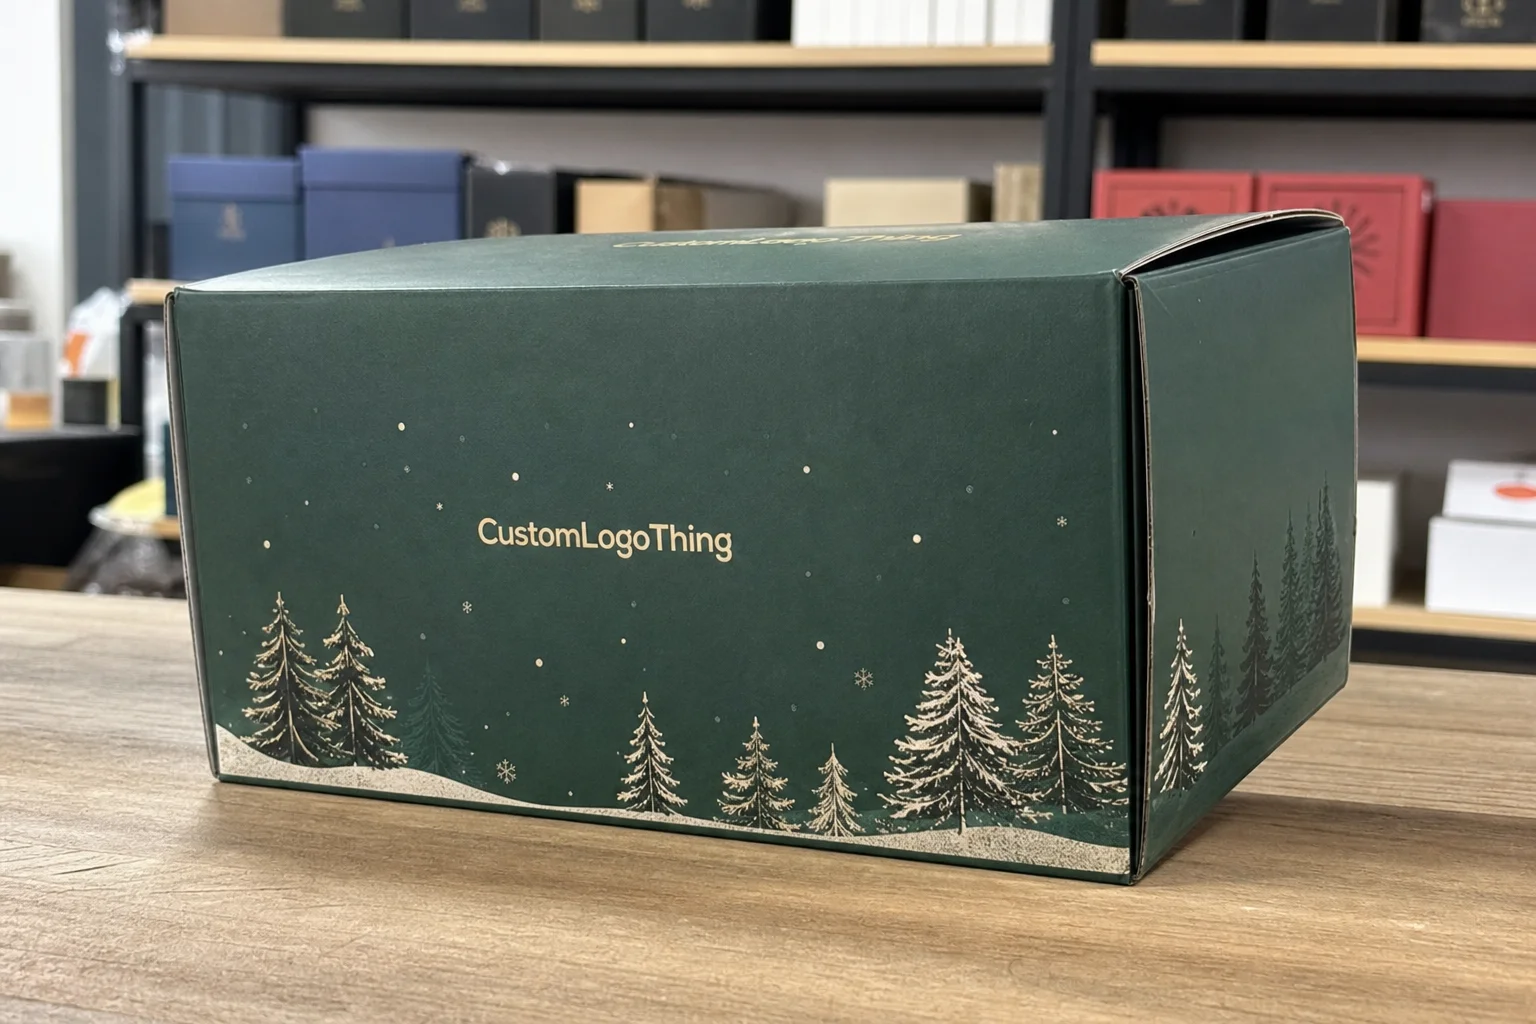
Get Printed Matte Zipper Bags Sample Approval Checklist Basics
Sample approval is not the same as liking a PDF proof. For custom Matte Zipper Bags, approval means checking the physical package: material, finish, zipper function, print placement, ink density, gusset shape, hang hole, tear notch, seal width, and barcode readability. If the pouch will sit on a retail shelf, survive ecommerce shipping, or appear in product photography, the sample review should test those conditions.
Most buyers approve the artwork, not the bag. Artwork can be perfectly centered on a dieline and still look wrong once the pouch is filled. The bottom gusset may pull the design downward. A soft-touch matte film may mute a brand color by a visible degree. A zipper may close cleanly when empty, then fight powder dust, crumbs, or oily residue after filling.
Matte plastic packaging scatters light instead of reflecting it cleanly like glossy film. Colors can appear softer, flatter, or slightly darker. A black logo on matte white film can look expensive. A low-contrast beige logo on matte kraft-style film can nearly disappear under warm store lighting. That is not always a printing failure. Sometimes the substrate changes the way the color is perceived.
A practical checklist separates four sample types that often get lumped together:
- Blank structural sample: Checks size, gusset, zipper, thickness, stand-up behavior, and product fit, but not final print.
- Digital print proof: Checks layout and approximate color, often faster and cheaper, but may not match production film or press conditions.
- Pre-production sample: Uses the intended structure, material, finish, and print method as closely as possible before the full run.
- Production sample: Pulled from the final run to confirm that approved specs carried into mass production.
That distinction matters. A $75 to $300 sample review can prevent much larger problems: misprinted inventory, delayed launches, repacking labor, retailer rejection, compliance rework, or photography reshoots. Sample approval is risk control. Not ceremony.
Practical rule: Do not approve a matte zipper bag until you have seen it packed, measured, photographed, scanned, opened, closed, and compared against the quote and dieline.
How Matte Zipper Bag Sampling Works Before Production
The usual path starts with artwork setup, dieline confirmation, material selection, proofing, sample making, shipping, buyer review, revisions, and written approval. It sounds tidy on a project timeline. In practice, delays show up when a buyer sends a low-resolution logo, changes the fill weight after the dieline is made, or approves a sample with a vague “looks good.”
A clean sampling process documents exactly what is being approved. The sample should match the quote number, artwork version, material spec, bag size, finish, zipper type, print method, and order quantity. If any of those items are unclear, the checklist is doing its job by slowing the decision down.
Before the sample reaches the buyer, the packaging supplier is usually checking film roll compatibility, sealing temperature, zipper alignment, print registration tolerance, ink adhesion, lamination behavior, and whether the chosen finish can support the artwork. Flexible packaging does not give much room for sloppy assumptions. A 2 mm registration shift may be acceptable on one layout and painfully obvious on another, especially if a logo sits close to a zipper, tear notch, or window.
Matte effects are produced in several ways. Some pouches use matte-laminated film, where a matte outer layer is bonded over the print. Some use matte varnish over selected or full print areas. Others rely on naturally low-gloss substrates, including frosted or kraft-look films. Each choice affects cost, scratch resistance, color intensity, tactile feel, and sustainability claims. For broad recycling guidance, buyers can review resources from the U.S. Environmental Protection Agency, though final claims still depend on the exact structure and local recycling access.
Samples can differ from mass production if nobody asks the awkward question: “Was this made with the same film and process we are buying?” A digital sample may be printed on a short-run device while production uses a different press setup. A blank stock pouch may prove the size but not the final matte layer. A pre-production pouch may be close, but not identical if the final roll stock has not been locked.
Use a simple decision rule. If the bag affects shelf appeal, food safety perception, child-resistance expectations, compliance labeling, or ecommerce unboxing photos, request a physical sample before bulk approval. Custom Logo Things can help buyers compare sample types, but the core principle is supplier-neutral: physical packaging should be tested physically.
Key Specs to Inspect: Film, Finish, Zipper, and Print
Break the inspection into four zones: structure, surface, print, and usability. That may sound formal, but flexible packaging failures rarely stay in one category. A thin film can change zipper feel. A crowded dieline can hurt barcode scanning. A heavy product can distort the gusset and drag artwork into the bottom fold.
Start with structure. Measure outside width, outside height, bottom gusset depth, side seal width, zipper height, tear notch placement, hang hole position, and usable inner space. A common stand-up pouch may use film in the 3.5 mil to 5 mil range, depending on product weight, barrier needs, and construction. Coffee may need aroma barrier and a degassing valve. Powder supplements may need stronger seals and cleaner zipper closure. Apparel accessories may need puncture resistance more than high oxygen barrier.
Then check the matte surface. Look at gloss level, texture consistency, fingerprint visibility, rub resistance, and scuffing around high-contact areas. Test under cool office light, warm kitchen light, and daylight near a window. Matte finishes can look elegant under one light source and tired under another. Many premium packaging projects lose discipline right here: the team judges the pouch under one conference room light, then wonders why launch photos look different.
Print inspection needs patience. Review logo sharpness, Pantone or brand color match, ink coverage, small text legibility, bleed, safe zone, front-to-back alignment, and whether the print still lands correctly after filling. Matte film can reduce perceived saturation, so color approval should happen on the real substrate whenever possible. If the bag includes a barcode or QR code, scan it flat, filled, upright, and slightly curved. Codes that work on a desk can fail once the pouch bows outward.
Zipper testing should be part of the approval checklist, not an afterthought. Open and close the zipper at least ten times. Fill the bag with the actual product weight, then repeat the test. Powders, coffee grounds, crumbs, and pet treat dust can interfere with closure. Check whether the seal area above the zipper tears cleanly from the tear notch. Customers should not need scissors unless the product category already expects that.
| Inspection Area | What to Check | Common Failure | Buyer Test |
|---|---|---|---|
| Structure | Width, height, gusset, seal width, thickness | Bag bulges or will not stand after filling | Measure with ruler or caliper, then pack real product |
| Matte Finish | Texture, gloss level, fingerprints, rub marks | Surface looks scuffed before retail handling | Rub lightly with clean fingers and photograph under three lights |
| Color, registration, small text, barcode, bleed | Logo appears muted or code fails on filled pouch | Compare to Pantone reference and scan codes after filling | |
| Usability | Zipper, tear notch, opening, stacking, squeezing | Zipper feels weak or seal is hard to tear | Open and close ten times, then simulate normal handling |
Photograph the sample beside a ruler, the packed product, and a brand color reference. These photos become the approval record. They also reduce later disputes because everyone can see what was accepted instead of debating what they thought they saw.
Cost, Pricing, MOQ, and What Changes the Quote
Sample cost and bulk unit cost are connected, but they are not identical. A sample may look expensive because artwork setup, plate preparation, material sourcing, press time, hand assembly, and courier shipping are spread over one or two bags instead of 5,000 or 50,000. That does not mean the final unit cost will be equally high.
For custom Printed Matte Zipper Bags, pricing usually moves with bag size, film thickness, barrier structure, number of print colors, matte lamination or varnish, zipper type, gusset style, valve, hang hole, tear notch, rounded corners, custom shape, order quantity, and shipping method. A small digitally printed pouch can price very differently from a high-barrier matte-laminated pouch with a valve and dense ink coverage.
As a practical range, buyers might see short-run custom pouches around $0.35 to $0.90 per unit at lower quantities. Larger runs can move closer to $0.12 to $0.35 per unit depending on size, film, print coverage, and freight. Specialty features push costs up. A degassing valve, premium soft-touch finish, unusual zipper, or extra-thick structure can add meaningful cost even if the bag looks simple.
MOQ deserves a clear discussion. Lower MOQs help new brands test packaging, launch limited batches, and avoid tying up cash. The tradeoff is higher unit cost because setup time and material waste are spread across fewer bags. Larger runs reduce unit cost, but they also increase the financial risk of approving a flawed sample. Saving $0.06 per unit does not help much if 20,000 bags need rework.
A paid pre-production sample is worth considering if the artwork includes gradients, metallic effects, dense ink coverage, transparent windows, regulatory text, or a premium matte finish. Screen proofs rarely predict how complex print and film layers behave together.
Do not compare quotes on unit price alone. A cheaper quote may exclude sample shipping, artwork adjustment, plate charges, matte finish upgrades, zipper strength requirements, final inspection, or import duties. Ask for a breakdown that separates sample fee, tooling or plate cost, bulk bag unit cost, freight, revision fees, and estimated duties if importing.
| Cost Item | Typical Range or Impact | Why It Matters |
|---|---|---|
| Physical sample fee | $75 to $300 for many custom projects | Covers setup, material handling, sample making, and review time |
| Plate or tooling charge | Varies by print method and color count | May be separate from unit price, especially for larger runs |
| Matte finish upgrade | Moderate to high impact | Affects feel, color, scratch resistance, and visual quality |
| Lower MOQ | Higher unit cost | Useful for testing, but less efficient per bag |
| Freight method | Air is faster; ocean or ground is cheaper | Can change launch timing and landed cost |
Process and Timeline From Proof to Approved Sample
A realistic sampling timeline depends on artwork readiness, material availability, print method, revision count, and shipping distance. A blank structural sample may move quickly. A printed matte pre-production sample with a custom film structure, valve, and detailed regulatory copy takes longer. The more custom the bag, the more calendar space should sit between sample request and launch deadline.
The sequence usually looks like this: artwork review, dieline correction, digital proof, sample production, transit, buyer testing, revisions, and final written approval. For many custom packaging projects, buyers should expect several business days for artwork and dieline cleanup, additional time for sample production, then shipping and internal review. If revisions are needed, part of the process resets.
Delays often start before production, not during it. Missing nutrition panels, low-resolution logos, undecided bag size, unconfirmed fill weight, and late barcode files can stall sampling faster than any press bottleneck. A packaging supplier cannot accurately check safe zones if the final ingredients panel is still being rewritten.
Buyers can compress the timeline responsibly. Submit final artwork in vector format. Approve the dieline before sampling. Provide Pantone references or physical brand standards. Confirm product dimensions, fill weight, and whether the bag must stand upright. Decide whether the sample needs to be blank, digitally printed, or made on production-intent materials.
Revision loops need boundaries. One revision for color or placement is normal. Repeated changes to size, finish, artwork, and zipper type can create new sample fees and reset production planning. Strong feedback is specific: “Move logo up 4 mm,” “Increase barcode quiet zone,” or “Switch from soft-touch matte to standard matte lamination for better rub resistance.” Vague feedback creates vague results. Shocking, I know.
Build a buyer-side testing window into the schedule. A sample should not be approved five minutes after delivery. Pack the actual product. Leave it overnight. Test the zipper again. Photograph the front and back. Scan every code. Review under multiple lighting conditions. If packaging is needed for product photography, retailer onboarding, influencer seeding, or inventory receiving, sample approval belongs near the front of the launch calendar, not the final week.
Step-by-Step Sample Approval Review for Buyers
Use the approval checklist as a structured review, not a loose opinion session. The goal is not to find flaws for sport. The goal is to decide whether the sample is fit for production, needs a documented change, or requires a new sample.
- Confirm the sample identity. Match the sample to the quote, dieline, material spec, artwork version, size, finish, and order quantity. A beautiful sample is still risky if it came from the wrong revision.
- Measure the bag. Check outside dimensions, inner usable space, gusset depth, zipper height, tear notch placement, hang hole position, and seal width. Compare measurements to the approved dieline and record any variance.
- Pack the real product. Fill the bag with the actual weight and volume. Test whether it stands, seals, bulges, wrinkles, or distorts the front design. A 250 g powder fill behaves differently from 250 g of pet treats.
- Inspect print quality. Review color, registration, logo placement, spelling, ingredients, warnings, barcode, QR code, social handles, and country-of-origin details. Scan codes after the bag is filled, not only while flat.
- Stress test the user experience. Open, close, tear, squeeze, stack, and photograph the pouch. If customers will use it in a pantry, gym bag, freezer, or shipping mailer, simulate that environment before approval.
- Document approval. Send written approval with marked photos, accepted specs, and allowed tolerances. If changes are needed, request a revised proof or new sample before bulk production.
Distribution changes the review, too. If bags will ship through parcel networks, consider outer carton testing and transit risk. The International Safe Transit Association publishes widely used packaged-product testing protocols at ISTA.org. Not every pouch project needs formal ISTA testing, but ecommerce brands should understand how compression, vibration, and handling can expose weak seals or scuff-prone finishes.
For food, supplements, pet treats, and cosmetics, do not let design enthusiasm override compliance review. Lot-code areas, ingredient panels, net weight, warnings, and country-of-origin details need enough space and contrast to remain readable after filling. Matte finishes can make small gray text feel softer than expected. If the copy matters legally or operationally, the right reviewer should check it before production.
Common Mistakes That Cause Rejected Matte Bag Samples
The first mistake is approving color from a screen. Monitors emit light; matte bags reflect it. That physics gap explains many “but it looked right in the proof” disputes. Pantone references, printed drawdowns, and substrate-based samples reduce the risk, although they do not eliminate normal production tolerance.
The second mistake is ignoring fill behavior. Empty Matte Zipper Bags can look crisp and flat. Filled bags may bow outward, hide lower artwork, wrinkle near the gusset, stress the zipper, or make the bottom panel uneven. If the front design relies on a clean rectangular block, filling can change the whole visual.
The third mistake is forgetting compliance copy. Food, supplements, cannabis-adjacent products, pet treats, and cosmetics may need warnings, lot-code areas, nutrition panels, ingredients, or specific formatting. A missing compliance detail can force reprinting even when the bag looks beautiful.
The fourth mistake is treating matte as one finish. Soft-touch matte, standard matte lamination, matte varnish, frosted effects, and kraft-look films do not perform the same. Some feel luxurious. Some are more cost-conscious. Some support stronger recyclability narratives, depending on the film structure. Some show rub marks faster in distribution.
The fifth mistake is failing to test barcode and QR codes on the curve of the filled bag. A code placed near a side seal or gusset may scan flat but fail after packing. Quiet zones matter. Contrast matters. The code size matters more than many designers want to admit.
The sixth mistake is verbal approval. Without a written record, teams can disagree later about whether a scuffed finish, shifted logo, tight zipper, or muted color was accepted. Written approval protects both the buyer and the supplier because it defines the decision in evidence, not memory.
Before You Approve Bulk Production
Create a one-page approval sheet. It should list bag size, usable inner space, material structure, thickness, finish type, zipper type, print colors, artwork version, sample date, reviewer name, decision status, and required changes. This turns subjective packaging feedback into a traceable record.
Gather the right reviewers early. The brand lead should check color and design. Operations should test packing speed, fill behavior, and zipper handling. Compliance should review required text. Sales should consider retailer expectations. Customer service should judge usability. Five minutes with the right people beats a week of scattered opinions from people who cannot approve the spec.
Separate must-fix issues from preferences. A barcode that fails to scan is a must-fix. A weak zipper is a must-fix. Missing regulatory copy is a must-fix. A logo that feels 2 mm too high may be a preference unless it affects shelf blocking, safe zones, or brand consistency. This distinction keeps revisions focused and launch calendars realistic.
Ask your supplier three direct questions before approval:
- Will bulk production use the same material, thickness, finish, and print method as the approved sample?
- What tolerances apply to color, size, seal width, zipper placement, and print registration?
- Which changes would require a revised proof or new physical sample?
Set a final approval deadline tied to the launch calendar, not only the factory schedule. Packaging approvals affect filling appointments, product photography, freight booking, retailer onboarding, influencer seeding, inventory receiving, and cash flow. A late pouch decision can ripple across the whole product plan.
Sign off only after the bag is packed, measured, photographed, scanned, stress-tested, and confirmed against the quote. If the sample passes those checks, bulk production becomes a controlled decision. If it fails, you caught the problem while it was still small enough to fix.
Frequently Asked Questions
What should be included in a printed matte zipper bags sample approval checklist?
Include bag dimensions, usable inner space, film thickness, matte finish type, zipper function, gusset shape, seal strength, print color, artwork placement, barcode scanning, QR code scanning, product fill behavior, and written approval notes. Attach photos of the sample with a ruler, packed product, and color reference so every reviewer is judging the same evidence.
Do I need a physical sample before ordering custom matte zipper bags?
A physical sample is strongly recommended when color accuracy, premium finish, food packaging, retail display, or exact product fit matters. A digital proof may be enough for a simple repeat order, but it cannot confirm texture, zipper feel, fill behavior, matte surface performance, or how the bag photographs after filling.
How long does sample approval take for printed matte zipper bags?
Timing depends on artwork readiness, material availability, print method, sample type, revision count, and shipping distance. Buyers should budget time for internal testing after the sample arrives instead of approving it the same day. Even a simple review should include packing, measuring, scanning, photographing, and zipper testing.
Why does matte zipper bag color look different from the proof?
Matte film scatters light, which can make colors appear softer, darker, or less saturated than they do on a backlit screen. Pantone references, real-substrate sampling, and viewing the pouch under cool, warm, and daylight lighting reduce surprises before production.
What sample issues should stop bulk production approval?
Stop approval for incorrect size, weak zipper closure, unreadable barcode, missing compliance text, major color mismatch, poor seal quality, wrong material, or artwork outside the safe zone. Request a revised proof or new sample when the issue affects safety, usability, legal compliance, or brand presentation.


