Buyer Fit Snapshot
| Best fit | Printed Padded Mailers for Sample Kits projects where brand print, material claims, artwork control, MOQ, and repeat-order consistency need to be specified before quoting. |
|---|---|
| Quote inputs | Share finished size, material target, print colors, finish, packing count, annual reorder estimate, ship-to region, and any compliance wording. |
| Proofing check | Approve dieline scale, logo placement, barcode or warning zones, color tolerance, closure strength, and carton packing before bulk production. |
| Main risk | Vague material claims, crowded artwork, missing packing details, or unclear freight terms can make a low unit price expensive after revisions. |
Fast answer: Printed Padded Mailers for Sample Kits: Sustainable Options should be specified like a repeatable production item. The safest quote records material, print method, finish, Artwork Proof, Packing Count, and reorder notes in one written spec.
Production checks before approval
Compare the actual filled-product size with the drawing, then confirm tolerance on folds, seals, hang holes, label areas, and retail display edges. Reserve space for logos, QR codes, warning copy, and material claims before decorative graphics fill the panel.
Quote comparison points
Review material grade, print process, finish, sampling route, tooling charges, carton quantity, and freight assumptions side by side. A quote is only useful when the supplier can repeat the same color, closure quality, and packing count on the next order.
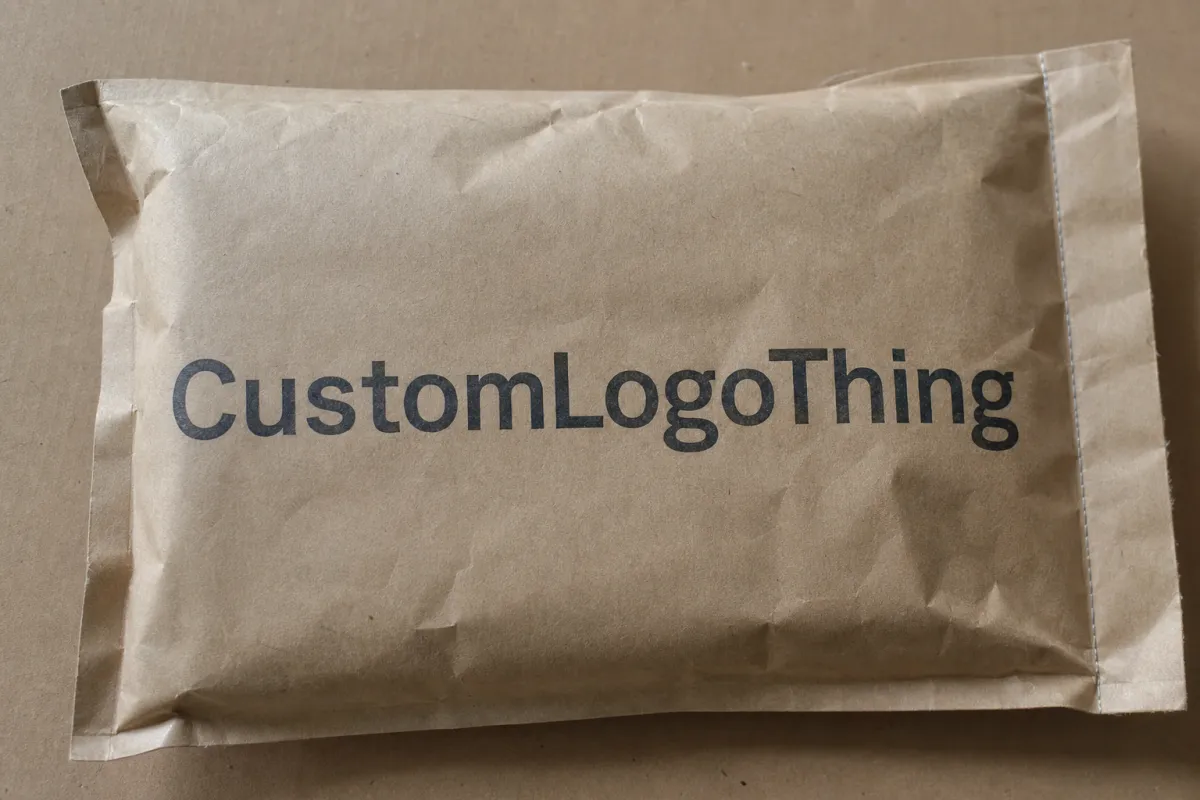
Printed Padded Mailers for Sample Kits: Sustainable Material Options
If a sample kit is going to earn attention, the outer mailer usually does the heavy lifting before anyone touches the inserts. Printed Padded Mailers for Sample kits sustainable material options shape that first read fast: they signal that the shipment was planned, they protect the contents from ordinary transit damage, and they support a cleaner materials story without making the kit feel cheap or thrown together. For brands sending product samples, swatch cards, mini kits, or launch mailers, the right mailer has to do three jobs at once: look intentional, survive shipping, and avoid waste that adds nothing to the experience.
That balance matters because sample kits are a strange little category. They are often slimmer than a box, but they are also more likely to carry multiple components, folded literature, product vials, sachets, or cosmetic inserts that need to arrive flat, clean, and ready to open. A good printed padded mailer keeps the whole stack in place. A bad one crushes corners, rubs ink, or makes the kit feel rushed before the recipient even sees what is inside.
Material choice is no longer only about reducing waste. It affects unit price, print quality, handling feel, curbside recyclability, and how a sustainability claim lands with buyers who have heard every green slogan in the book. That is why anyone comparing padded mailers should look at the full build, not just the headline material. A mailer built around 350gsm C1S artboard, for example, has a different print feel and stiffness than a softer kraft-fiber construction, and that difference shows up in the hand and in transit. In the sections below, I walk through construction, sustainable substrate choices, lead time, pricing, and the checks that keep teams from overbuilding a mailer for a job that does not need it.
Printed Padded Mailers for Sample Kits: Why They Matter
A sample kit is often judged before the insert is even seen. The mailer lands first, and that outer layer sets the tone for the whole shipment. Clean print, a neat closure, and a package that feels considered in the hand make the kit read as more valuable. A flimsy, dirty, or generic mailer sends the opposite message. Small detail. Big effect. Packaging gets blamed for that all the time, and usually deservedly so.
Printed padded mailers are lightweight outer mailers with a cushioning layer built to keep flat contents from shifting, bending, or rubbing against each other. In practice, they give enough structure for sample sets, marketing kits, press mailers, and small fulfillment orders without jumping all the way to a rigid box. That can mean less shipping weight, easier pack-out, and lower material usage than a corrugated shipper when the contents are slim enough to fit properly.
For sample kits, that middle ground is useful. These kits often include more than one piece: a product sample, a folded card, instructions, branding inserts, maybe a small pouch or sealed sachet. The outer mailer has to protect those pieces while still staying easy to open and easy to stack in fulfillment. A mailer that is too soft can wrinkle and distort. One that is too heavy or oversized can push freight up and make the kit feel overbuilt.
The sustainability angle belongs in the conversation from the start. Buyers are not comparing just “eco” versus “non-eco.” They are comparing recycled materials, FSC-certified paper, post-consumer waste content, barrier performance, print finish, and whether the structure is actually recyclable in the region where customers live. That is where the tradeoffs get real. A kraft paper face may support a natural brand look and a more straightforward recycling path, while a hybrid build may handle moisture and abrasion better but need more careful documentation. If the pack is for a flat cosmetics sample set, a 6 x 9 inch mailer may be enough. If it carries a thicker assortment with folded cards and a vial tray, 8.5 x 11 or 9 x 12 inches is more realistic. The size matters more than the mockup. Always does.
Practical rule: if the contents are flat, moderately light, and not easy to crush, a well-built padded mailer usually gives a better cost-to-presentation ratio than a small box. If the contents are fragile, irregular, or hard, the box still earns its keep.
That is the basic decision frame for any team reviewing printed Padded Mailers for Sample kits sustainable material options. Start with the contents, then decide what level of protection and presentation the kit actually needs. If you are still building the broader packaging system, it can help to browse Custom Packaging Products and compare how mailers, inserts, and outer shippers work together as one package family.
How Printed Padded Mailers Work
At a basic level, a padded mailer has three jobs. The outer face carries branding and print. The middle layer adds cushioning. The closure keeps the package sealed without extra packing steps. Straightforward on paper. The quality of the build decides whether the mailer behaves once it enters the parcel system, which is where packaging gets judged for real.
The cushioning layer absorbs the small shocks that happen in normal shipping: a drop from a conveyor edge, a scrape against another parcel, or compression when several packages are stacked together. Sample kits are lighter than cartons, but lighter does not always mean safer. Thin contents can still dent, crease, or scuff if the mailer lets them slide around. A good padded structure reduces that movement and keeps the interior stable enough that the recipient opens a neat package instead of a bag of shifted parts.
In many programs, padded mailers beat small boxes when the shipment is slim and the contents are flat. They use less dimensional space, which can reduce shipping charges, and they simplify fulfillment because the packer does not need separate void fill or internal stabilization. For a team sending hundreds or thousands of sample kits, those minutes matter. So does storage footprint. Mailers take up less warehouse room than corrugated cartons, which is a real issue when inventory space is tight and nobody wants another wall of packaging eating the floor plan. A standard carton may need extra inner wrap and tape; a mailer usually does not. That is the point. Less handling, fewer parts, fewer chances to mess it up.
Printing depends on the substrate family. Paper-based faces usually take branding well, especially when the design uses bold color blocks, clean logos, or restrained line work. Recycled content materials can also print well, although the surface finish may be a little softer or more textured than a premium coated sheet. Hybrid constructions, where paper and film components are combined, can offer a different balance of scuff resistance and presentation quality. Good ink adhesion matters either way. Fold quality matters too, because a mailer that cracks at the seams or feathers at the creases will look tired before it is even shipped. A decent spec might call for a 350gsm C1S artboard face with a 120gsm recycled kraft inner layer, or a kraft face with a paper-fiber padded liner. Those are common, workable builds. Not magic. Just specific.
There is a limit to what this format should be asked to do. A padded mailer is not a substitute for a rigid shipper when the contents are glass, brittle cosmetics, weighted components, or loose parts that can collide inside the pack. If the product needs immobilization, a carton with structured inserts is still the safer choice. The right format is the one that matches the actual shipment risk, not the one that just looks more premium in a mockup.
For teams comparing mailer styles against other flexible pack formats, it is useful to look at Custom Poly Mailers as a reference point. Poly mailers are lighter and often cheaper, while padded mailers add a layer of protection and a more finished presentation. That comparison helps clarify whether the kit needs cushioning or just a branded outer shell.
Printed Padded Mailers for Sample Kits Sustainable Material Options
This is where most buying decisions get serious. The phrase Printed Padded Mailers for Sample kits sustainable material options sounds broad, but the actual choices come down to a few concrete build questions: what the outer face is made from, what the padding is made from, how the closure works, and what claim can be supported with paperwork. A sustainable mailer is not automatically better just because it uses less plastic. It has to perform well enough for the route, the contents, and the recipient’s expectations. Otherwise it is just a nicer-looking problem.
Paper-based outer faces are often the easiest place to start. Kraft paper is familiar, printable, and widely accepted in packaging programs that want a more natural look. If the mailer uses recycled fiber content or post-consumer waste, that can support a resource-conscious story without changing the customer experience too sharply. Many brands like the matte texture because it feels honest and less glossy than a film-based pack. That said, a paper face can show moisture, rub marks, and edge wear more quickly if the shipment sees rough handling.
For a more polished look, some teams move to coated paper faces such as 350gsm C1S artboard or a similar SBS sheet with a clay-coated front side. That gives sharper type and better solid ink coverage, especially if the design uses full-bleed color or a brand mark that needs clean edges. It is not the most rustic option, and it is not always the most recyclable one, but it can be a smart choice when presentation matters and the mailer is still meant to feel paper-led. The trick is matching the sheet to the use case instead of forcing a single sustainability narrative onto every job.
Film-based or hybrid constructions are usually selected when durability matters more than a pure paper look. They can resist scuffing and moisture better, which helps if the kit travels through humid environments or sits in a fulfillment queue before shipping. The sustainability conversation then gets more specific. Is the build recyclable in the intended market? Does it use recycled materials? Is the recovery path clearly documented? Those questions matter more than the marketing label on the front of the sheet.
The cushioning layer deserves equal attention. Padding can come from kraft fiber, recycled fiber, molded paper, or other paper-based structures, and the choice affects burst strength, flexibility, weight, and the hand feel of the mailer. A denser padding layer may protect better but add bulk. A lighter one may lower cost and shipping weight but fail if the contents have sharp corners or hard edges. The best choice depends on the contents, not on a generic sustainability ranking that sounds good in a sales deck. For sample kits with folded cards and sachets, paper padding is often enough. For sample kits carrying glass vials or small metal components, more structure is usually worth the extra spend.
Green claims need evidence. Buyers should ask for documentation on recycled content, FSC-certified paper sourcing, and the exact recyclability guidance by region. If a supplier uses compostable or biodegradable packaging language, that claim should be reviewed carefully and tied to the real disposal path. Compostable does not mean universally composted, and biodegradable does not mean fast or harmless in every disposal environment. The safest packaging claim is the one you can explain clearly and prove with supplier data.
Branding is part of the material decision too. Some sustainable substrates hold sharp color beautifully, especially if the design uses strong type and limited coverage. Others create a softer, more tactile print surface that suits earthy palettes, minimalist layouts, or brand systems built around natural texture. Neither is better in the abstract. The question is whether the visual language fits the product and the audience. A mailer can be clean without pretending to be a halo product.
| Mailer Build | Typical Strength | Brand Look | Sustainability Angle | Common Use Case | Approx. Unit Cost Range |
|---|---|---|---|---|---|
| Kraft paper face with paper padding | Good for flat, light-to-moderate kits | Natural, matte, tactile | Often easier to position as recyclable and fiber-based | Beauty samples, literature kits, swatch sets | $0.20-$0.42 at 5,000 pieces |
| Recycled-content paper hybrid | Moderate to good, depending on structure | Clean, slightly textured, brandable | Can support recycled content and reduced virgin fiber use | Press kits, subscription samples, retail outreach | $0.24-$0.55 at 5,000 pieces |
| Paper-film hybrid with padding | Better scuff and moisture resistance | Sharper graphics, more polished surface | Needs careful claim review and recycling documentation | Shipping routes with rough handling or humidity | $0.28-$0.68 at 5,000 pieces |
| Premium structured padded mailer | High protection for flatter products | Premium, rigid feel | May use more material, so sustainability depends on build | Launch kits, high-value samples, specialty packs | $0.32-$0.90 at 5,000 pieces |
The table above is a solid starting point, not a substitute for a quote tied to actual dimensions and print coverage. Two mailers that look similar on paper can price very differently once you account for substrate availability, print colors, and run size. A buyer who wants a more defensible sustainability story should also ask whether the supplier can separate substrate cost, print cost, and freight in the quote. That makes the tradeoff easier to read and a lot harder to dress up with vague language.
For practical benchmarking, this is a useful range: at 5,000 pieces, custom printed padded mailers often land around $0.15-$0.24 per unit for simpler paper-based builds with modest print coverage, while more complex structures, heavier board, or higher ink coverage can push the number higher. At 1,000 pieces, the same job may run closer to $0.35-$0.80 each because setup costs are spread across fewer units. At 10,000 pieces, the price may drop into the $0.11-$0.18 range if the spec stays straightforward. That spread is normal. The quote that looks cheap at 1,000 units can look very different once the full run and freight are added.
For more on fiber sourcing and responsible paper systems, the FSC site is a useful reference. For broader recycling guidance, the EPA recycling page explains how regional access changes what is actually recyclable in practice. Those details matter because a package claim should follow the path a consumer can realistically use, not the one a brochure wishes existed.
Process and Timeline: From Artwork to Delivery
Production starts long before the mailer reaches a press. The first step is confirming the structure and size. After that comes artwork setup, proofing, and sometimes a physical sample. Only then does the job move into full print and finishing. It can feel slow if you are used to off-the-shelf packaging, but each step removes a risk that would cost more if it showed up after production. Packaging rarely rewards optimism.
The most common delays come from avoidable issues. Artwork that is not print-ready can stall proofing. Sustainability documentation can slow approval if the buying team needs to confirm recycled content or FSC-certified sourcing. A team that is still debating between two substrate options can also lose time because the line cannot begin until the spec is locked. In practice, the package does not just need design approval; it needs material approval, size approval, and often routing approval from whoever handles fulfillment.
Print complexity affects the schedule too. More colors mean more setup. Special coatings can add a separate finishing step. Die-cut adjustments or custom closure changes can extend the front end of the job before the press run begins. If the brand wants fine typography, exact Pantone matching, or large solid ink areas on a textured paper face, build extra room for proofing because those details are where subtle shifts become visible.
The cleanest projects are the ones that treat the mailer as part of the launch calendar, not a last-minute purchase. If a sample kit is tied to a trade show, sales rollout, media drop, or retail refresh, the mailing date should drive the packaging schedule backward. That gives the team enough time to sample, test, revise, and approve before hundreds or thousands of units are packed. I have seen simple mailers become bottlenecks because the insert was ready, the product was ready, and the packaging was still waiting on a proof sign-off. Not glamorous. Still common.
A practical lead-time rule is to leave room for both approval and testing. A digital proof can come back in 1 to 2 business days if the art is clean. A physical prototype or shipping sample may take another 3 to 5 business days, depending on the substrate and the shop load. Full production for a standard printed padded mailer run often sits around 12 to 15 business days from proof approval, then add freight. If the job uses a specialty paper, custom size, or heavier print coverage, the timeline can stretch. That is not a surprise. It is just production doing production things.
Even if the first digital proof looks right, the first physical sample can reveal things that never show up on screen: a closure line that sits too close to artwork, a fold that softens the logo, or a surface that prints with less contrast than expected. Build time for that correction window. A package that is tested before full production is much less likely to become the first quality check in a customer’s hands.
For teams that want a broader view of how packaging production fits together, Packaging Europe has useful industry coverage on materials, regulations, and format shifts. It is a practical way to track how sourcing and sustainability expectations keep changing across the sector.
Cost, Pricing, MOQ, and Quote Factors
Pricing for printed padded mailers is shaped by a handful of variables that buyers can actually control once they understand them. Material type is the biggest. Size is next. Then come print coverage, number of colors, closure style, and whether the build uses a premium sustainable substrate that is harder to source. A mailer with a simple one-color logo on kraft paper may sit in a very different cost band than a full-coverage branded mailer with recycled-content hybrid construction and custom sizing.
MOQ matters because setup costs have to be spread across the run. If a supplier is preparing plates, adjusting a die, or sourcing a specialty paper, a 1,000-piece order will carry a much higher per-unit cost than a 10,000-piece order. That does not make the smaller run wrong. It just means the economics change. A buyer ordering a limited launch kit should expect the unit price to reflect those setup steps. The same is true for custom packaging in general, whether the format is mailers, cartons, or branded inserts.
The cheapest quote is not always the best value. A lower-cost mailer can become expensive if it causes damage, forces slower packing, or clashes with the brand’s presentation standard. One damaged sample can cost more than the savings on several mailers once you account for replacements, service recovery, and the lost impression from a disappointing opening experience. Packaging should be measured by landed value, not unit price alone. Cheap is not a strategy. It is a line item waiting to bite back.
Landed cost includes freight, storage, fulfillment labor, and waste from over-ordering. A bulky mailer may be cheap on paper but expensive to store. A lightweight mailer may ship well but fail transit tests. A better-priced sustainable option may reduce damage enough to justify itself, even if the first quote looks higher. That is why the quote needs context.
Here is a simple way to read it:
- Material cost: paper face, recycled content, hybrid structure, padding type.
- Print cost: number of colors, coverage area, registration complexity, special finishes.
- Logistics cost: freight, cube in storage, pack-out speed, damage rate.
- Compliance cost: documentation for FSC-certified claims, recycled content, or regional recyclability.
Sustainability can move pricing in either direction. Sometimes a recycled fiber build is competitive because the supplier can source it efficiently. Sometimes it costs more because the substrate is in shorter supply or requires a different production flow. Buyers should ask for a line-item view where possible so the material premium, print premium, and freight premium are all visible. That makes it easier to compare options without guessing where the difference came from.
When the mailer is part of a larger packaging program, that full comparison gets easier if you are already coordinating other components through a single packaging partner. The custom packaging system works best when size, insert, and outer shipper are evaluated together instead of as separate purchases.
Step-by-Step Guide to Specifying the Right Mailer
The best way to specify printed padded mailers is to start with the contents, not the packaging catalog. List everything the sample kit must hold: product units, inserts, cards, small accessories, instruction sheets, tissue wrap, and any protective pouching. That list gives you the real packed footprint, which is the number that matters for sizing. A kit that looks small on a desk can become much thicker once the insert stack is folded and the product samples are nested inside.
Next, measure the finished pack, then add tolerance. That tolerance should account for the padding layer, the closure area, and a little room for movement during transit. If the contents can slide or press into a corner, the mailer is too tight. A snug fit may look efficient, but a package that is forced shut often damages the contents or stresses the seams. It is usually better to move up to the next size than to force a package that was never meant for the actual load.
After the size is set, choose the structure. Ask whether the route requires more moisture resistance, more scuff resistance, or simply a cleaner paper presentation. If the brand wants a natural look, kraft paper can be an excellent fit. If the shipment is likely to encounter rough handling or warehouse dwell time, a hybrid may be worth the extra scrutiny. Match the build to the transit path, not to a generic “premium” preference.
Then write a clean spec sheet. It should include:
- Finished internal and external dimensions
- Print placement and ink colors
- Required certifications or sourcing notes
- Closure type and seal strength
- Quantity and target ship date
- Whether the priority is recyclability, visual impact, or transit durability
That document saves time later because it removes guesswork from the quote and proof stages. It also gives the supplier something concrete to review against test samples. A good spec sheet is not long; it is accurate. If you already know the insert stack measures 7.8 x 10.2 x 0.6 inches when packed, write that down. If you need a matte paper face with a soft-touch feel, say so. If you want the mailer to stay under a certain weight because freight brackets matter, include that too. Vague briefs create expensive surprises.
Finally, order a proof or sample and test it with the real contents. Do not test with an empty mailer and assume the result transfers. The weight, thickness, and edge profile of the actual kit can change the way the mailer folds and closes. A simple transit test, even if it is not a formal ISTA lab run, can reveal whether the contents shift or the closure loosens. If you want a more formal reference point for transit performance, the ISTA site outlines testing standards used across packaging development.
Small revisions at this stage are cheap. Reprinting after a full run is not. That is why the safest way to buy printed padded mailers for sample kits sustainable material options is to treat the sample as a production rehearsal, not just a pretty proof.
Common Mistakes, Expert Tips, and Next Steps
The most common mistake is sizing the mailer to the product, instead of sizing it to the finished kit. That sounds subtle, but it is often the difference between a package that arrives crisp and a package that arrives crushed at the edges. The second common mistake is assuming all sustainable materials perform about the same. They do not. One paper-based build may be perfectly fine for a flat literature kit, while another may be too soft for a route with heavy compression or moisture exposure.
A third mistake is treating green claims casually. If a mailer is recyclable in theory but the local collection system does not support that stream, the claim needs more care. If recycled content is being promoted, the supplier should be able to document it. If a package is described as biodegradable packaging, the buyer should ask under what conditions and in what time frame. Those details sound picky, but they are what separate a credible claim from a risky one.
From a production standpoint, a few habits consistently improve results. Keep artwork clean and intentional. Limit special effects unless they genuinely support the brand. Standardize sizes across programs where possible so inventory and fulfillment stay simpler. Most importantly, test the mailer with the actual sample kit before approving bulk production. That single step catches enough problems to justify itself many times over.
If the team is comparing options, the next move is usually simple:
- Gather the finished kit dimensions and component list.
- Map the shipping route and likely handling conditions.
- Request two or three substrate options with clear documentation.
- Compare quotes by landed cost, not only unit price.
- Confirm proof timing and production lead time before placing the order.
That process keeps the decision grounded. It also prevents the all-too-common problem where packaging is chosen for a render instead of for real shipping conditions. The right mailer should be easy to explain to procurement, marketing, and fulfillment without changing the story for each team.
If the sample kit is part of a wider campaign, it can help to evaluate the mailer alongside inserts, labels, and outer shippers at the same time. That is where packaging choices stop being separate line items and start behaving like one coordinated system. For many brands, that is the difference between a kit that feels assembled and a kit that feels designed.
So, if you are sorting through printed padded mailers for sample kits sustainable material options, keep the decision practical: protect the contents, support the brand, and choose a material path you can defend with documentation and real-world performance. The right spec is not the one with the loudest sustainability claim. It is the one that survives the route, opens well, and still makes sense after the invoice lands.
FAQ
What sustainable material options work best for printed padded mailers for sample kits?
Paper-based outer faces with recycled fiber padding are often the easiest starting point when the kit is light to moderate and the brand wants a more recyclable look and feel. Hybrid builds can be useful when you need better moisture or scuff resistance, but you should confirm the exact recycling path and documentation before claiming sustainability benefits. A practical spec might be a kraft paper face, paper fiber padding, and FSC-certified sourcing where available.
Are printed padded mailers better than boxes for sample kits?
They are usually better for flat, slim, lightweight kits because they reduce bulk, lower shipping weight, and simplify fulfillment. Boxes still make more sense when the samples are fragile, irregularly shaped, or need rigid internal protection to prevent movement. If the kit includes glass, hard components, or stacked items that can collide, the box usually wins.
How do I choose the right size for a sample kit mailer?
Measure the finished packed kit, not just the product components, and allow room for padding, inserts, and a clean seal. If the contents can slide around or create pressure points, move up to the next size rather than forcing a tight fit that could damage the kit. Common custom sizes for sample kits range from about 6 x 9 inches to 9 x 12 inches, with larger formats used for thicker launch kits.
What affects pricing and MOQ for printed padded mailers?
Material choice, print coverage, number of colors, closure style, and required certifications all influence the quote. MOQ matters because setup costs are spread across the run, so lower quantities usually carry a higher unit cost. As a practical benchmark, 5,000-piece orders often land around $0.15-$0.24 per unit for simpler builds, while smaller runs may cost more and larger runs may reduce the unit rate if the spec stays consistent.
How long does production usually take for sustainable printed mailers?
Timeline depends on artwork readiness, proof approval, substrate availability, and the complexity of the print spec. A digital proof may take 1 to 2 business days, a physical sample can add 3 to 5 business days, and full production often runs 12 to 15 business days from proof approval before freight. Build extra time for revisions and testing, especially if you are validating a new sustainable material option for the first time.


