Retail embroidered logo Hats Print Options sound straightforward until a buyer has to choose one for a real shelf, with a real margin, on a real deadline. The first thing most shoppers register is not the logo itself. It is the texture of the decoration, the edge quality, and whether the crown looks intentional or improvised. A hat can carry the same artwork in three different ways and still read like three different products: premium, promotional, or unfinished. That is why the decoration decision matters so much on retail headwear.
People often use “print options” as a broad label, but on caps the field is wider than that. The main choices are flat embroidery, 3D puff embroidery, woven patches, embroidered patches, screen print, heat transfer, and digital print. Each one changes the hand-feel, the cost structure, the minimum order, and the way the hat photographs under store lighting. The right method depends on more than art preference. It depends on how the cap will be sold, how close the customer will look, and how much punishment the decoration has to survive before it reaches the register.
Retail embroidered logo hats print options: what buyers see first
Retail buyers often spend a lot of time on artwork and not enough time on the physical impression. That is a mistake. On a cap, the decoration is judged at arm’s length, under overhead lighting, while the shopper is moving. A raised stitch line, a sharp patch border, or a clean print edge tells the customer something about quality long before they inspect the logo. A design that looks competent on a flat proof can feel crowded, flat, or cheap once it sits on a curved crown.
Here is the simplest way to frame the main decoration paths:
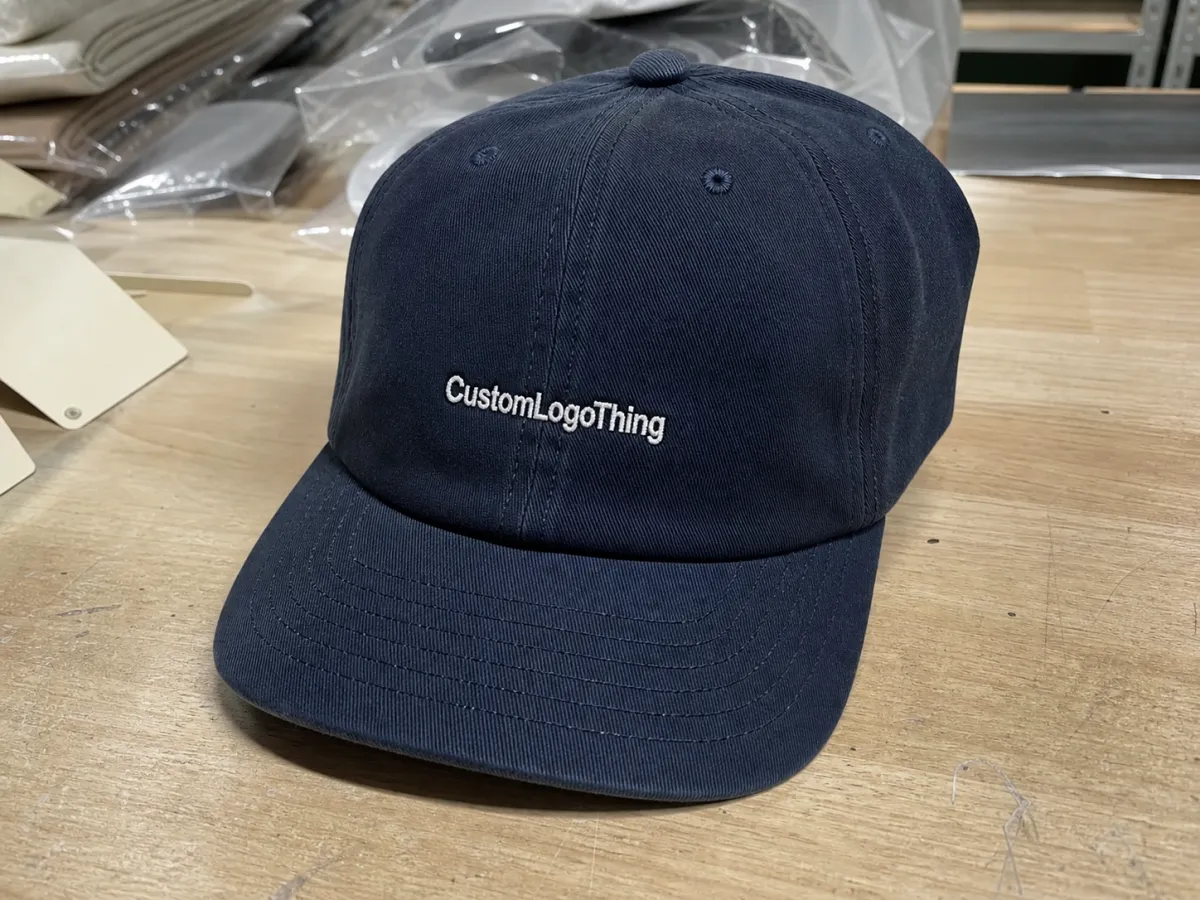
- Flat embroidery stitches directly into the cap and gives a textured, durable finish.
- 3D puff embroidery uses foam under the thread so select areas rise above the surface.
- Woven patches capture fine detail in a tighter woven face, then attach to the cap.
- Embroidered patches add a more dimensional, stitched look with a border around the design.
- Screen print places ink on top of the cap and works best for simple graphics.
- Heat transfer and digital print handle smoother gradients, smaller runs, and more complex color art.
The phrase “print options” can hide an important fact: a retail hat is not a poster. It is a curved, structured object with seams, panels, and materials that all change how decoration behaves. On some programs, embroidery sells better because the thread gives the cap more substance. On others, a patch is the better retail move because it creates a more fashion-led front and separates the artwork from the blank fabric. The cap needs to match the positioning. A premium hat should feel like a premium object before the customer even reads the name.
Buying tip: if the decoration only works in a mockup and not in the hand, it is probably the wrong method for retail.
That leaves buyers with three questions that are usually more useful than asking, “Can you print this?” First, how premium does the hat need to feel? Second, how much detail does the logo actually require? Third, how will the cap be merchandised, hung, stacked, boxed, or bundled with other branded items?
How embroidery, patches, and print methods are built on caps
Once the production method is understood, the differences stop sounding abstract. Embroidery starts with digitizing, which is the process of turning artwork into stitch instructions. A strong digitized file controls stitch direction, density, underlay, pull compensation, and where the needle exits at corners and curves. That matters because hat fronts are not flat. They bend, flex, and sometimes collapse slightly under the needle. Too much density can cause puckering or a stiff feel. Too little can leave gaps or a weak edge.
Flat and 3D embroidery
Flat embroidery is the most familiar retail choice. It handles logos with bold letters, solid shapes, and moderate detail very well. It also tends to age gracefully because thread has a tactile quality that ink cannot copy. 3D puff embroidery adds foam beneath selected elements so the design rises off the cap. That raised profile can look excellent on structured six-panel caps and foam-front truckers, especially when the art is large and simple. It is less forgiving with tiny text, narrow strokes, or intricate linework. If the details are too tight, the foam can swallow them.
Patches, transfers, and print
Woven patches are useful when the logo has tiny type, thin outlines, or a level of detail that embroidery would blur. They give a cleaner face and a more controlled edge, which is why they often show up in fashion programs and heritage-inspired branding. Embroidered patches feel more dimensional and crafted, though they need enough border space to frame the art cleanly. For print, screen print still works well for bold, limited-color graphics. Digital print and heat transfer make more sense when the artwork needs fine detail, multiple colors, or a gradient that would be awkward in thread. If the art is close to photographic, forcing it into stitches usually creates a worse result, not a better one.
Cap construction changes the outcome too. A structured crown gives embroidery a stable base. An unstructured front can distort a dense logo. Mesh backs reduce the usable area for decoration and can limit placement. Seams can cut through a circular emblem and make it look like the design was interrupted on purpose when it was not. Even the bill matters indirectly because it affects how the hat sits, how it shadows the front panel, and how it photographs for a product page. Buyers comparing retail Embroidered Logo Hats print options should treat the blank cap as part of the decoration system, not a neutral backdrop.
Material, artwork, and finish choices that change the result
The same logo can look better or worse depending on the fabric. Cotton twill usually accepts embroidery cleanly and reads as a classic retail blank. Washed cotton softens the overall look and can make patch work feel more lifestyle-driven. Polyester often holds color well for print, though it can reflect light differently and show sheen in ways that change the mood of the piece. Foam-front truckers suit puff embroidery and bold patch graphics because their shape already carries a retro tone. Performance blends can work for activewear retail, but their technical finish often pushes the decoration toward simpler graphics.
Artwork should be judged with the blank in mind. Thick letters and open counters survive embroidery far better than thin script. Tiny type below roughly 0.12 to 0.15 inches in cap-face height can become difficult to read once stitched, especially if the thread color is close to the fabric color. If the design depends on gradients or subtle shading, print may be the honest answer. If it depends on a clear silhouette, embroidery or a patch usually looks stronger. Forcing a decoration method to do a job it was never built for is one of the fastest ways to waste money.
- Thread sheen can make embroidery look rich under retail lights, or overly glossy if the color choice is wrong.
- Print opacity matters on dark caps; weak coverage makes logos look faded instead of intentional.
- Stitch density affects both sharpness and fabric distortion.
- Patch border style changes the mood, from crisp and modern to rugged and heritage-driven.
- Color count affects setup, cost, and how easily the hat coordinates with the rest of the line.
Retail presentation matters as much as decoration. If the hat is sold with apparel, tags, and cartons, the decoration should feel like part of the same system. That includes hang tags, size stickers, insert cards, and the shipping box. Packaging has to survive handling, stacking, and transit without making the cap look cheap when the box is opened. For sourcing and distribution-minded packaging decisions, references such as fsc.org and ista.org are useful anchors for paper sourcing and testing standards.
Practical point: a cap, a hang tag, and a shipper should all look like they belong to the same retail family, even if they are made by different methods.
Process and turnaround: from art file to finished retail hats
Production goes more smoothly when the art and cap style are decided early. The first step is art review. A good vendor will check line weight, color count, placement, and whether the logo can actually be built on the chosen blank. For embroidery, the next step is digitizing. For print, it is screen setup, digital prep, or transfer preparation. Patches add their own production chain because the patch must be made before it is attached to the cap.
Proofing catches a lot of issues before they become expensive. A sew-out or strike-off shows how the design behaves on material rather than on a screen. That proof can reveal a border that feels too heavy, corners that fill in, a logo that needs more open space, or a placement that runs into a seam. Buyers should expect to review stitch simulation, thread color approximations, size, and placement. If the blank has a panel shift or a seam across the front, that should be visible in the proof. A clean mockup is helpful, but it is not enough.
- Review the logo file and cap blank together.
- Digitize or set up the print method.
- Approve a sample, sew-out, or strike-off.
- Run bulk production with in-line inspection.
- Pack, label, and ship to the retail destination.
Turnaround is shaped by more than the decoration method. Artwork cleanup can add days. Sample rounds add more. Stock cap availability matters, especially for retail programs that need a specific crown height, panel shape, or color. Orders with multiple decoration locations, special labeling, or individual packaging almost always take longer than a plain bulk pack. In practical terms, a simple repeat embroidery run on stock caps can move in roughly 10 to 15 business days after approval. A first-time retail run with patches and custom packaging may take 15 to 25 business days or more, depending on sourcing and how many proof changes are needed.
Quality control should not stop at the sample. During bulk production, buyers should expect checks for placement drift, thread tension, thread trim, print alignment, adhesive edge cleanliness on patches, and packaging consistency. A one-piece sample can look excellent while a full run slowly drifts out of spec. The best retail programs catch that early, not after cartons have shipped.
Cost, pricing, MOQ, and quote details to compare fairly
Unit cost usually comes down to a short list of variables. Stitch count is a major one for embroidery. A large front logo with dense fill costs more than a small mark, even on a hat. Patch construction adds cost because the patch has to be made before it is attached. Specialty threads, including metallic or matte finishing thread, can increase both price and lead time. For print, the main drivers are setup, color count, and whether the art needs spot color screening or a more complex CMYK build.
MOQ is tied to the blank and the decoration method. Some stock caps support small runs quite well, especially for simple embroidery. Others need a larger quantity to keep sourcing and setup practical. Patches can raise the MOQ because the patch itself has setup and production requirements. Retail packaging can also affect the minimum because custom hang tags, individual polybags, and insert cards add labor.
| Method | Typical look | Common MOQ range | Approx. decoration cost on a 500-piece run | Best fit |
|---|---|---|---|---|
| Flat embroidery | Textured, clean, durable | 24-100+ | $1.40-$2.80 per cap | Retail basics, classic branding, strong logos |
| 3D puff embroidery | Raised, bold, dimensional | 50-150+ | $1.70-$3.25 per cap | Structured caps, athletic and streetwear styling |
| Woven or embroidered patch | Fashion-led, refined edge control | 100-250+ | $1.80-$3.50 per cap | Detailed logos, premium retail programs |
| Screen print | Flat, graphic, simple | 50-200+ | $1.10-$2.40 per cap | Bold spot color art, short messages, simple icons |
| Digital print or heat transfer | Smoother gradients, fine detail | 24-100+ | $1.50-$3.20 per cap | Small runs, complex art, color blends, photo-like images |
Those numbers are only useful if the quote compares the same blank, the same decoration size, the same packaging, and the same delivery terms. A quote that leaves out digitizing, polybags, or hang tags is not really cheaper; it is just incomplete. Ask for each line item separately: blank, decoration, setup, sample, packaging, and freight. If the vendor handles cartons or retail inserts, those should be written out too. That is the only fair way to compare retail Embroidered Logo Hats print options side by side.
- Digitizing fees often run about $25 to $65 for embroidery, depending on complexity.
- Screen or plate charges can add up quickly for multi-color print programs.
- Rush fees usually show up when the art is late or the blank cap is hard to source.
- Sample charges are normal and often worth paying to avoid a bad bulk run.
- Individual polybagging and hang tags can add meaningful labor to a retail order.
There is one more cost trap: changing the decoration after sample approval. A color shift, a border change, or a size adjustment may seem small, but on a production line it can mean a new setup, a new proof, or another sample round. That is not a vendor tactic. It is how the physical process works.
Common mistakes that make retail hat decoration look off
The biggest mistake is trying to cram too much detail into too little space. Tiny letters, thin strokes, soft gradients, and intricate line art often lose clarity once they are stitched or wrapped across a curved crown. A design that looks precise in a vector file can turn muddy if the line weight is too light or the negative space is too tight. If the logo depends on exact type rendering, ask early whether the cap can support it.
Ignoring cap structure causes plenty of failures too. A logo centered neatly on a flat artboard may land across a seam, a front panel break, or a soft low-profile front that shifts under the needle. Mesh-back hats can also make placement more difficult because the front decoration area is smaller than many buyers expect. If the method does not respect the blank, the result can feel wrong even when the art is technically correct.
Poor files create another layer of trouble. Low-resolution artwork, missing font outlines, and fuzzy edge work can all weaken the final piece. That is true for print and embroidery. For print, a weak file can make the edges look feathered or soft. For embroidery, bad digitizing can cause crowding, loose edges, or awkward needle travel that leaves the logo looking rough. Buyers often blame the blank, but the file was the real problem.
Shelf lighting changes everything. Thread sheen, print coverage, and color contrast can read one way on a desk and another under retail fluorescents or warmer boutique lighting. Dark navy on black can disappear. White thread on textured fabric can look bright in one setting and faint in another. A good vendor should warn about that before approval, not just sign off to keep the order moving.
There is also a habit of approving decoration before checking wear and handling. A cap can pass a visual review and still fail practical use if the front is too stiff, the patch edges catch on packaging, or the print looks cracked after a few folds. Retail hats are touched more than display apparel in many programs. That extra handling should be part of the evaluation.
Expert tips and next steps for choosing the right method
If the brand goal is texture and perceived value, choose embroidery. If the goal is a more fashion-forward or heritage feel, choose a patch. If the artwork needs tiny detail, smoother gradients, or a more photo-like finish, print usually has the advantage. That is the short version. The better answer is to match the decoration to the SKU strategy. A retail line might use one premium hero cap for the shelf and a simpler version for deeper colorways or higher-volume tiers.
It helps to test the decoration on the exact cap that will be sold. The same art can look different on a structured six-panel cap, a foam-front trucker, and a brushed cotton dad hat. A sew-out, strike-off, or printed sample is cheap insurance. It shows stitch density, color contrast, border shape, and how the decoration sits on the crown. If packaging is part of the sale, review the whole presentation: hang tag, price sticker, polybag, carton, and any display insert.
- Gather vector art in a clean format.
- Choose the exact hat blank before approving decoration.
- Decide whether the cap needs premium, fashion, or utility positioning.
- Set quantity tiers so quote breaks make sense.
- Confirm packaging, labeling, and ship method before production starts.
Buyer discipline matters here. The best retail Embroidered Logo Hats print options are the ones that survive curved crowns, bright lights, handling by shoppers, and the pressure of sitting beside every other item on the shelf. Compare the methods on the actual cap, not just on a flat proof, and the right choice usually becomes obvious. A clean result rarely comes from a flashy process. It comes from a method that fits the art, the blank, and the job the hat has to do.
Which retail embroidered logo hats print options work best for small logos?
Flat embroidery or a woven patch usually gives the cleanest result for small logos because both hold edges better than low-detail print. If the design has tiny text or thin lines, ask for a minimum-detail review before approving the method, because some artwork needs more open space to read well on a curved crown.
Are embroidered hats more durable than printed retail hats?
In most everyday retail use, embroidery holds up very well because the design is built into the fabric rather than sitting on top of it. Printed decorations can still perform well, but durability depends more on the print method, wash care, and how often the hat is handled.
What MOQ should I expect for retail embroidered logo hats?
MOQ usually depends on the blank cap style and decoration method, not just the logo itself. Simple embroidery can sometimes support smaller runs than specialty patches or custom packaging, which often need more volume to stay cost-effective.
How long do embroidered logo hats take to produce after approval?
Production time depends on digitizing, sample approval, stock availability, and how many finishing steps the order needs. Repeat orders usually move faster than first-time runs because the art setup and cap specification are already locked in.
How do I choose between embroidery, patches, and print for retail hats?
Choose embroidery when you want texture, structure, and a premium feel on the shelf. Choose patches for a more fashion-forward look, and choose print when your logo needs very fine detail or smoother color transitions. For retail embroidered logo hats print options, the smartest move is to judge the decoration on the exact blank cap, because the same art can shift quite a bit from one crown shape to another.


