A bad cap sample is rarely loud. That is the problem. It can look almost right in a photo, pass a quick internal review, and still fail once thread tension, panel curvature, and real lighting enter the picture. A strong Embroidered Logo Hats sample checklist catches those issues before they become an expensive stack of unusable inventory.
The sample is not a decoration exercise. It is a measurement tool. If the logo reads at arm's length, if the placement respects the cap structure, and if the stitch density stays stable on the chosen fabric, the production run has a better chance of behaving the same way 200 or 2,000 pieces later. If any one of those pieces is off, the failure tends to repeat with machine-like efficiency.
What this embroidered logo hats sample checklist catches early
The first thing a stitched sample reveals is whether the artwork survived the jump from screen to thread. Vector files can flatter a design. Embroidery does not. Thin letters close up, outlines thicken, and details that looked elegant in a PDF can disappear once the needle starts making decisions for you.
That is why the embroidered logo Hats Sample Checklist should focus on three questions: can people read it, does it sit where it should, and does the cap still wear naturally after the embroidery is added? Those are not cosmetic issues. They are production issues.
Readable logos usually survive. Logos that rely on delicate hairlines or tiny internal spaces are much less forgiving. A mark that looks excellent at 12 inches on a monitor may be useless at 6 feet on a job site, a retail floor, or a trade show aisle.
The checklist should also force a reality check on the blank hat itself. A structured front panel can support denser embroidery. An unstructured crown or a softer brushed cotton front may distort sooner, especially if the design uses a large satin column or heavy fill. The cap is part of the system, not just the canvas.
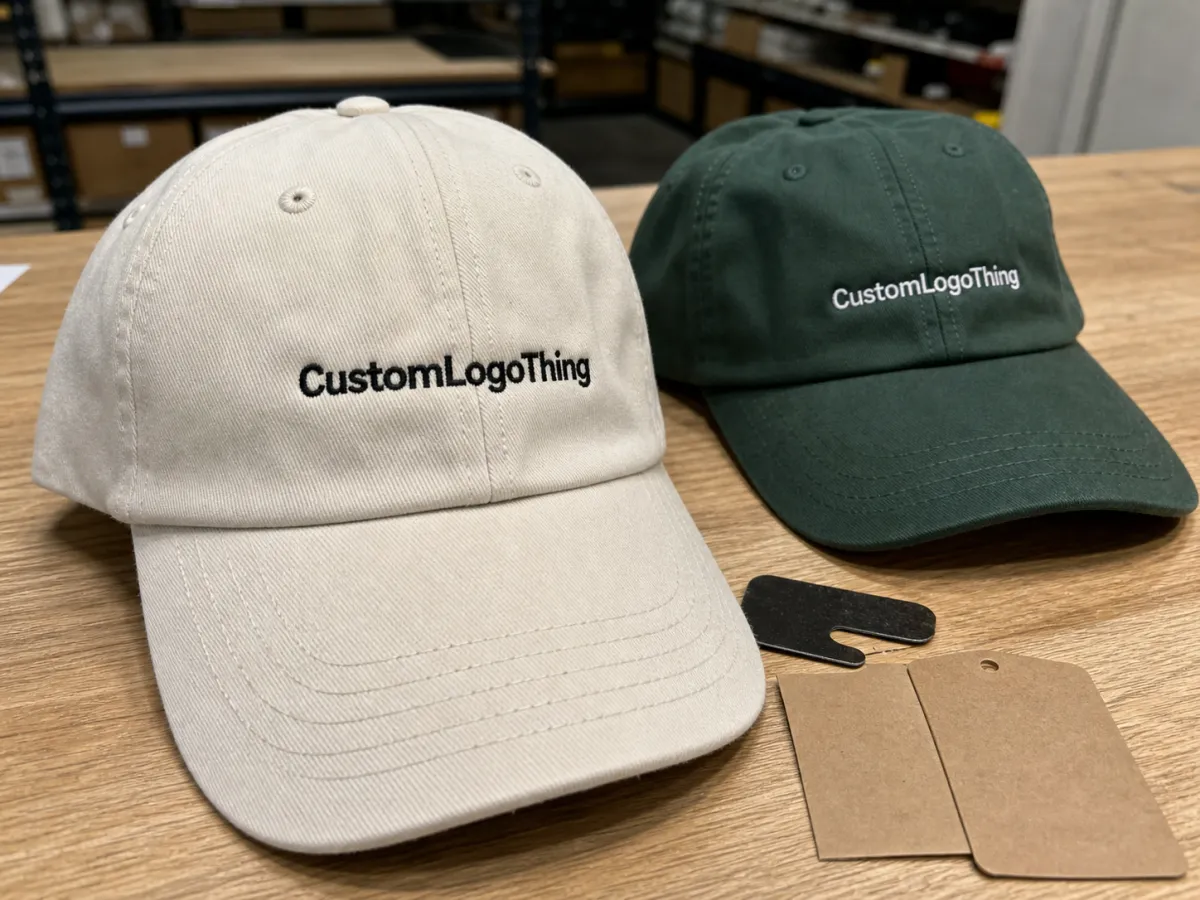
- Color: thread shade, backing shade, and contrast against the blank cap.
- Placement: centerline, height above the brim, and side-to-side symmetry.
- Stitch behavior: density, pull, tension, and clean start/stop points.
- Structure: structured, unstructured, low-profile, mid-crown, or flat-front styles.
- Readability: small text, thin strokes, and icon detail at real viewing distance.
A sample is useful only if it exposes the same problems the bulk order would have exposed.
From a budget standpoint, that matters more than most buyers expect. A sample mistake that costs $25 or $40 can be a cheap lesson. The same mistake repeated across a large order becomes a delay, a rework discussion, and sometimes a packaging problem as well. Repacking and reshipping often cost more than the embroidery fix itself.
Process and timeline: from art file to stitched sample
The sample process usually starts with artwork review, and that review should be stricter than many buyers realize. A low-resolution logo, a flattened image, or a file with too many tiny details creates extra work before a needle ever touches fabric. If the art is not clean enough to digitize, the rest of the timeline slips immediately.
Digitizing comes next. This is where the artwork becomes stitch instructions, and it is also where the logo can change in subtle ways. Stitch direction, underlay, compensation, pull, and order of operations all affect the final result. Two files that look identical on screen can stitch very differently once the pathing is rebuilt for embroidery.
Then the shop runs the first stitch-out, checks it against the art, and decides whether the cap needs a second pass. A simple one-color front logo may move quickly. A multi-color emblem with small text or layered shapes usually needs at least one correction round. The timeline is driven by detail, not just by supplier speed.
Sample timing also changes with queue length. A clean 3- to 5-business-day sample can stretch to 7 to 12 business days during a busy period. That spread is normal. What causes trouble is assuming every supplier has the same machine availability, thread stock, and approval workflow.
Shipping can add another layer of friction. If the sample is going across the country or overseas, transit damage, crushed crowns, and bent brims are real risks. For carton and transit planning, teams that care about packaging standards sometimes look at ISTA testing practices, while FSC-certified outer packaging can matter if the buyer tracks paper sourcing on the logistics side. For framework references, see ISTA and FSC.
| Sample path | Typical timing | Best use case | Risk level |
|---|---|---|---|
| Digital proof only | Same day to 2 business days | Early artwork alignment | Medium-high |
| Stitched first sample | 3 to 12 business days | Placement and stitch validation | Low if reviewed carefully |
| Revised stitched sample | 2 to 7 additional business days | Fine-tuning density, text, or fit | Lowest, but slower |
Speed has a place. It just should not outrun accuracy. If the logo is simple, a compressed sample cycle can work. Once the artwork includes small lettering, multiple thread colors, or a cap shape that curves aggressively at the front panel, the safer move is to slow down long enough to confirm the sample is telling the truth.
Key spec factors that change the final sample
Embroidery is sensitive to small changes. A logo that is 2.25 inches wide and a logo that is 2.75 inches wide may not sound far apart, but the extra space can be the difference between legible and cramped. The same is true for crown height. A taller front panel gives the design room to breathe; a low-profile cap can compress the layout faster than expected.
Stitch count drives both cost and behavior. More stitches can preserve detail, but they also increase the chance of puckering on lighter fabrics or softer caps. Dense fills look polished on paper and aggressive in production. They need backing, tension, and fabric support to match.
Stitch direction matters just as much. Smart angle changes can sharpen lettering and reduce thread breaks. Poor direction can create shiny patches, uneven texture, or those awkward little ridges that only show up after the sample leaves the machine.
Cap construction changes the result
Structured caps usually hold embroidery better because the front panel has internal support. That support keeps the logo flatter and the placement more predictable. Unstructured caps are softer and often more comfortable, but they expose weakness in the stitch plan more quickly. The fabric moves, the crown flexes, and the design can warp in motion.
Flat-front and high-profile styles usually give the digitizer more room to build. Low-profile caps are trickier. The same logo can feel crowded or too tall simply because the crown shape shortens the usable real estate. Curved brims add another variable: they change how the eye reads the logo once the hat is worn, which means a sample viewed only on a table can be misleading.
Fabric and backing shape the stitch
Cotton twill is predictable, though not immune to distortion. Polyester blends tend to hold sharper edges, but the heat and pressure of embroidery can still affect the surface. Mesh-backed caps reduce front-panel surface area and often need more careful stabilization. Brushed fabrics can hide minor flaws, which sounds useful until a buyer realizes the flaw is still there, just harder to spot.
Backing is not a detail to skip. Tear-away, cut-away, and specialty stabilizers each behave differently. If the backing is too light, the logo may shift or tunnel. If it is too heavy, the cap can feel stiff and expensive in all the wrong ways. A sample should reveal that balance.
Use this practical version of the embroidered logo Hats Sample Checklist before digitizing is locked:
- Confirm logo width and height in inches, not only on screen.
- Check whether small text needs simplification before stitching.
- Verify cap style, crown height, and brim shape before final approval.
- Ask for thread color references, not a vague close-match promise.
- Make sure the sample reflects the same fabric, backing, and placement planned for production.
Cost, pricing, MOQ, and quote variables to compare
Sample pricing looks simple until the quote arrives with separate lines for digitizing, revision, blank cap selection, and shipping. That breakdown matters. A cheap sample can become a costly order if the approval process was built on incomplete assumptions.
For basic cap samples, a typical range is roughly $15 to $75 depending on complexity, setup, and whether the supplier includes revision rights. A straightforward digitizing job may land around $10 to $35. More detailed art, more colors, or multiple locations can push that higher. Specialty caps and rush requests can add more still.
MOQ changes the economics in a subtle way. Buyers with small minimums sometimes skip the sample because the order feels manageable. That can be a mistake. Fifty wrong hats are still fifty wrong hats, and a launch or event deadline does not care that the run was “small.” Larger minimums make the sample more valuable, not less, because the downside of a mistake rises with volume.
Compare quotes only after isolating the variables that usually get buried in the fine print. The first price is rarely the final price.
- Setup charges: digitizing, file cleanup, or punch fees.
- Revision policy: one round included, or extra charges after the first stitch-out.
- Blank cap cost: standard stock style versus premium construction or fabric.
- Rush fees: compressed sample or production timing.
- Shipping: sample courier cost, replacement transit, and split shipments.
The cleanest quotes separate artwork work from decoration work. That makes comparison possible. A $22 sample with no revision rights can be worse than a $35 sample that includes one correction and a second stitch-out. The second option often costs less in the real world because it reduces the chance of a production failure.
Step-by-step review checklist before you approve
Approval should be methodical. A sample can look clean and still carry problems that only show up under close inspection or real wear. The point of review is not to admire the sample. The point is to decide whether it is repeatable.
- Compare the sample to the approved proof line by line.
- Check logo placement from center, side, and eye-level views.
- Inspect edge clarity on letters, icons, and thin strokes.
- Feel the back side for excessive stiffness or rough backing.
- Look for puckering around dense fill areas or tight curves.
- Test the cap on a real head or an accurate form, not only on a table.
- Confirm the logo still reads clearly at a few feet away.
That last step gets skipped surprisingly often. Close-up photos can hide a lot. Once the cap is worn, the truth shows up quickly: the logo sits too low, the brim interrupts the visual balance, or the front panel holds a shape that looks fine in hand but awkward in motion.
It helps to create a simple approval packet. Keep the approved sample photo, thread references, artwork file version, cap model, placement measurements, and any exceptions in one place. If there was a special request for tighter spacing or a different backing, that note needs to travel with the purchase order. Memory is a bad production system.
If the sample and the purchase order disagree, production follows the clearest instruction set available. That set should be yours.
Common mistakes that distort embroidery results
The most common mistake is treating a mockup like a stitched sample. A flat design file cannot show puckering, thread shine, or the way a small letter loses its center when the needle path tightens. The image may be accurate as artwork and still be wrong as embroidery.
Scale is the next trap. Small serif details, tight counters, and narrow lettering often look refined in a graphic file and become fragile once the stitch width is reduced. If the design depends on microscopic detail, the sample should prove that detail survives at actual production size.
Another issue is assuming one sample covers every cap variation in the order. A dark cap and a light cap may need different thread choices to preserve contrast. A structured front panel and a softer unstructured crown do not react the same way. If the order spans multiple fabrics or fits, one stitched proof is only a starting point.
Fit testing is often treated as optional, which is odd considering the product is literally worn on a head. Dense embroidery can alter the feel of the cap. Backing choice, crown stiffness, and panel tension all affect comfort. If the sample feels off after ten minutes, it will not improve in a warehouse carton.
These are the errors that show up most often in the embroidered logo Hats Sample Checklist process:
- Approving from a screenshot instead of a stitched piece.
- Ignoring small text until production is already underway.
- Assuming thread color looks identical under every light source.
- Skipping a real wear test on the actual cap structure.
- Failing to document whether the sample is final or only a first draft.
A measurement reference helps too. A ruler in the photo, or at least a fixed template mark, makes it harder for anyone to mistake visual neatness for accuracy. Embroidery is full of optical tricks. The sample review should resist them.
Expert tips and next steps before bulk production
Before bulk production starts, build a final packet that leaves very little room for interpretation. Include the approved sample image, Pantone or thread codes, placement measurements, cap model, shipment timing, and any revision notes. The best production packets are plain. They are not exciting, and that is exactly why they work.
One useful habit is to treat the sample as a reproducible standard, not a one-off approval. That changes the question from “Does it look good?” to “Can this be repeated 500 times without drifting?” The second question is harder. It is also the one that saves money.
If the order is tied to a launch date, ask for a backup sample or a second stitch-out when the logo has borderline detail. A small extra delay early in the process is cheaper than discovering too late that the letters are too tight, the logo is too tall, or the front panel has too much give.
Packaging and shipping deserve the same discipline. A sample that arrives crushed can create a false failure, while a production run packed too loosely can create a real one. Keep the approved Embroidered Logo Hats sample checklist attached to the purchase order, the sample file, and the sign-off record so the decoration spec does not drift between departments.
For buyers who want fewer surprises, the next move is straightforward: gather artwork, define the cap style, compare quotes, confirm the revision policy, lock the sample spec, and run the sample against the checklist again before production. That is how an embroidery order becomes predictable instead of hopeful.
What should an embroidered logo hats sample checklist include first?
Start with artwork accuracy, logo placement, and stitch quality. Those are the hardest issues to correct after approval. Add cap fit, fabric type, thread colors, and written sign-off notes so the sample reflects the real production setup, not just a cleaned-up proof.
How long does the embroidered hat sample process usually take?
Timing depends on digitizing, revision count, blank cap availability, and the production queue. A simple proof may move in a few business days, while a more detailed logo can take longer if the first stitch-out needs adjustment. Ask for a timeline that separates file review, stitching, shipping, and approval.
How much should I budget for a sample and setup?
Budget depends on digitizing complexity, blank hat choice, and whether revisions are included. A basic proof may be inexpensive, but special thread requests, multiple logo locations, or rush handling can raise the total. Compare the full quote, not only the first sample fee.
What is the most common mistake buyers make with embroidered cap samples?
Approving a mockup instead of a stitched proof is one of the biggest risks. The second mistake is ignoring how the logo behaves on the actual cap structure, where curvature and fabric tension can change readability quickly.
How do I use the checklist before placing a bulk order?
Review the sample against the approved artwork, then confirm notes on color, placement, stitch density, and cap style. Keep the checklist with the purchase order so the buyer and production team stay aligned on the exact approved result.


