Skincare Embroidered Beanies Digital Proof Checklist
Use this checklist to catch artwork issues, confirm specs, and keep Custom Embroidered Beanies moving before production starts.
Embroidery on a beanie can look perfect on a screen and still land too high, too wide, or too cramped once knit stretch and thread density enter the picture. That is why a skincare embroidered beanies Digital Proof Checklist matters before anyone signs off. A proof is not decoration; it is the control point where placement, sizing, thread color, backing, and stitch limits get fixed before the first hat is sewn. For skincare brands, that matters more than it may seem. The product has to read cleanly at a glance, feel restrained rather than loud, and still look intentional against packaging, sampling kits, or retail displays.
Most of the trouble starts with the gap between design intent and stitched reality. A logo that looks balanced in an email mockup may shift once it is embroidered onto a curved knit surface. A delicate wordmark may need simplification because the thread cannot hold the same detail that print can. The proof is where those limits become visible. If the file needs revision, it is far cheaper to learn that before production than after a run of 300 beanies has already been scheduled.
That is the practical value of the checklist: it slows down the right decisions and speeds up the wrong ones. It helps a buyer check the things that usually cause delays, cost overruns, or quality complaints later.
Why proof errors on custom beanies cost more than you think
A beanie proof can look tidy and still fail in production because embroidery behaves differently from flat artwork. Knit fabric stretches, crowns curve, and cuff height changes where the eye lands. On a mockup, those shifts are easy to miss. On the finished hat, they are impossible to ignore.
Placement is usually the first mistake. A logo that feels centered on a digital render may sit too high once the beanie is worn. Slouchy styles exaggerate that problem because the fabric pools behind the crown. Cuffed beanies have their own trap: the fold can hide part of a design or make a perfectly centered logo appear off by a few millimeters. That is enough to make a premium product look rushed.
Size is just as sensitive. On screen, a 3-inch mark sounds modest. On a small knit surface, it can crowd the seams, leave no breathing room, or force the embroidery into a shape that looks compressed. Small text suffers the most. Thin strokes, tiny serifs, and outlines around letters can all blur or fill in once thread density and fabric movement are added to the mix.
Thread and backing choices also change the final look more than buyers expect. Polyester thread usually gives a sharper sheen and better color consistency than softer-looking options, while rayon can appear more muted. Backing influences support, drape, and comfort. A heavier backing may hold a dense stitch field better, but it can also make a soft beanie feel stiffer than intended. If the logo is complex, the digitizing step may need to simplify corners, widen letterforms, or reduce the stitch count so the design stays readable.
A proof should answer one question clearly: will this still look like the brand once it is stitched into knit fabric?
For skincare brands, the cost of a miss is not only financial. A bad approval can push back a launch, disrupt a retail drop, or create a product that feels slightly out of sync with the rest of the line. The cheapest proof is the one that catches the problem early.
How the proof process works from artwork to approval
The process usually starts with artwork submission. A buyer sends a vector file, ideally AI, EPS, or an editable PDF, along with notes on placement, quantity, and the exact beanie style. If the file is flattened, low-resolution, or built with tiny details that do not translate well to embroidery, the art team may need to clean it up before digitizing. That is normal. It is also where a lot of schedule pressure disappears if the file is not prepared well from the start.
There is a real difference between a mockup and a production proof. A mockup helps with layout and visual direction. It can show the general feel of the hat and help a team align on branding. A production proof has a sharper job: it should state actual dimensions, thread colors, the embroidery method, and any restrictions that may affect the final result. That is the point of the skincare embroidered beanies Digital Proof Checklist. It turns an attractive image into a production instruction set.
Good feedback makes the cycle faster. Notes like “move the logo 0.2 inch lower,” “reduce width by 0.25 inch,” or “switch to a warmer gray thread” give the production team something measurable to adjust. Vague comments slow everything down. “Looks off” is hard to work from. Measurable notes are not only easier to action, they also make the next proof more likely to match what the buyer actually wants.
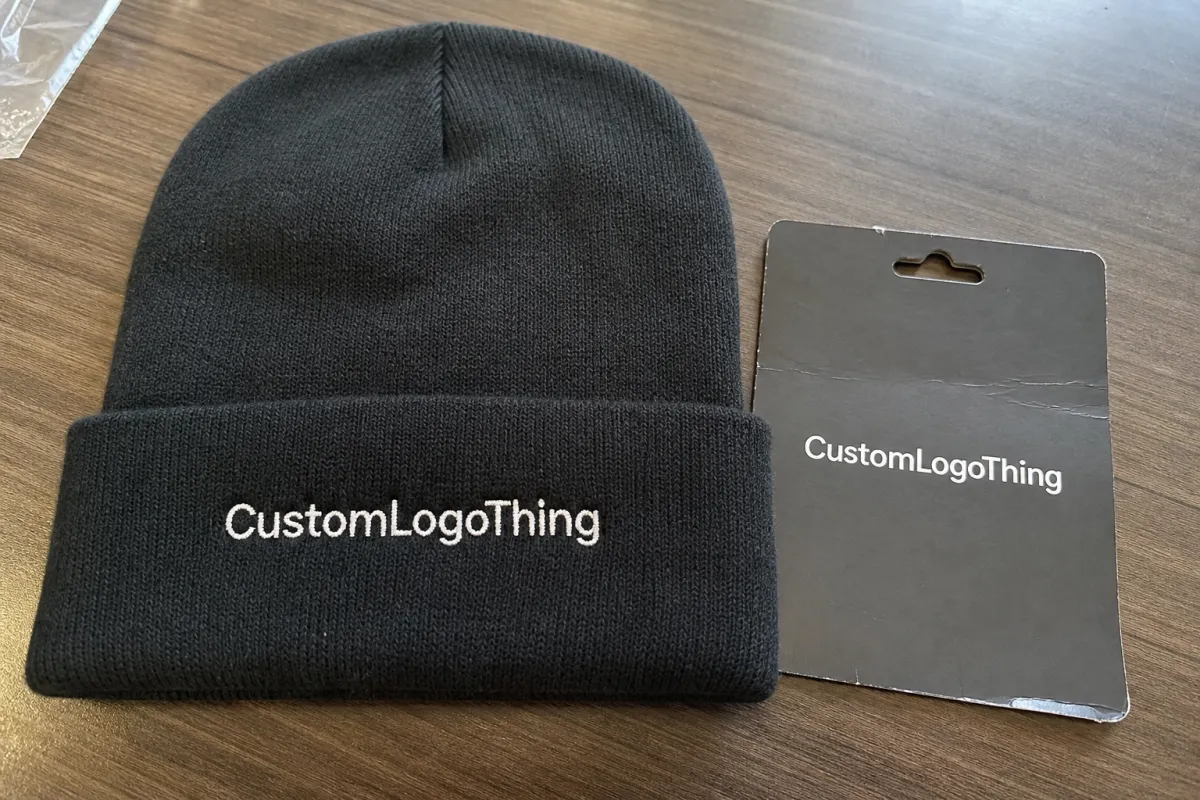
If the supplier can provide close-up views, ask for them. A full-hat thumbnail hides the exact details that usually create problems: letter spacing, edge sharpness, fill density, and how the stitch path handles tight curves. For small logos or delicate marks, those close-ups are more useful than a polished mockup. They show whether the embroidery can survive the scale chosen for the blank.
One practical habit helps more than most teams realize: mark up the proof directly. Use the artwork file or PDF to call out what needs to change rather than describing it in a separate email. That reduces misunderstandings and keeps the approval record clean.
Specs that control the final result
Placement is the first spec to lock down. On custom beanies, the logo can sit on the front panel, on the cuff, or slightly off-center depending on the style. Each position changes the way the logo reads on a head and each one carries a different risk. Front placement usually gives the strongest visibility. Cuff placement often looks cleaner for smaller marks and works well for skincare brands that want a calm, minimal presentation. The best answer depends on the blank, the logo shape, and how much vertical space the hat construction leaves once it is worn.
Sizing needs a real measurement, not a guess. A 2.5-inch logo may work well on one style and feel undersized on another. A 3.5-inch mark may fit a chunky rib knit but overwhelm a lightweight beanie. The best range for many branded beanies sits around 2.5 to 3.5 inches wide, but detailed art often needs to stay toward the lower end. The goal is not to fill space for its own sake. The goal is legibility at arm’s length without forcing the embroidery to fight the fabric.
Thread color should never be reviewed in isolation. A beige, sage, blush, or stone beanie can look sophisticated, but it can also flatten a logo if the contrast is too soft. Fine text is especially sensitive. If the thread and the knit color are too close in value, the mark disappears faster than many buyers expect. Ask for the actual thread reference and check it against the beanie color, not just against the brand palette on a screen.
Stitch count is where detail meets budget and durability. Dense embroidery can look polished, but too much density on a soft beanie may create stiffness, puckering, or a raised feel that works against the hand of the garment. Simplifying the art slightly is often a smarter move than forcing a design to keep every original detail. Fewer tiny corners, wider lettering, and cleaner fill paths usually produce a better finish.
Two other points deserve a line on the proof:
- Backing: cutaway, tear-away, or no-show backing changes support, comfort, and how the inside of the hat feels against the skin.
- Digitizing: a clean stitch file reduces distortion, especially on small letters, thin outlines, and tight shapes.
If the order includes packaging components such as inserts, hang tags, or cartons, that belongs in the same approval pass. For paperboard pieces, FSC-certified stock may be part of the conversation, and the FSC site is a useful reference: FSC-certified paper guidance. If packaging needs to withstand distribution or retail handling, the ISTA testing standards site is also worth a look. Those details matter most when the beanie is part of a launch kit or retail gift set rather than a standalone accessory.
For teams comparing decoration methods or finishing options, our Manufacturing Capabilities page is a useful reference for how production limits shape the final result.
Cost, pricing, and MOQ factors that change the quote
Pricing for embroidered beanies usually comes down to a few variables: the blank hat, stitch count, thread-color count, setup or digitizing fees, and any packaging work added on top. Blank quality matters more than many first-time buyers expect. A heavier, better-fitting beanie may cost more upfront, but it often produces a cleaner overall product. Cheap blanks can save a little on paper and cost more in complaints later.
MOQ changes unit price in a direct way. Smaller quantities spread setup work over fewer pieces, so the per-unit cost rises. Larger runs usually lower the unit price, but only if the design stays consistent and the production method does not need extra handling. If you are comparing quotes, ask for an itemized breakdown. That is the fastest way to see whether one supplier is using a lower-grade blank, a simpler embroidery spec, or thinner packaging to hit the number.
A useful working range: a simple embroidered beanie at lower quantity might land in the roughly $8 to $14 wholesale range, while a midweight hat with a more detailed logo can move into the $12 to $20 range. Premium blanks, denser embroidery, and added packaging can push higher, sometimes into the $18 to $30 range or above depending on volume. Those numbers are not fixed, and they shift with labor markets, setup charges, and shipping method, but they give buyers a more realistic frame than a single “starting at” figure.
| Option | Typical Cost Driver | Best For |
|---|---|---|
| Basic knit beanie with simple one-color embroidery | Lower stitch count, minimal setup | Short runs, sampling, giveaway programs |
| Midweight beanie with two- to three-color logo | Moderate stitch count, more color changes | Retail merch and team assortments |
| Premium blank with dense embroidery and packaging add-ons | Higher blank cost, digitizing, finishing labor | Launch kits, premium gifting, retail presentation |
Rush service changes the quote too. If the order has to move ahead of a standard production queue, the supplier may charge for priority scheduling. That premium is often larger than buyers expect because it affects more than one order. It can bump other work, change shipping method, or compress the time available for revisions. A clean quote should show standard, accelerated, and rush options so the schedule tradeoff is visible before approval.
Finally, avoid comparing only the unit price. A lower quote can hide a higher setup fee, a weaker blank, or a less forgiving digitizing approach. If the beanie is meant to represent a skincare brand, the lowest price is not always the best value. Small differences in fabric weight, thread choice, or finishing can change how the product feels in hand.
Timeline from first proof to final shipment
A realistic schedule starts with artwork readiness. If the file is clean and the beanie style is confirmed, the first proof can move quickly. If the artwork needs cleanup, size adjustment, or thread matching, the first round takes longer. That is not a delay in the bad sense; it is the stage where the job is being made production-ready rather than just visually approved.
After the first proof arrives, the buyer reviews the dimensions, placement, colors, and any stitch notes. This approval window matters more than many teams realize. A fast-turn order can still stall for days if the proof sits in an inbox. In production planning, that delay is not neutral. It can move the order behind other confirmed jobs and compress the time left for embroidery, finishing, packing, and transit.
Once the proof is approved, the supplier confirms digitizing settings and releases the order into production. The embroidery itself may be fairly quick, but the work does not stop there. Hats still need trimming, folding, packing, and quality inspection. If the order includes special packaging, individual bags, or inserts, add time for hand assembly. A straightforward project may move from approval to shipment in roughly 10 to 15 business days. Larger runs, custom packaging, or more complex artwork usually need more room.
Here is the sequence that tends to hold up best in practice:
- Artwork received: file checked, blank style confirmed, basic spec sheet reviewed.
- Initial proof sent: placement, size, thread colors, and decoration method shown.
- Revision round: buyer marks changes and clarifies anything that feels off.
- Final approval: proof is signed off and production is released.
- Manufacturing: embroidery, trimming, finishing, and packing are completed.
- Shipment: order leaves the facility and enters transit.
The best planning habit is simple: work backward from the date the hats need to arrive. If the beanies are part of a launch kit, seasonal drop, or event pack, build in room for proof changes and shipping variability. If the supplier offers more than one decoration path, ask for the lead time difference early. A cleaner decoration method can sometimes save more schedule than a slightly cheaper one, especially when the timeline is tight.
Common mistakes that delay skincare branded beanies
Low-resolution artwork is still one of the easiest ways to slow a job down. A logo that looks fine in an email may break apart when enlarged for embroidery, especially if it contains fine lines or tiny text. Vector artwork helps, but it does not guarantee a clean stitch file. If the design carries too much detail for knit fabric, the digitizer may need to simplify it. That is not a downgrade. It is how the design survives the move from screen to thread.
Vague feedback causes the next biggest delay. “Looks a little off” is not enough for production. “Move the logo 0.2 inch lower and center it on the cuff seam” is. Measurable notes make it easier to correct the proof without adding extra rounds. The same approach works for size and contrast. If the beanie needs to read clearly from a shelf, say that. If the goal is a softer, more understated piece, say that too. The production team can adjust for a clear brief; they cannot guess at one.
Color approval is another common snag. Buyers sometimes approve thread colors on a screen and discover too late that the logo disappears against the actual beanie color. Thread can also vary slightly from dye lot to dye lot, so even a good match has a small range. If Pantone alignment matters, ask how close the thread can realistically get rather than assuming exact print-level matching. Thread is a physical material. It does not behave like ink.
There is also a habit that causes more frustration than it should: treating the mockup like the final product. A screen render cannot show thread sheen, puckering risk, stitch direction, or how the knit will react when stretched. A tightly written skincare embroidered beanies Digital Proof Checklist should always include the exact blank, the stitch limits, the final placement callout, and the approved thread references. That is the difference between a pretty approval file and an actionable one.
Final proof check before approval
The cleanest way to move a beanie order forward is to use one one-page spec sheet before the proof arrives. List the logo file name, exact dimensions, placement notes, quantity, desired delivery date, and thread-color references. If more than one person has input, identify the actual approver. Otherwise the proof can bounce between marketing, design, and purchasing while everyone assumes someone else has the final say.
Ask for a proof that includes measurements or markup lines. A close-up of the stitch area is useful too, especially for small lettering or thin outlines. You want to judge legibility, not just overall appearance. If a detail matters and is missing, request it before approval. That is a much easier conversation than explaining a re-run after production has already started.
Before signing off, run one final check:
- Confirm the beanie blank, color, and decoration placement.
- Check the logo width, height, and any small-text tolerances.
- Verify thread colors against the actual hat color.
- Review any packaging, labeling, or insert requirements.
- Save the approval email and final proof PDF in the same folder.
If the order supports a launch, event, or gifting program, confirm the production deadline, transit method, and warehouse receiving notes at the same time. A proof that is technically correct but approved too late can still miss the window. In practice, ten extra minutes of review is far cheaper than two weeks of avoidable delay.
The most successful orders are usually the least dramatic. Every decision is documented, the proof matches the spec sheet, and no one is guessing what “approved” meant three days later. That is the real job of the checklist: reduce the number of moving parts before the first stitch is made.
FAQ
What should be on a skincare embroidered beanies proof checklist?
The checklist should confirm placement, logo size, thread colors, backing choice, and the exact beanie blank being decorated. It should also name who approves the proof and by when, so the order does not stall waiting for feedback.
How many proof revisions are normal for embroidered beanies?
One to two rounds are common for clean artwork, while small logos, detailed lettering, or color changes may need more review. A revision limit helps both sides understand the difference between a small adjustment and a full redesign.
What affects the cost of custom embroidered beanies the most?
Stitch count, thread-color count, blank beanie quality, order quantity, and setup or digitizing fees usually move the price most. Rush production and special packaging can also raise the quote, so those should be priced separately.
How long does the digital proof and production timeline usually take?
A simple proof can move quickly, but the full timeline depends on how fast the art is approved and how busy the schedule is. After sign-off, embroidery, finishing, packing, and shipping still need time, so buyers should plan backward from the delivery date.
Should I approve a proof if the mockup looks slightly off?
No, small placement or sizing issues can become obvious once the design is stitched into knit fabric. Ask for a correction before approval if anything feels unclear, because changes are much easier before production starts.


