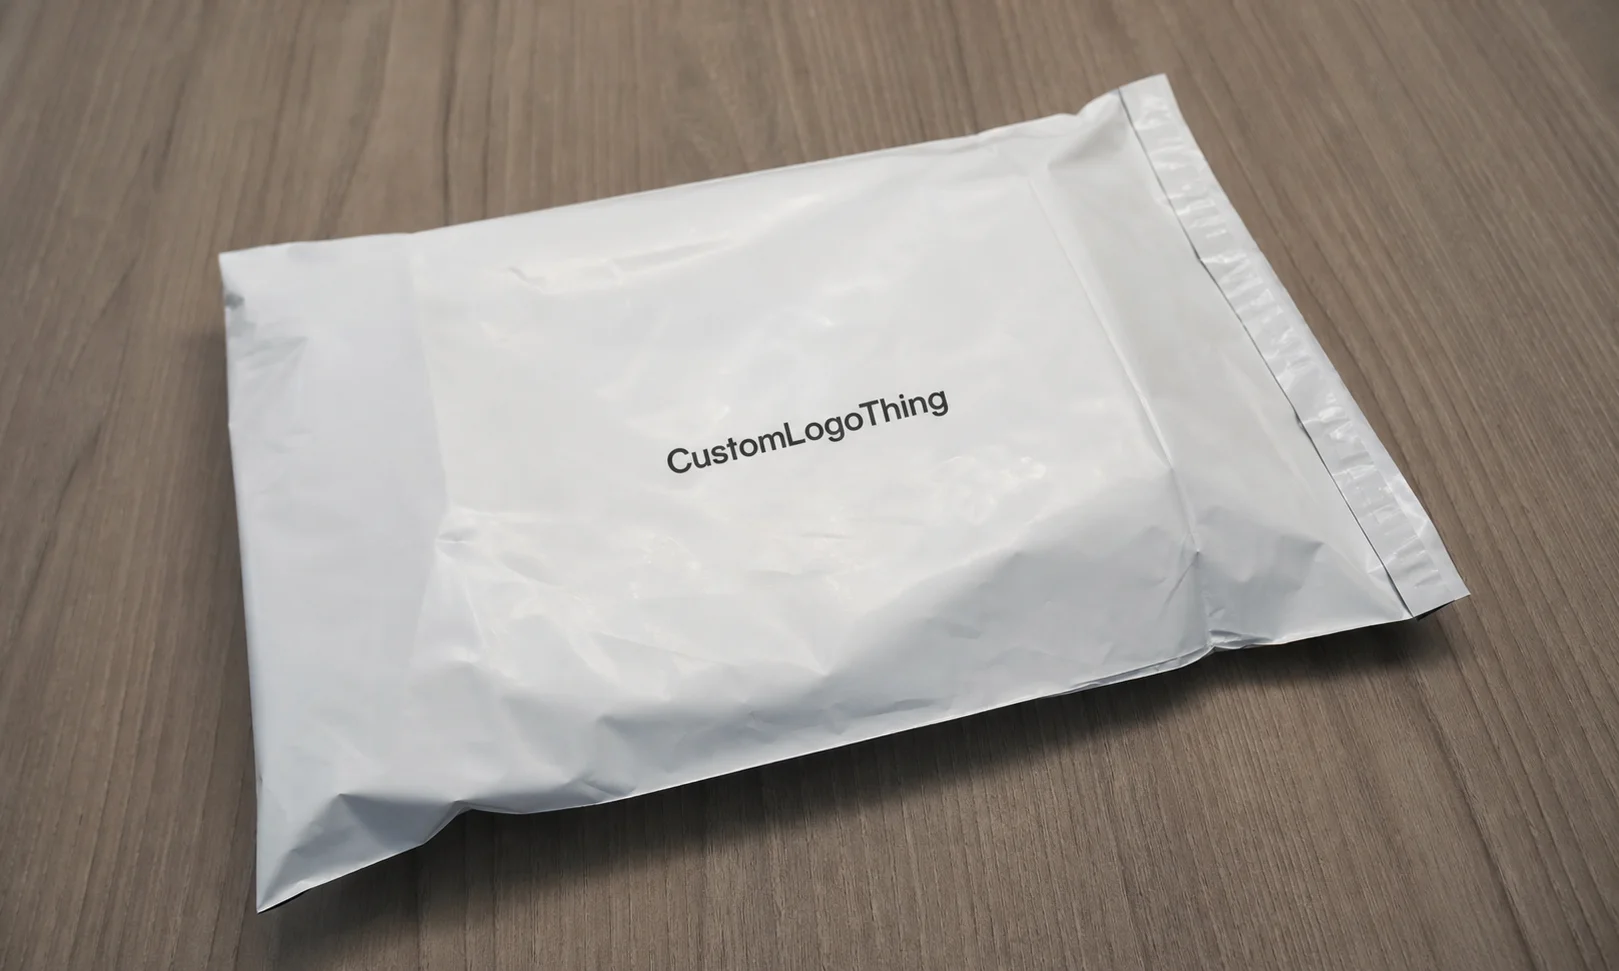
A customer opens a well-designed product and finds it inside a flimsy bag that will not reseal cleanly. The product may still be good, but the first impression has already been marked down. That is why a practical Slider Lock Bags for ecommerce brands brand launch checklist belongs in the launch plan, not in a last-minute packaging thread three days before fulfillment starts.
Slider Lock Bags sit in a modest part of the packaging system, yet they influence brand identity, warehouse speed, product protection, returns, and the everyday customer habit of opening, storing, and reopening an item. For ecommerce brands launching sample kits, apparel, refills, accessories, hardware sets, or subscription bundles, the bag is not just a clear sleeve around the product. It is a working part of the order experience.
Slider lock bags for ecommerce brands brand launch checklist basics
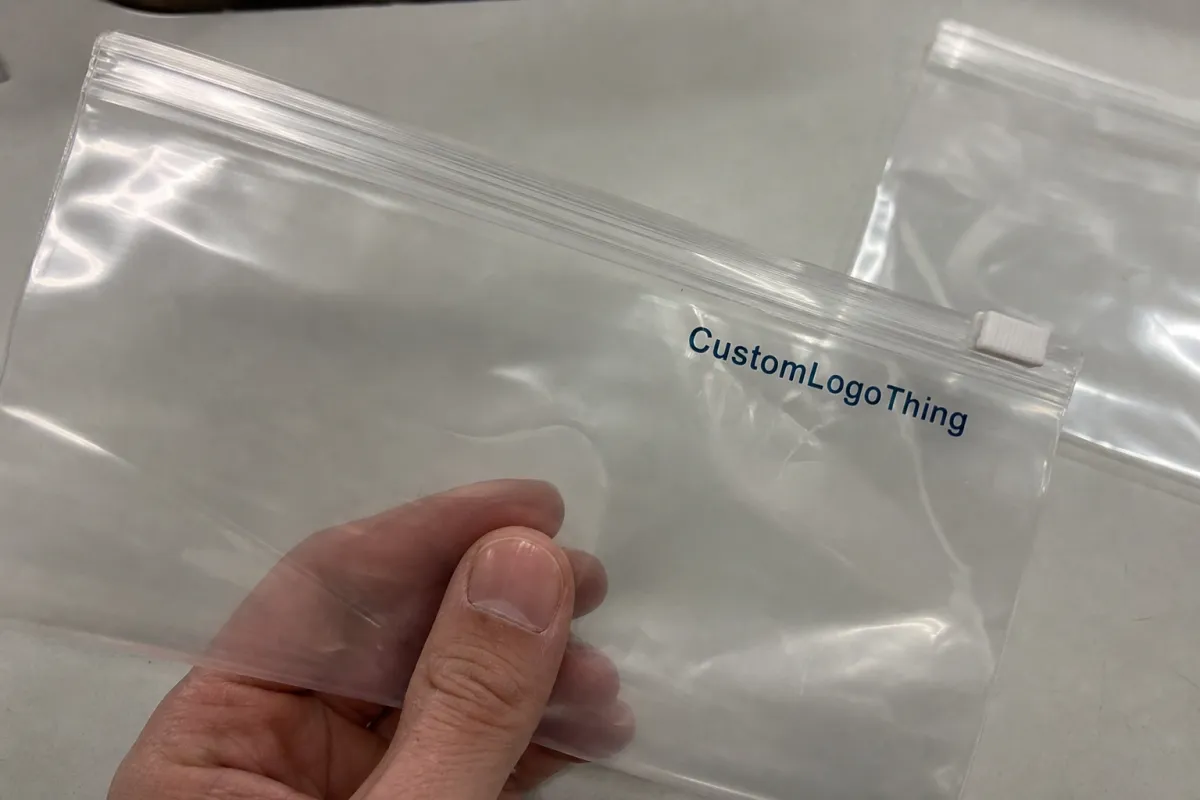
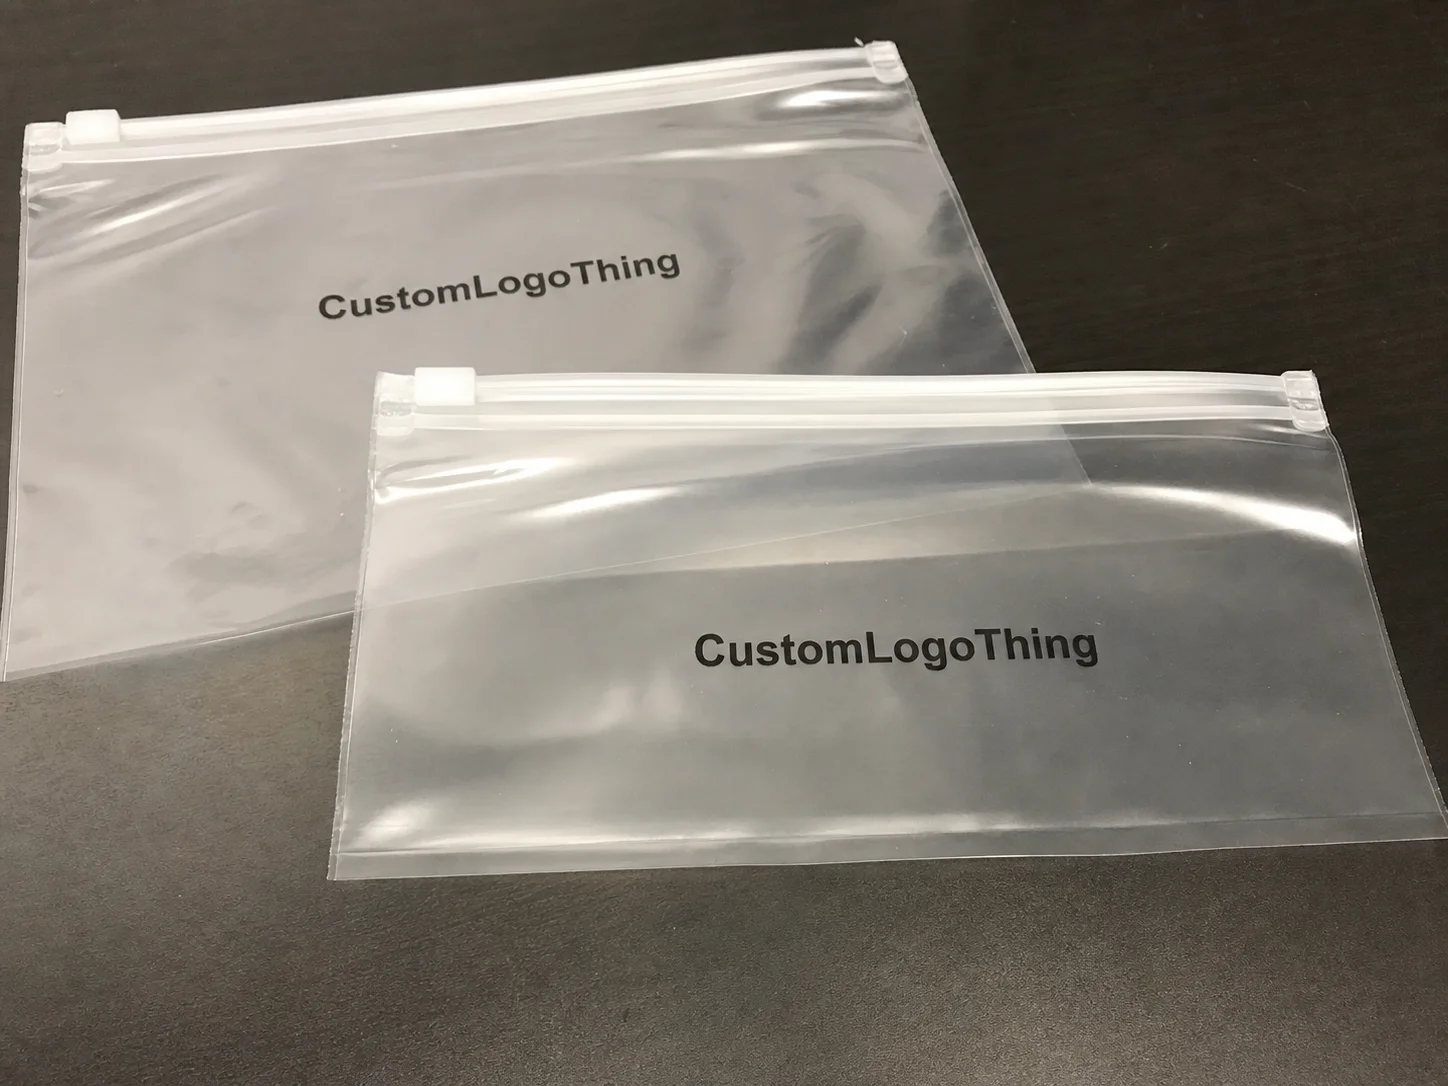
Slider Lock Bags are resealable plastic bags with a small slider that moves along the top closure track. Instead of pressing two zipper strips together by hand, the customer pulls the slider across the track and the closure seats more consistently. That sounds like a tiny improvement until you watch customers try to reseal an overfilled zipper bag or see packers lose time pinching closures across hundreds of orders.
Ecommerce teams use slider bags when the package needs to survive more than one opening. Common use cases include travel kits, beauty refill packs, children’s accessories, garment sets, spare parts, sample assortments, craft supplies, electronics accessories, and subscription items that customers may store in the original bag. The closure adds convenience, and convenience has a real effect on customer perception.
Compared with a standard press-to-close zipper bag, a slider bag usually feels more deliberate and a little more premium. It is easier to close, easier to reopen, and less dependent on the customer lining up the track perfectly. The tradeoff is equally clear: the slider adds cost, thickness, and another component that must be specified and checked.
Not every launch needs it. If the bag is only a dust cover inside a branded box, a basic zipper bag or open poly bag may be enough. If the product is liquid-heavy, oily, sharp, unusually heavy, or regulated, the slider bag may need secondary containment, thicker film, or a different packaging structure entirely. Compostable-only packaging goals also require careful review, because conventional plastic slider closures do not fit every sustainability position.
A slider bag is small, but it is still a brand decision. If it closes poorly, tears easily, or looks crowded once filled, customers notice before they read a single line of brand copy.
The smartest launch planning starts by deciding what the bag is supposed to do. Is it protecting the product during shipping? Organizing multiple parts? Creating a cleaner unboxing moment? Supporting reuse after purchase? Helping the fulfillment team pack faster? Those answers determine the right size, film, closure, artwork, and budget.
How slider closures work in real ecommerce packing
A slider lock bag has several working parts: front and back film panels, side seals, a bottom seal, the zipper track, the slider piece, and sometimes a hang hole, vent hole, write-on panel, warning copy, or printed brand area. The closure does the most visible work, but the seals and film gauge carry the load during packing and transit.
On a packing line, the benefit is repeatability. A packer can close the bag without running fingers across the whole zipper profile, which helps when order volume climbs or when products vary slightly in thickness. Customers get the same benefit later. They can open the bag, remove one item, and reseal it without fighting the track.
That matters for products meant to stay organized after first use. A set of small hardware parts, a skincare refill assortment, a group of hair accessories, or a spare cable kit can remain in one place instead of scattering inside a drawer. Returns and exchanges can also arrive cleaner when the original packaging survives a second use.
The slider, however, creates a hard edge at the top of the bag. If the filled bag is forced into a tight paper mailer or rigid outer carton, the slider can catch, crease surrounding materials, or make the packed order feel bulkier than expected. This is one reason fit testing should include the outer mailer, not only the product and the bag.
Headspace is another practical detail buyers often underestimate. The product should not sit so high that it pushes into the zipper track. Leave enough room above the product so the slider can travel freely and the top seal does not look strained. For soft goods, that may mean allowing for natural puff after folding; for kits, it means accounting for the thickest combined point, not the neatest arrangement on a conference table.
Film gauge changes both performance and feel. Lighter films can work well for soft samples, documents, lightweight apparel, and low-risk accessories. Heavier gauges are better for hardware, sharper edges, heavier bundles, and products that may shift inside the package. Many slider Bags for Ecommerce use fall within common flexible packaging ranges such as roughly 2 to 4 mil, though the right choice depends on weight, edge profile, desired feel, and shipment conditions.
Print placement needs the same discipline. The zipper track, slider path, side seals, and bottom seal are poor places for important graphics, QR codes, or compliance copy. Those areas can distort, crease, or become partly hidden once the bag is filled. Keep essential artwork where the film stays flat and readable.
For technical validation, packaging teams often borrow thinking from parcel test methods such as the ISTA distribution test framework or from carrier-specific shipment profiles. A slider bag does not need to be over-engineered for every possible abuse scenario, but it should be tested against the way it will actually be stored, kitted, shipped, opened, and reused.
Size, film, and print specs to lock before you quote
Start with the real product, not the product listing dimensions. Measure it as it will ship, including folds, insert cards, instruction sheets, bundled accessories, desiccant packets, hang tags, sleeves, or any protective wrap. A product that looks flat in a listing can gain surprising thickness once it is folded, stacked, or paired with printed materials.
For flat items, buyers often begin by adding about 0.5 to 1 inch in width and enough height for product clearance plus slider headspace. Bulky goods need more breathing room. Multi-piece kits should be measured in the arrangement the fulfillment team will actually use, because a beautiful arrangement that takes 40 seconds to build is not a launch plan; it is a photoshoot.
Material choice shapes both appearance and performance. LDPE is common for flexible, soft-touch use. PE blends may improve toughness, stiffness, or seal behavior depending on the structure. Clear film helps with SKU identification and product visibility, especially for apparel colors, sample shades, small parts, or warehouse picking. Frosted film gives a softer, more premium look, but it can reduce barcode contrast and make fine print harder to read if artwork is not adjusted.
Gauge is where many launch teams try to save money first. Thinner film lowers material cost and can reduce freight weight, but it also changes hand feel and puncture resistance. Thicker film improves durability and reuse potential, though it costs more and can add bulk. The right answer is rarely the thickest possible bag; it is the lightest bag that still protects the product, presents well, and survives the customer’s expected use.
Slider color should not be an afterthought. Clear, white, black, and standard color sliders may be available depending on the supplier and order size. Custom colors can require higher minimums or longer production time. If the slider is visible in product photography or unboxing content, make sure it supports the overall visual branding rather than looking like a leftover component from another package.
Print decisions should be made before quoting. Decide whether the bag needs a one-color logo, multi-color graphics, front-only branding, back-panel instructions, a QR code, barcode, suffocation warning, recycling mark, lot code area, or SKU label. Each choice affects setup, print method, proofing, and unit cost.
Artwork should be production-ready. Use vector files for logos and line art. Confirm Pantone or CMYK references. Leave safe zones around seals, corners, the slider track, and any hang hole. For barcodes and QR codes, verify contrast and quiet zones before approval. If the creative team is still debating whether the logo should feel louder, quieter, or “more premium,” pause the order until the direction is settled.
| Option | Typical use | Pros | Tradeoffs |
|---|---|---|---|
| Stock slider bag | Basic launches, internal kits, quick replenishment | Lower setup cost, faster availability, easier testing | Limited sizes, minimal branding, less distinctive presentation |
| Lightly customized bag | Logo print, simple color work, recurring ecommerce SKUs | Better brand recognition, moderate cost, useful for early launches | Requires artwork approval, minimum order planning, and proof review |
| Fully custom printed bag | Retail-ready launches, premium kits, multi-SKU programs | Strong visual branding, better brand consistency, more controlled presentation | Higher setup cost, longer timeline, tighter forecasting, more obsolete-inventory risk |
Before asking for pricing, lock the product dimensions, target bag size, film type, gauge, slider color, print method, artwork files, compliance copy, quantity tiers, delivery location, and requested in-hands date. A clear one-page spec prevents quote revisions that waste a week without improving the final package.
Cost, pricing, MOQ, and unit cost reality checks
Slider bag pricing depends on bag size, film thickness, closure style, print colors, print coverage, order quantity, setup requirements, packing method, and freight. A supplier can give a rough range early, but a useful quote needs those inputs. Otherwise the number is more placeholder than plan.
For early-stage launches or uncertain demand, stock bags or lightly customized runs often make sense. Fully custom printed slider bags usually require higher minimum order quantities because setup, color matching, production scheduling, and machine time have to be spread across enough units. Ordering a few hundred custom bags and expecting commodity pricing rarely works.
The cost stack usually includes:
- One-time setup, plate, or artwork preparation charges
- Per-bag production cost based on size, gauge, print, and quantity
- Proofing, prototype, or pre-production sample cost if requested
- Freight, duties, taxes, and warehouse receiving charges where applicable
- Rush fees when the launch calendar is compressed
Print coverage has a direct effect on cost. A small one-color logo is typically the most economical branded option. Multi-color printing, larger coverage, tighter registration, and special finishes raise both price and review complexity. Full-coverage graphics can be useful for premium launches, but they should earn their place by supporting shelf impact, unboxing, instructions, or SKU clarity.
Buyers should compare landed cost, not just unit cost. A bag quoted at a lower piece price may become more expensive after freight, duty, sampling, storage, or late delivery are included. A slightly higher unit cost can be the better business decision if the supplier offers a more reliable lead time, clearer proofing process, or lower risk of defects.
Ask for tiered pricing at two or three quantities. The useful question is not only “What does 5,000 cost?” but also “Where does the unit cost drop enough to justify extra inventory?” Sometimes the next price break is meaningful. Sometimes it tempts a brand into buying a year of bags for a product that has not proven demand yet.
Hidden cost traps are easy to spot once you know them. A bag that is too small creates repacking labor and wasted inventory. The wrong gauge creates damage, poor hand feel, or customer complaints. Late artwork changes trigger revision charges. Too many printed versions divide volume across SKUs and raise unit cost. Expedited freight can erase every cent saved during sourcing.
As a practical range, stock slider bags may be purchased in smaller quantities with lower setup costs, while custom printed programs often become more economical at several thousand units and above. Exact minimums vary by supplier, size, film, and print method, so treat any generic MOQ claim with caution. The better conversation starts with the forecast, launch date, and reorder plan.
Process, timeline, and lead time before launch day
The normal path is straightforward: requirement brief, size confirmation, material recommendation, quote, artwork setup, digital proof, physical sample if needed, production, quality check, shipping, and warehouse receiving. Most delays are not dramatic. They are small, ordinary delays that stack until the launch team suddenly has no buffer left.
Stock bags with applied labels can move quickly when the size is available. Custom printed slider bags need more time because artwork proofing, print setup, material availability, production scheduling, curing or drying, packing, and freight all sit in the chain. If the bags are needed for photography, influencer seeding, kitting, pre-orders, or warehouse training, the packaging due date is earlier than the public launch date.
Approval delays deserve special attention. Machines do not usually ruin the calendar by themselves; unclear decision-making does. Set deadlines for final dimensions, final material, artwork approval, sample approval if required, production release, pre-shipment review, ship date, and delivery appointment. Then make one person responsible for collecting approvals.
Request physical samples when the product has sharp edges, odd thickness, unusual folding behavior, premium presentation needs, strict QR or barcode requirements, or a strong reuse expectation. A digital proof can show artwork location, but it cannot show whether the product bulges against the slider or whether the bag looks underbuilt in hand.
Freight planning matters because slider bags are light but not always compact, especially once packed in cartons with protective spacing. Warehouse receiving also needs coordination. If bags arrive late or in mixed cartons without clear labeling, the fulfillment team may lose time sorting packaging before they can pack orders.
For packaging material decisions, recycling communication, and consumer-facing disposal language, the EPA recycling resources are a useful reference point. Claims around recyclability, recycled content, and disposal should be reviewed carefully, especially when a bag is part of a larger sustainability message.
Quality-control tests before you approve production
A slider bag should be checked before full production and again when goods arrive. The goal is not to create a laboratory project around a simple bag. The goal is to catch obvious failures before they become customer-facing problems.
Start with fit. Put the real product, inserts, and any secondary items inside the bag. Close the slider several times. The slider should move without grinding, skipping, or separating the track. The filled bag should not pull hard at the side seals or force the top closure into an arched, strained shape.
Check seal strength by gently tugging the side and bottom seals near the thickest part of the product. For heavier or sharper products, add a basic drop or shake test inside the actual outer mailer or carton. The outer package can change the result; a bag that behaves well on a table may fail after the slider rubs against a tight mailer wall.
Review print quality under normal warehouse and customer lighting. Logos should be clean, colors should be within the approved range, and fine text should be readable. Scan every barcode and QR code from the filled bag, not just the flat proof. Curved film, frost, gloss, and low contrast can all reduce scan reliability.
Count and inspect a small random sample from received cartons. Look for slider pieces installed backward, zipper tracks that separate too easily, weak bottom seals, inconsistent print position, blocked vent holes, or carton labeling that does not match the SKU. None of these checks take long, but they protect the launch from avoidable cleanup work.
Common launch mistakes that make slider bags fail
The first mistake is sizing from flat dimensions only. Real products have folds, corners, height, and packing variance. A bag can technically fit on paper and still be miserable on the line.
The second is placing logos, warnings, or QR codes too close to the slider, side seal, or bottom seal. Once the bag is filled, those areas distort or disappear into the structure. That hurts brand recognition because customers notice the awkward placement before they notice the design intent.
The third is using thin film for heavy, sharp, or multi-piece products. If the item punctures the bag, the customer will not admire the cost savings. They will remember the failure.
The fourth is ignoring pack-out speed. A bag that looks elegant but adds 15 or 20 seconds per order can become expensive quickly. Multiply that by real launch volume and the labor math stops being polite.
The fifth is skipping barcode and QR testing. Matte film, curved surfaces, low contrast, tight placement, and poor quiet zones can all cause scan problems. A code that does not scan is decoration pretending to be infrastructure.
The sixth is ordering too many custom bags before the product is proven. Branded packaging is useful inventory only when the product, artwork, and forecast are stable. Otherwise it becomes a stack of obsolete decisions.
The seventh is treating compliance copy as a final art detail. Depending on the bag size, market, product type, and use case, the package may need suffocation warnings, recycling marks, product labeling, batch information, or age-related warnings. Add that copy before proof approval, not after production is scheduled.
The eighth is forgetting the customer’s hands. Give the filled bag to someone outside the launch team and ask them to open it, remove the product, close it, store it, and reopen it. Watch where they hesitate. That is where the package is talking back.
Good packaging is often quiet. It fits, closes, scans, protects, and gets out of the way. Bad packaging turns a small decision into a loud complaint.
Next steps: build your bag spec sheet and launch pack
Build a one-page bag spec sheet before requesting quotes. It should include product name, product dimensions, packed thickness, target bag size, film type, gauge, slider color, print colors, print locations, quantity tiers, delivery location, launch date, and required in-hands date. Add notes for inserts, labels, warnings, and whether the bag needs to work for returns or long-term storage.
Then assemble a launch pack: product sample, logo files, brand color references, required copy, barcode or QR files, insert card dimensions, outer mailer dimensions, and reference photos for the intended packaging style. The goal is not to make the bag decorative for its own sake. The goal is to support brand identity while keeping fulfillment repeatable.
Run test fits before full production. Put the real product inside the proposed bag. Close it, shake it, pack it in the outer mailer, mail it if the launch risk is high, and open it again. That practical loop is still the fastest way to learn whether the bag is doing its job.
Compare supplier quotes beyond unit price. Review material, gauge, size tolerance, print method, setup fees, sample cost, revision policy, lead time, freight, carton packing, and what happens if a production issue is found. A low quote with vague specifications is not a bargain; it is an argument waiting for a ship date.
Set decision deadlines for artwork approval, sample approval, production release, ship date, and warehouse receiving. Hold those dates carefully. Slider Lock Bags may be a small piece of the launch, but they touch the product, the fulfillment team, and the customer’s first impression. That is enough reason to specify them well.
What should be on a slider lock bag launch checklist for ecommerce brands?
Include product dimensions, packed thickness, target bag size, film type, gauge, slider color, print method, artwork files, compliance copy, quantity tiers, budget, delivery address, and launch deadline. Add fit tests, slider function checks, barcode or QR scans, outer mailer fit, pack-out speed, and approval dates.
Are slider lock bags better than regular zip bags for ecommerce packaging?
They are better when customers need to reopen and reuse the bag or when an easier closure supports the product experience. Regular zip bags are usually cheaper and flatter, so they can be better for one-time packaging or tight budgets. Slider bags cost more and take up slightly more space, but they often improve convenience and perceived quality.
How do I choose the right size slider lock bags for an ecommerce launch?
Measure the real product after folding, bundling, or adding inserts. Allow room for thickness, packing variance, and slider headspace. If the item is bulky, sharp, soft, or sold as a multi-piece kit, test a physical sample before production. Paper dimensions are useful, but the filled bag tells the truth.
What affects the cost of custom slider lock bags for ecommerce brands?
The main drivers are bag size, film gauge, slider type, print colors, print coverage, order quantity, setup charges, sampling, and freight. Higher quantities usually reduce unit cost because setup and machine time are spread across more bags. Rush production, late artwork changes, and expedited shipping can raise the landed cost quickly.
How early should ecommerce brands order slider lock bags before a brand launch?
Start quoting as soon as product dimensions and launch quantities are reasonably clear. Build in time for artwork proofing, sample testing if needed, production, quality checks, shipping, and warehouse receiving. Start earlier for fully custom printed bags, multiple SKUs, special films, or packaging needed before photography, kitting, or influencer seeding.