Small Retail Paper Bags Sample Approval Checklist for Buyers
A bag can look perfect in a photo and still fail five minutes later on a checkout counter. That is why a Small Retail Paper Bags sample approval checklist is useful. It forces you to check the dull details: gusset width, fold lines, handle drop, ink rub, bottom strength, carton packing, and all the little things that become expensive once thousands of bags are made.
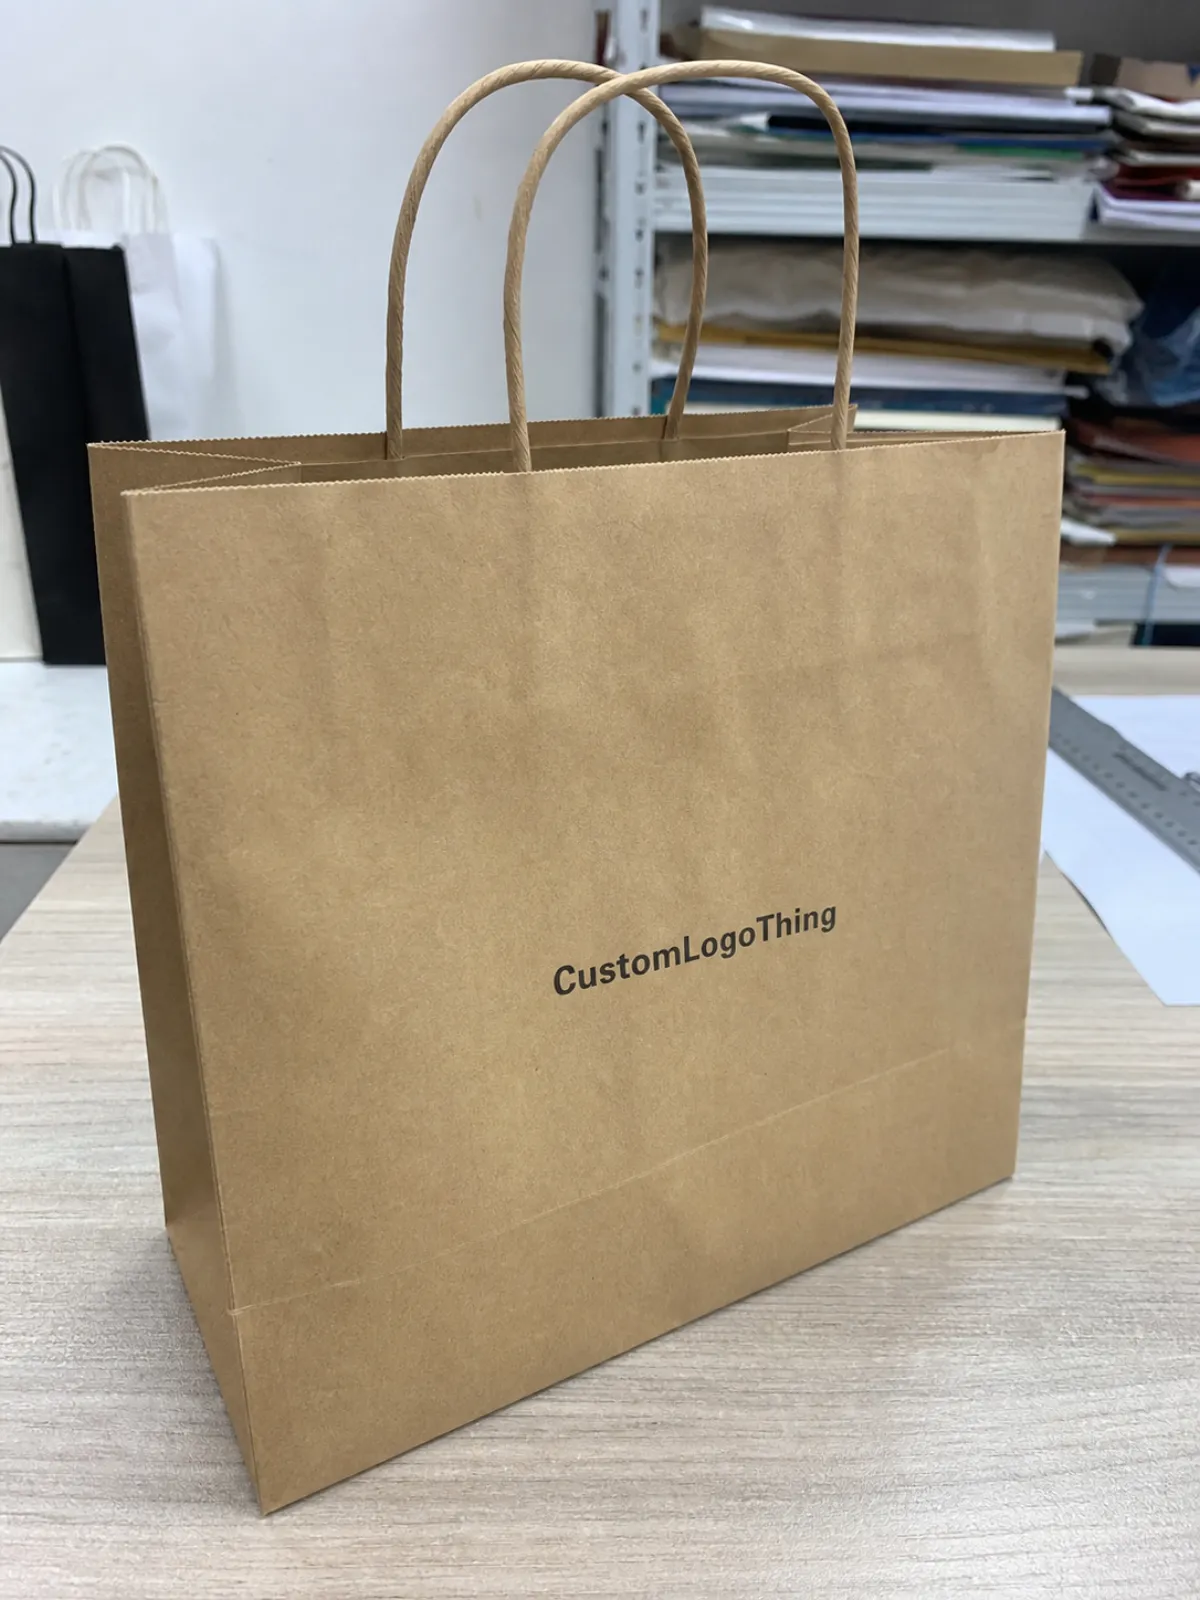
Most paper bag problems are not dramatic. They are off by 3 mm. The logo sits slightly too low. The rope handle feels fine empty, then cuts into fingers with two candles inside. The kraft stock turns your warm beige logo into sad oatmeal.
Tiny misses become big invoices.
Small Retail Paper Bags Sample Approval Checklist: What Fails First
The first thing that fails is usually not the print. Buyers stare at the logo because that is the fun part. Fine. But the bag has a job. It has to open cleanly, stand up, hold weight, sit properly on a counter, and make the product feel intentional instead of improvised.
Visual approval is only one slice of sample approval. A digital proof tells you whether the artwork file is placed correctly. A flat sample can show the dieline, fold marks, bleed, panel layout, and glue zones. A full physical sample tells you whether the bag actually works. That last one deserves the real signoff, especially for custom paper shopping Bags with Handles, foil stamping, spot UV, embossing, lamination, or non-standard sizing.
Here is the part buyers learn the annoying way: once you approve the physical sample, the supplier treats those details as locked. Finished size, material, ink color, handle type, reinforcement, lamination, carton packing, and tolerances all become production instructions. If you later discover the bag is too shallow for your product box, that is not a quick adjustment. It is a revision, and sometimes a new sample.
Approval is not a compliment. “Looks good” is not quality control. Approval means the factory can reproduce the sample at scale within agreed tolerances.
A useful checklist moves the decision away from “I like it” and toward better questions. Does this exact bag meet the spec sheet? Does it carry the product? Does the color match closely enough on the chosen stock? Does the handle survive normal retail handling? Less romance. Fewer reprints.
For small retail bags, the weak points tend to repeat: undersized gussets, weak bottom folds, handles placed too close to the top edge, cracking ink on folds, scuffed lamination, and color shifts between proof and production stock. None of these sound exciting. That is the point. The boring checks protect the order.
How the Sample Approval Process Works
The approval chain starts with a brief: bag size, paper type, handle style, print method, quantity, delivery deadline, and budget target. Then comes the dieline, which maps the front, back, side gussets, bottom panel, fold lines, glue areas, handle holes, and bleed. Artwork sits on top of that dieline. If the dieline is wrong, pretty artwork only helps you make the wrong bag faster.
After that, you usually approve a digital proof. Check logo placement, spelling, barcode placement if used, PMS callouts, bleed, safe zones, and whether the artwork version matches the latest file. For retail bags, file names should be painfully clear, such as BrandName_8x4x10_Kraft_1C_Black_V3. Boring file names save money. Creative file names belong somewhere else.
Then comes the physical sample. Depending on the supplier and budget, it may be a white dummy sample with no print, a digitally printed prototype, or a production-intent sample using the final paper, print, finish, and handles. If your order includes custom color matching, hot foil stamping, embossing, heavy ink coverage, or premium lamination, do not pretend a flat PDF is enough.
Different people should approve different parts. Brand or marketing should approve artwork, color direction, logo scale, and finish. Procurement should approve cost, MOQ, tolerances, and delivery terms. Store operations should test whether the bag works with real products and checkout flow. If the bags are white-labeled or resold, the end client should approve before production starts. Otherwise, everyone feels confident until someone important sees the carton delivery.
Every revision adds friction. A color tweak may require another ink drawdown or press proof. A structural change, such as widening the gusset from 80 mm to 100 mm, may require a new dieline and fresh dummy sample. A handle change from twisted paper to cotton rope can affect reinforcement, hole position, labor, and carton packing. Use the Small Retail Paper Bags sample approval checklist to separate must-fix issues from personal preference.
Cost, Pricing, and MOQ Tradeoffs That Change the Quote
Custom bag pricing is not “bag plus logo.” The quote usually stacks several costs: sample charge, artwork setup, printing setup, plate or screen fees, material, labor, packing, freight, and sometimes color matching. A plain stock bag with a one-color imprint may be simple. A custom size with PMS ink, foil, rope handles, and matte lamination is a different animal. Obviously. Yet buyers still compare them like apples and forklifts.
MOQ drives unit cost hard. At 500 pieces, a custom printed paper bag may land around $0.75-$1.80 per unit depending on size, paper, and decoration. At 5,000 pieces, the same style might drop to $0.18-$0.45 per unit. At 20,000 pieces, larger runs may get cheaper again, but freight, storage space, and cash tied up in inventory start to matter.
| Option | Typical MOQ | Approximate Unit Range | Best For | Watchouts |
|---|---|---|---|---|
| Stock kraft bag with one-color imprint | 250-1,000 pieces | $0.35-$0.95 | Pop-ups, events, small boutiques | Limited sizes and print area |
| Custom printed paper shopping bag | 3,000-5,000 pieces | $0.18-$0.55 | Retail stores with repeat use | Setup fees and longer sampling |
| Premium laminated bag with rope handles | 1,000-5,000 pieces | $0.65-$2.50 | Gift, beauty, jewelry, luxury retail | Lamination, reinforcement, and freight cost |
| Foil stamped or embossed bag | 1,000-3,000 pieces | $0.80-$3.00 | High-margin products and launches | Tooling charges and slower proofing |
Sample charges commonly run $50-$250 for simple paper bags and $150-$500 or more for complex production-intent samples. Plate, screen, or foil die charges may add $40-$300 per color or finish. PMS color matching can add cost too, especially if you need a drawdown on kraft paper rather than white stock.
Premium paper changes the quote quickly. A 120gsm kraft shopper behaves very differently from a 200gsm white art paper bag or a 250gsm laminated bag. For rigid luxury bags, you may see 350gsm C1S artboard wrapped over board with soft-touch lamination, but that is no longer a cheap retail carrier. It is packaging theater with handles. Sometimes useful. Sometimes overkill.
Freight can ruin a “cheap” quote. Paper bags are light, but they take space. Bulky cartons, rigid handles, and poor packing efficiency increase dimensional weight for air freight and container volume for ocean freight. If the supplier quotes ex-works or FOB and another supplier quotes delivered duty paid, compare the landed cost, not the prettiest unit price.
A higher quote can be the cheaper choice if it includes a proper physical sample, clear tolerances, better handle reinforcement, and accurate production specs. Saving $120 on sampling and losing $2,400 on unusable bags is the kind of math nobody frames for the office wall.
Fit, Structure, and Print Specs Buyers Must Verify
Start with finished dimensions, not flat dimensions. For a small retail bag, a common format might be 8 in wide x 4 in gusset x 10 in high, or 200 x 100 x 250 mm. Check width, height, gusset depth, bottom panel, and handle drop. If your product is a box, place it inside. If your product is soft goods, fill the bag to a realistic volume. Air is not merchandise.
Handle drop matters more than buyers think. A short 3 in drop may be fine for a small candle or soap bag. A 5-6 in drop is more comfortable for hand carry. Shoulder carry is a different design and usually needs a larger bag, stronger reinforcement, and longer rope or ribbon handles. Twisted paper handles are practical and recyclable in many programs, while cotton rope or ribbon looks premium but can complicate recycling and add labor.
Paper weight should match the load. Light retail bags often use 100-130gsm kraft or white paper. Better small shopping bags may use 150-200gsm paper. Premium laminated versions may use heavier art paper or board. Ask for burst strength, tear resistance, or load guidance if the bag will carry glass jars, cosmetics, books, or dense packaged goods. For broader packaging performance thinking, the International Safe Transit Association is a useful reference point for transport testing concepts, even if your retail bag itself is not being ISTA-certified.
Print checks need daylight and patience. Look at logo placement from the top edge, side fold, and bottom crease. Check bleed at folds and gussets. Inspect registration if there are multiple colors. Heavy ink coverage can crack at fold lines, especially on uncoated kraft. Metallic foil can look sharp on white or black stock and strangely dull on textured paper. Not always, but often enough to test Before You Order 10,000.
Color shifts are normal across substrates. A PMS orange on white paper will not match the same ink on brown kraft. Matte lamination can mute color. Gloss lamination can intensify it. Uncoated paper absorbs ink differently from coated paper. If color accuracy matters, ask for ink drawdowns on the actual stock, not a loose promise that the factory will “match the brand.”
For responsible sourcing claims, confirm whether the paper is FSC-certified and whether the claim is supported by the supplier’s chain-of-custody paperwork. The Forest Stewardship Council explains the certification framework better than most sales sheets do. Also check whether the finished bag construction supports the claim you plan to print. A recyclable kraft bag with a plastic lamination layer is not the same story as an unlaminated kraft bag with paper handles.
Finish details change durability. Matte lamination reduces scuffing and gives a softer hand feel. Gloss lamination makes color pop but can look less refined on small luxury bags. Spot UV needs clean registration. Embossing needs enough paper thickness to hold the impression. Foil stamping needs the right pressure, heat, and surface. Your sample approval checklist should make every finish a checkable line item, not a vague “premium finish” note.
A Step-by-Step Review Routine Before You Approve
Use a routine. Not vibes. A consistent review catches defects your eye skips after staring at the same logo for two weeks.
- Measure the sample. Compare width, height, gusset, bottom panel, and handle drop against the spec sheet. Allowable tolerance might be plus or minus 2-3 mm for many paper bag dimensions, but confirm it in writing.
- Check the product fit. Load the actual products. Test the bulkiest item, the heaviest item, and the most common combination a customer buys.
- Test carry comfort. Hold it for 2-3 minutes with real weight. If the handle twists, digs, or tears the patch area, revise it.
- Inspect print under store-like lighting. Warm boutique lighting, daylight near windows, and warehouse fluorescents can make the same ink look different.
- Photograph every panel. Capture front, back, side gussets, bottom, handle attachment, glue seam, and close-ups of finish details.
- Write deviations down. Label each issue as accepted, revise, or reject. No mystery notes.
Do not compare the sample against memory. Compare it against the current spec sheet and approved proof. If the sample is supposed to be 200 x 100 x 250 mm and it arrives at 195 x 90 x 250 mm, that is not close enough unless your product fit still works and procurement accepts the tolerance.
For print, check spelling first. Yes, really. Misspelled URLs, wrong social handles, outdated taglines, and old logos still make it to production because everyone assumes someone else checked them. Then inspect print placement, color, edge sharpness, ink rub, scuffing, and registration. If the bag has foil or embossing, run a fingertip over the finish and check for cracking, skipping, or shallow impression.
Do a simple rub test with a clean white cloth or tissue. It is not a lab test, but it will catch obvious ink transfer, dusty foil, or unstable coatings. Flex the folds. Open and close the bag several times. Set it on a flat counter and see whether it stands or leans like it has given up.
For strength, load the bag to the expected retail weight plus a modest safety margin. Do not get theatrical and overload a 120gsm kraft bag with dumbbells. Test the actual use case: jars, boxes, books, apparel, sample kits, or whatever customers will carry. Watch the handle holes, patch area, bottom fold, and side seams.
The best Small Retail Paper Bags sample approval checklist is not long for the sake of looking official. It is specific enough that two people reviewing the same bag reach the same conclusion. That is the point.
Process, Timeline, and Turnaround Expectations
Sampling and production are separate timelines. Buyers mix them up constantly, then act betrayed by calendars. A digital proof may take 1-3 business days after artwork submission. A white dummy sample can take 3-7 business days. A printed physical sample often takes 7-15 business days, depending on print method, material availability, and finish.
Mass production for small retail paper bags often takes 12-25 business days after final sample approval for common constructions. Premium bags with lamination, foil, embossing, rope handles, or rigid board structures may need 25-40 business days. Add freight. Air shipment may take 3-7 days after pickup but costs much more. Ocean freight can take several weeks, plus customs clearance and final delivery.
Revisions add time in uneven ways. Text changes on artwork may be fast if no sample is needed. PMS color matching can add 3-7 business days. Structural changes can add 5-12 business days because the dieline may need to change and a new dummy sample may need approval. Finish changes can be slower if a new foil die, embossing plate, or lamination test is required.
Holiday shutdowns, material shortages, customs holds, and late approvals stretch schedules even when the supplier performs well. Build a buffer. For a retail launch, final approval 6-8 weeks before the bags are needed is a safer target for a straightforward custom run. Imports, premium finishes, or multi-location rollouts need more space. Rush production exists, but it usually means higher cost and fewer chances to catch mistakes.
Use version control like an adult. Every proof, sample, and approval email should share the same version number. If the physical tag says V2, the approved PDF says V3, and the buyer email says “latest version,” congratulations, you have built a dispute machine.
Ask the supplier what happens after approval. Some move straight to bulk production. Others make a pre-production sample from the actual production setup, especially for larger orders or premium finishes. A pre-production sample is not always necessary, but it can be useful when the prototype was made digitally and the bulk run will use offset, flexo, screen printing, or foil tooling.
Common Mistakes That Trigger Reprints or Delays
The biggest mistake is approving the sample because the front panel looks good. Retail bags fail in three dimensions. They collapse, lean, twist, pucker, tear at the handle, or refuse to sit flat. A clean logo does not fix a weak bottom.
Another classic: skipping the spec sheet and trusting a verbal promise from sales. If the approved document does not say 150gsm white kraft, matte lamination, twisted paper handles, 6 mm bleed, and plus or minus 3 mm size tolerance, do not assume production will magically honor the conversation. Factories make what is documented. Memory has terrible print resolution.
Testing only one bag is also risky. Ask for multiple samples if possible, especially for handle strength and print consistency. Open and close them. Stack them. Load them. Carry them. If five samples all show the same side-crease cracking, that is not random. That is the process talking.
Buyers also under-check carton packing. Carton size affects storage, freight, and store handling. Bags packed too tightly can arrive crushed or creased. Bags packed too loosely can shift and scuff. If stores have limited backroom space, ask how many bags ship per carton and how the cartons stack. Glamorous? No. Useful? Very.
Vague approval language creates expensive arguments. “Looks fine” tells nobody which version was approved, whether deviations were accepted, or whether the buyer noticed the off-center logo. A proper approval should name the exact sample, date, artwork file, spec sheet, accepted tolerances, and any exceptions.
A practical checklist also protects the supplier. That may sound generous, but it is true. Clear signoff reduces back-and-forth, avoids subjective complaints, and gives both sides a reference point if the first shipment looks different from the approved sample.
Actionable Next Steps Before Final Signoff
Before final signoff, gather the approved physical sample, current dieline, final artwork file, quote, purchase order, and production spec sheet. They should all agree. Same size. Same paper. Same handles. Same finish. Same quantity. Same carton packing if that matters to storage or retail distribution.
- Archive the approved sample. Label it with supplier name, sample version, date, material, size, and approval status.
- Lock the artwork file. No casual logo swaps after approval. Send print-ready PDF or AI files with fonts outlined and linked images embedded.
- Confirm production tolerances. Include size, color, placement, and finish expectations. For strict brand programs, Delta E targets may be useful.
- Request a pre-production note. Ask the supplier to confirm they will use the same stock, handle, print setup, and finish as the approved sample.
- Plan first-shipment inspection. Compare the first carton against the reference sample before distributing bags to stores.
Your approval email should be boring and precise. Try language like: “Approved for production: small retail paper bag sample V3, received May 14, matched to spec sheet CLT-BAG-8x4x10-V3 and artwork file BrandLogo_Bag_V3.pdf. Accepted tolerance: size plus or minus 3 mm, logo placement plus or minus 2 mm. No substitutions to paper, handle, lamination, or print color without written approval.” Not poetic. Very useful.
Keep the physical reference sample. Put it in a sleeve, box, or labeled folder. Do not let someone borrow it for a meeting and lose it, because memory is not a quality-control system. For first-shipment inspection, pull 10-20 bags from different cartons when possible and compare them against the approved sample for size, color, handle attachment, finish, odor, scuffing, and carton damage.
Run the small retail Paper Bags Sample Approval Checklist before production release, not after the bags are already in transit. Once cartons are on the water or stacked in a warehouse, your choices get ugly: accept, discount, rework, or reprint. Better to be picky while the fix still fits inside an email.
The final signoff should feel slightly tedious. That is normal. Good packaging approval is not dramatic. It is measurement, documentation, product fit, and a few firm no-substitution lines. The reward is simple: the bag that arrives should behave like the bag you approved.
FAQs
How do I use a sample approval checklist for small retail paper bags?
Compare the physical sample against the approved spec sheet, not just the mockup. Check finished dimensions, gusset width, print placement, handle strength, bottom construction, paper weight, finish quality, and carton packing. Record any accepted deviations in writing so production does not drift later.
What should I check first on a small retail paper bag sample?
Start with finished dimensions and product fit. If the bag does not hold the actual product load, print quality is almost irrelevant. After fit, inspect color, logo placement, registration, fold quality, bottom strength, and handle comfort with real weight inside.
How many sample rounds are normal before approval?
One round is common when the dieline and artwork are already well defined. Two rounds are normal for custom colors, premium finishes, or structural changes. Three or more rounds usually means the brief, spec sheet, or decision process needs tightening.
Does approving a sample lock the final paper bag quality?
It locks the agreed spec, but only if the supplier follows the same materials, print setup, and construction. Ask for written tolerances for size, color, placement, and finish. Keep the approved sample and use it for first-run inspection.
What if the paper bag sample looks right but feels flimsy?
Test it with the real product weight, not an empty bag. Check paper weight, handle reinforcement, bottom construction, and stiffness. Reject or revise it before mass production, because flimsy bags get expensive fast once customers start carrying them out the door.

