Snapback caps sample approval checklist for brand launch kits
A Snapback Caps Sample Approval Checklist for Brand Launch Kits is one of those tools that looks simple on paper and quietly saves a project from expensive friction. A cap can pass a digital proof and still miss the mark once it is built as a physical object. The crown may sit too tall, the visor may curve more than expected, or the embroidery may shift just enough to change the balance of the logo. Those are small differences measured in millimeters, but they carry real weight in a launch kit where every item is meant to feel deliberate.
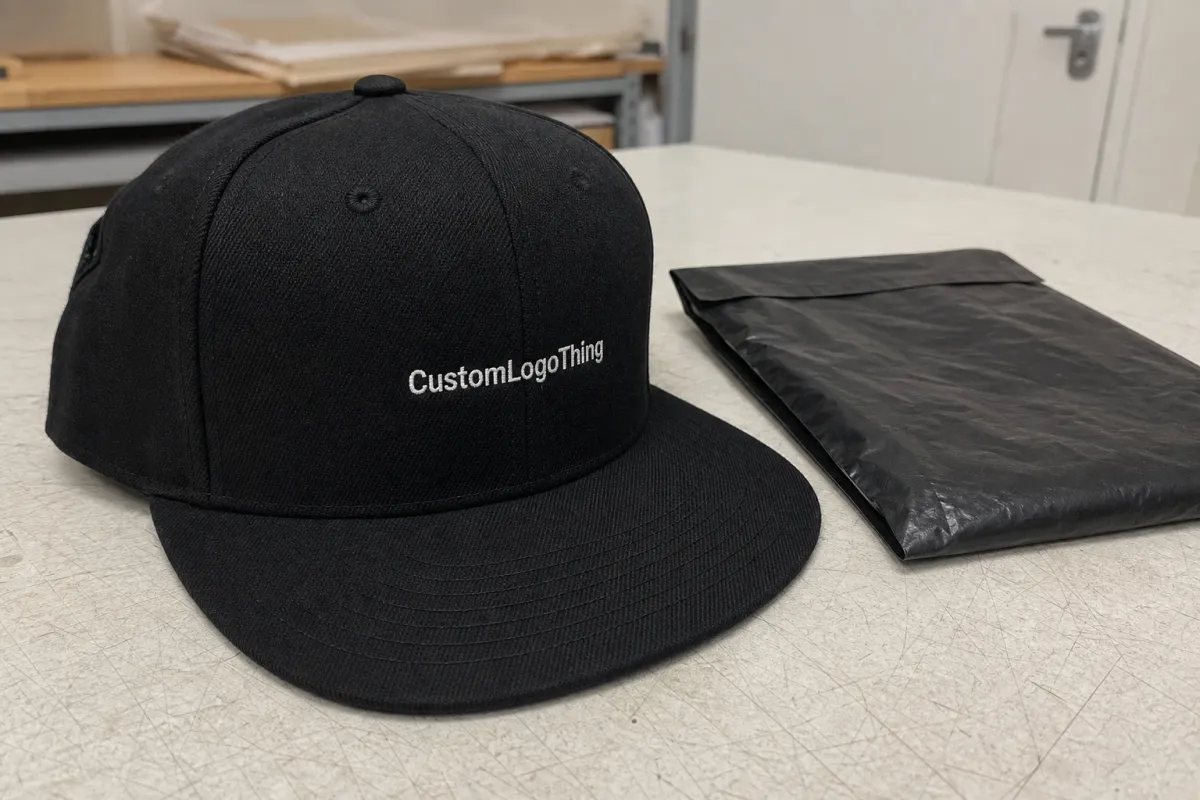
The reason this checklist matters is straightforward: a snapback is not just a promotional add-on. It is a wearable product with structure, fit, materials, decoration, and packaging constraints that all affect how the brand reads in hand. If the cap is part of a retail drop, event kit, onboarding box, or influencer mailer, it becomes a visible marker of the brand standard. Buyers notice the shape first, then the quality of the finish, and only after that do they look at the rest of the package.
That is why sample approval should be treated as a production gate, not a creative discussion that happens to involve a cap. The sample tells you whether the approved direction can actually be built at scale. It also reveals where the quote, timeline, or pack-out plan may need correction before a full run begins.
A good checklist reduces avoidable surprises. It keeps marketing, sourcing, and operations looking at the same object, the same measurements, and the same version history. That kind of discipline usually feels slower at the start, then saves time once the project enters revision and release.
Approval process and lead time
The approval process works best when the brief is complete before sampling starts. Cap style, panel count, profile, closure type, fabric, decoration method, color target, and packaging format should all be agreed on early. If those basics are still moving while the sample is being built, the first round often becomes a correction round. That is where lead times start to stretch.
The typical sequence is clean and repeatable: brief, sample request, sample build, receipt, internal review, revision if needed, final sign-off, and production release. The fragile part is usually the handoff between teams. Artwork may need cleanup. A preferred blank or sweatband may be out of stock. One reviewer may want a structural change while another is only looking for visual balance. If those notes are not gathered in one place, the process slows down for no useful reason.
For a straightforward snapback, a first sample commonly takes 7-14 business days before freight. A revision can add another 3-7 business days. International shipping can extend that window further, especially if the sample has to move across multiple handoff points. If the cap is entering a larger launch kit with boxes, inserts, tissue, or mailers, add time for pack-out checks and transit review. A cap that looks fine alone may fail once it is compressed into the final kit format.
There are a few specifications that should be frozen before production is released. Crown height, panel shape, closure hardware, embroidery size, thread colors, patch dimensions, label placement, and packaging inserts all affect the final result. Once those are locked, the quote becomes more stable and the launch calendar becomes easier to protect. If those details continue changing, the risk moves from sampling into production.
Fit, structure, and decoration checks
This is the stage where the sample either earns approval or gets sent back for adjustment. A snapback cap has a clear silhouette, and small changes alter that silhouette quickly. Crown height should be measured against the spec, not judged by memory. A high-profile cap creates a different look from a mid-profile one, and that difference shows up in photos, on shelf displays, and in wear tests.
The visor deserves close attention as well. A flat brim communicates a different style from a gently pre-curved one. If the brand standard calls for a flat edge with a crisp front panel, a sample that arrives with extra curve should not be waved through just because the logo looks fine. The shape is part of the message. So is the firmness of the front panel, the spacing of the side seams, and the way the crown holds its form after handling.
Comfort matters more than many teams expect, especially for launch kits tied to premium positioning. The closure should open and close cleanly without grit or uneven tension. The sweatband should feel smooth, not scratchy, after a few minutes of wear. If the inside finish is rough, the user will notice even if the exterior looks polished. That experience becomes part of how the brand is remembered.
Decoration checks need the same discipline. Embroidery placement should be measured from fixed points on the cap, not eyeballed from the center of the logo. Stitch density, thread color, and letter spacing all change the final impression. A shift of 1-2 mm can make a logo look slightly off-center or cramped. Woven patches should be checked for border clarity and edge finish. Printed transfers need to be inspected for adhesion, sharpness, and whether they sit flat against the surface instead of lifting at the edges.
Labels and internal details deserve equal attention. Confirm the position of the size label, brand label, and any care label. Check whether the sweatband hides the stitching neatly or exposes it in a way that looks unfinished. If the cap uses contrast stitching, make sure the contrast is intentional and consistent with the approved artwork, not the result of a rushed substitution.
A practical review usually includes:
- Fit: does the cap suit different head sizes without pinching or gaping?
- Structure: is the crown height, front panel stiffness, and visor shape correct?
- Decoration: is the logo placed correctly and scaled to spec?
- Finish: are seams, labels, and interior edges clean?
- Pack-out: does the cap fit the final launch kit without distortion?
That last point is often skipped until it becomes a problem. A cap can pass on a table and fail in a box. Structured crowns rebound after compression, and that rebound can create a lifted lid, a warped insert, or a crush mark on the front panel. If the cap is going to ship inside a tight kit, test it in the exact final packaging before final sign-off.
Cost, pricing, MOQ, and quote drivers
Cap pricing is easier to understand once the quote is split into components. A simple embroidered snapback is a different cost structure from a cap with a woven patch, custom inside label, hangtag, and branded packing. Decoration is usually the biggest driver, but it is rarely the only one. Every added material or setup step adds labor, and labor tends to show up in the unit cost faster than buyers expect.
MOQ affects the final price in a very direct way. A 300-piece run carries a larger share of setup cost per unit than a 3,000-piece run. That does not make smaller orders bad. It just means the buyer needs to understand where the money is going. For sample work, fees often sit around $35-$120 depending on complexity, revision pressure, and freight. Production pricing for many custom snapbacks can land somewhere around $4.50-$10.50 per cap, though that range shifts quickly with dense embroidery, specialty patches, premium trims, or mixed-label setups.
There are also less obvious quote drivers. Rush schedules add cost because they compress sampling, approval, and shipping into a tighter window. Split shipments cost more when part of the order goes to a warehouse and part goes directly into launch kits. Extra assembly labor appears when caps need to be packed with inserts, tissue, stickers, or custom cartons. Revision rounds can add both time and expense if artwork changes after the sample has already been built. If the project includes paper packaging and a sustainability claim matters to the brand story, material choice and certification also affect cost and availability.
| Option | Typical setup | Indicative unit cost | Best fit |
|---|---|---|---|
| Simple embroidery | Small logo, standard closure | $4.50-$6.25 | Lean launch kits and promotional drops |
| Woven patch | Custom patch, moderate detail | $5.25-$7.50 | Sharper branding and stronger shelf appeal |
| Mixed trims + labels | Patch, inside label, hangtag | $6.75-$10.50 | Retail-facing launches and premium kits |
| Rush or split shipment | Compressed schedule, multiple destinations | Varies by order | Deadline-sensitive activations |
The safest buying habit is to ask for a line-item quote. That makes it easier to see whether a higher number comes from decoration, packaging, labor, freight, or an actual spec change. Without that detail, small assumptions can hide inside the final invoice.
Step-by-step approval workflow for launch kits
A clean workflow should feel almost dull. That is a good sign. The more predictable the approval path, the fewer surprises appear later in production. Start by receiving the sample and registering the date, version, supplier reference, and any notes that came with the shipment. Then compare the cap to the tech pack and approved artwork using the same light source and the same review setup every time.
Consistency matters because it removes noise. If one reviewer looks at the sample on a warm office light and another looks at it under daylight-balanced lighting, the discussion can drift into lighting differences instead of product differences. The sample should be seen the same way by everyone who is signing off on it.
After the first inspection, gather feedback in one place. A decision log works better than scattered emails because it ties each comment to a version number and a reviewer. Record what needs correction, what is acceptable, and what is a preference rather than a defect. That distinction keeps the revision loop focused. If every note is treated as equally urgent, the project slows down and the schedule becomes harder to defend.
- Receive and register the sample with version, date, and reference number.
- Inspect physically for fit, structure, decoration, and finish.
- Photograph consistently so the same sample can be reviewed later without confusion.
- Collect feedback in a single log with one owner.
- Confirm corrections and request a revised sample if needed.
- Document final sign-off before any production release.
If the cap is part of a larger launch kit, test the full package at this stage. Insert cards, tissue, cartons, and outer mailers can affect the fit of the cap or alter how the cap presents once the box is opened. A cap that looks strong on its own may appear cramped or underwhelming once placed beside the rest of the contents. The full system needs to be reviewed together.
Production should not begin until the approval note includes the final revision number, the sign-off owner, and the exact changes that were accepted. That record becomes the reference point if anything in the shipment needs to be traced back later. It is a simple habit, but it prevents a great deal of confusion.
Common mistakes that trigger delays, rework, and chargebacks
The biggest mistake is approving from photos alone. Photos are useful for quick review, but they do not show fit, hand feel, or how the closure behaves under real use. A snapback can look centered in a flat lay and still feel wrong on the head. It can appear properly balanced on screen and still carry a logo that sits too high once the cap is worn. That is why in-hand review should be the default whenever the timeline allows it.
Color creates another easy trap. Navy may look clean on a monitor and turn almost black under warehouse lighting. Black embroidery on black fabric can disappear if the thread sheen is too low or the surrounding panel absorbs too much light. Red may appear softer on a proof and much louder in person. Those differences are not cosmetic trivia. They affect how premium or coordinated the launch kit feels the moment it is opened.
Packaging-fit mistakes cause their own problems. A structured cap can spring back after compression and create a lid bulge or crush the front panel. If the box was sized only from the cap’s flat dimensions, the final pack-out may fail even though the sample passed inspection. That kind of issue often shows up late, when the correction costs more and the shipping deadline is already close.
The administrative mistake that causes the most confusion is unclear ownership. If nobody can say who approved the sample, which revision replaced the earlier one, or whether the final change was a must-fix or a preference, the project becomes hard to defend. Rework and chargebacks often follow weak recordkeeping rather than bad manufacturing.
- Photo-only approval instead of a physical inspection.
- Color decisions made under inconsistent lighting.
- Untracked revisions that blur the approved version.
- Poor pack-out testing that ignores the final kit format.
- Late artwork changes after the sample has already been signed off.
The easiest way to avoid these problems is to treat the sample as a production gate. Once that mindset is in place, the checklist does real work instead of acting like paperwork.
Expert tips for cleaner approvals across teams
If several teams are reviewing the same cap, give them the same reference. One sample, one measurement sheet, one lighting setup, one revision log. That sounds basic because it is, but basic discipline is what keeps a launch moving cleanly. Marketing will care most about appearance. Product teams will focus on spec compliance. Operations will care about repeatability and pack-out. A shared reference helps those groups reach the same decision from different angles.
Separate must-fix items from nice-to-have ideas. That single habit keeps a review from drifting into preference management. A logo that is 4 mm off-center is a production issue. A wish for a slightly warmer green thread may be a future-line discussion. If those are mixed together, the revision loop expands and the schedule absorbs unnecessary noise.
Have backup options ready for trim, closure color, label stock, or packaging insert if the lead-time window gets tight. That does not mean lowering the standard. It means protecting the launch without scrambling. The strongest teams usually plan the fallback before they need it, which gives them room to keep moving if one material slips.
Package standards deserve the same care as the cap itself. If the launch includes printed inserts or branded cartons, inspect those items with the same approval discipline. If the brand is making a sustainability claim, keep the material trail clear and the documentation tidy. If the cap is shipping through a distribution route with rough handling, the outer pack needs to survive that route without crushing the front panel or deforming the crown.
Teams that document approvals well usually build a useful reference library for the next order. That library shortens future sampling, makes vendor comparisons easier, and helps keep brand consistency intact across different runs. It also reduces debate when the next colorway, logo update, or launch kit format comes along.
Next steps before you release production
Turn the checklist into a shared approval document with owners, dates, sample photos, revision numbers, and exact sign-off language. If a correction is needed, write what must change and which version replaces the earlier one. A vague “approved with notes” is not enough for a cap that has to be reproduced consistently at scale.
Before the purchase order is released, confirm that the factory file matches the approved sample. The cap spec should reflect the actual decoration method, closure, label placement, and packing details that were signed off. If the team approved a woven patch, the file should say woven patch. If the closure changed from plastic to metal, that should be written down too. If the color was matched to a brand standard, include the reference code rather than relying on memory.
The point of a snapback Caps Sample Approval Checklist for Brand Launch Kits is not to create more paperwork. It is to make the final decision clear enough that production can move without guesswork. That clarity protects the budget, keeps the schedule steadier, and helps the kit arrive looking like the brand intended it to look.
What should a snapback caps sample approval checklist include for a brand launch kit?
It should cover fit, crown shape, visor curve, closure function, comfort, decoration placement, color accuracy, label location, and pack-out fit. The checklist should also record the sample version, the reviewer, the date, and the final approval decision so the record is easy to trace later.
How long does snapback sample approval usually take before production?
A simple sample can be reviewed quickly, but one revision round can add several business days or more, depending on freight and correction scope. Lead time grows when artwork needs cleanup, trim materials are out of stock, or multiple teams are reviewing the same sample. Add buffer if the cap is part of a larger launch kit with printed components.
What drives snapback cap sample pricing and the final quote?
Decoration complexity, MOQ, custom trims, and packaging inserts are the main drivers. Rush service, extra revisions, and split shipments can raise the price faster than expected. Ask for a line-item quote so the sample fee, production cost, and freight are easy to separate.
Can I approve a snapback cap sample from photos only?
Photos can help with a quick precheck, but they do not show fit, hand feel, or how the crown sits in real use. If photo approval is the only option, treat it as provisional rather than final. For production sign-off, an in-hand sample is still the safer route.
What is the biggest mistake brands make with cap sample approval checklists?
They approve the cap before checking decoration, packaging compatibility, and color standards together. They also forget to document revision history, which makes later disputes hard to resolve. The most reliable method is to treat the sample as the last check before production, not the first rough version of the design.


