Stationery Woven Label Beanies bulk order planning looks straightforward on paper. Then the first sample arrives, the logo feels too small, the cuff eats part of the design, and the thread colors do not read the way they did on the mockup. That gap between a flat proof and a finished hat is where most mistakes begin.
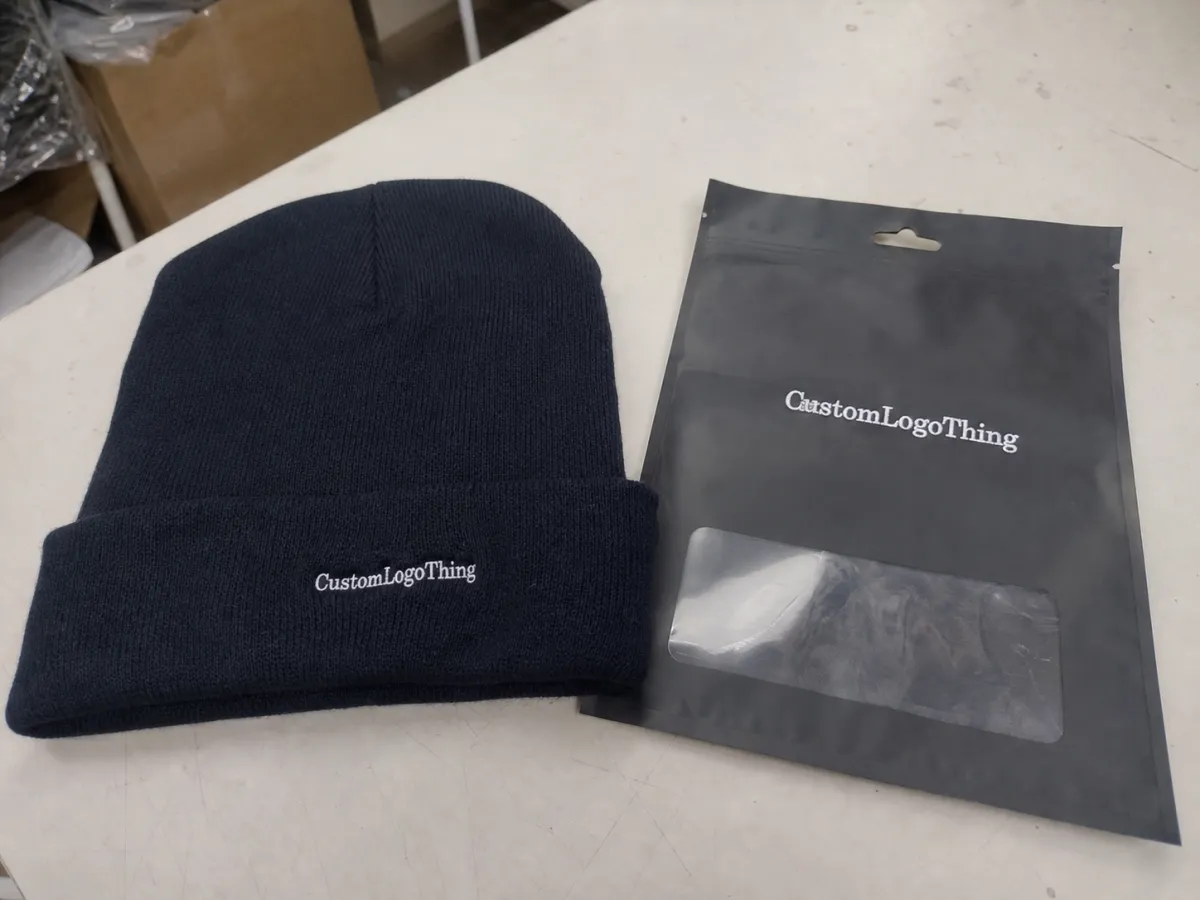
The label is not a decorative afterthought. On a beanie, it is often the only brand cue a buyer touches, sees, and remembers after the hat has been folded, pocketed, and worn through a few cold mornings. If the label frays, warps, or loses legibility after handling, the spec was wrong from the start.
The most reliable way to manage a bulk order is to treat the beanie body as the frame and the woven label as the part that has to fit inside it. That sounds obvious, but plenty of briefs start with the artwork and only later ask where the label can physically live. The order should be reversed.
Stationery woven label beanies bulk order planning starts with fit, not art
A logo can look clean at 800 pixels wide and still fail on a knit cuff. Once a beanie stretches around a head, folds at the cuff, and bends at the seam, small type compresses and thin lines vanish. Woven labels have limited resolution, so artwork that depends on fine detail usually needs to be simplified before it ever reaches sampling.
Good planning starts with three practical questions: which body style are you buying, where can the label sit without distortion, and how much of the logo can the fabric actually carry? Those answers shape everything else. Color is important, but fit decides whether the label is readable in real use.
The other buyer mistake is forgetting that the label is handled more than it is seen. It gets rubbed by hands, brushed by coats, and tugged during packing. A tight weave, clean edge finish, and secure stitching usually age better than a bold print that cracks or pills. For a small accessory, durability matters more than visual drama.
A sample should be judged on stretch, fold, and handling, not just on a flat table.
A practical sequence keeps the order under control:
- Choose the beanie body first.
- Confirm where the label can sit on the cuff, side, or hem.
- Size the woven label to the visible area, not the artwork file.
- Approve the artwork with production limits in mind.
That order saves rework and keeps stationery woven label beanies Bulk Order Planning grounded in something useful: legibility, repeatability, and wear. If the first sample is right, the bulk run usually follows. If the sample is wrong, the correction bill grows quickly.
Beanie construction details that change label performance
Not every beanie gives the same surface to work with. A cuffed acrylic beanie is very different from an uncuffed rib knit or a slouch style. Cuffed hats usually provide the most stable branding area because the fold creates a consistent front panel. Uncuffed styles can work, but they allow more movement. Slouch beanies often need a smaller label or a quieter side placement because the fabric hangs instead of holding shape.
Placement changes the effect more than many buyers expect. Center-front placement is the easiest to read and the simplest to approve. Side-seam placement can feel more premium if the label is balanced and the artwork is restrained. Hem tags are useful for subtle branding, but they are not ideal for tiny legal copy or crowded logos. The hat should guide the placement, not the render file.
Three construction variables deserve attention before sampling:
- Cuff depth - shallow cuffs leave little room for a label that still reads well after the hat is worn.
- Knit gauge - loose knits move more and can distort small shapes.
- Stretch recovery - poor recovery can leave a label bowed or rippled after handling.
Material choice matters too. Acrylic is common because it is affordable, warm, and easy to knit at scale. Polyester blends tend to hold shape better in some constructions. Wool or wool-blend bodies usually cost more and can feel softer, but they can also introduce a different surface texture that changes how labels sit. If the label is stitched onto a denser knit, expect a cleaner attachment; if the knit is very soft, expect more movement and a greater need for sample review.
A tight pre-sample checklist helps keep decisions from drifting:
- Finished hat height
- Cuff height
- Label size
- Attachment method
- Whether the logo contains small text or thin icons
For larger retail programs, ask for one master body spec and keep it fixed across colorways. Small changes across sizes or markets create sorting problems later and make reorders harder than they should be. If you are building a broader branded program, the Wholesale Programs page is a better starting point than a one-off quote request.
Packaging needs its own basic planning. Cartons, inserts, and retail packout should be considered early if the hat is headed to stores. Transit testing does not need to be complicated, but the logic used by organizations such as the International Safe Transit Association is useful because it keeps the conversation focused on shipping risk instead of assumptions.
Color, stitch, and label specifications buyers should lock before sampling
Woven labels are not miniature posters. They do not reproduce gradients, hairline strokes, or a long list of closely related shades very well. If the logo relies on tiny details that disappear when scaled down, the art needs to be simplified before sampling. That is not a downgrade. It is how production artwork becomes usable.
The basic specs should be locked before the first sample is made:
- Beanie base color
- Label background color
- Logo thread colors
- Fold type
- Backing or no backing
- Stitch density
One-color and two-color labels usually look cleaner at small sizes and keep costs lower than more complex builds. They are also easier to read on a tight cuff panel. A three- or four-color woven label can work, but only if the artwork is bold enough to survive the reduction in scale. If the design is already delicate, extra colors tend to create noise rather than clarity.
Thread matching deserves a realistic expectation. Buyers often ask for a brand color and assume the thread will match exactly. In practice, woven thread has its own range, and a precise color may require a surcharge, a longer lead time, or a compromise. Pantone references help guide the process, but they are not a color guarantee. If color accuracy is critical, approve a physical sample instead of relying on a PDF proof.
A simple proof flow works well in most cases:
- Digital mockup for placement and layout
- Physical sample if the order is large, detailed, or color-sensitive
- Final sign-off on label and body color before bulk production
Backing also affects how the label behaves. A soft backing can improve comfort on skin, while a firmer backing can help the label hold shape. Sew-on attachment is standard and usually economical. Heat-applied options exist, but they are not ideal for every knit surface and should be tested on the actual body fabric. What works on one beanie style can be a poor fit on another.
For buyers with sustainability requirements, packaging material is a separate decision from the beanie itself. FSC-certified paper is a common request and a practical one if retail inserts or hangtags are part of the order. The standard is clearly defined at FSC, which makes it easier to align packaging expectations before production starts.
Stationery Woven Label Beanies bulk order planning gets easier once the label structure is fixed early. Every late change adds time, and in many cases it adds cost too. That is not a surprise; it is simply how low-margin production behaves.
Cost, pricing, MOQ, and unit-cost tradeoffs for bulk runs
The quote is never just the beanie. It includes the body, the woven label, the attachment method, packing, and any extra handling requested by the buyer. Barcode stickers, retail inserts, custom cartons, mixed color ratios, or special folding instructions all move the number. Buyers who compare only the headline price usually discover the real cost in the final invoice.
For woven-label beanie orders, the price curve is usually predictable. Smaller runs carry heavier setup costs per unit, then the unit price falls at common breakpoints such as 100, 300, 500, and 1,000 pieces. The exact numbers depend on the body style and label complexity, but the direction is steady: tiny runs cost more per piece, and larger runs spread the setup more efficiently.
| Order Size | Typical Unit Price Range | What Drives the Cost | Best Fit |
|---|---|---|---|
| 100-300 pcs | $2.80-$5.20 | Higher setup impact, sample cost, simple packing | Test runs, events, small teams |
| 500 pcs | $2.10-$4.10 | Better spread of setup, still manageable inventory | Retail pilots, seasonal drops |
| 1,000+ pcs | $1.60-$3.40 | Better efficiency, stronger spread on setup | Wholesale, repeat programs |
Those ranges are broad on purpose. A simple acrylic cuffed beanie with a one-color woven label usually lands lower than a specialty knit, a heavier yarn blend, or a label with multiple colors and custom backing. Sew-on construction is standard. More complex patch formats, unusual placement, or detailed finishing can push the price upward. That is normal production economics, not a hidden fee.
MOQ should be split into two parts: the body MOQ and the custom decoration MOQ. A supplier may source the beanie at one minimum, while the woven label, packaging, or carton printing has another. Quotes become confusing when those requirements are bundled together without explanation. Ask for each minimum in writing.
Compare quotes line by line. Setup fees, rush charges, split-color surcharges, sample fees, freight, and carton or barcode costs should all be visible. If a supplier cannot explain why the unit price changes at each quantity step, the quote is not ready for approval. A low number that hides extra charges is not a low number.
For teams buying across multiple products, it helps to compare the beanie order against broader Custom Labels & Tags requirements so one item is not optimized at the expense of another. A cheaper hat with a more expensive label or packaging line item can erase the savings fast.
One more practical point: ask how the price changes if you adjust only one variable. Increasing the label width, switching to a second thread color, or adding folded backing can all move cost in ways that are easy to miss in a quick quote. The cleaner the pricing logic, the easier the reorder.
Process, timeline, and turnaround from artwork to shipment
The production process should feel orderly. Brief, mockup, proof, sample, bulk production, quality control, packing, shipment. That sequence sounds basic, yet delays usually happen when someone tries to skip a step and move straight from artwork to production. Missing one approval early often costs more time than the step would have taken.
Timelines are fairly consistent for standard runs. A simple digital proof can take 1 to 3 days. Sample development often takes 7 to 14 days. Bulk production usually lands in the 2 to 4 week range after final approval, before freight is added. If the order needs custom-dyed body colors, unusual packaging, or several revisions, the schedule stretches. There is no trick that changes how cutting, knitting, stitching, and packing work.
What speeds the job up?
- Clean vector artwork
- One decision-maker
- Confirmed Pantone or stock color choices
- A final spec sheet before sampling
What slows the job down?
- Changing label dimensions after the sample
- Debating color names instead of confirming codes
- Waiting too long to approve shipping details
- Adding new text after bulk production has started
Lead time should be judged against the in-hand date, not the invoice date. Freight delays, port congestion, and holiday bottlenecks can push a clean production schedule off course. Build buffer time into the plan, especially if the hats need to arrive before a retail launch, team event, or seasonal drop. In tight calendars, the cheapest protection is time.
Packaging-heavy orders deserve their own review because a beanie that looks fine in a production photo can still arrive crushed, miscounted, or mislabeled. Basic distribution testing logic from ISTA helps keep the discussion practical. The question is not whether the carton is beautiful. The question is whether the goods arrive ready to sell.
Once the spec sheet is approved, keep it fixed. One file version. One placement note. One color reference. Revisions after approval are where otherwise simple orders drift into delay and rework. That discipline matters more than any single supplier promise.
Bulk-order mistakes that trigger rework, delays, and extra charges
The most common mistake is approving artwork before checking real dimensions. A label that looks crisp in a layout file can become cramped once it is stitched onto a stretch knit. Buyers often sign off on the screen version and only notice the problem when the first sample arrives. By then, the art may need to be simplified or resized, which adds time and cost.
Sample approval should include handling, not just viewing. Stretch the cuff. Fold the hat. Hold it at arm's length. If possible, place it on a head form. A label that sits neatly on a flat table can twist once the knit moves. This is especially true on softer rib knits and shallow cuffs, where a few millimeters matter.
Another mistake is running too many variations through the same program. Every extra colorway increases sorting work. Every label size change adds a new point of failure. Every region-specific tweak creates a future inventory problem. Some buyers call this flexibility. In practice, it often turns into higher unit cost and slower reorder cycles.
Logistics errors are just as expensive. Missing delivery details, vague carton marks, barcode formats that are never confirmed, or shipping dates that ignore holiday congestion can all add avoidable delays. If the shipping team has to guess, the order slows down. Guessing is not a workflow.
Do not approve a sample and then treat the approved spec like a suggestion. If the sample is wrong, fix it before bulk. If it is right, keep it unchanged. Small changes are the fastest way to turn a controlled order into an expensive one. One extra millimeter, one added thread color, one late packaging request - those are rarely small in production.
The cleanest bulk order is usually the least dramatic one: no surprise edits, no last-minute color debates, and no extra versions hidden in email threads.
For future runs, keep the final art file, the approved label size, the placement notes, and the color references in one place. Reorders become much easier when the first spec survives the first campaign.
Next steps: artwork brief, approvals, and reorder planning
Before asking for a quote, gather a brief that actually helps someone price the job. Include the beanie style, quantity, target price, label size, label placement, color targets, logo file, ship-to location, and required in-hand date. If there is a ceiling price, say it. That is better than forcing several rounds of guesswork.
Ask for quote timing and sample timing in the same exchange. A low price with a vague lead time is not really a low-cost option if the order misses the launch window. Cost matters, but so does the calendar. A delayed seasonal drop can be more expensive than a slightly higher quote.
For repeat orders, protect one master spec sheet. Record what should never change: logo artwork, label width, approved colors, and placement. Store the final files in a shared place so no one has to search old email threads six months later. That kind of discipline is not glamorous, but it keeps production clean.
If the program is larger, or if you expect to reorder across multiple products, review the structure under Wholesale Programs and keep the workflow simple. If the team needs basic production answers before sending a brief, the FAQ page is a useful place to clear up common questions.
For stationery woven label Beanies Bulk Order Planning, the goal is simple: make the first sample accurate, make the bulk run repeatable, and make the reorder boring. Lock the spec sheet first, then ask for production pricing. That sequence saves money and avoids the kind of mistakes that usually show up only after the hats are already in motion.
FAQ
How many beanies should I plan for a first stationery woven label bulk order?
A practical test run usually starts at 100 to 300 pieces if you are checking fit, color, and label placement. Move to 500 pieces or more if the artwork is already proven and you want better unit pricing. Keep a 10% to 15% buffer so demand does not leave you short.
What label size works best on cuffed beanies in bulk production?
Most cuffed beanies work best with a finished label around 40 x 20 mm to 60 x 25 mm, depending on logo detail. Tiny text and thin icons disappear quickly, so simplify the mark before shrinking it. If the cuff is shallow, move the branding to the side seam or hem instead of forcing a crowded front label.
Can I mix colors in one woven label beanies bulk order?
Yes, but the body color mix usually has to stay within the supplier's MOQ and production window. If you want pricing to stay stable, use the same woven label across all body colors. Extra body shades often add sorting work and inventory complexity, which is why they usually cost more.
How long does production usually take after artwork approval?
A standard custom run usually lands in the 2 to 4 week range after final approval, before shipping time is added. Samples, special packaging, or custom-dyed body colors can add another 1 to 2 weeks. If the artwork keeps changing, the schedule stretches fast, so the first approval should be clean.
What do I need before requesting a quote for stationery woven label beanies?
Send the logo file, quantity, beanie style, label placement, size, color targets, delivery address, and required in-hand date. If you already know your target price, include it. A clear brief reduces back-and-forth and makes the production path easier to price accurately.


