A trucker cap can look right in a product render and still feel wrong in hand, which is why a trucker caps Sample Approval Checklist matters before bulk production starts. A shift of 3 to 5 mm in crown height, a stiffer mesh back, or a slightly flatter brim curve can change the way the cap sits, photographs, and sells.
Sample approval is the point where guesswork stops. You are confirming fit, decoration accuracy, finish, and order details while corrections are still cheap enough to make. That is the practical value of a trucker caps Sample Approval Checklist: it turns a subjective “looks good” moment into a documented sign-off process with fewer surprises later.
Trucker Caps Sample Approval Checklist: Catch Small Differences Early
Small differences matter more on trucker caps than many buyers expect. A structured front panel can hold embroidery well, but if the crown sits too high, the cap starts to look boxy. If the mesh is too soft, the cap loses shape. If the visor curve is too aggressive, the silhouette shifts from casual retail to something more promotional. Those are exactly the kinds of details the sample stage is meant to catch.
In practice, sample approval means reviewing a physical or near-physical version of the cap and deciding whether it matches the target spec. That target should cover more than artwork. It should include fit, crown profile, closure feel, stitch quality, color match, and how the cap reads under normal indoor light. Buyers often focus on the logo first and miss a crooked side seam or a closure that feels flimsy after a few adjustments.
The most overlooked risks are usually structural, not cosmetic:
- Panel structure: front panels can feel underfilled, too rigid, or too tall depending on buckram, foam, and stitch density.
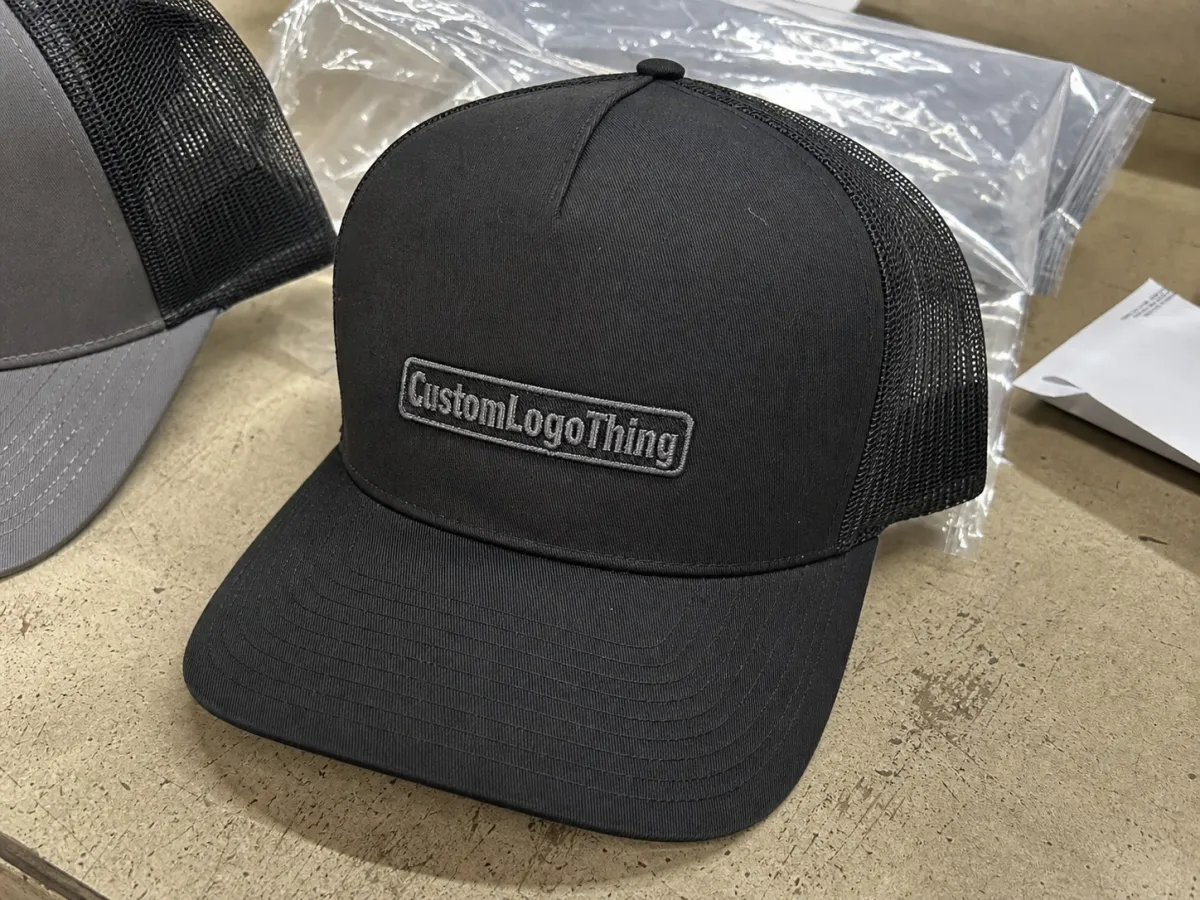
- Color match: black is rarely just black, and dark navy can lean green or purple under different lighting.
- Logo scale: artwork that looks balanced on a flat proof can feel oversized on a curved front panel.
- Closure feel: snapbacks, straps, and hook-and-loop finishes all wear differently in hand.
- Photo behavior: a cap can look fine in close-up and still feel off at arm’s length.
A sample should be treated as an insurance point, not a ceremonial checkbox. Once fabric, decoration setup, and packaging are locked in, every correction becomes harder. A good approval checklist protects brand consistency while the fix is still as simple as adjusting stitch count, changing a patch border, or correcting the closure spec.
Sample Approval Process and Timeline for Trucker Caps
The process usually starts with artwork submission, followed by a review of whether the logo file, placement notes, and cap spec are clear enough to build from. If the style is standard, the sample may move quickly. If it needs custom patches, specialty thread, or a less common mesh color, the timeline stretches because materials have to be sourced and decoration has to be set up correctly.
For a simple decorated cap, a realistic sample cycle is often 7 to 14 business days before transit, then several more days for shipping depending on the route. A more involved pre-production sample, especially one with sewn patches or a tight color match, can take 2 to 4 weeks. The exact timing depends on whether you are looking at a true pre-production sample or a review piece that proves the visual direction without replicating every final detail.
A clean approval process usually follows this sequence:
- Artwork check: confirm logo files, font outlines, Pantone or LAB targets, and placement dimensions.
- Blank sourcing: verify the base cap, mesh, visor, and closure match the planned order.
- Decoration setup: approve embroidery, patch samples, print films, or transfer settings.
- Sample shipment: inspect the cap in person, not only in photos.
- Revision loop: request one round of corrections if needed, then lock the final version in writing.
Fast is not always better. Buyers sometimes want to approve a cap from a few photos in a day or two, but that approach misses the little things that trigger complaints later: loose thread ends, uneven patch edges, a brim that feels too soft, or a closure that does not stay where it should. A slower review window can prevent a full production run from going in the wrong direction.
If packaging or retail presentation matters, ask how the cap will be packed for transit. A basic polybag may be fine for some orders, while others need a folded insert, carton separation, or a pack-out that follows FSC-certified paperboard expectations for the outer materials. For shipment integrity, many teams also refer to ISTA test methods so the goods arrive looking like the approved sample, not crushed or warped.
Fit, Crown Shape, and Closure Checks Before You Sign Off
Fit is where sample approval becomes practical rather than visual. A cap can look attractive on a table and still feel wrong on a head. Check the crown depth first. If the front panel sits too shallow, the cap may ride high and expose too much forehead. If it sits too deep, the cap can feel heavy or collapse into the face. With truckers, the balance between a structured front and an airy back matters because people buy them for everyday wear, not just shelf display.
Try the cap on more than one head size if possible. The snap setting should close comfortably without pinching, and the front should not press into the brow after a few minutes. That matters especially for foam-backed or heavily structured styles, where the front panel can feel stable but not necessarily comfortable. A trucker caps Sample Approval Checklist should include a wear test, even if it lasts only ten minutes.
Closure type changes both feel and perceived value. A plastic snapback gives a classic retail look and a quick adjustment range. A fabric strap feels softer and a little more refined. Hook-and-loop is easy to adjust, but it can collect lint and look less premium if the edge finishing is rough. Buyers positioning the cap as promotional merchandise may accept a simpler closure, while apparel brands usually want a cleaner finish.
Brim shape deserves its own check. A slightly curved visor feels familiar on most trucker caps, but the curve should be intentional and consistent. Too flat, and the cap can seem unfinished. Too bent, and the silhouette starts to feel casual in the wrong way. Feel for seam irritation, scratchy sweatband edges, and mesh pressure points along the temples as well. Those comfort issues do not show up in a product photo, but they do show up in returns and complaints.
A useful habit is to check the same cap in three situations: on a flat surface, on a head, and under normal room lighting. The cap should hold its shape in all three without looking forced. If it only looks right from one angle, the design probably needs adjustment before production starts.
Decoration Specs That Affect the Final Look
Decoration changes the personality of a trucker cap more than almost any other detail. Embroidery gives a classic, durable look, but it depends on the right stitch density and thread sheen. If the density is too light, the logo can look thin. If it is too heavy, small shapes lose clarity and the front panel feels stiff. Woven patches keep fine detail better than embroidery in many cases, especially for small text, but the border style and patch size still need to match the cap’s front panel.
Printed patches and heat transfers can work well on flatter surfaces or simpler graphics, although they are more sensitive to pressure, heat, and edge finish. Mixed-media builds, where a patch is combined with embroidery or a printed underlayer, can look excellent when handled carefully. They can also go wrong quickly if the artwork is scaled without considering the front panel curve. On a curved trucker front, even a small change in patch diameter can shift the visual center enough to make the cap feel off-balance.
Check logo placement from multiple angles. Straight-on is not enough. Tilt the cap, hold it at arm’s length, and look at it in normal room lighting. The logo should still read correctly when the crown shape changes the viewing angle. If your artwork includes fine lines or small letters, verify legibility at real viewing distance, not just in a close-up proof. Most people will see the cap from 2 to 6 feet away, and that is the distance that matters.
For buyers comparing decoration methods, a simple table keeps the discussion grounded:
| Decoration method | Best for | Typical strengths | Watchouts |
|---|---|---|---|
| Embroidery | Classic logos and durable branding | Strong retail feel, good wear resistance | Can lose detail in small text or thin lines |
| Woven patch | Fine details and cleaner edges | Sharp artwork, polished presentation | Patch border and placement must be exact |
| Printed patch | Color-rich graphics and gradients | Flexible artwork, clear visual impact | Needs careful finish control on the edges |
| Heat transfer | Short runs or lightweight branding | Fast setup, lower decoration complexity | Adhesion and long-term durability need review |
If you want the cap to feel premium, ask for stitch count, thread type, border treatment, and backing method in writing. These details look small on paper, but they separate a polished sample from one that still feels underdeveloped.
Cost, Pricing, MOQ, and Sample Charges Explained
Sample pricing is often more layered than buyers expect. A quote may include the blank cap, decoration setup, sampling labor, packaging, and freight, or it may split those pieces apart. If you are comparing suppliers, make sure you know whether the sample fee covers one build only or includes a revision round. That detail matters because a second sample can cost almost as much as the first if the decoration setup has to be repeated.
MOQ affects unit cost in a direct way. Small runs usually carry a higher per-cap price because setup cost has fewer units to spread across. Once quantities move up, the decoration and sourcing cost per unit tends to drop, but the final price still shifts based on fabric quality, patch type, and closure hardware. As a rough industry range, simple trucker caps might land around $3.50 to $6.50 per unit at higher quantities, while more detailed builds with custom patches or specialty trims can move above that depending on the order size and finish.
Here is a buyer-friendly way to compare sample and production quotes:
- Blank cap quality: ask for panel weight, mesh type, sweatband finish, and closure material.
- Decoration method: confirm embroidery, patch, or print setup before comparing prices.
- Sample charges: separate the sample fee from the unit cost so you can see what is refundable or creditable.
- Shipping timeline: include transit time in the real approval window, not just the production time.
- Revision allowance: clarify whether a corrected sample costs extra.
Reasonable sample fees are normal. What you want to avoid is a quote that looks cheap at first but hides the real cost in freight, second-round setup, or unexplained revision charges. A clear approval checklist lets you compare suppliers on the same terms instead of judging only the first number you see.
For buyers who also care about broader supply-chain standards, packaging references can be useful, but they should never replace the spec sheet. Keep the discussion on measurable details: carton count, insert material, label placement, shipping marks, and any packaging requirements tied to retail or distribution.
Material and Build Quality Checks That Matter on Trucker Caps
The front panel fabric should feel consistent from piece to piece. If one side panel is noticeably rougher than the other, the material source or finishing may not be stable. Mesh quality matters just as much. Good mesh has enough structure to hold the cap shape while still breathing well. Poor mesh can feel scratchy, collapse early, or stretch out after a short wear cycle. Buyers usually notice that after only a few uses, which is exactly why it belongs on the sample checklist.
Color should be checked in natural light and indoor light. A cap that looks like a clean charcoal gray under daylight may read almost brown under warm office lighting. This matters most for dark neutrals, faded vintage tones, and brand colors that need to match other merchandise. A Pantone target helps, but it still needs visual confirmation on the actual material. Dye lots and fabric finishes can shift the final appearance in small but visible ways.
Construction details matter too:
- Seam alignment: front seams should sit cleanly and not pull the logo off center.
- Thread trimming: loose ends are a sign that finish control needs attention.
- Stress points: the crown-to-visor join and closure attachment should feel reinforced.
- Sweatband comfort: edge tape and inner finishes should not irritate during wear.
- Weight and balance: the cap should feel light enough for daily use but stable enough to hold its shape.
That balance between wearability and appearance is what makes trucker caps a little deceptive. On the table, almost anything can look passable. In use, the cap either sits right or it does not. For retail, events, or branded merchandise, the difference shows up quickly.
Common Sample Mistakes That Delay Approval
The biggest delays usually come from unclear instructions, not from the cap itself. If the artwork file is low resolution, if the color reference is vague, or if the logo placement is described only as “centered,” the sample team has to guess. Guessing is expensive. It creates back-and-forth, and every round adds time to the schedule. A precise Trucker Caps Sample approval checklist removes that uncertainty before it starts.
Another common mistake is approving from a single photo. Camera angle, lens distortion, compression, and lighting can all hide issues. A cap photographed slightly from above can make the crown look lower than it is. A bright light can flatten thread texture. If the sample is important, ask for multiple angles under neutral light or review the physical cap whenever possible.
Buyers also sometimes focus only on the front logo and ignore the rest of the cap. That is risky. Inside labels, seam finish, closure comfort, and brim feel all affect whether the final product matches expectations. If the sample is approved with those details unreviewed, they can become the source of complaints after the bulk order lands.
Once approval is given, changes are not free in either time or money. If the correction touches decoration setup, patch sourcing, or cap material, the supplier may need to rebuild tooling or reorder components. That is why the sample stage exists in the first place: to make the hard corrections while the order is still flexible.
Next Steps After Approval for a Clean Production Run
After the sample passes, confirm the approved version in writing. Attach the final artwork file, the cap spec, the exact decoration size, and any tolerances you are willing to accept. If you want a logo to sit within a 2 mm range of a specific point, say so. If the mesh color must match a reference cap, identify the reference clearly. Production runs go smoother when everyone is working from the same paper trail.
A short internal sign-off routine helps as well. Have one person check appearance, one person check fit, and one person check order details like quantity, carton count, and shipping terms. It does not need to be formal, but it should be consistent. That is the point where a trucker caps sample approval checklist becomes a reusable system instead of a one-off note.
If packaging is part of the order, add the pack-out details now rather than later. Confirm polybag type, folding method, label position, carton count, and any shipping marks. For larger shipments, ask whether the cartons or inserts meet the paperboard and transit expectations you want, especially if sustainability claims matter to your buyers. Small details like that are easier to standardize before production than after.
Used well, the sample approval checklist keeps the process calm, measurable, and far less prone to surprises. It protects fit, decoration accuracy, pricing clarity, and timing, which is exactly what a bulk buyer needs before release. Approve the sample carefully, document it clearly, and the final run is far more likely to match the cap you said yes to.
What should a trucker caps sample approval checklist include?
It should cover fit, crown shape, brim curve, closure type, decoration placement, color match, and build quality. It should also confirm pricing details, sample charges, revision rules, and the expected production timeline after approval.
How long does trucker cap sample approval usually take?
A simple approval can move quickly if artwork is final and the blank cap is in stock. More complex samples take longer when they need custom patches, embroidery setup, material sourcing, or a revision round.
How do sample pricing and MOQ affect trucker cap orders?
MOQ usually lowers the unit cost as quantities rise, while small orders tend to carry a higher per-cap price. Sample pricing may include setup work, decoration time, and shipping, so it should be compared line by line.
Can I approve trucker cap samples from photos only?
Photos help, but they should not replace a physical sample when fit, texture, and finish matter. A cap can look correct in a picture yet still feel wrong in hand because of crown shape, mesh stiffness, or closure quality.
What changes are hardest to fix after trucker cap sample approval?
Decoration placement, logo size, thread color, and material substitutions are usually the hardest to change once production begins. Fit-related details like crown height and closure type can also be costly to revise after approval.


