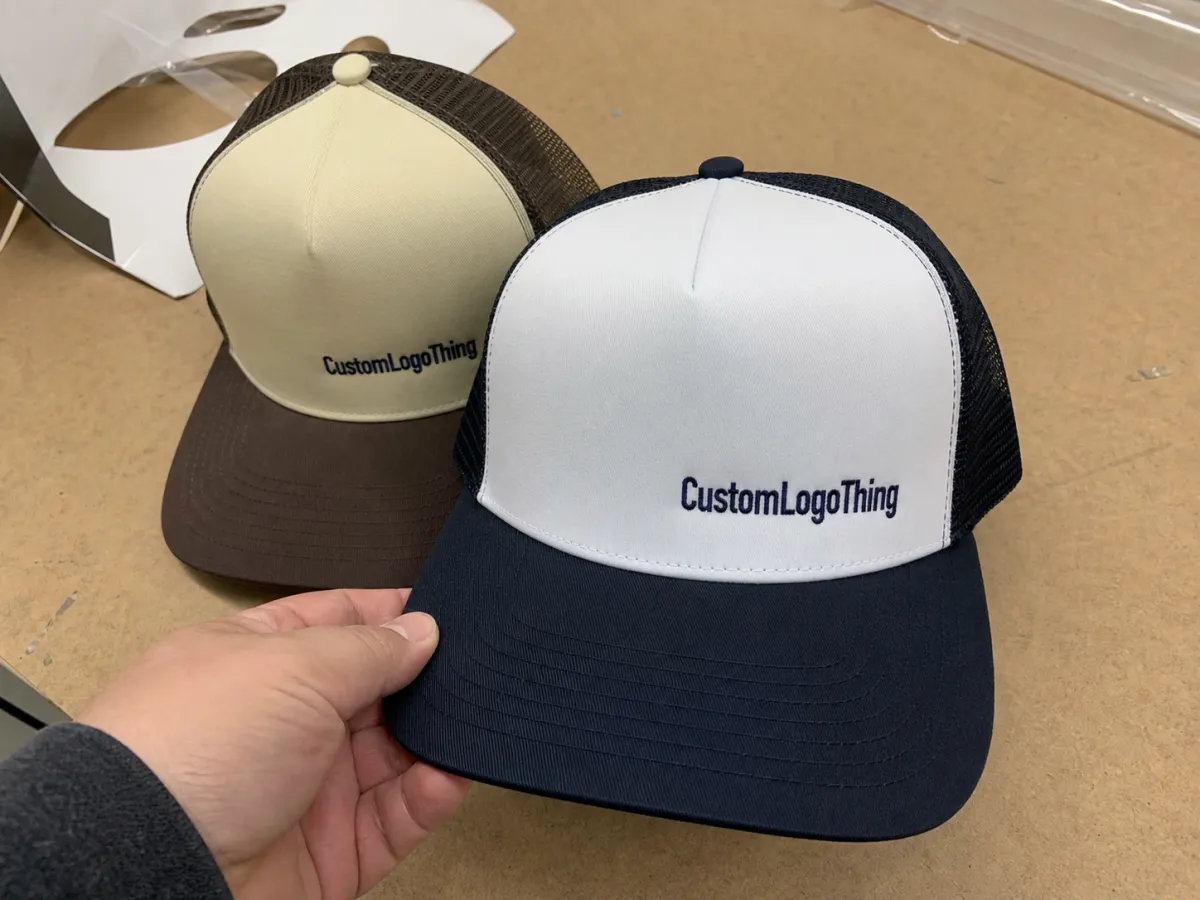
Apparel foam trucker Hats Sample Checklist is a practical tool, not a formality. Foam-front truckers expose shape, proportion, and decoration issues faster than softer caps, so a sample that looks fine in a mockup can still fail in hand. A front panel that sits too tall, a patch that crowds the seam, or a bill curve that feels off changes the whole product.
The checklist exists to compare the sample against the approved spec, record what changed, and keep the next round from drifting. Without that discipline, buyers usually lose time on revisions or approve bulk stock that no longer matches the intended cap.
What an apparel foam trucker hats sample checklist actually covers
The checklist should replace memory with measurements. At minimum, it should capture crown height, foam thickness, mesh type, bill curve, closure style, stitch quality, sweatband feel, and logo placement. If those details are missing, approval becomes guesswork.
That matters especially for foam-front construction. A dad hat can hide small inconsistencies; a foam trucker advertises them. Too much height makes the cap look stiff. Too little structure makes the front wrinkle. A patch that is too large can crowd the seams and make the front panel look overloaded.
The sample is there to reveal what the mockup hid.
A useful checklist answers three basic questions before sign-off:
- Does it match the spec? Measure the sample rather than relying on images.
- Does it wear correctly? A cap can be accurate and still sit badly on the head.
- Can the factory repeat it? Approval only makes sense if the build can scale.
This also protects the project record. If one teammate wants a taller crown and another wants a lower profile, the next sample can drift in the wrong direction unless the feedback is written down. The cheapest correction is the one made before bulk production starts.
How the foam trucker hat sampling process works
The process usually starts with a quote request, but the quote is only as good as the inputs. The factory needs artwork, a spec sheet, target quantity, decoration method, and any special material request. Vague inputs usually produce vague samples.
Most projects move through three sample stages. A proto sample checks shape, construction direction, and proportions. A sales sample is cleaner and closer to presentation quality. A pre-production sample should match the final order as closely as possible and is the last serious checkpoint before bulk work.
The first sample should answer the biggest questions quickly: Does the crown height suit the market? Is the foam too soft or too rigid? Does the bill shape support the design? If the answer is no, that is still progress. The point is to find out which variables matter most before the order scales.
Some decisions should be locked before sampling begins, especially patch method, logo placement, foam thickness, mesh color, closure type, and brim curve. If those change midstream, buyers need to know whether the change affects price or timing. Hidden decisions tend to surface after the sample is already built.
What should change and what should not
Revisions are normal. Vague revisions are not. “Make it better” does not help anyone. “Lower the front panel by 4 mm, reduce the bill curve, and move the patch down slightly” does. The closer the instruction is to a measurement, the fewer rounds it takes to reach approval.
The best sample process is narrow and controlled: one issue at a time, one response at a time. That discipline matters because even small geometry changes can alter how a foam trucker hat wears and reads.
The specs that make or break approval
Some specs are cosmetic; others decide whether the cap is worth approving. Start with structure: crown height, foam density, front panel symmetry, mesh quality, bill shape, and sweatband construction. If the front panel is too flimsy, it wrinkles. If it is too stiff, the cap feels boxy. If the mesh is uneven, the hat may still pass in photos and fail in hand.
Foam thickness often falls around 1.5 mm to 3 mm, but the right number depends on the silhouette and price target. Thinner foam gives a lighter feel. Thicker foam can look more premium but may sit stiffer. The right choice depends on brand position and the intended shape of the cap.
Fit and structure
Fit should be tested on more than one head size. A cap that looks clean on a desk can sit shallow on one wearer and tight on another. That is especially true with foam-front construction because the shape holds itself instead of relaxing around the head. Check the closure range, front-panel level, and side profile.
Crown height is another detail buyers underestimate. Many trucker profiles sit around 4 to 4.75 inches at the center front, but the right height depends on the intended look. A retro style usually needs more volume; a cleaner retail style may need a lower front. The eye reads proportion before it reads measurements.
The bill matters just as much. Flat, lightly curved, and more curved brims all change the style. If the brim is too hard, the cap can look forced. If it is too soft, it may feel unfinished. Wear testing is more useful than a quick visual approval under office light.
Decoration details
Decoration is where many approvals succeed or fail. Measure patch width and height, confirm center placement, and check whether embroidery density hides detail or supports it. If the cap uses a woven patch, inspect edge finishing and thread consistency. If it uses print, look closely at small text and fine lines. Not every artwork translates well to foam-front construction.
Color accuracy also needs a written reference. Pantone or PMS guidance is useful when a brand has fixed colors that cannot drift. A sample that looks fine on a monitor can still read wrong under daylight or store lighting, so the physical sample must be compared against the approved reference.
Do not ignore the details buyers often notice late: sweatband feel, stitch density, panel alignment, back mesh tension, and inside finishing. The outside can look acceptable while the inside feels cheap.
- Measure foam thickness, crown height, and bill depth.
- Confirm patch size, placement, and edge finishing.
- Test fit on multiple head sizes and closure positions.
- Inspect stitch lines, seam symmetry, and sweatband comfort.
If the order includes retail packaging, add that to the checklist too. Cartons, inserts, backer cards, and polybagging all affect cost and presentation. For paper components, FSC certification is worth asking about. For shipping packs that need to survive rough handling, ISTA methods are more useful than assumptions about “good enough” packing.
Cost, pricing, and MOQ: what buyers should budget
Sample pricing and bulk pricing are not supposed to match. Samples carry setup time, pattern adjustments, and one-off labor, so the per-unit cost is higher. For a custom foam trucker hat, a sample often lands around $40 to $120, depending on decoration method, patch complexity, and special material sourcing. Shipping is usually separate.
Bulk unit cost depends on order size, patch method, foam quality, logo complexity, packaging, and whether any custom component needs tooling. A simple foam-front hat can price very differently from one with layered embroidery, molded details, or retail packaging. For many orders, the unit price may sit roughly in the $2.50 to $6.50 range at workable volumes. Smaller runs cost more per piece; larger runs usually reduce the price.
Minimum order quantity often falls in the 100 to 300 piece range for custom Foam Trucker Hats, though stock-based builds can go lower. Low MOQ is rarely free. It usually comes with a higher unit price or fewer customization options. If a quote looks unusually cheap at a tiny volume, ask what is missing.
| Sample type | Typical cost | Turnaround | Best use |
|---|---|---|---|
| Proto sample | $40-$70 | 7-12 business days | Shape, structure, and early fit checks |
| Sales sample | $50-$90 | 8-14 business days | Presentation and brand approval |
| Pre-production sample | $60-$120 | 10-15 business days | Final sign-off before bulk production |
Buyers Should Ask for a landed-cost picture early: sample fee, production price at several quantity tiers, revision charges, packaging, and shipping. A quote that leaves out one of those pieces is incomplete, even if it looks neat in the inbox.
Process and timeline: sample turnaround from quote to approval
A realistic sample timeline starts before the sample itself. If the artwork is incomplete or the spec sheet is messy, the schedule slows immediately. For a simple custom foam trucker hat, the full path from quote to physical sample often takes 10 to 15 business days. If the project involves custom patches, special shaping, or a revision round, it can stretch to 15 to 20 business days or more.
Where delays usually happen
Most delays are predictable: missing vector files, unclear color references, late replies to photo approvals, or design changes after the first sample is already built. None of that is mysterious, and all of it slows the job.
A good timeline should be broken into business-day checkpoints: quote, artwork confirmation, sample build, review, revision, and final approval. “Soon” is not a timeline. Buyers need dates tied to each step if they want to manage launch dates, retailer commitments, or event deadlines.
Leave room for at least one revision. Two is safer if the cap has multiple custom elements. That buffer matters even more when the order includes custom packaging or a label system that needs to be verified before the full run.
The timeline is also affected by material choices. The front panel, mesh, backing, closure, patch method, and packaging all affect the calendar. A project that starts with clear specs usually stays manageable. A project that starts with guesses tends to wander.
- Quote stage: confirm decoration, quantity, and component availability.
- Artwork stage: lock colors, placement, and size references.
- Sample stage: compare the sample against the approved spec sheet.
- Revision stage: correct only the changes you actually want made.
- Approval stage: sign off before production starts.
Common mistakes that waste sample rounds
The first mistake is approving from photos alone. A hat can look acceptable in a staged image and still fail in person because the foam front is too soft, the crown stands too high, or the seam tension changes under natural light. Foam-front caps need in-hand review.
The second mistake is vague feedback. “Make it better” does not help the factory. Specific corrections do: lower the front panel, shift the patch, reduce the curve, or change the mesh color.
The third mistake is skipping fit testing. One head size does not tell you enough. Try the cap on different wearers if possible. A trucker hat that fits one person cleanly may feel shallow or tight on another.
The fourth mistake is ignoring the full landed cost. Sample fee, shipping, revision fees, packaging, and setup charges all belong in the budget. If the team only tracks the unit price, the real number usually arrives later and higher than expected.
There is also a quieter mistake: losing the revision log. If approvals are scattered across email, chat, and screenshots, the “final” version can become ambiguous. That is how a factory makes the wrong closure, the wrong patch placement, or the wrong bill shape while following the last clear instruction it received.
Quick check: if the sample review leaves the team uncertain, do not force approval. Fix the spec before releasing the order.
Expert tips and next steps before production
Use one approval document. Not three. One. It should include measurements, approved artwork, material notes, packaging notes, and photos of the final sample. That page becomes the reference point for everyone involved.
If the order is large or the branding is sensitive, request pre-production photos after the sample is approved. That step catches the last problems that matter: a patch that shifted, a color that drifted, or a component that changed to stock without notice. It is a low-cost checkpoint compared with discovering the issue after the full run leaves the factory.
Keep the revision log short and clear. Every change needs three things: what changed, why it changed, and which version is final. That is basic, but basic is useful here.
Before releasing the purchase order, confirm four things:
- Approved spec sheet matches the physical sample.
- Quote reflects quantity, decoration method, packaging, and shipping assumptions.
- Timeline includes production and transit in business days.
- Revision history is closed and no longer moving.
A strong apparel foam trucker Hats Sample Checklist protects the order from drift. It keeps the project focused on the decisions that matter: specs, cost, MOQ, lead time, decoration, and inspection. The best production runs usually come from clear measurements and one final document everyone can trust.
What should be on an apparel foam trucker hats sample checklist?
Include crown height, foam thickness, bill shape, mesh quality, closure type, patch size, logo placement, stitch quality, sweatband feel, and color accuracy. Add packaging and labeling if the order ships retail-ready. The goal is to compare the sample against a written spec, not to judge it by appearance alone.
How long does a foam trucker hat sample usually take?
Simple samples may move in about 10 to 15 business days, but custom patches, special shaping, and revisions can extend the timeline. Ask for stage-by-stage estimates so the schedule is tied to quote, artwork, build, review, and approval rather than a vague promise.
How much does a foam trucker hat sample cost?
Sample pricing is usually higher than bulk unit cost because the work is one-off. A common range is roughly $40 to $120, depending on decoration method, complexity, revisions, and shipping. Ask whether any part of the sample fee is credited back on the production order.
What MOQ should I expect after sample approval?
MOQ often falls around 100 to 300 pieces for custom Foam Trucker Hats, though stock-based builds can sometimes go lower. Lower MOQs usually carry higher unit pricing. Request pricing at multiple quantity tiers before you approve the sample so the order fits the budget you actually have.
Can I change the design after the sample is made?
Yes, but each change can affect cost, timing, and whether another sample is needed. Small artwork edits are usually easier than changes to foam thickness, patch size, or the cap structure itself. Track every revision in writing so the production order follows the correct version.


