If you are buying branded winter merch, the apparel Logo Patch Beanies sample checklist is the difference between a clean launch and a pile of hats that look fine in a render but weird in hand. A flat mockup never shows how a patch behaves when it wraps over rib knit, and that is where a lot of buyers get burned.
Here is the practical mindset: treat the sample like a mini production run, not a pretty pre-sale prop. You are checking fit, drape, edge quality, comfort, color, and whether the logo still reads from a few feet away. If it fails any of those, the bulk order will fail harder.
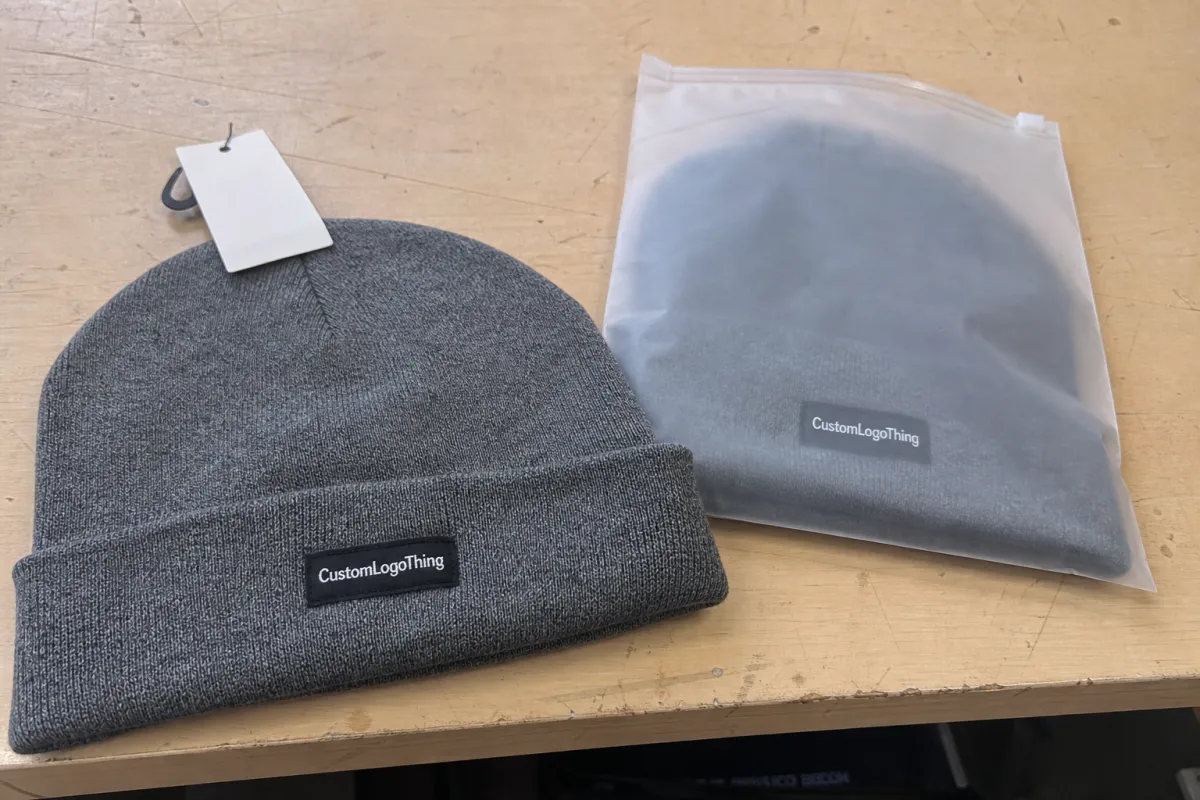
What an apparel logo patch beanies sample checklist should catch
Start with the uncomfortable part: a patch can look perfect on a screen and still flop on a beanie. Knit stretches. Seams curve. The front panel is not a flat sign board. Once the logo sits on a rib knit cuff or crown, the edges, tension, and placement all start to matter in ways the mockup never warned you about.
The apparel logo patch Beanies Sample Checklist should catch the stuff that ruins first impressions. I mean puckering around the patch, a crooked center line, weak adhesive that lifts at the corners, and a logo that feels scratchy against the forehead. Buyers often focus on the artwork and ignore the tactile part, which is exactly how cheap-looking goods sneak through.
From a packaging buyer’s point of view, the sample has to answer four basic questions:
- Does the patch sit flat on the knit structure?
- Does the logo stay readable at hat distance?
- Does the patch feel acceptable against skin?
- Does the finish still look controlled after handling?
That last one matters. A beanie is folded, shipped, tried on, stuffed into a bag, and pulled on and off all day. If the edge stitching starts to fray in sample stage, production will not magically improve it.
Patch type, knit gauge, and placement that change the fit
Patch choice changes everything. Woven patches handle detail well and stay relatively flexible. Embroidered patches add texture but can feel thicker. PVC gives you a clean, bold face, though it usually reads more structured. Faux leather looks premium, but it can stiffen the front of a soft beanie if the piece is oversized.
Here is a simple way to compare them:
| Patch type | Typical cost pressure | Fit on knit beanies | Best use | Watch-out |
|---|---|---|---|---|
| Woven | $0.08-$0.18 | Flexible and thin | Small logos with detail | Can look muted if artwork is too fine |
| Embroidered | $0.10-$0.25 | Medium thickness | Bold retail logos | May feel bulky on soft knits |
| PVC | $0.20-$0.45 | Structured, less forgiving | Clean, modern branding | Can fight the beanie's stretch |
| Faux leather | $0.12-$0.30 | Semi-rigid | Premium lifestyle look | Edge lift is more visible if placement is off |
Knit gauge matters just as much as patch style. A chunky 1x1 rib beanie can usually tolerate a larger patch than a finer-gauge knit, because the fabric has more structure. If the crown is shallow or the fabric is loose, a big patch starts to wrinkle the moment the hat is stretched over a head. That is not a small issue. That is the difference between tidy and sloppy.
Placement changes comfort and visibility. Center-front cuff placement gives you the clearest read and the best symmetry. Side placement can feel more fashion-forward, but it also risks getting lost when the beanie folds. On slouchy beanies, a front patch that is too wide can distort the silhouette and make the hat sit awkwardly high.
As a rule of thumb, a patch around 2 to 2.5 inches wide works well on many cuffed beanies. Push beyond 3 inches, and you need to inspect the actual knit structure carefully. If the logo is simple and the fabric is loose, smaller can be smarter. Bigger is not automatically better. That rule gets people into trouble fast.
Cost, MOQ, and quote traps on custom beanie samples
Sampling is where pricing gets fuzzy. You may see a low base quote, then the real number shows up after setup, backing changes, color matching, or a revised patch shape. That is why I separate four buckets right away: sample fee, setup charge, tooling cost, and shipping.
For simple custom beanie samples, a realistic sample fee is often in the $35-$120 range depending on how custom the patch is. If you need a molded PVC patch, special debossing, or color matching to a Pantone target, expect more pressure on the price. Shipping can add another $10-$35 domestically, or more if you want faster transit.
MOQ changes the economics too. A run of 50 pieces usually carries more setup pain per unit than a run of 500 or 1,000. Sometimes the sample is credited back if you move into bulk production. Sometimes it is not. Ask. Do not assume. Vendors love vague language here because vague language is profitable.
Use this comparison when you review quotes:
- Included in sample price: artwork adjustment, one round of revisions, and standard backing.
- Usually extra: rush turnaround, multi-location patch placement, PMS matching, and alternate yarn or leather colors.
- Production credit: a sample fee that is deducted from the first bulk invoice if you approve the order.
From a buying angle, the cleanest quote is the one that spells out what changes the price. If a supplier cannot tell you whether a second revision costs $15 or $50, the final invoice will probably be a surprise. Nobody needs that kind of entertainment.
For packaging and transit handling, I like to think in ISTA terms: protect the sample so the carton and contents arrive in the same condition they left in. If the sample gets crushed in shipping, the approval process becomes theater. See ISTA handling standards for the kind of thinking that prevents wasted approvals.
Production steps and turnaround: from artwork to approval
A decent supplier process should feel orderly. First comes artwork intake. Then patch sizing. Then material selection. Then a sample build. Then photos or a physical proof. If the vendor jumps straight from logo file to final quote without asking about knit type, patch size, or placement, that is a warning sign, not efficiency.
The apparel Logo Patch Beanies sample checklist works best when every step has a clear owner. You provide clean vector art, exact color references, and placement notes. The supplier confirms the patch format, backing, and hat style. Nobody should be guessing where the logo goes or how big it should be.
Turnaround depends on how clean the file is. A simple sample with one patch style and no color matching can often move in 7-12 business days after proof approval. Add revisions, special materials, or a wait for missing artwork, and it can stretch to 15 business days or more. If the beanies are tied to a launch date, build that buffer early. Waiting until the last week is how inventory plans become fiction.
Here is what usually slows things down:
- Missing logo files or low-resolution artwork
- Unclear placement notes for cuff, front, or side application
- No written color target, especially for dark knit bases
- Late decisions on backing style or patch thickness
For retail buyers, those delays ripple into photography, preorder windows, and delivery commitments. If you need the beanies to support a holiday drop or a staff uniform rollout, work backward from the date you actually need the approved sample in hand, not from the day you emailed the logo.
Stitch quality, adhesion, and wash tests you should request
Once the sample is in your hands, inspect it under bright light. Not soft office light. Bright light. Look for loose thread ends, lifted corners, uneven borders, and any stitching that wanders outside the patch edge. If the outline is messy on the sample, the bulk lot will not behave better simply because you were optimistic.
The next test is practical. Flex the beanie. Fold the cuff. Stretch it lightly over your hand. If the patch pops away from the knit or the corners start to curl, that tells you more than any product sheet ever will. A good sample keeps its shape without feeling like a piece of armor.
Then do a simple wear check. Put it on. Take it off. Repeat. A stiff patch can scratch the forehead, pull the fabric, or make the hat sit strangely. If you are buying for retail, that discomfort matters because people do not keep wearing beanies that annoy them.
A basic wash-and-wear test is worth the time, especially for team gear and promo orders. You are looking for three things:
- Does the patch stay attached?
- Does the beanie keep its shape?
- Does the logo still look crisp after handling?
Also check symmetry. Left-right consistency matters more than buyers think. On a wall of stacked hats, a patch that is 2 mm off-center can make the whole line look crooked. That kind of defect is subtle on a desk and loud on a shelf.
If you use paper inserts, hang tags, or retail packaging with the beanie, choose materials that do not cheapen the product. FSC-certified paper is a clean choice for brands that care about sourcing. The point is simple: the accessory should feel intentional from the first touch. For background on certified paper materials, see FSC-certified packaging.
Common sample mistakes that wreck a beanie launch
The biggest mistake is approving a mockup instead of the real sample. I see this all the time. A buyer signs off on a clean render, then acts surprised when the finished beanie distorts the logo because knit tension changed the shape. The mockup was not a product. It was a promise.
Another classic problem is vague approval language. Saying the patch is "fine" is not approval. It is a liability. Spell out the size, color, placement, stitching style, and backing type in writing. If there is a later dispute, your notes are the only thing that matters.
The apparel logo patch Beanies Sample Checklist also saves buyers from chasing the cheapest sample. Low sample pricing can hide thin materials, rushed stitching, or no revision support. That looks frugal for about five minutes. Then the bulk order arrives and the savings evaporate in rework, returns, or dead stock.
Here are the mistakes that create the most damage:
- Approving a flat mockup without touching the sample
- Ignoring knit stretch and patch thickness together
- Failing to compare the sample under real lighting
- Forgetting to write down the approved spec
One more thing: color contrast changes everything. A dark patch on a dark beanie may look stylish on screen and disappear on a shelf. A light patch on a pale knit can lose definition once the product is photographed. The sample should be checked in the same lighting you expect for retail photos or sales sheets. That is not fancy. It is just basic quality control.
Next steps before you approve bulk beanies
Before you release production, build a one-page spec sheet. Keep it blunt. Include logo art, patch type, patch size, placement, backing style, color target, approved sample date, and who signed off. If the supplier cannot match that sheet, do not pretend the bulk order will somehow sort itself out.
Then request photos from the front, side, and a close-up of the patch edge. If the hat is for retail, also ask for a worn shot. That tells you more about drape and fit than a hanger shot ever could. For team uniforms or promo giveaways, the threshold is a bit different. You may accept a more basic patch if the logo reads clearly and the price fits the budget.
Use the sample against its intended use case:
- Retail shelf: prioritize clean finish, premium feel, and visual consistency.
- Staff uniform: prioritize comfort, repeatability, and easy replacement.
- Promo giveaway: prioritize readability, durability, and cost control.
- Merch bundle: prioritize fit with the rest of the line and packaging presentation.
If you need the fastest route to bulk, approve only when the sample matches the spec without hand-waving. That is the whole point of the apparel Logo Patch Beanies sample checklist: catch the fit, stitch, and pricing problems before you commit to hundreds of units that cannot be fixed cheaply. A clean sample is the last safe place to be picky. Use it.
What should I check on an apparel logo patch beanie sample before approving it?
Check patch placement, size, edge finish, and whether the logo stays readable on stretched knit. Confirm the beanie feels comfortable on skin and does not pucker, twist, or lose shape after handling. If you are using the apparel logo patch beanies sample checklist properly, those basics should be visible before you sign off.
How much does a custom patch beanie sample usually cost?
Expect a sample fee plus possible setup or tooling charges, especially for new patch shapes or special materials. Shipping, color matching, and revisions can add cost fast, so ask what is credited back if you place production.
How long is the turnaround for a patch beanie sample?
A simple sample can move in about one to two weeks, while revisions or custom materials extend the timeline. Delays usually come from missing artwork, unclear specs, or waiting on approval for placement and color.
Which patch material works best for knit beanies?
Woven and embroidered patches are solid for detailed logos, while PVC and faux leather create a bolder, cleaner look. Choose based on feel, wash performance, and how much the knit fabric stretches around the patch.
Can I skip the sample if the mockup already looks good?
Bad idea. Knit stretch, stitch tension, and patch thickness can change the final result in ways a mockup will not show. A sample is the cheapest place to catch fit, placement, and quality problems before bulk production starts.


